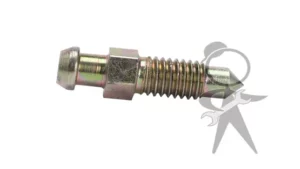
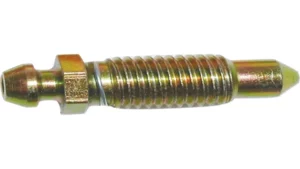
Have you ever found yourself in a situation where you need to change your brake pads but can’t get the brake bleeder screw to budge? It can be a frustrating experience, especially if you don’t have much experience with car repair. The brake bleeder screw is a small part, but if it’s frozen, it can put a halt to your entire brake replacement process. In this blog post, we’ll explore the steps you can take to remove a frozen brake bleeder screw, so you can get your car back on the road in no time.
So, let’s dive in and learn how to tackle this tricky situation.
What You’ll Need
Removing a frozen brake bleeder screw can be a frustrating task, especially if you don’t know what you’re doing. To get the job done, you’ll need a few essential tools, including a penetrating lubricant, a wrench, and a pair of pliers. First and foremost, make sure you have enough space to work around the brake bleeder screw.
Apply the penetrating lubricant to the screw and let it sit for a few minutes to allow the lubricant to penetrate the threads. Once you’ve done that, use a wrench to try and loosen the screw. If the screw is still frozen, use a pair of pliers to grip the screw and try to turn it.
Be careful not to apply too much force, as you could end up stripping the threads. With patience and determination, you should be able to successfully remove the frozen brake bleeder screw. Remember, safety should always come first, so make sure your vehicle is securely supported and you’re wearing appropriate protective gear like gloves and eye protection.
Penetrating Oil
When it comes to rusted or seized parts, penetrating oil can be a lifesaver. But before you start spraying away, there are a few things you need to make sure you have on hand. First and foremost, you’ll need a can of penetrating oil.
There are many brands to choose from, so do your research and pick one that has good reviews and fits your budget. Additionally, you’ll want to have a pair of gloves to protect your hands from the oil and any sharp edges on the parts you’re working on. A wire brush can also be handy for removing any loose rust or debris from the area you’re trying to free up.
Lastly, consider having a breaker bar or socket wrench on hand to help you apply more force if necessary. With these tools in your arsenal, you’ll be well-equipped to tackle even the most stubborn rusted parts. So go ahead and give that stuck bolt another try – with the right tools, you might just be surprised at what you can accomplish.
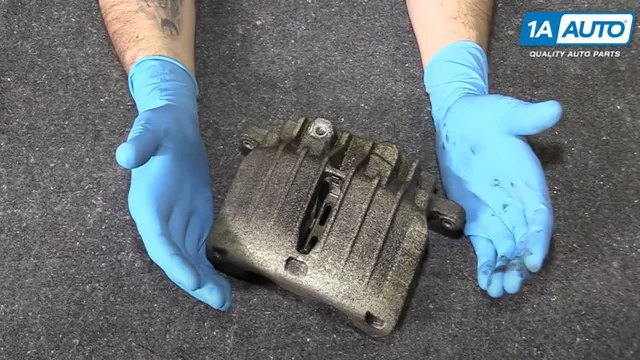
Vice Grips
If you’re planning to work on your car or perform some DIY repairs, one of the essential tools that you should have is a pair of vice grips. Vice grips, also known as locking pliers, are versatile tools designed to hold, clamp, and twist objects. They feature adjustable jaws and a locking mechanism that allows them to remain in place, providing a firm grip.
To use vice grips effectively, you need to make sure that you’re using the right type and size for the job at hand. Consider the material you’ll be working with, the force required, and the space available. Additionally, you may need to supplement your vice grips with other tools such as pliers, cutters, or wrenches, depending on the task at hand.
Overall, having the right tools and knowing how to use them is critical to getting the job done safely and efficiently. Don’t forget to do your research or consult with an expert if you have any doubts.
Propane Torch
If you’re looking to do some serious heating or welding, a propane torch can be an excellent tool to have in your arsenal. To get started, you’ll need a few things: first and foremost, a propane torch head. This is the heart of your setup, and you’ll want to make sure you choose one that’s designed for the job you have in mind.
You’ll also need to attach your torch to a propane tank, so you’ll need a regulator and hose to connect the two. Depending on your setup, you may also need a striker to ignite your torch and safety gear like gloves and eye protection. Once you have all your pieces in place, you’ll be ready to tackle all sorts of welding and heating jobs with ease.
Step by Step Process
If you’re experiencing a frozen brake bleeder screw, it’s important to address the issue as soon as possible to avoid further damage. The first step in removing a frozen brake bleeder screw is to try a penetrating oil or rust dissolver. Apply the product to the screw and let it soak for at least a few hours.
After the oil has had a chance to work, use a wrench to try and loosen the screw. If the screw is still stubborn, move on to using a heat source, such as a torch, to expand the metal and break up any corrosion. Be careful not to overheat the area, as this could cause damage to the brake caliper or other parts.
Another option is to use a bolt extractor to grip onto the screw and twist it out. This tool can be purchased at most automotive stores. Once the screw is removed, it’s important to inspect the threads for any damage and to replace the screw if necessary.
With these steps, you can successfully remove a frozen brake bleeder screw and get your brakes back in working order.
Step 1: Spray the Screw with Penetrating Oil and Let Sit
If you’re struggling with a stuck screw, one of the first things you should try is applying a penetrating oil to loosen it up. Start by spraying the affected area with a liberal amount of oil, making sure to cover the entire surface. Then, give it some time to work its magic.
Depending on the severity of the situation, you may need to let it sit for several hours or even overnight. This allows the oil to seep into the threads and begin loosening up any rust or corrosion that may be holding the screw in place. Keep in mind that not all oils are created equal, so be sure to choose one that is specifically designed for this purpose.
Some of the most popular options include WD-40, PB Blaster, and Liquid Wrench. By giving your screw a good dose of penetrating oil and some patience, you’ll be well on your way to freeing it up and getting on with your project.
Step 2: Clamp the Screw with Vice Grips
When it comes to fixing a screw that’s stuck or difficult to turn, the second step in the process involves using vice grips to clamp down on the screw. Vice grips are a type of pliers that can lock onto an object, such as a screw, and provide a strong grip to help turn it. To begin, make sure the vice grips are sized appropriately for the screw you’re working with.
Then, clamp the vice grips down on the head of the screw, taking care not to apply too much pressure and strip the grooves on the screw head. Once the vice grips are securely attached to the screw, use them to turn the screw in the direction needed. With the added grip and leverage provided by the vice grips, the sometimes-difficult task of unscrewing a stuck screw becomes much easier.
It’s important to use care and caution when working with vice grips, however, as applying too much pressure or torque can cause damage to the screw or surrounding material. By following these steps and taking care when using vice grips, you can successfully remove a stuck screw and get back to your project in no time.
Step 3: Heat the Screw with a Propane Torch
The third step in fixing a stripped screw is to heat the screw with a propane torch. This may sound intimidating, but it’s actually a straightforward process that can be accomplished with just a few simple steps. First, adjust the propane torch to a medium flame, then hold it about an inch away from the stripped screw.
Move the flame in a circular motion around the screw for about 10 seconds, being careful not to overheat the surrounding material. After heating, let the screw cool for a few seconds before attempting to remove it with a screwdriver or pliers. The heat should have loosened the screw, making it easier to extract.
It’s important to exercise caution when using a propane torch, as it can be dangerous if not used properly. Make sure you have a clear workspace and take appropriate safety precautions, like wearing protective gloves and eyewear. Heating the screw may be the trickiest part of the process, but with a little practice, you’ll be able to master it in no time.
Step 4: Loosen with a Wrench or Socket
When it comes to loosening a stubborn bolt or nut, a wrench or socket is your go-to tool. First, ensure that you have the correct size of wrench or socket for the job at hand. Trying to loosen a bolt with the wrong size tool can result in damage to the bolt head or the tool itself.
Next, apply some force with the wrench or socket in a counterclockwise direction. If the bolt is particularly tight, you may need to use a bit of extra force, but be careful not to over-tighten and risk damaging the bolt or nut. If the bolt remains stubbornly stuck, apply some penetrating oil, such as WD-40, and give it some time to work its way into the threads.
After a few minutes, try again with the wrench or socket. Remember to keep the tool straight and apply steady pressure to avoid slipping and causing injury. With some patience and persistence, you should be able to successfully loosen even the most stubborn bolts and nuts.
Preventing Future Freezing
If you’re experiencing a frozen brake bleeder screw, it’s important to take steps to prevent it from happening in the future. One way to do this is to make sure the screw is properly lubricated before installation. This can be done by using a small amount of grease or anti-seize compound.
It’s also important to make sure the screw is tightened to the appropriate torque specifications to prevent stripping or damage. Additionally, you can choose to replace the brake bleeder screw with a brass or stainless steel option, which is less prone to corrosion and freezing. With proper maintenance and care, you can prevent the frustration of dealing with a frozen brake bleeder screw in the future.
Use Anti-Seize Compound
If you are tired of dealing with frozen bolts and nuts, then using anti-seize compound might be the solution you’ve been looking for. Anti-seize compound is a type of lubricant that can prevent metals from sticking together, even under extreme temperatures. Applying anti-seize compound to bolts, nuts, and other metal parts can help prevent future freezing and make it easier to remove them in the future.
This compound can also help prevent rust and corrosion, which can cause further problems down the line. So, if you want to make sure your metal parts are protected from the elements and don’t freeze up in the future, consider investing in anti-seize compound. With it, you can ensure that your bolts and nuts stay loose and easy to manage for many years to come.
Tighten to Proper Torque Settings
When it comes to preventing future freezing, one key aspect to consider is tightening to proper torque settings. This may sound like a small detail, but it can have a big impact on the functionality of your equipment. When bolts and nuts are not tightened to the correct torque value, it can lead to them becoming loose over time.
This not only affects the performance of your machinery, but it can also be dangerous if a part falls off or malfunctions. By taking the time to tighten everything to the correct torque settings, you can ensure that your equipment runs smoothly and safely. It may require a bit of effort and extra time, but it’s worth it in the long run.
A little bit of preventative maintenance can go a long way in avoiding costly breakdowns and repairs. So, take the time to double-check your torque settings and save yourself trouble down the line.
Conclusion
In conclusion, removing a frozen brake bleeder screw requires a steady hand, a little patience, and sometimes a touch of brute force. Whether you’re using heat, penetrating oil, or a combination of both, the key is to take your time and find the right tools for the job. And if all else fails, remember the wise words of Forrest Gump: ‘Sometimes, shit happens.
‘ But with persistence and a bit of ingenuity, you’ll be back on the road in no time with brakes that stop on a dime (and give you nine cents change).”
FAQs
What causes a brake bleeder screw to freeze?
Corrosion, dirt, and moisture can cause a brake bleeder screw to freeze.
Can I loosen a frozen brake bleeder screw with WD-40?
WD-40 is not recommended as a lubricant for brake components. Use penetrating oil instead.
How do I prevent a brake bleeder screw from freezing?
Use anti-seize compound during reassembly to prevent corrosion and lubricate the threads.
What tools do I need to remove a frozen brake bleeder screw?
You will need a penetrating oil, a wrench or socket set, and possibly a hammer or impact driver for stubborn screws.
How do I know if my brake bleeder screw needs to be replaced?
If the screw is damaged, corroded, or stripped, it may need to be replaced with a new one.
Can a frozen brake bleeder screw be repaired?
In some cases, a frozen brake bleeder screw can be repaired by rethreading or re-tapping the hole.
Should I attempt to remove a frozen brake bleeder screw myself or take it to a professional?
If you do not have experience with brake repairs, it is recommended to take your vehicle to a professional mechanic for brake repairs.
