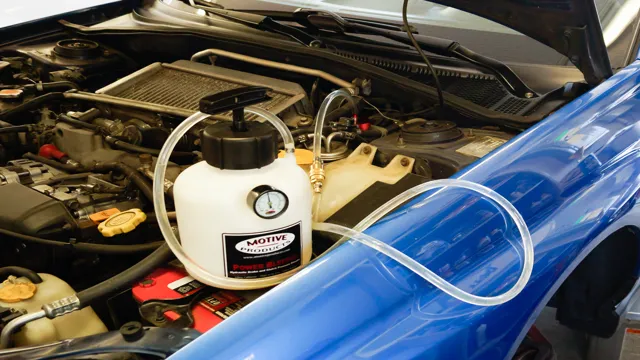
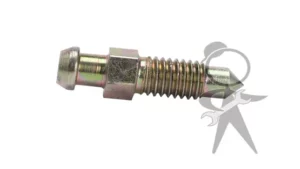
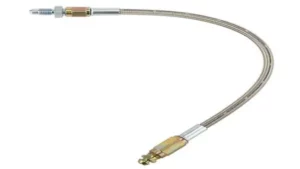
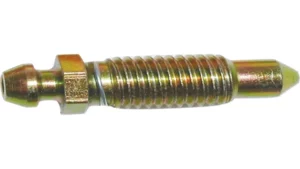
Have you been struggling to bleed the brakes of your vehicle? Do you find it tiring to perform this task manually? Fret not! A pneumatic brake bleeder can make the task a whole lot easier and less time-consuming. A pneumatic brake bleeder is a tool used to help bleed the brakes of air, which is crucial for optimal braking performance. With its ability to quickly and effortlessly remove air from the brake lines, this tool is a must-have for any DIY mechanic or professional.
In this blog post, we will walk you through the steps on how to use a pneumatic brake bleeder, making brake bleeding a task that you can confidently complete on your own without seeking professional help.
Gather Necessary Tools and Equipment
One of the most crucial steps in using a pneumatic brake bleeder is gathering the necessary tools and equipment. The first thing you’ll need is the brake bleeder itself. Make sure it is the right size and type for your vehicle.
You don’t want to end up with a bleeder that won’t fit or won’t work with your braking system. Next, you’ll need an air compressor that can power the bleeder. A regulator and filter will also be necessary to ensure the air supplied to the bleeder is clean and at the right pressure.
In addition, you’ll need a container to catch the old brake fluid, a wrench to loosen the bleeder valve, and a hose to connect the bleeder to the braking system. Once you have all these items gathered, you’re ready to begin the process of bleeding your brakes and ensuring your vehicle is safe to drive. Remember, using a pneumatic brake bleeder can be dangerous if not done correctly, so always follow the manufacturer’s instructions and take all necessary safety precautions.
Pneumatic brake bleeder
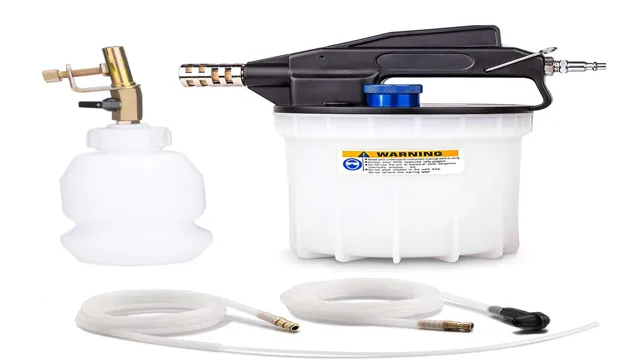
When using a pneumatic brake bleeder, you’ll need a few specific tools and equipment to get the job done right. First and foremost, you’ll need the bleeder itself, which typically consists of a canister to hold brake fluid and a hose to attach to the vehicle’s brake system. You’ll also want to have a sturdy air compressor to power the bleeder.
Additionally, it’s important to have a quality set of brake wrenches to properly open and close the bleeder valves without damaging them. Finally, don’t forget the brake fluid itself! Make sure you have enough fluid and the right type for your vehicle. With all these tools and equipment on hand, you’ll be able to efficiently and effectively bleed your brakes with a pneumatic brake bleeder, ensuring your vehicle stops smoothly and safely every time.
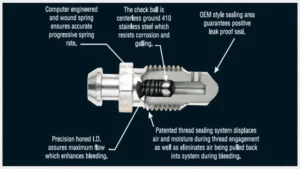
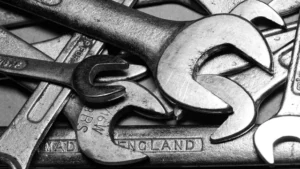
Wrenches to remove the bleeder valve
When removing the bleeder valve on a car, it’s important to gather the right tools and equipment. One of the essential items you’ll need is a wrench. There are different types of wrenches that you can use, but the most common one is the box-end wrench.
This type of wrench has a closed end that provides maximum grip on the bleeder valve. It’s important to choose a wrench that fits the valve size properly to avoid slipping and other problems while removing it. You also need to ensure that the wrench is sturdy and of good quality to prevent it from breaking while applying pressure.
With a good wrench and other necessary tools, you’ll be ready to remove the bleeder valve and keep your car running smoothly.
Brake fluid
When it comes to working with brake fluid, having the right tools and equipment is essential to getting the job done correctly and safely. First and foremost, you’ll need a brake fluid tester to determine the condition of the fluid. This is important because brake fluid can degrade over time, reducing its ability to perform its critical functions.
You’ll also need a brake bleeding kit, which allows you to remove air from the brake lines and replace old fluid with new. Other tools you’ll need include a socket set, wrenches, and pliers. It’s also a good idea to have a drain pan to catch the old fluid as you work.
With the right tools in hand, you’ll be able to work on your brakes with confidence, knowing that you have everything you need to perform the job safely and efficiently. So, before you get started, make sure you have everything on hand, and don’t forget to always follow proper safety procedures when working with brake fluid.
Clear tubing to connect to the bleeder valve
When it comes to bleeding brake lines, having the right tools and equipment is crucial. One important item you’ll need is clear tubing to connect to the bleeder valve. This tubing is used to collect the old brake fluid and air that’s being expelled during the bleeding process.
You’ll want to make sure the tubing fits snugly over the bleeder valve to prevent any leaks. Additionally, having a clear tube makes it easy to see when the old brake fluid has been completely flushed out and replaced with fresh fluid. Overall, this small piece of equipment is a key factor in ensuring the success of your brake bleeding process.
So, don’t forget to gather all the necessary tools and equipment before starting the job, including clear tubing for the bleeder valve.
Prepare the Vehicle
Before using a pneumatic brake bleeder, it is essential to prepare your vehicle properly. Start by parking your car on a flat surface, ensuring that you have enough space to maneuver around it. First, check the condition of your brake fluid.
If it appears dirty or discolored, you may need to flush out the old fluid and replace it with new fluid. Next, locate your brake bleed valves, which are usually near the calipers or brake cylinders. You may need to refer to your owner’s manual to locate them properly.
Once you have located them, loosen them to prepare for the brake bleeding process. Lastly, make sure that your brake fluid reservoir is full and topped off. Proper preparation of your vehicle will ensure that your brake bleeding process is smooth and effective.
Lift the vehicle and secure it safely
Before you can begin any repairs on your vehicle, it’s crucial to prepare it properly. One of the most important steps is to lift the vehicle and secure it safely. First, check to make sure the ground is level and stable.
Uneven ground or soft soil could cause the car to tip over, causing serious injury or damage. Next, determine which type of jack is best suited for your car. Some vehicles require a hydraulic jack, while others can be lifted with a scissor jack.
Once you have the proper jack, place it in a designated lift point under the car. Refer to your owner’s manual for specific locations. Never attempt to lift the car from any other location, as it could cause damage to the body or undercarriage.
Once the car is lifted, place jack stands on both sides under designated support points. Double-check that the car is stable and secure before beginning any work. By taking these precautions, you’ll ensure the safety of yourself and your vehicle while working on repairs.
Remove the wheel to access the brake bleeder valve
Before attempting to access the brake bleeder valve, it is important to prepare your vehicle properly. The first step is to park your vehicle on a flat surface and engage the parking brake. You should then loosen the lug nuts on the wheel that needs to be removed using a lug wrench.
Jack up the car using the recommended jack points and secure it with jack stands. With the wheel elevated from the ground, remove the lug nuts and carefully take off the wheel. At this point, you can easily access the brake bleeder valve.
Remember, safety is paramount when undertaking vehicle repairs. So be sure to consult your car manual, wear appropriate gear, and take all necessary precautions. Removing the wheel is the only way to access the brake bleeder valve as it is often located behind the wheel.
By safely jacking up your vehicle, you are one step closer to performing a brake bleeding efficiently.
Clean the valve and surrounding area
When it comes to maintaining your vehicle’s valves, it’s important to start by preparing the area. Begin by cleaning the valve and the surrounding area thoroughly. This will help to remove any build-up of dirt, dust or debris that might be present, as well as any oil or grease that may have accumulated.
You can use a clean cloth or a specialized cleaning product to ensure that the area is spotless. Once the valve and area are clean, it’s important to inspect the valve for any signs of corrosion or damage. If you notice any issues, be sure to address them before moving on to the next step.
This will help to ensure that your valve is in good working condition and will operate effectively. By taking the time to properly prepare your vehicle’s valve, you can help to extend its lifespan and avoid any potential issues down the line. So, take some time to get things prepped, and you’ll be well on your way to taking care of your vehicle’s valves in the best way possible.
Use the Pneumatic Brake Bleeder
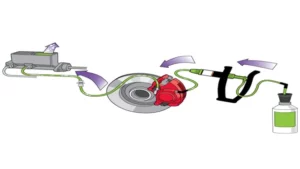
If you’re looking for a quick and efficient way to bleed your brakes, consider using a pneumatic brake bleeder. This tool is perfect for individuals who want to avoid the hassle of manually bleeding their brakes. To begin, attach the tool to your brake fluid reservoir and connect the air hose to an air compressor.
Next, open the bleeder valve on each brake caliper, starting with the wheel furthest away from the brake fluid reservoir. As the air pressure from the tool builds, you will see the old brake fluid and air bubbles escape through the bleeder valve. Once the brake fluid appears clean and free of bubbles, close the bleeder valve and repeat the process on the other wheels.
Using a pneumatic brake bleeder can save you time and effort, and it’s a great option for anyone who needs to bleed their brakes at home. So, why not give it a try and see the difference it can make?
Attach the clear tubing to the valve
To properly attach the clear tubing to the valve, you can use the Pneumatic Brake Bleeder. First, make sure the valve is tight and secure, so no air will escape. Then, insert the end of the clear tubing onto the valve and carefully slide it onto the fitting until it clicks into place.
You can ensure a tight connection by tightening the metal clip around the tubing. Using the Pneumatic Brake Bleeder will make the process easier and speed things up. This tool uses air pressure to force the brake fluid out of the system and through the tubing, eliminating any air bubbles and ensuring a smooth brake operation.
With this method, you can complete a brake job in half the time it would take using traditional methods. So, let’s get to work and make sure your brakes are in top condition using the Pneumatic Brake Bleeder!
Open the valve and insert the other end of the tubing into the brake bleeder
When it comes to bleeding brakes, using a pneumatic brake bleeder can make the process much easier and more efficient. To use one, start by filling the tank with brake fluid and then attaching the tubing to the bleeder valve on the brake caliper. Next, open the valve and insert the other end of the tubing into the brake bleeder.
With the valve still open, turn on the air supply to create pressure that will force the old brake fluid out through the tubing and into the tank. As the old fluid is displaced, keep an eye on the tank to ensure that it doesn’t overflow. Once you see clear, new fluid flowing through the tubing, close the valve and shut off the air supply.
Finally, remove the tubing and repeat the process on the other brake caliper. Using a pneumatic brake bleeder may take a bit of practice at first, but with a little bit of patience and attention to detail, you can quickly become a pro at this essential brake maintenance task.
Connect the pneumatic brake bleeder to an air compressor and set the pressure
If you’re looking for an efficient way to bleed your brakes, a pneumatic brake bleeder is the right tool for you. Here’s how to use it: First, connect the pneumatic brake bleeder to an air compressor and make sure the pressure is set to the recommended level. Then, attach the brake bleeder to the brake system’s bleeder valve, which is usually located on the caliper or wheel cylinder.
Once you’ve connected the bleeder, make sure the reservoir is full of brake fluid and open up the valve on the brake bleeder. This will allow the air and old brake fluid to flow out of the brake system and into the reservoir. Keep an eye on the reservoir and make sure it doesn’t run out of fluid throughout the process.
As you continue to bleed the brakes, you’ll notice that the air bubbles will eventually stop flowing, indicating that the brake system is properly bled. When you’re done, be sure to close the bleeder valve and remove the brake bleeder from the vehicle. With a little attention to detail, using a pneumatic brake bleeder can be a speedy and efficient process for maintaining your vehicle’s brake system.
Open the bleed valve on the pneumatic brake bleeder to start the process
If you’re looking to bleed your brake system quickly and easily, then a pneumatic brake bleeder might just be the tool you need. Using compressed air, this device can help you remove any air bubbles that may have built up in your brake lines and ensure that your brakes are working as they should. To use a pneumatic brake bleeder, first, you’ll need to locate the bleeder valve on your brake system.
Once you’ve found it, connect the bleeder valve to the brake bleeder, making sure to secure it tightly. Then, open the bleed valve on the pneumatic brake bleeder to start the process. This will allow compressed air to flow into your brake system, forcing the brake fluid through the lines and pushing out any air bubbles that are present.
You can continue to bleed your brakes until the fluid coming out of the bleeder valve is free of bubbles and clear in color. With a pneumatic brake bleeder, bleeding your brakes has never been easier.
Keep an eye on the fluid level in the brake master cylinder and refill as needed
Maintaining the fluid level in the brake master cylinder is crucial for the proper functioning of your vehicle’s brakes. It’s important to keep an eye on the fluid level regularly and refill it as needed to ensure that the braking system operates at its best. One way to make this process easier is by using a pneumatic brake bleeder.
This tool allows you to quickly and efficiently bleed the brakes and refill the system with new brake fluid. The pneumatic brake bleeder uses air pressure to bleed the brakes and is a more effective method than the traditional manual bleeding process. In addition to keeping an eye on the fluid level in the brake master cylinder, using a pneumatic brake bleeder can help improve the lifetime of your brake system and ensure your safety on the road.
So, make sure to prioritize checking and refilling the brake fluid, and consider investing in a pneumatic brake bleeder to make this process easier and more efficient for you.
Finish the Procedure
So, you’ve got your pneumatic brake bleeder and you’re ready to get started. First things first, you need to fill the reservoir with brake fluid and attach the bleeder to the brake caliper. Once you’ve done that, it’s time to connect the air compressor and set the pressure to around 20-30 PSI.
Now comes the important part – bleeding the brakes. Begin by loosening the bleeder screw slightly and have a friend press the brake pedal down slowly. You’ll see air bubbles and old brake fluid coming out of the hose.
Once the fluid runs clear, you can tighten the bleeder screw back up. Repeat this process for all the wheels and be sure to keep an eye on the fluid level in the reservoir, topping it up as necessary. After all the wheels have been bled, it’s time to finish up the procedure.
Disconnect the bleeder from the caliper and wipe down the area to remove any excess fluid. Double-check that the fluid level in the reservoir is at the correct level and take the car for a test drive to make sure the brakes feel as they should. Voila! You’ve successfully used your pneumatic brake bleeder to properly bleed your brakes.
Remember, it’s important to take your time and bleed the brakes thoroughly to ensure maximum safety on the road.
Close the bleed valve on the pneumatic brake bleeder
After following the previous steps of the pneumatic brake bleeder procedure, the final step is to close the bleed valve. This is a crucial step to prevent any air from seeping back into the brake system. Turning off the bleed valve should be done slowly to give ample time to the brake fluid already in the system to fill up the space.
Clockwise turning should do the trick. Once it feels tight, you can stop turning it. Normally, the brake pedal will feel firmer after bleeding the brakes.
Finally, don’t forget to top off the brake fluid reservoir with fluid if it’s below the minimum level. With a simple step-by-step guide and the right tools, it’s easy to perform this task at home. It’s an important maintenance task that should not be neglected.
The risk of brake failure is not worth taking, especially when the procedure is so quick and easy!
Remove the tubing and reattach the valve
To finish the procedure, remove the tubing and reattach the valve. This step is crucial to ensuring that everything is properly secured and functioning as it should. Carefully disconnect the tubing by loosening any clamps or connections and gently pulling it off.
Take care not to damage any surrounding parts in the process. Once the tubing is removed, ensure that the valve is still in good condition and free from any debris. Reattach it by lining it up with the opening and securing it in place with the appropriate fittings.
It’s important to double-check that everything is tight and secure before operating the system again. Neglecting this crucial final step can lead to leaks or malfunction, so take the time to complete it properly. And with that, the procedure is complete – congratulations!
Repeat the process on other brakes if needed
Now that you’ve successfully bled one of your brake systems, it’s time to move on to the other brakes if necessary. After all, if one brake system needed a bleeding, it’s likely that the others will need it too. The good news is that the process for bleeding other brakes is nearly identical to the first one.
Simply work on the next brake in line, following the same steps and using the designated brake bleeder valve. Don’t forget to continue checking the brake fluid level periodically throughout the process, adding more if necessary. Once all of the brakes have been bled, it’s time to wrap up the procedure.
Carefully cap the brake bleeder valves that you’ve been using, and replace any other parts that you removed during the process. Lastly, take your car for a test drive to ensure that all brakes are operating smoothly and reliably. With a little bit of patience and attention to detail, you can successfully bleed your car’s brakes and ensure your safety on the road.
Put the wheel back on and lower the vehicle
Once you have tightened the lug nuts enough and lowered the vehicle to the ground, it’s time to finish up the procedure by putting the wheel back on and lowering the vehicle completely. You want to align the wheel with the studs and slide it in place. Once it’s properly seated, reattach the lug nuts and tighten them in a crisscross pattern.
Finally, lower the car completely until it’s fully on the ground and remove the jack. It’s important to ensure that all the lug nuts are properly tightened, or you could risk an accident. Taking the time to double-check that the wheel is secure will provide peace of mind when you’re back on the road.
Remember, safety should always be your top priority.
Test the brakes to ensure they are functioning properly
Now that you have checked the brake fluid level and ensured that the brake pads are in good condition, it’s time to test the brakes to make sure they are functioning properly. To do this, start your car and drive slowly in a safe area with no other vehicles or pedestrians around. Apply the brakes gently to see if the car comes to a smooth stop.
If you hear any screeching noises or feel any vibrations through the brake pedal, it could indicate a problem with the brakes. If this happens, you should take your car to a mechanic immediately. Additionally, test the emergency brake by pulling it up while driving at a low speed.
If the car slows down and comes to a stop smoothly, then your emergency brake is working fine. If not, you must get it checked by a mechanic. Test the brakes again at higher speeds by easing off the accelerator and braking firmly.
This will tell you how quickly your car can come to a stop and help you identify any issues. It’s crucial to ensure that your car’s brakes are reliable to ensure your safety on the road. So, take your time to test them properly and address any issues immediately.
Conclusion
Using a pneumatic brake bleeder is like putting on a magic show for your car – it’s all about making the old brakes disappear and making new, fresh brakes appear. But unlike pulling rabbits out of a hat, there’s no need for smoke and mirrors. With a little bit of know-how and the right tool, you can solve your car’s brake problems faster than you can say “presto-chango!” So go ahead, wave that wand (or rather, the bleeder), and watch as your car’s brakes are magically transformed into a smooth and safe ride.
Your car will thank you, and you might even get a standing ovation from your mechanic. Now that’s what we call a brake-though!”
FAQs
What is a pneumatic brake bleeder and how does it work?
A pneumatic brake bleeder is a tool used to remove air bubbles from a car’s brake system. It works by creating a vacuum, which pulls the brake fluid through the system and expels any air present.
Is it necessary to use a pneumatic brake bleeder to bleed brakes?
While it is not necessary to use a pneumatic brake bleeder to bleed brakes, it can make the process much easier and more efficient. Using a pneumatic brake bleeder can also help prevent the introduction of air bubbles into the system.
Can I use a pneumatic brake bleeder on all types of brake systems?
Pneumatic brake bleeders can typically be used on most types of brake systems, including hydraulic and ABS systems. However, it is important to consult the manufacturer’s instructions to ensure proper use.
How often should I bleed my brakes with a pneumatic brake bleeder?
The frequency with which you need to bleed your brakes will depend on your driving habits and the manufacturer’s recommendations. In general, it is recommended that you bleed your brakes at least once a year to prevent air bubbles from entering the system.
Can a pneumatic brake bleeder be used on a car with anti-lock brakes (ABS)?
Yes, a pneumatic brake bleeder can be used on a car with anti-lock brakes (ABS). However, it is important to follow the manufacturer’s instructions carefully to avoid damaging the ABS system.
Can I use a pneumatic brake bleeder on my motorcycle?
Yes, a pneumatic brake bleeder can be used on a motorcycle. However, it is important to ensure that the tool is compatible with your specific motorcycle make and model before using it.
Are there any safety precautions I need to take when using a pneumatic brake bleeder?
Yes, some safety precautions to consider when using a pneumatic brake bleeder include wearing proper protective equipment, ensuring the tool is properly installed and secured, and following all manufacturer’s instructions carefully. Additionally, be sure to use the tool in a well-ventilated area to prevent exposure to brake fluid fumes.
