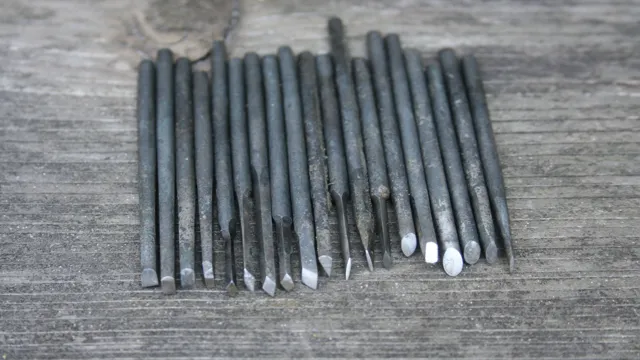
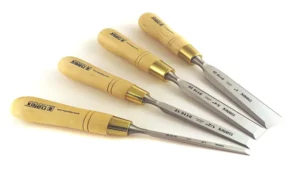
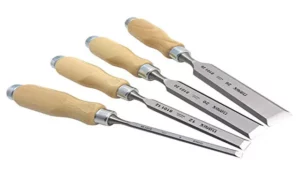
Are you tired of using mass-produced engraving chisels that don’t quite fit your needs? Do you want to create custom chisels that are perfect for your unique engraving projects? Well, you’re in luck! Making your own engraving chisels is not only possible, but it can also be a fun and rewarding DIY project. Think of making your own chisels as similar to preparing a meal from scratch. You have full control over the ingredients, flavors, and presentation.
The same goes for making your own engraving chisels. You have the ability to choose the materials, sizes, and shapes that best suit your engraving needs. Not only does making your own chisels allow for customization, but it also saves you money in the long run.
Instead of constantly purchasing new chisels that may not fit your needs, creating your own means you only have to make an initial investment in materials. Plus, you have the satisfaction of knowing that you made something with your own two hands. In this guide, we’ll walk you through the basics of making your own engraving chisels.
From selecting the proper materials to shaping and sharpening the chisels, we’ll cover it all. So put on your DIY hat and get ready to create chisels that are perfect for all your engraving needs.
Choose the Right Steel
If you’re interested in making your own engraving chisels, it’s important to choose the right steel for the job. High-quality tool steel is the best choice for chisel blades because it is durable and resistant to wear and tear. Some popular choices for making engraving chisels include O1 and W1 tool steel, which are both easy to work with and hold a sharp edge.
It’s important to note that different steel types require different heat treatments, so be sure to do your research and follow the recommended heat treatment for the type of steel you’ll be using. By selecting the right steel and properly heat treating it, you’ll be able to create long-lasting and effective engraving chisels that will help you create beautiful and intricate designs on your workpieces.
Research Different Types of Steel
When it comes to steel, choosing the right type is crucial. With so many different varieties available, it can be overwhelming to navigate the options and select the best one for your project. One of the most important factors to consider is the steel’s composition.
Carbon steel, for example, is a popular choice due to its high strength and durability, while stainless steel is ideal for applications that require resistance to corrosion and oxidation. Other options include alloy steel, tool steel, and weathering steel. It’s important to keep in mind the specific properties and characteristics you need for your project when selecting the appropriate type of steel.
By doing so, you’ll be able to ensure the best possible results for your needs.
Purchase High-Quality Steel
If you’re looking to purchase high-quality steel, it’s important to choose the right type for your specific needs. There are various grades of steel available, each with their own unique properties and uses. So, it’s crucial to consider factors such as strength, corrosion resistance, and ductility when selecting a steel grade.
For example, if you’re in the construction industry and are building a skyscraper, you’ll need steel with high strength and toughness to support the weight of the building. On the other hand, if you’re constructing a pipeline that will be exposed to corrosive elements, you’ll need steel with excellent corrosion resistance. By choosing the right type of steel, you can ensure that your project is built using the most appropriate materials, reducing the risk of failure or other issues down the line.
So, take the time to research and understand your options before making a purchase, and always consult with an expert if you’re unsure about which grade of steel to choose. Remember that using the right steel can make a huge difference in the success of your project.
Design Your Chisels
Engraving is a delicate art that requires specialized tools to create intricate designs and patterns. One of the key instruments used in engraving is the chisel, which is used to carve into the surface of the material being engraved. While there are many different types of chisels available on the market, it is also possible to make your own personalized chisels for engraving.
To make your own chisels, you will need a few basic tools and materials such as steel rods, a bench grinder, a file, sandpaper, and a handle material. By carefully shaping the steel rod and grinding it into the desired shape and angle, you can create custom chisels that are perfectly suited to your engraving needs. Whether you plan to work on wood, metal, or even leather, designing your own chisels allows you to create unique and precise designs that can’t be achieved with mass-produced tools.
So why not try your hand at making your own engraving chisels and see how much more creative and precise your designs can become?
Consider the Purpose of Your Chisels
When designing your chisels, it’s important to consider the purpose they will be used for. Are they for cutting soft wood or hardwood? Will they be used for intricate details or carving out large sections? These factors can greatly affect the design of your chisel. For softer woods, a thinner and narrower blade may be more efficient, while for hardwoods, a thicker and wider blade can handle the tougher material.
If you’re working on intricate details, a chisel with a small and pointed blade is ideal, while a wider and curved blade is better suited for larger sections. Additionally, the handle design should also be taken into consideration for comfort and grip. By taking the purpose of your chisels into account, you can design them to be efficient and effective for your specific needs.
Sketch Out Your Design
When it comes to chisel design, it’s important to start by sketching out your ideas. This allows you to visualize the chisel’s shape and size, as well as its intended use. You’ll want to consider factors such as the angle of the blade, the length and thickness of the handle, and the overall balance of the chisel.
It’s also important to think about materials: what type of metal will be used for the blade, and what type of wood or composite for the handle? Each of these choices will impact the chisel’s performance and durability. By taking the time to carefully sketch out your design, you’ll be setting yourself up for success when it comes time to bring your chisel to life. Remember, your design should be tailored to your specific needs and preferences, whether that be for woodworking, metalworking, or other precision tasks.
So grab your pencil and paper, and let’s get started on designing your perfect chisel!
Cut and Shape the Steel
To make engraving chisels, you’ll need to start by cutting and shaping the steel. The first step is to choose the right type of steel for your chisels. High carbon steel is a popular choice as it can hold a sharp edge and is durable.
Once you have your steel, you’ll need to cut it to size using a metal cutting saw or grinder. Next, you’ll need to shape the chisel’s cutting edge using a bench grinder or belt sander. It’s essential to maintain the proper angle and shape of the cutting edge to ensure that your chisels work effectively.
When shaping the steel, it’s also important to keep the handle’s shape and size in mind. You’ll need to create a comfortable grip that allows for precision and control when using your chisels. Overall, cutting and shaping the steel is a vital step in the process of creating high-quality engraving chisels.
Use a Bandsaw or Hacksaw to Cut the Steel
If you’re planning on building something using steel, you’ll need to know how to cut and shape it properly. One of the best ways to cut steel is with a bandsaw or a hacksaw. A bandsaw is a power tool that uses a blade with teeth to make curved or straight cuts in metal.
If you don’t have access to a bandsaw, a hacksaw can be used instead. A hacksaw is a hand-held saw with a blade that can be replaced as needed. When using a hacksaw, it’s important to choose the right blade for the thickness of steel you’re cutting.
Be sure to wear safety gear, such as gloves and eye protection, when cutting steel with a saw. Remember to make cuts slowly and smoothly, and try to use the entire length of the blade to reduce wear and tear. With practice and patience, you can become skilled at cutting and shaping steel for your projects.
Use a Bench Grinder to Shape the Blade
When it comes to making a knife, cutting and shaping the steel is a crucial step in the process. Using a bench grinder can help to make this task a bit easier. Before starting, ensure that you have the appropriate protective gear, such as safety glasses and gloves.
Start by cutting the steel to the desired size using a band saw or hacksaw. Next, use the bench grinder to shape the blade. Begin by setting the angle and then carefully grinding away excess material until the blade has the desired shape.
It’s important to take breaks to prevent the steel from overheating, which can cause it to lose its temper. Once you’ve achieved the desired shape, take some time to refine the edge, ensuring that it is straight and even. With practice and patience, you’ll soon be able to cut and shape steel with ease using a bench grinder.
Grind and Sharpen the Blade
If you’re interested in making your own engraving chisels, one of the most important steps is to grind and sharpen the blade. This will ensure that the chisel is sharp enough to create clean and precise lines in your engravings. To start, you’ll need to use a grinding wheel or sandpaper to remove any nicks or defects on the blade.
Then, you’ll need to sharpen the blade using a sharpening stone or honing guide. It’s important to maintain a consistent angle while sharpening to avoid creating a jagged edge. Once you’ve sharpened the blade to your satisfaction, you can test it out by making some practice cuts on a piece of scrap metal or wood.
With a bit of practice and patience, you’ll be able to create your own custom engraving chisels that are perfect for your needs.
Use a Grinding Wheel to Refine the Shape
After forging a blade and rough-shaping it, the next step in the blade-making process is refining the shape and sharpening it. This involves using a grinding wheel, which is a high-speed tool with abrasive grains that remove metal from the blade’s surface. When grinding, it’s important to maintain a consistent angle and pressure to ensure an even and symmetrical edge.
A blunt edge won’t cut well, so it’s crucial to keep the blade sharp. As you slowly grind the blade’s surface, you’ll see sparks flying as the metal dust is removed. It’s essential to wear appropriate protective gear, like gloves and goggles, and stay alert to avoid accidents.
Once the blade has the desired sharpness and shape, you can finish the process by honing and polishing it. Overall, grinding is a vital part of the blade-making process that takes experience and expertise to execute correctly.
Use a Sharpening Stone to Hone the Edge
If you’re looking to sharpen a knife, a sharpening stone is a tool you don’t want to go without. First things first, you need to grind and sharpen the blade before you hone the edge. Grinding involves reshaping the blade to fix any imperfections or chips, while sharpening focuses on making it razor-sharp.
Once you’ve taken care of these tasks, it’s time to hone the edge. This is where the sharpening stone comes in. Sharpening stones come in different grades or grits, ranging from coarse to fine.
To hone the edge, you’ll start with the coarsest grit and work your way up to the finest one until you get a razor-sharp edge. Keep in mind that honing is a lot gentler than grinding and sharpening, so you’ll need to take your time and use a gentle touch. With some patience and a little practice, you’ll be able to master the art of sharpening your knives with a sharpening stone and keep them in top shape for all your chopping, slicing, and dicing needs.
Attach the Handle
Now that our chisels have been properly sharpened and polished, it’s time to attach the handle. First, measure the length of the tang and mark it on the handle. Then, using a drill bit that matches the size of the tang, drill a hole into the center of the handle.
Be sure to drill to the proper depth so that the tang will fit securely into the handle. Apply a generous amount of wood glue into the hole and onto the tang of the chisel. Next, insert the tang into the hole and tap it in gently with a mallet.
Make sure the chisel sits flush with the handle. Wipe off any excess glue with a damp cloth. Allow the glue to dry completely before using the chisel.
By following these simple steps, we now have a fully functional and personalized engraving chisel ready for use!
Choose a Comfortable Material for Your Handle
When it comes to attaching a handle to your project, it’s important to choose a comfortable material that will make carrying and using it a breeze. After all, nobody wants to deal with an uncomfortable handle that makes it difficult to hold and carry around. Some popular materials for handles include wood, plastic, metal, and leather.
Each of these materials offers unique benefits and drawbacks, so it’s important to choose the one that works best for your needs. For example, wood is sturdy and provides a classic look, but it may not be as comfortable to grip as other materials. On the other hand, leather handles provide a comfortable grip, but may not be as durable as other materials.
Once you’ve chosen the right material for your handle, attach it securely to your project using screws, bolts, or other fasteners. With the right handle in place, your project will be much easier to use and enjoy.
Securely Attach the Handle to the Blade
When it comes to attaching a handle to a blade, it is important to ensure a secure and sturdy connection. The first step is to select the appropriate handle material, such as wood, plastic, or metal, that fits comfortably in your hand. Next, carefully align the handle with the blade and tightly secure in place using screws or rivets.
It is crucial to use the right size and type of hardware to prevent the handle from becoming loose during use. Additionally, applying a strong adhesive can also help reinforce the joint. Remember, a poorly attached handle can compromise your safety and the quality of your work.
So take the time to attach your handle securely and double-check for any potential weaknesses or looseness before use. By doing so, you’ll be sure to have a reliable and safe tool in your hands every time you work.
Conclusion
In conclusion, engraving chisels are not just tools, they’re an extension of our creativity. Making your own set of chisels can be a rewarding and satisfying experience. It requires a steady hand, patience, and a good eye for detail.
But with some basic materials and a little bit of know-how, you can create a set of engraving chisels that will meet all your artistic needs. So, go ahead and give it a try, make your chisels, and unleash your imagination onto your next work of art! Just remember, always keep your chisels sharp and your creativity sharper.”
FAQs
What materials are needed to make engraving chisels?
To make engraving chisels, you will need steel rods, a metal cutting tool, a forge or heat source, a hammer, and a vice.
How do you shape the steel rods into chisel blades?
After heating the steel rods, they can be shaped into chisel blades using a metal cutting tool and a hammer.
What are some common types of engraving chisels?
Some common types of engraving chisels include round, flat, and angled chisels, as well as liners and scorper chisels.
How do you sharpen engraving chisels?
Engraving chisels can be sharpened using a sharpening stone or honing tool.
What are some tips for using engraving chisels?
When using engraving chisels, it is important to wear safety goggles and use a secure work surface. It is also helpful to practice on scrap materials before starting a project.
How can you maintain the quality of your engraving chisels?
To maintain the quality of your engraving chisels, it is important to keep them clean and dry, store them in a secure and dry location, and sharpen them regularly.
What are some common mistakes to avoid when making engraving chisels?
Some common mistakes to avoid when making engraving chisels include overheating the steel rods, not allowing enough time for the metal to cool and harden, and not properly shaping the chisel blade before sharpening.
