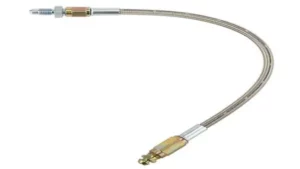
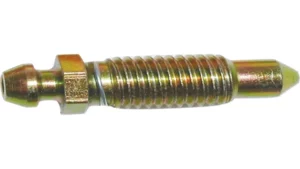
Whether you are an experienced mechanic or a DIY enthusiast, learning how to perform brake bleeding is an essential skill that can save you time and money. However, buying a commercial brake bleeder can be expensive, and not everyone has one lying around in their garage. Fortunately, making your homemade brake bleeder is relatively easy, and it’s an excellent option if you’re looking to save some money.
In this step-by-step guide, we will take you through the process of making a homemade brake bleeder. This DIY tool is perfect for those who are regularly working on their vehicles at home or have a small garage. Not only will it save you money, but it will also give you a sense of achievement, knowing that you made it yourself.
Our guide will cover all the steps required to make your homemade brake bleeder. We’ll provide you with a list of the necessary materials, including things you may already have at home. We’ll also explain everything in layman’s terms, making it easy for anyone to understand, even if you’re not mechanically inclined.
So, grab your tools and let’s get started on creating your homemade brake bleeder. By the end of this guide, you’ll be able to service your brakes like a pro and save yourself a trip to the mechanic.
Why Make Your Own Brake Bleeder?
If you’re looking to save some money on car maintenance, then making your own brake bleeder could be the perfect solution. A brake bleeder is a tool that’s used to remove air from the brake lines, which can cause your brakes to feel spongey or ineffective. Making your own brake bleeder is relatively easy and requires just a few basic materials.
All you’ll need is a small container, some clear tubing, and a one-way valve. Begin by filling the container with brake fluid, then attach the tubing to the valve and place the other end into the brake fluid. Connect the valve to your brake caliper and pump the brake pedal to remove any air bubbles.
This simple brake bleeder can save you a trip to the mechanic and ensure that your brakes are working safely and efficiently. So, why not give it a try and see how much you can save?
Benefits of Homemade Brake Bleeder
If you’re someone who enjoys DIY projects or wants to save a bit of money, making your own brake bleeder can be a great option. Not only is it an easy and cost-effective way to maintain the brake system of your vehicle, but it can also improve its performance. One major benefit is that homemade brake bleeders are customizable, allowing you to adjust the pressure to fit your specific needs.
They also give you a sense of control and assurance since you made it yourself and know exactly how it works. Plus, buying all the materials needed is more affordable in the long run compared to repeatedly taking your car to a mechanic for brake maintenance. By making your own brake bleeder, you’re not only learning about your vehicle’s brake system but also developing DIY skills that can be used for other projects.
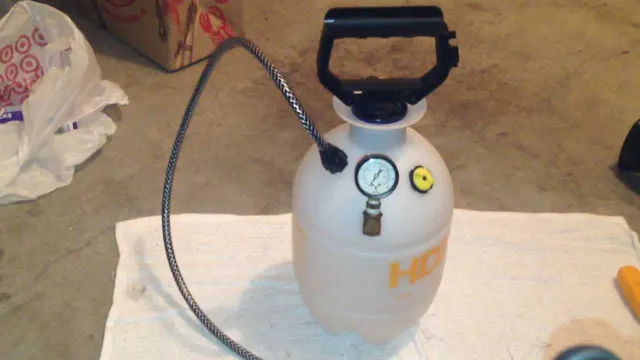
Materials Needed
If you’re looking to bleed the brakes on your car but don’t want to spend a lot of money, you can easily make your own homemade brake bleeder with just a few materials. First, you’ll need a one-way valve, which you can find at an auto parts store or online. Next, grab a length of clear plastic tubing that fits snugly onto the bleeder valve.
You’ll also need a container to collect the brake fluid, such as a plastic bottle or a jar. Lastly, make sure you have enough brake fluid for your vehicle’s make and model. With these simple materials, you can quickly and cost-effectively bleed your brakes at home.
So next time you need to do a brake job, consider making your own brake bleeder and save some money.
List of Required Tools
When it comes to woodworking, having the right tools is essential to getting the job done efficiently and effectively. Whether you’re a professional woodworker or just starting out, there are certain materials you’ll need to acquire. First and foremost, you’ll need a saw to cut wood to size.
There are a variety of saws available, including hand saws, circular saws, and table saws. Along with a saw, you’ll need measuring tools such as a tape measure, speed square, and a level. Additionally, you’ll need basic hand tools such as a hammer, screwdrivers, and pliers.
For more detailed work, you may also need chisels, files, and sanders. Safety gear is also important, including safety goggles, earplugs, and a dust mask, as woodworking can generate a significant amount of sawdust and noise. By having all of the necessary materials, you’ll be able to tackle any woodworking project with ease and precision.
List of Required Materials
When it comes to starting a DIY project, having the right materials is key to success. Depending on what kind of project you’re working on, the list of required materials can vary. For example, if you’re planning on painting a room, you’ll need paint, brushes, rollers, and painter’s tape.
But if you’re planning on building a piece of furniture, you’ll need wood, screws, and possibly a saw. Other common materials that you might need for DIY projects include measuring tape, sandpaper, nails, glue, and various power tools. It’s important to have all the necessary materials before starting your project so that you can work efficiently and avoid any delays.
By making a list of required materials and acquiring them ahead of time, you can ensure that your project goes smoothly and you’ll be able to enjoy the satisfaction of a job well done.
Building the Homemade Brake Bleeder
If you want to save some money, you might be interested in learning how to make a homemade brake bleeder. Luckily, making one isn’t as difficult as you might think. Essentially, a brake bleeder is a tool that allows you to flush out old brake fluid from your vehicle’s braking system and replace it with fresh, new fluid.
To make your own brake bleeder, you’ll need a few simple items: some clear plastic tubing, a brake-bleeding valve, a container for old fluid, and a container for new fluid. Once you have all your materials, it’s a matter of attaching the tubing to the brake valve, feeding the other end into the container, and then opening the valve to let the old fluid flow out. Be sure to follow the manufacturer’s instructions on how to use your brake bleeder safely to avoid any mishaps! With a homemade brake bleeder, you can save some money and do this necessary maintenance yourself.
Step 1: Preparing the Materials
To start building your homemade brake bleeder, the first step is to gather all the necessary materials and prepare them properly. The materials required to build a brake bleeder include a clean plastic bottle, a brake bleeding kit, an extra brake fluid, a small piece of rubber tubing, and a bottle cap. It is important to ensure that these materials are clean and free from any dirt or debris to avoid any potential contamination when bleeding the brakes.
Once you have gathered the materials, clean the plastic bottle thoroughly with soap and water, and then rinse it out. Next, make a small hole in the bottle cap, and attach the rubber tubing to the end of the brake bleeding kit. Finally, fill the plastic bottle with an extra brake fluid and attach the brake bleeding kit to the bottle cap.
These steps will help you prepare all the necessary materials to build your homemade brake bleeder and ensure a clean and effective brake bleeding process.
Step 2: Assembling the Bleeder
To build a homemade brake bleeder, the first step is to gather all the necessary materials and tools. Once you have assembled all your items, the next step is to assemble the bleeder. The bleeder consists of a jar with a lid, a rubber hose, a brake bleeder valve, and fittings.
Begin by drilling a small hole through the lid of the jar, and then attach the rubber hose to the hole using a fitting. Next, place the brake bleeder valve onto the other end of the hose, making sure it is securely fastened with a fitting. Finally, attach another fitting to the bleeder valve and then screw it onto your brake’s caliper or wheel cylinder.
This ensures a tight seal so you can effectively bleed the brake system. Remember, proper assembly of the homemade brake bleeder is essential for efficiently and safely bleeding your brakes.
Step 3: Testing Your Homemade Brake Bleeder
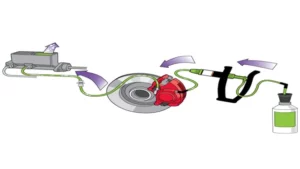
Once you’ve built your homemade brake bleeder, it’s essential to test it out before using it on your vehicle. A simple way to do this is by filling the brake master cylinder with fluid, attaching the bleeder to the brake caliper or wheel cylinder, and opening the bleeder valve. Next, pump the brake pedal several times until the fluid begins to flow out of the bleeder valve.
Then, close the valve and check the fluid level in the master cylinder. If it has gone down, it means the bleeder is working correctly and has removed the air from the brake system. However, if air bubbles are still visible, you may need to bleed the brakes several more times before achieving a fully functional brake system.
Don’t forget to double-check all connections, tightening any loose bolts or fittings before testing the brakes to ensure your safety on the road.
Using Your Homemade Brake Bleeder
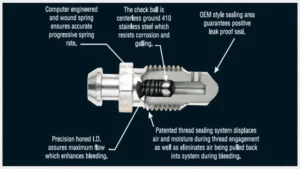
Are you looking for an affordable way to bleed your vehicle’s brakes? Making a homemade brake bleeder is easier than you might think. First, purchase a one-way check valve from your local automotive store. Attach one end of a clear vinyl tube to the valve and the other end to the bleeder valve on the brake caliper or cylinder.
Next, attach a syringe to the check valve. Fill the syringe with brake fluid and slowly force it through the system, starting with the brake furthest away from the master cylinder. Keep an eye on the fluid level in the master cylinder and add more as necessary.
Once the air bubbles have been eliminated from the system, remove the vinyl tubing and check valve and tighten the bleeder valve. Your brakes are now bled and ready to go! With a little practice, using your homemade brake bleeder will become a quick and easy maintenance task.
Preparation
Preparation for using your homemade brake bleeder is essential for a smooth and successful brake bleeding process. Firstly, ensure that the brake system is completely cool before beginning the process. Remove the wheels and thoroughly clean the brake calipers to avoid any debris or dust from entering the brake fluid.
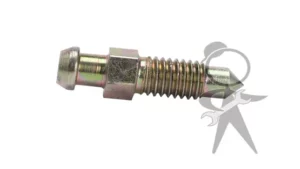
Next, attach the brake bleeder kit to the brake caliper’s bleed screw, ensuring that all connections are tight and secure. Fill the brake bleeder reservoir with the appropriate brake fluid, then pump the brake pedal slowly to force the air bubbles out of the brake lines. Finally, check the brake fluid level and refill as necessary, and test the brake pedal for any sponginess before replacing the wheels.
With these simple preparations, you’ll be able to use your homemade brake bleeder effectively and efficiently, ensuring that your brakes perform at their best.
Bleeding Your Brakes
Bleeding your brakes is an essential part of maintaining safe driving conditions. Even though it may seem like a daunting task, it’s fairly simple to do with a homemade brake bleeder. First, fill up the brake fluid reservoir to the recommended level, then locate the brake bleeding valve on the caliper.
Attach the brake bleeder tool to the valve and loosen it with a wrench. Make sure the tube attached to the brake bleeder tool is submerged in a container with brake fluid to prevent air from being sucked into the brake system. Next, pump the brake pedal a few times until the old brake fluid starts to come out.
Keep pumping until the brake fluid coming out is clear and free from air bubbles. Finally, tighten the bleeder valve and repeat the process on the remaining calipers until all four brakes are bled. This simple process can ensure the safety of your vehicle and prevent brake failure on the road.
In Conclusion
And there you have it, folks! A homemade brake bleeder that is both efficient and cost-effective. By using everyday items found in your garage, you can save yourself the trouble of visiting a mechanic and keep your brakes in top condition. So next time you find yourself in need of a brake bleed, don’t fear – simply follow these steps and you’ll be braking smoothly in no time.
DIY at its finest!”
Final Thoughts
In conclusion, using your homemade brake bleeder can save you time and money while ensuring your brakes are working as they should. However, it’s important to use caution and follow the instructions carefully. Always make sure that the brake fluid reservoir is topped up and never let it run dry during the bleeding process.
Also, be aware of any air bubbles that may be present in the system, and continue to bleed the brakes until they are completely free of air. With a little bit of knowledge and a DIY brake bleeder, you can keep your car brakes in top condition without having to break the bank. So, go ahead and give it a try and feel the satisfaction of a job well done!
FAQs
What materials do I need to make a homemade brake bleeder?
To make a homemade brake bleeder, you will need a few items such as a plastic bottle, clear tubing, a brake bleeding kit, and a wrench.
How does a brake bleeder work?
A brake bleeder helps remove air and old brake fluid from your car’s brake system. By attaching the hose to the brake bleeder valve and pumping the brake fluid, the air gets expelled and the fluid gets replaced.
Is a homemade brake bleeder as effective as a professional one?
That depends on the quality of the materials you use and your expertise in using it. A well-made homemade brake bleeder can work just as effectively as a store-bought one.
Can I use a homemade brake bleeder on any type of car?
Yes, as long as your car has a brake bleeder valve, you can use a homemade brake bleeder on any make or model.
Can a homemade brake bleeder damage my car’s brake system?
If not used properly, a homemade brake bleeder can potentially damage your car’s brake system. It’s important to follow instructions carefully and have a basic understanding of how brake systems work.
How often should I use a brake bleeder on my car?
It’s recommended to use a brake bleeder every two years to ensure that your brake system is functioning properly.
How much does it cost to make a homemade brake bleeder?
The cost of materials for a homemade brake bleeder can vary, but it can be as low as $10-$20 if you already have some of the necessary materials on hand.

