When it comes to woodworking, there’s nothing quite like the satisfaction of carving wood with chisels. It’s a true test of skill and patience, requiring a steady hand and a keen eye for detail. But where do you begin? How do you choose the right chisels for the job? And how do you avoid making costly mistakes along the way? In this blog post, we’ll cover everything you need to know to get started with carving wood with chisels.
From selecting the right tools and materials to mastering the techniques and finishing your work, we’ll walk you through the entire process step by step. So whether you’re a seasoned woodworker or just getting started, grab your chisels and let’s dive in!
Choosing the Right Chisels
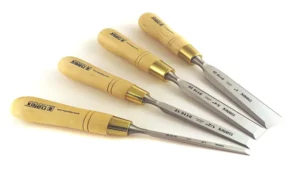
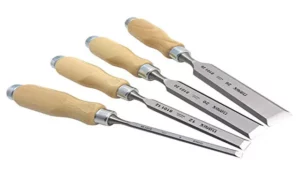
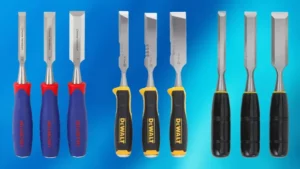
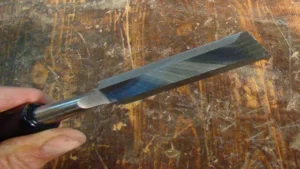
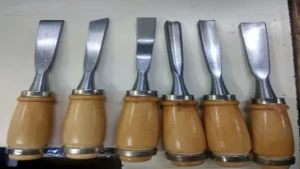
If you’re interested in carving wood with chisels, the first thing you need to consider is choosing the right type of chisels. A good set of chisels can make the carving process much easier and more precise. Look for chisels that are made of high-quality steel and have sharp, durable edges.
You’ll want to choose chisels in different sizes and shapes, depending on the type of carving you want to do. For example, a straight chisel is great for making straight cuts, while a gouge chisel is better for curved and concave cuts. Additionally, consider the handle of the chisel.
Look for chisels with ergonomic handles that feel comfortable in your hand, allowing you to work for longer without getting tired. With the right set of chisels, you can start carving beautiful pieces of wood in no time!
Consider the Size and Shape of the Chisel
When it comes to woodworking, choosing the right chisels can make a huge difference in the quality and precision of your work. One important factor to consider is the size and shape of the chisel. The size of the chisel will impact how much material you can remove at a time and how deep you can make your cuts.
Narrower chisels are better suited for detailed work, while wider chisels can remove material more quickly. The shape of the chisel also plays a role in its effectiveness. A beveled edge chisel is ideal for creating precise angles, while a straight edge chisel is better for general purpose work.
It’s important to have a variety of chisel sizes and shapes in your toolkit so that you can tackle any woodworking project with ease. Remember, investing in high-quality chisels may seem like a large expense at first, but the precision and ease they offer will pay off in the long run in the form of beautiful, professional-looking woodworking projects.
Decide on the Type of Chisel
When it comes to woodworking, a chisel is an essential tool. However, with so many types and shapes of chisels available, choosing the right one for your project can be a confusing task. One important factor to consider is the type of chisel that best suits your needs.
For instance, if you want to work on intricate details, a firmer chisel would be perfect for the job. On the other hand, if you’re handling rough carpentry, a beveled edge chisel would be ideal. Another factor to consider when choosing a chisel is the blade’s length and width.
Longer blades are more versatile and can handle larger tasks, while shorter ones are perfect for controlled and delicate work. Keep in mind that your chisel selection will also depend on the type of wood and the type of project you are working on. Ultimately, choosing the right chisel will not only make your woodworking more efficient, but it will also improve the quality of your finished product.
Preparing the Wood for Carving
Before you can start carving wood with chisels, it is important to properly prepare the wood. This involves carefully selecting the right type of wood and then preparing it by drying and sanding it. You can either purchase pre-dried wood or allow freshly cut wood to dry slowly over a period of time in a well-ventilated area.
Once the wood has dried, you should sand it with increasing grits of sandpaper, starting with a coarse grit and working your way up to a fine grit. This will allow for a smoother surface and prevent any resistance when carving. It’s also important to keep your chisels sharp at all times, as dull blades can cause frustration and damage the wood.
By properly preparing the wood and keeping your tools in good condition, you can set yourself up for a successful carving experience.
Select a Suitable Wood
When it comes to wood carving, selecting the right wood is key. Not all types of wood are created equal, some are harder and denser than others, which makes them ideal for intricate carvings. On the other hand, softer woods tend to be easier to carve, but may not hold up as well over time.
Some popular woods for carving include basswood, butternut, and white pine. Once you have selected your wood, it’s important to prepare it properly for carving. This includes removing any bark or rough spots, and smoothing out the surface.
You may also want to apply a coat of sealer or sand the wood to avoid any cracks or splits. Taking the time to properly prepare your wood will ensure a successful carving project.
Create a Rough Sketch or Template
When it comes to preparing the wood for carving, the first step is to create a rough sketch or template. This can be done by drawing the design onto a piece of paper and then transferring it onto the wood using carbon paper or by simply sketching directly onto the wood. It is important to have a general idea of the design and the dimensions before beginning the carving process.
Once the sketch or template is in place, it is time to choose the right type of wood for the project. Different types of wood have different characteristics, so it is essential to choose a wood that is appropriate for the intended design and level of detail. Some people prefer softwoods such as cedar and pine for easier carving, while others prefer hardwoods like cherry and walnut for their durability and finer finish.
After selecting the appropriate wood, it is time to prepare the surface for carving. This can be done by using sandpaper or a hand plane to smooth out any rough patches or inconsistencies. It is important to work slowly and carefully, paying attention to any knots or grain patterns that may affect the overall design.
In conclusion, preparing the wood for carving is an essential step in creating a successful masterpiece. By using a rough sketch or template, selecting the appropriate type of wood, and preparing the surface carefully, the final carving will be both visually appealing and structurally sound. With a little patience and attention to detail, anyone can create a beautiful piece of art from a simple block of wood.
Secure the Wood in Place
When it comes to carving wood, securing the wood in place is an essential step in preparing it for carving. One of the most common methods is using a clamp or vise to hold the wood in place. This ensures that the wood doesn’t move around while you’re carving, which can lead to mistakes and unsafe conditions.
It’s important to choose a clamp or vise that’s the right size for the wood you’re carving, as well as one that’s sturdy and reliable. You should also make sure that the clamp or vise is firmly attached to your work surface to prevent any movement. Another option is to use a carving stand or bench, which provides a stable surface for your wood and allows you to work comfortably for extended periods.
With a secure wood holding method in place, you’ll be able to focus on your carving without worrying about holding the wood in place, and you’ll be able to create more precise and detailed carvings.
Carving the Design into the Wood
Carving wood with chisels can seem like a daunting task, but once you get the hang of it, you’ll find that it’s a satisfying and rewarding hobby. The first step is to choose the right chisel for the job. For larger, rougher cuts, a wider chisel is best, while finer details require a narrow, tapered chisel.
It’s also important to keep your chisels sharp, as dull blades can cause uneven cuts and make the process more difficult. Once you’ve selected your chisel, use a pencil to sketch out the design on the wood. Start with simpler designs and work your way up to more complex ones as you become more confident in your skills.
Begin carving with the grain of the wood, using light, controlled strokes. Take breaks and step back from your work to assess your progress and make adjustments as needed. Remember, carving wood is a slow and deliberate process, so don’t rush it.
With practice and patience, you’ll be able to create beautiful, intricate designs that are sure to impress.
Mark the Design onto the Wood
When it comes to carving a design into wood, the first step is marking the design onto the wood itself. This requires a steady hand and attention to detail, as any mistakes made at this stage will carry over into the final product. Begin by drawing the design onto the wood using a pencil, ensuring that it is symmetrical and visually appealing.
Once you are satisfied with the design, it’s time to break out the carving tools. Depending on the complexity of the design, you may need a variety of tools, including chisels and gouges. When carving the wood, take your time and be patient, as rushing will only lead to mistakes.
Use a combination of different tools to create depth and texture in the design, adding shadows and highlights where necessary. With a bit of practice and perseverance, you’ll be able to create stunning works of art that showcase your love for wood carving.
Begin Roughing Out the Design with a Gouge
Carving intricate designs into wood can be a challenging yet rewarding experience for both beginners and experienced carvers alike. One of the best tools to use when beginning to rough out your design is a gouge. The gouge is a versatile tool that can be used to create curved cuts and shapes in the wood.
To begin, you will want to choose the appropriate size gouge for your design. A smaller gouge is perfect for creating fine details, while a larger gouge is optimal for roughing out the overall shape of your design. As you use the gouge, it’s important to keep in mind the direction of the wood grain, as this can impact the final outcome of your carving.
Working with the grain can help prevent the wood from splintering or breaking, providing a smoother finish. With patience and practice, using a gouge to carve your design into the wood can be a rewarding artistic experience. So, grab your gouge and start carving today!
Use a Fine Chisel for More Detailed Work
When it comes to carving intricate designs into wood, using the right tools can make all the difference. While larger, wider chisels may be suitable for rough cuts, for more detailed work, a fine chisel is essential. A fine chisel allows you to carve delicate lines and curves with precision and control, resulting in a beautiful final product.
Think of it like using a small brush to paint the fine details on a masterpiece, rather than a large roller to slap on the background color. So if you’re working on a woodcarving project that requires intricate details, be sure to grab a fine chisel to make the job easier and more satisfying.
Finishing the Carving
So you’ve gone through the first step of creating a wood carving by planning and roughing out the general shape. Next up, is the fun part – carving with chisels! Firstly, make sure to start with a sharp chisel to ensure clean and precise cuts. Begin by making rough chisel cuts, going with the grain and using a mallet for more control.
Once the basic shape is outlined, switch to a smaller chisel for finer detailing. Take your time and be cautious not to remove too much wood at once. To achieve depth and texture, try using various chisel sizes and angles for different effects.
Remember, wood carving is a personal journey and everyone’s style is unique. Experiment with different techniques and find what works best for you. With patience and practice, you’ll have a beautiful finished wood carving in no time!
Sand the Surface of the Carving
After you’ve finished carving your wooden masterpiece, it’s now time to sand the surface. Sanding is an essential process that helps to smooth out the rough texture left behind by the carving process. It is important to start with a coarse-grit sandpaper, gradually working your way up to a finer grit, to achieve a flawless finish.
The coarse-grit sandpaper effectively gets rid of the major imperfections on the surface, while finer-grit sandpaper helps to remove any remaining marks and smoothen the surface even further. It is important to pay particular attention to the details of the carving, so as not to destroy the intricate work that you’ve just created. Regularly check and test the surface with your hands to ensure that it’s smooth to the touch.
Once it’s smooth and free of blemishes, you can then apply a finish to protect and add shine to the carving. With a bit of patience and attention to detail, your freshly sanded carving will look as good as new!
Apply a Finish to the Wood
After spending countless hours carving a wood piece, it’s crucial to apply a protective finish to keep it looking shiny and new for years to come. First, make sure the surface is clean and dry before applying any finish. Then, select a finish that suits the wood type and personal preference.
Some popular options include varnish, wax, oil, or shellac. Each has its own application method, so make sure to follow the instructions on the product label. Varnish is a durable, long-lasting finish that provides excellent protection against scratches and stains.
It’s a popular choice for furniture and decorative pieces that need to endure daily use. Apply it in thin, even coats using a brush or roller and let it dry between each layer. Wax is a natural and easy-to-apply finish that adds a soft glow and warmth to the wood.
It’s best suited for low-traffic items that do not require heavy-duty protection. Melt the wax and use a soft cloth to apply it in circular motions. Buff the surface until it shines.
Oil is a simple and versatile finish that enhances the natural beauty of the wood. It penetrates deep into the pores and forms a protective layer against moisture and dirt. Apply it generously with a brush or cloth and let it soak in for at least 10 minutes before wiping off the excess.
Shellac is a traditional finish that provides a glossy, lacquered look to the wood. It’s made from natural resin and alcohol and dries quickly between coats. Apply it in thin layers with a brush or pad, being careful not to over-brush the surface.
Display Your Finished Carving
Once you’ve completed all the necessary carving on your wooden piece, it’s time to finish it off and display it proudly. Finishing the carving involves sanding down any rough edges and applying a protective coating to the wood. This helps to preserve the integrity of the carving and prevents any damage caused by moisture or dirt.
There are a variety of finishes that you can use, including varnish, lacquer, or a simple coat of wax. It’s important to choose a finish that matches the natural tones and look of the wood to bring out its full beauty. Once you’ve applied the finish, allow it to dry completely before putting it on display.
Whether you’re showcasing your carving in your home or giving it as a gift, a finished carving is a beautiful and unique work of art that you can be proud of.
Conclusion
In conclusion, carving wood with chisels is like weaving a conversation with the wood itself. It is a dance between the carver and the timber, where each movement of the chisel conveys a message to the wood and it responds in kind. With practice and patience, one can create intricate and beautiful designs, revealing the natural beauty and character of the wood.
So, pick up your chisels, let your imagination run wild, and let the wood speak to you through your carving. Happy chiseling!”
FAQs
What tools do I need for carving wood with chisels?
To carve wood with chisels, you will need chisels of various sizes, a mallet, a sharpening stone, and a workbench.
How do I sharpen my chisels for wood carving?
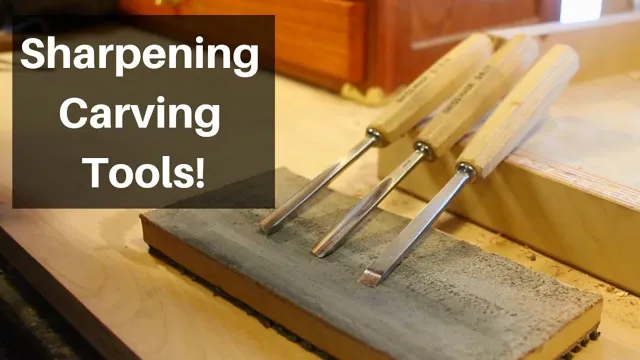
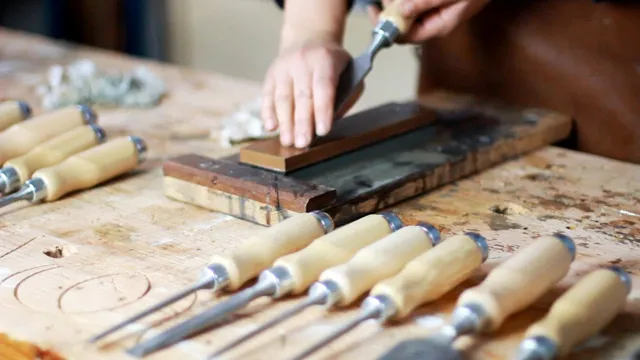
You can sharpen your chisels for wood carving using a sharpening stone or diamond stone. First, make sure your chisel is clean and dry. Then, hold the chisel at an angle against the stone and apply light pressure as you move the chisel back and forth.
What are some tips for beginners learning how to carve wood with chisels?
Some tips for beginners learning how to carve wood with chisels include starting with soft woods like basswood, using light pressure when carving, and practicing different cuts such as slicing, chopping, and paring.
Can I use a rotary tool instead of chisels for wood carving?
While you can use a rotary tool for wood carving, chisels are generally better for larger and more detailed projects. Rotary tools are better suited for smaller, more delicate work.
How do I prevent my wood from cracking while carving with chisels?
To prevent your wood from cracking while carving with chisels, make sure your wood is dry and avoid carving against the grain. You can also carve with the grain and use a sharp chisel to prevent splinters.
Which type of chisel should I use for carving details in my wood project?
For carving details in your wood project, you should use a small or micro chisel. These chisels are designed for intricate cuts and can help you achieve fine details in your carving.
What are common mistakes to avoid when carving wood with chisels?
Common mistakes to avoid when carving wood with chisels include using too much force, not sharpening your chisels properly, and not carving with the grain. It is also important to take breaks and rest your hands to avoid fatigue and injury.
