How to Calibrate a Digital Caliper: A Step-by-Step Guide for Accurate Measurements
Do you ever find yourself needing to measure a small object down to the hundredth of a millimeter? If so, a digital caliper is an excellent tool to have on hand. With its high precision and accuracy, you can measure the smallest of objects with ease. However, after extended use, digital calipers can become uncalibrated, leading to incorrect measurements and false readings.
Luckily, calibrating a digital caliper is a simple process that can be done by anyone. In this blog, we will provide you with a step-by-step guide on how to calibrate your digital caliper to ensure you’re getting accurate measurements every time.
Introduction
Calibrating a digital caliper is an essential task for ensuring accurate measurements. The process involves checking the accuracy of the caliper and adjusting it if necessary. To calibrate a digital caliper, you will need to have a calibration block or a micrometer standard handy.
The first step is to turn on the caliper and set it to zero. Then, place the calibration block or micrometer standard in the jaws of the caliper and take a measurement. Compare the displayed measurement to the actual value of the block or standard.
If there is a discrepancy, you will need to adjust the caliper by following the instructions provided in the user manual. Keep in mind that calibration should be done regularly, especially if the caliper is used frequently or gets dropped. By following these steps, you can ensure that your digital caliper is always providing accurate measurements.
What is a digital caliper?
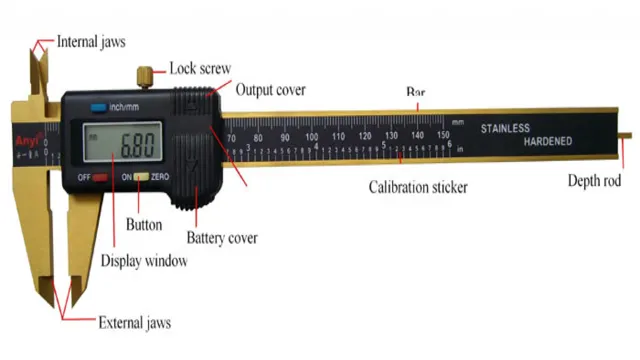
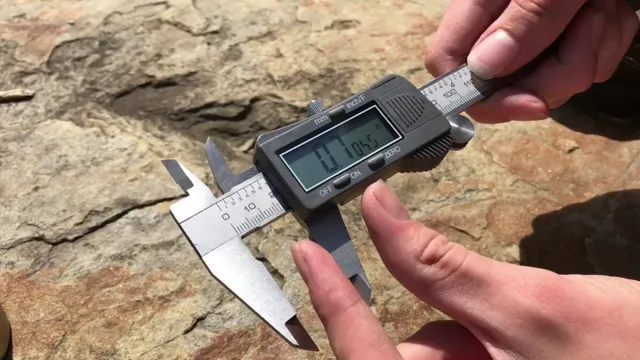
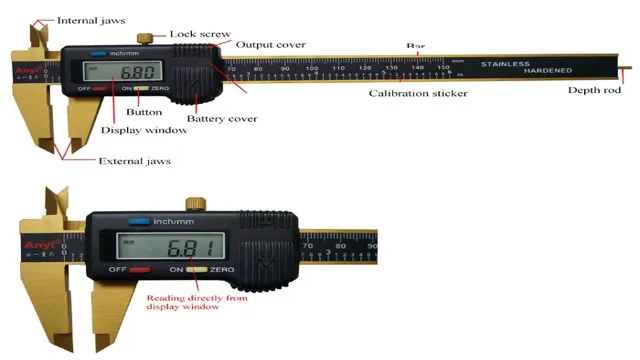
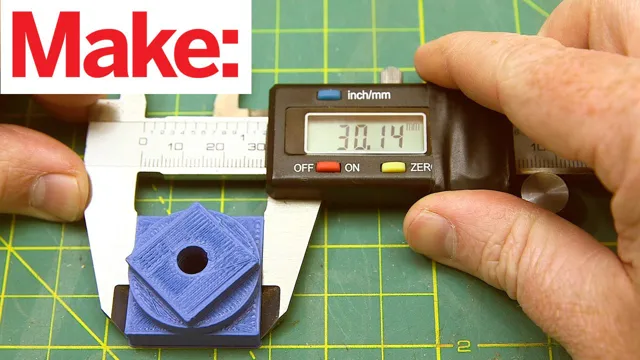
A digital caliper is a precision tool used to take accurate measurements of small objects. It consists of two metal jaws, one fixed and the other movable, which can be adjusted using a digital display. These jaws are used to pinch the object being measured, and the digital display provides a clear numerical readout of the distance between them.
Digital calipers come in various sizes and types, with different levels of precision and functionality. Some have additional features such as data output, absolute and incremental modes, and zero-reset buttons. They are commonly used in engineering, manufacturing, and scientific applications, where high accuracy and reliability are essential.
The benefit of digital calipers is that they allow for fast and accurate measurements, which can be easily recorded and traced. This eliminates the need for manual calculations and improves the precision of the results. They also save time, as they eliminate the need for repositioning and re-measuring the object.
Overall, digital calipers are an essential tool for anyone who needs to take accurate measurements of small objects. They are easy to use, reliable, and highly accurate, making them an ideal choice for professionals and hobbyists alike.
Why is calibration important?
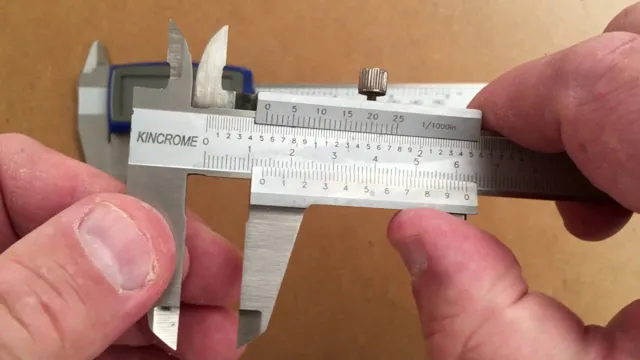
Calibration is an essential aspect of any measurement or testing process and plays a crucial role in ensuring accurate and reliable results. It involves comparing a device’s measurements to a standard reference and adjusting it accordingly, making it work as it should. Precise calibration is essential across numerous industries, including manufacturing, healthcare, and scientific research.
The calibration process also helps enhance the longevity of a device, minimizes measurement errors, and prevents recalls and lawsuits. Therefore, calibration must be carried out consistently, with strict adherence to standards and protocols. In essence, calibration is the key to ensuring the quality and accuracy of measurements and testing processes.
Preparation
Calibrating a digital caliper is crucial to make sure it measures accurately. Before starting the calibration process, it is important to gather all the necessary tools, namely, a calibration block, cleaning cloth, and the manual provided by the manufacturer. The calibration block should be made of the same material as the one you will be measuring, and if the environment temperature is different from where you will measure, let it settle in that environment for some time to ensure temperature uniformity.
Then, use the cleaning cloth to wipe off any dust and dirt from the caliper, ensuring it is clean before starting the calibration. Finally, follow the instructions provided by the manufacturer’s manual to calibrate the digital caliper using the calibration block. By doing this, you can ensure that your caliper will give consistent and accurate readings, improving the quality of your work overall.
Tools needed
Before diving into a project, having the proper tools is crucial to success. When it comes to preparing for a task, you want to make sure you have what you need to get the job done right. The same is true when taking on any project, whether it be a DIY home repair, a building project, or even writing an important essay.
You’ll need to determine what tools are necessary and ensure you have them on hand. Sometimes the tools needed may include simple ones like a hammer and nails, while other times, you may need power tools like screwdrivers or drills. That’s why it’s essential to carefully evaluate what’s required before diving in.
This approach will help ensure that once you get started, the process is smooth, and any possible issues will be handled quickly and easily. Always be sure to make a checklist of the tools you’ll require to avoid any frustrating mistakes along the way.
Clean the caliper
When it comes to maintaining your brake system, one of the critical components to check is the caliper. It is essential to keep the caliper clean since dirt and debris tend to accumulate in the caliper’s crevices, leading to brake failure and uneven wear on your brake pads. Before cleaning the caliper, ensure that you have a few things in hand; a clean, dry cloth, brake cleaner, and a wire brush.
Begin by removing the wheel and exposing the caliper. Inspect the caliper for any leaks and ensure the pins are lubricated and moving freely. Spray the brake cleaner on the caliper and scrub it with a wire brush to remove grime and other particles.
Once the caliper is clean, wipe it dry with a clean cloth and inspect it for any damage or wear. By maintaining a clean caliper, you reduce the risk of premature brake failure and increase your vehicle’s safety on the road.
Calibration Process
If you’re working in a field that requires high precision measurements, calibrating your digital caliper is essential. Fortunately, the process is straightforward and doesn’t require any specialized skills. First, clean the scale using a lint-free cloth, then turn the caliper on and check that the zero reading matches the scale.
If it doesn’t, adjust the zero point until it reads correctly. Next, use a calibration block that is either the same size as the caliper or slightly larger to calibrate the length measurement. Place the block between the jaws and adjust until it reads the correct value on the scale.
Repeat this process several times to ensure accuracy. Finally, recalibrate after any rough handling or drops to ensure your measurements remain precise. By taking the time to calibrate your digital caliper, you can rely on accurate measurements every time.
Step-by-step guide
Calibrating your equipment is an essential step in ensuring accurate measurements and reliable results. To begin the calibration process, the first step is to gather all necessary equipment and materials. This will include the instrument to be calibrated, a calibration standard, and any additional tools or accessories needed for the specific calibration.
Once the necessary equipment is assembled, the next step is to perform a pre-calibration check to ensure that the instrument is functioning properly before calibration begins. This can involve checking for any damage to the instrument, ensuring that it is clean and free of any debris, and checking for any error codes or malfunctions. Once the pre-calibration check is complete, it is time to begin the actual calibration process.
This will generally involve a series of measurements taken with the instrument and compared to a known standard. By making adjustments to the instrument based on these measurements, it is possible to calibrate the instrument to a high level of accuracy and reliability. With proper calibration procedures in place, you can rest assured that your equipment is providing accurate and trustworthy measurements every time.
Zero point calibration
Zero Point Calibration Calibration is a vital process for any measuring instrument to ensure that it provides accurate and reliable readings. Zero point calibration is a type of calibration that is carried out to set the zero point of an instrument. It involves adjusting the instrument in such a way that it reads zero when there is no input signal.
This calibration method is particularly useful for instruments that are required to measure small changes in the input signal, as even small offsets from the zero point can have a significant impact on the accuracy of the readings. The zero point calibration process is simple but critical. The first step is to ensure that the instrument is clean and free from any external influences that may affect its readings.
The instrument is then set to its zero point, and any necessary adjustments are made to ensure that it reads zero when there is no input signal. This process may need to be repeated several times to ensure that the accuracy of the instrument is within acceptable limits. In conclusion, zero point calibration is an essential process for ensuring the accuracy and reliability of measuring instruments.
It may seem like a simple procedure, but it can have a substantial impact on the accuracy of readings. Regular calibration can help to prevent errors and ensure that your instruments provide accurate measurements time and time again. So, if you want to be sure that your instruments are performing correctly, make sure to carry out zero point calibration regularly.
Full scale calibration
Full-scale calibration is a process that ensures that measuring instruments are functioning correctly and are accurate. The process involves comparing the measurements of the instrument being tested to a known standard to establish their accuracy. Full-scale calibration aims to determine the minimum and maximum values that the instrument can indicate.
The full-scale calibration process allows users to check for any deviation or miscalibration of an instrument, which could result in inaccurate measurements. Instruments that require calibration include scales, thermometers, and pressure gauges. It is essential to regularly calibrate measuring instruments to ensure the reliability of the data they produce.
Technicians follow specific procedures during the calibration process to guarantee consistency, and this helps to ensure the accuracy of measurements. Full-scale calibration is particularly crucial in industries where precision and accuracy are paramount, such as aerospace, telecommunications, and pharmaceuticals. By regularly calibrating instruments, users can achieve accurate measurements and be confident in their results, providing greater levels of safety and reliability.
Tips and Tricks
Calibrating a digital caliper might seem like a daunting task, but it is actually quite simple and can be done in just a few steps. Firstly, make sure that the caliper is clean and free from any debris, such as dust or metal shavings. Then, locate the calibration button or switch on the device.
Press this button to enter calibration mode. Next, use a known accurate object, such as a micrometer or gauge block, to measure the accuracy of the caliper. Adjust the zero point and any other necessary settings to ensure that the readings are correct.
Once the adjustments have been made, exit calibration mode and test the caliper again to ensure that everything is working correctly. By following these simple steps, you can ensure that your digital caliper is performing at its best and giving you accurate measurements every time.
Maintenance
Maintenance is a vital aspect of keeping your home in good condition and preventing costly repairs down the line. However, many homeowners are unaware of the proper techniques to maintain their homes. Here are some tips and tricks to ensure that your home is well-maintained.
Firstly, it’s essential to have a maintenance checklist. This list should include routine cleaning tasks such as dusting, vacuuming, and mopping, as well as other tasks like changing air filters and checking smoke detectors. Consistently following the checklist ensures that no task is overlooked or forgotten.
Secondly, focus on preventative maintenance. This involves regularly inspecting your home for signs of wear and tear, such as leaks or cracks in the walls. Addressing these issues early on can prevent more significant problems from occurring in the future.
Lastly, don’t neglect the exterior of your home either. Regularly cleaning gutters and maintaining the landscaping can improve the curb appeal and protect the home from potential damage. By incorporating these tips and tricks, you can ensure that your home is well-maintained and in excellent condition for years to come.
Avoiding common mistakes
Avoiding Common Mistakes: Tips and Tricks to Keep in Mind Making mistakes is a natural part of life, but when it comes to important matters like business or personal finances, avoiding common mistakes is crucial. If you’re looking for ways to prevent blunders, there are several tips and tricks you can keep in mind. Firstly, it’s important to do your research and gather as much information as possible before making any decisions.
This will help you make informed choices and avoid surprises down the road. Secondly, it’s wise to seek advice from others who have experience in the area you’re dealing with. They may have insights or tips that can save you from costly errors.
Another helpful tip is to take your time and not rush into decisions. Remember, patience is a virtue, and it can help you avoid hasty decisions that can lead to serious consequences. Finally, don’t be afraid to ask questions or seek clarification.
Sometimes, mistakes can happen simply because of a lack of communication or understanding. By asking questions and seeking clarification, you can ensure that everyone is on the same page, and prevent misunderstandings that can lead to mistakes. By following these simple tips and tricks, you can avoid common mistakes and make informed decisions that will help you succeed in the long run.
Conclusion
In the world of precision measurement, the calibration of a digital caliper is the equivalent of a finely tuned musical instrument. Like a virtuoso musician, the trained technician must exercise a delicate touch and an unwavering attention to detail in order to ensure the accuracy and consistency of the instrument. From zeroing to calibration checks, each step must be performed with care and precision, making the digital caliper a reliable tool for precision measurement.
So, if you want to hit all the right notes in your work, make sure you calibrate your digital caliper with precision and expertise!”
FAQs
What is digital caliper calibration?
Digital caliper calibration refers to the process of adjusting or verifying the accuracy of a digital caliper to ensure reliable and precise measurements.
Why is it important to calibrate a digital caliper?
Calibration of a digital caliper is important because it ensures that the measurements obtained are accurate and reliable. This is essential for achieving precision and avoiding errors.
How often should a digital caliper be calibrated?
The frequency of calibration depends on the level of accuracy desired, the type of measurements being made, and the conditions of use. Generally, a digital caliper should be calibrated at least once a year.
What are the steps for calibrating a digital caliper?
The steps for calibrating a digital caliper include preparing the calibration standards, selecting the correct measurement mode, zeroing the caliper, and making the calibration adjustments.
Can a digital caliper be calibrated without any special equipment?
While specialized calibration equipment is recommended, it is possible to calibrate a digital caliper manually using basic tools. However, this method may not achieve the same level of accuracy as a calibration performed with specialized equipment.
What are the common errors encountered during digital caliper calibration?
Common errors encountered during digital caliper calibration include incorrect zero-setting, environmental factors affecting measurements, and wear-and-tear of the caliper components.
Who should perform digital caliper calibration?
Digital caliper calibration should be performed by trained personnel who have the necessary skills and knowledge in measurement techniques, calibration procedures, and equipment handling.

