How to Use a Marking Gauge Safely: Tips and Techniques for Precision Woodworking
When it comes to woodworking, using a marking gauge is a crucial step in ensuring precise measurements. However, like any tool, it’s essential to use a marking gauge safely to prevent injury and ensure accuracy. Whether you’re a seasoned professional or just starting, it’s essential to understand the basics of using a marking gauge.
In this blog, we’ll explore the fundamentals of marking gauges, tips for using them safely, and the best practices for achieving optimal results. So, let’s dive in and learn how to use a marking gauge safely and effectively!
Introduction
If you’re just starting out with woodworking, it can be a bit intimidating to work with new tools. One tool that you might come across is a marking gauge. A marking gauge is an essential tool for any woodworker as it allows you to make precise markings to your wood.
However, it’s also important to know how to use a marking gauge safely. The first thing to note is that you should always hold the marking gauge by the handle and not the stem. This ensures that your fingers don’t come into contact with the sharp edge of the marking gauge.
Additionally, make sure to keep your other hand away from the blade when making markings. As always, wear appropriate safety gear such as gloves and eye protection. By following these safety precautions, you can confidently use a marking gauge for all your woodworking needs.
What Is a Marking Gauge?
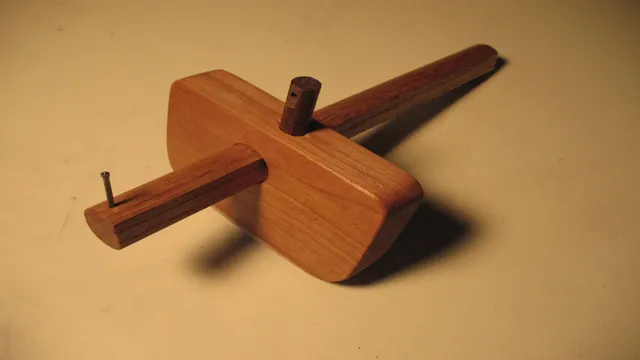
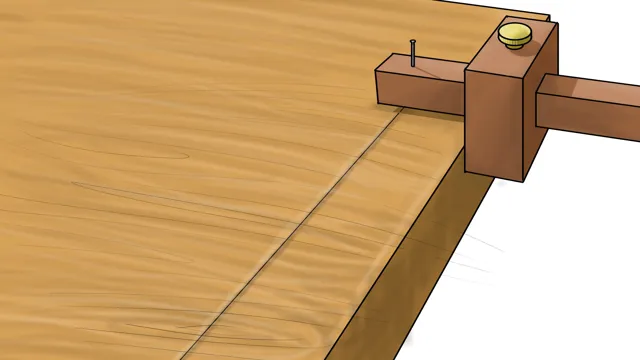
A marking gauge is an essential tool for woodworkers or carpenters. It is used to mark lines on wood or other materials, guiding precise cuts and ensuring accurate measurements. The gauge consists of a flat base, a stem that holds a marking device, and a locking mechanism to secure the stem in place.
The marking device may be a blade, a pin, or a wheel, depending on the type of gauge. The gauge is adjusted to the desired distance from the edge of the material and then run along the surface to create the line. It is a simple but effective tool that helps woodworkers achieve consistent and accurate results.
Why Is Safety Important?
Safety is an essential aspect of our lives, and we often overlook its importance until an accident happens. It’s easy to take for granted the everyday activities we engage in, forgetting the dangers they pose on our well-being. Safety is crucial at home, school, workplaces, and while commuting.
It’s a collective responsibility that we must all take seriously, and failure to do so could lead to serious injuries or even death. Safety measures such as wearing helmets while cycling, not texting while driving, and wearing protective gear while engaging in dangerous activities are all vital. Employers must ensure employees work in a safe environment, and school administrators must ensure the safety of students while in school.
Safety is important because it safeguards our physical, emotional, and mental wellbeing, ensures the longevity of our lives, and secures our future. So, whether you’re at home, on the road, at work or in school, remember the adage, “Safety first,” and take necessary actions to ensure your safety and that of others.
Choosing the Right Gauge
When it comes to woodworking, using the right tool for the job is essential. One of these tools is the marking gauge, which is used to make precise markings on wood. However, it’s important to choose the right gauge for the job at hand, as there are various types available.
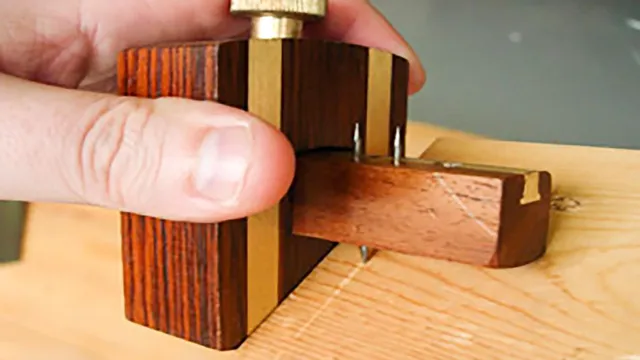
When selecting a marking gauge, consider the type of wood you’ll be working with, the depth and width of the marking you need to make, and the level of detail required. For instance, a mortise gauge with two pins is ideal for marking out the width of a joint, while a cutting gauge with a single blade is better for marking against the grain. By selecting the right type of gauge, you can ensure that you make accurate markings and work safely.
Types of Gauges
When it comes to choosing the right gauge, it’s essential to understand the different types available. One of the most common types is the dial gauge, which is simple to use and read. Another type is the digital gauge, which provides precise measurements and is perfect for applications that require high accuracy.
A third option is the dial test indicator, which measures the magnitude and direction of small deviations from a straight line. The fourth type is the pressure gauge, which measures the pressure of liquids and gases. The final type is the force gauge, which measures the force required to move an object.
Knowing the different types of gauges and their applications can help you make an informed decision and choose the right gauge for your needs. Whether you need to measure pressure, force, or small deviations, there’s a gauge out there that’s perfect for you.
Considerations When Choosing
When it comes to choosing the right gauge for your project, there are a few things to consider. First and foremost, you’ll want to think about the thickness of the wire. Different gauges are better suited for different tasks.
For example, a thicker gauge might be needed for a heavy-duty project, while a thinner gauge might be more appropriate for something delicate. Another factor to keep in mind is the material of the wire. Some materials are more malleable than others, which can affect how easy the wire is to work with.
Additionally, you’ll want to consider the finish of the wire, as this can impact its appearance and durability. All of these factors should be taken into account when choosing the right gauge for your project.
Preparing for Use
When it comes to using a marking gauge safely, there are a few key steps to keep in mind. The first thing you want to do is make sure you have a good grip on the tool before starting to create your markings. It’s important to hold the gauge firmly and keep your fingers away from the blade as much as possible.
Additionally, be sure to position the gauge correctly so that it is perpendicular to the surface you are working on. This ensures that your markings are accurate and also helps prevent the blade from slipping or accidentally cutting into the wood. Finally, always remember to keep the blade sharp and clean.
Dull or dirty blades can cause the gauge to slip or catch, leading to potential injury or damage to your project. With these tips in mind, you can use a marking gauge safely and effectively in your woodworking projects.
Inspect the Gauge
Inspecting the gauge before use is an essential step in ensuring its accuracy and safety. Before starting any task, be sure to check the pressure gauge for any signs of damage or rust. You want to make sure that the gauge is in good working order so that you get the right readings.
A damaged gauge can give false readings and lead to disastrous consequences, so always inspect the gauge before use. Additionally, check to see if the gauge is properly calibrated, as this can also affect its accuracy. By taking a few moments to inspect the gauge, you can ensure that your work is done safely and effectively.
So, make inspecting the gauge a habit before starting any project.
Select the Right Blade
When it comes to using a saw, selecting the right blade is crucial. There are various types of blades, each suited for different materials and purposes. Therefore, it’s essential to choose the appropriate blade for a particular task.
Before using a saw, it’s essential to check the blade’s condition, ensuring it’s not damaged or worn out. It’s also crucial to pay attention to the blade’s sharpness, as a blunt blade will not only affect the quality of the cut but also make the task more challenging. To maintain the blade’s sharpness, one needs to follow the manufacturer’s instructions on how to sharpen it or when to replace it.
In summary, preparing for the use of a saw requires selecting the right blade and ensuring that it’s in good condition and sharp enough to perform the task at hand.
Adjust the Depth of Cut
Adjusting the depth of cut is an essential part of preparing a tool for use. It determines the depth of the cutting pass, which can greatly impact the quality and precision of the finished product. Before adjusting the depth of cut, it’s necessary to make sure the tool is securely fastened in place and properly aligned.
Once that’s done, you can adjust the depth of cut using the tool’s depth adjustment mechanism. Some tools will have a simple screw mechanism, while others may have a more complex mechanism that requires more precise adjustment. Either way, it’s essential to make sure the depth of cut is set correctly before starting any cutting operations.
Proper adjustment of the depth of cut can help to ensure clean cuts, reduce vibrations and extend the life of the cutting tool. So take the time to adjust the depth of cut properly before use, and you’ll reap the benefits of a quality finished product.
Using the Gauge
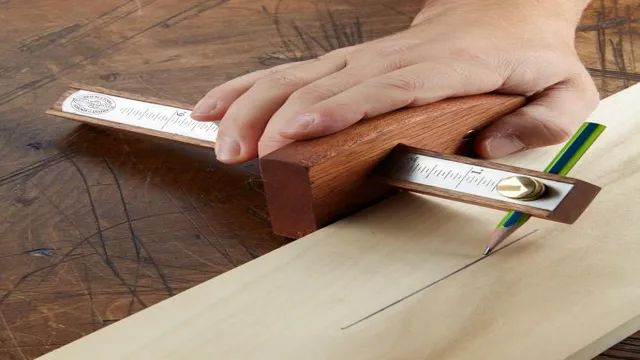
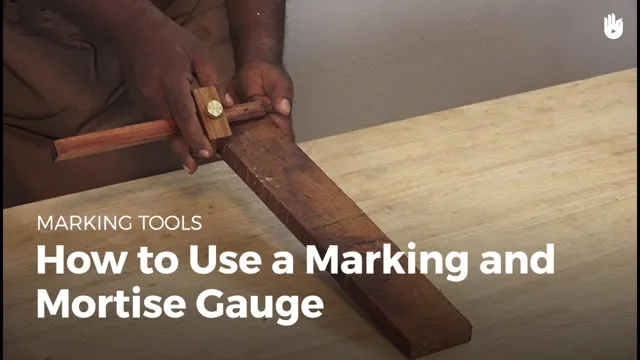
If you’re wondering how to use a marking gauge safely, it’s essential to first understand the tool itself. A marking gauge is a woodworking tool that is used to create consistent markings on wood, ensuring precise cuts. To use it, hold the stock firmly and slide the fence up against the edge of the wood, locking it in place with the thumbscrew.
Next, adjust the marking gauge to the desired measurement, making sure the blade projects just enough to make a clear line. Finally, run the blade gently along the edge of the wood, being careful not to apply too much pressure or force. Remember to always keep your fingers away from the blade and to store the tool in a safe place when not in use.
By taking these precautions, you can safely and effectively use a marking gauge to improve the accuracy of your woodworking projects.
Firmly Hold the Gauge
When it comes to using the gauge, one important thing to remember is to firmly hold it in place. This ensures that you get accurate measurements and prevents the gauge from moving around, which can lead to errors. To hold the gauge firmly, use your free hand to anchor it against a surface or object.
This will provide stability and give you greater control over the tool. Keep in mind that the amount of force you use to hold the gauge will depend on the specific type of gauge you’re using, as well as the material you’re measuring. For instance, you may need to apply more pressure when measuring harder metals than you would with softer plastics or fabrics.
By taking the time to learn how to properly hold the gauge, you’ll be able to take more accurate measurements and get better results overall.
Use Proper Technique
When it comes to knitting, using proper technique is crucial to ensure that your finished product looks great and lasts a long time. One important tool you’ll use as you knit is a gauge. A gauge measures the number of stitches per inch and rows per inch in your knitting, so that you can make sure your work is the correct size and has the right tension.
To use a gauge, simply knit a swatch of fabric using the same yarn and needles you plan to use for your project. Then, measure the number of stitches and rows per inch using the gauge. Adjust your technique or needle size as needed to achieve the correct gauge.
By taking the time to use a gauge properly, you can ensure that your knitting turns out just the way you want it to.
Work Slowly and Carefully
When it comes to woodworking, one essential tool that every craftsman should have is a gauge. A gauge is a measuring tool that makes it easy to mark and cut wood accurately. However, using a gauge incorrectly can ruin your project and waste your time.
That’s why it’s crucial to work slowly and carefully. Take your time to carefully set your gauge to the correct measurements before marking your wood. Make sure you’re using the right type of gauge for the job you’re doing.
Some gauges are better for measuring depths, while others are better for marking the thickness of the wood. Remember, the gauge is your friend, and it can help you achieve excellent results if you use it correctly. To use the gauge correctly, start by choosing the right type of gauge for the job you’re doing.
Next, adjust the gauge to the correct measurements and lock it in place. After that, use the gauge to mark your wood by running the gauge’s teeth along the surface of the wood. Once you’ve made your mark, take your time to cut the wood carefully.
Ensure that you follow your mark accurately to create straight cuts. Remember that woodworking is an art that takes time, effort, and practice. You won’t become a master craftsman overnight.
So, don’t rush your work. Take your time, work slowly and carefully, and let the gauge help guide you to accurate measurements and markings. With patience and practice, you’ll become a skilled woodworker who can create beautiful pieces of furniture and artwork.
Conclusion
In conclusion, using a marking gauge may seem like a simple task, but it requires a certain level of caution to ensure safety. Remember to always keep your fingers well away from the sharp blade, and make sure the gauge is firmly secured to the workpiece before making any marks. And if in doubt, don’t be afraid to seek guidance from an experienced woodworker.
Happy marking!”
Practice Safe Techniques
When it comes to using a gauge, safety should be top of mind. Knowing how to operate a gauge and using safe techniques can prevent accidents in the workshop or on the job site. Firstly, ensure that the gauge is calibrated correctly before beginning any readings.
Once you’re ready to take a reading, make sure that you’re holding the gauge properly and that you’re not obstructing the reading with your hand or body. Keep your eyes on the gauge and read the measurement accurately. Remember to always use the proper personal protective equipment, like safety glasses, gloves, and a face mask, to avoid exposure to harmful substances or particles.
Practicing safe techniques when using a gauge can protect both you and those around you, and ensure a successful outcome for your project.
FAQs
What is a marking gauge?
A marking gauge is a woodworking tool used to make precise markings on wood surfaces.
How does a marking gauge work?
A marking gauge consists of a fence with a cutting wheel or spur that protrudes from it. The cutting edge is adjusted to the desired distance from the fence, and then the tool is dragged along the surface of the wood to make a clean, straight line.
What are the different types of marking gauges?
There are several types of marking gauges, including wheel gauges, pin gauges, mortise gauges, and combination gauges.
How do you adjust the cutting depth of a marking gauge?
To adjust the cutting depth of a marking gauge, loosen the locking screw and slide the cutting wheel or spur up or down until it is at the desired depth. Then, tighten the locking screw to secure the adjustment.
How do you use a marking gauge safely?
To use a marking gauge safely, always keep your hands clear of the cutting wheel or spur. Make sure the tool is held firmly against the wood surface and that the cutting edge is properly adjusted. Always wear eye protection and use caution when handling any sharp tool.
What materials can you use a marking gauge on?
A marking gauge can be used on a variety of wood materials, including softwoods, hardwoods, and plywood.
What are some common uses for a marking gauge?
A marking gauge is commonly used in woodworking for tasks such as marking out mortises, measuring and marking thicknesses, and marking out joints for cutting.

