Driving a car with the correct tire pressure ensures your car’s ride is smooth, safe, and enhances fuel economy. While many drivers may overlook the importance of tire pressure, it is crucial to check and maintain it for optimal performance. Using a tire pressure gauge is an easy task that involves learning the correct tire pressure for your vehicle, finding the right gauge, and following simple steps to check and adjust the pressure if necessary.
In this blog, we will explore the basics of using a tire pressure gauge and some tips to keep your tires in good condition for a safer and more comfortable ride. So, buckle up and let’s dive in!
Step 1: Check Your Tire Pressure Gauge
If you’ve never worked with a tire pressure gauge before, it can be a bit daunting at first. But don’t worry, it’s actually quite simple and straightforward. The first step is to check your tire pressure gauge to make sure it’s in good working order.
Some gauges may require a bit of prep work, like removing the cap or activating a button, so always check the instructions first. Once you’re ready, simply press the gauge firmly against the tire valve stem and hold it there for a few seconds. Most gauges will give you a reading instantly, but be sure to check the instructions to see if there’s a specific way to read yours.
Remember, maintaining proper tire pressure is crucial for optimal performance and safety, so it’s always a good idea to check your tires regularly.
Choose a pressure gauge with a readable dial
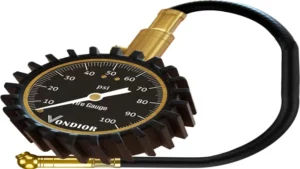
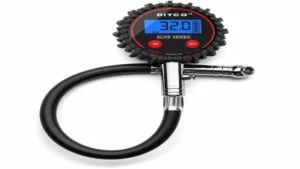
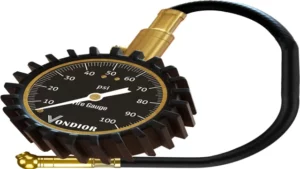
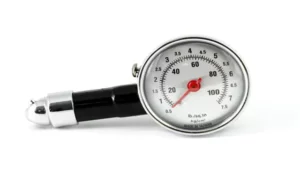
When choosing a tire pressure gauge, it’s important to select one with a readable dial that is easy to understand. After all, what good is a pressure gauge if you can’t accurately read the numbers on it? A readable dial ensures that you can quickly and easily determine your tire’s pressure level at a glance. Additionally, if the numbers are clearly marked, you won’t have to squint or second-guess your readings, which can save you time and frustration.
So when shopping for a tire pressure gauge, be sure to check the readability of the dial to ensure accurate and efficient pressure readings.
Check if it’s calibrated
One of the most important things to do before checking your tire pressure with a gauge is to make sure it’s calibrated. A calibrated gauge will give you accurate readings, while an uncalibrated one will give you inaccurate results. So, step one is to check your tire pressure gauge to make sure it’s calibrated.
To do this, you can compare it to another gauge that you know is accurate. If your gauge is off by more than a few psi, then it’s time to calibrate it. You can do this by following the instructions that came with your gauge, or you can take it to a professional to have it calibrated.
It’s important to check your gauge regularly to ensure it’s always giving you accurate readings. By doing so, you will avoid overinflating or underinflating your tires, which can both be dangerous and can lead to decreased fuel efficiency and uneven tire wear.
Step 2: Locate Your Valve Stem
When it comes to checking your tire pressure, the first step is finding the valve stem. This small, cylindrical tube is usually located on the edge of the tire and can be easily identified by its cap. Once you’ve located the valve stem, it’s important to remove the cap before using your tire pressure gauge.
This will allow you to insert the gauge into the valve stem and get an accurate reading of your tire pressure. Keep in mind that if you’re checking the pressure on all four tires, you’ll need to repeat this step for each one. Properly checking your tire pressure can improve your gas mileage and extend the life of your tires, so it’s a task that shouldn’t be overlooked.
By following these simple steps, you’ll be well on your way to maintaining safe and efficient driving conditions.
Remove Your Valve Cap
If you want to check the pressure in your tires or need to fill them, the first step is to locate the valve stem. It is a small but crucial component of your tire that connects to the valve stem cap and the inner tire. Most valve stems are located on the outer edge of your tire or the rim and protrude from it.
They can come in different shapes and sizes, but they usually have a small cap on top of them that secures the air pressure inside the tire. To locate your valve stem, you need to check on the sidewall of your tire and look for a small, circular rub mark on the rim. This mark will give you an idea of the approximate position of the valve stem.
Once you find it, you’re ready for the next step, which is removing the valve cap. Remember, the valve cap keeps out dirt and debris, so make sure to keep it safe while you check or fill up your tires.
Check Your Valve Stem for Damage
When it comes to checking your valve stem for damage, the first step is to locate it. The valve stem is a small, cylindrical extension that protrudes from your tire. You can find it by examining the area where your tire connects with the wheel.
It’s essential to check your valve stem regularly because any damage could cause air leaks, leading to a flat tire. Sometimes, damage to the valve stem is not noticeable, so it’s crucial to take a closer look to identify any subtle issues. A damaged valve stem requires immediate attention, and it’s recommended to replace it right away.
By doing this, you can avoid any potential problems and ensure the safety of your vehicle. Regular maintenance of the valve stem is key to extending the life of your tires, leading to significant savings in the long run.
Step 3: Press the Gauge to the Valve Stem
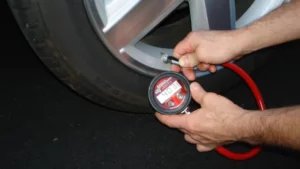
Once you have found your valve stem and positioned yourself in a way that will allow you to easily access it, the next step in learning how to work a tire pressure gauge is to press the gauge to the valve stem. Make sure that the gauge is lined up correctly with the valve stem before pressing it down firmly. You will hear a hissing sound as air is released from the tire and flows into the gauge.
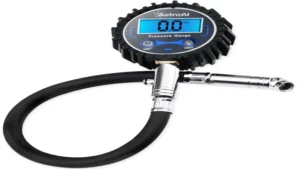
This is a normal part of the process. Once the hissing sound stops, the gauge will provide you with a reading of the tire’s pressure. This reading will be shown on a numbered dial or LCD screen, depending on the type of gauge you are using.
Keep in mind that you may need to repeat this process multiple times to get an accurate measurement, especially if your tires have been recently driven on or if the temperature outside has changed drastically. By following these steps and properly using your tire pressure gauge, you can ensure that your tires are always inflated to the correct pressure, which will help improve their lifespan and overall performance.
Press the Tip of the Gauge to the Valve Stem
When it comes to checking your tire pressure, one of the most important steps is pressing the gauge to the valve stem. This ensures that you get an accurate reading of how much air is in your tires. To do this, simply remove the cap from your tire’s valve stem and press the tip of the gauge directly onto it.
You’ll feel a small amount of resistance as the gauge pushes against the stem, but that’s normal. Be sure to hold the gauge firmly in place while you check the reading. It’s also important to make sure that the gauge is perpendicular to the stem, as angling it can affect the reading.
Once you’ve gotten your reading, release the gauge from the valve stem and put the cap back on tightly. Remember, regularly checking your tire pressure can help keep you and your passengers safe on the road, so make it a part of your routine!
Wait for the Reading to Stabilize
When it comes to checking the air pressure in your tires, pressing the gauge to the valve stem is an important step in ensuring accurate readings. However, it’s essential to wait for the reading to stabilize before recording it. This may take a few seconds as the gauge adjusts to the air pressure within the tire.
Rushing this step could result in an inaccurate reading and could potentially lead to underinflated or overinflated tires. Once the reading has stabilized, be sure to record it in a safe and accessible location for future reference. Remember, consistent tire pressure checks are crucial for maintaining your vehicle’s safety and performance on the road.
So, take the time to properly check your tire pressure and keep your tires in top shape.
Step 4: Check Your Tire Pressure Gauge Reading
Once you have gotten a reading from your tire pressure gauge, it’s important to check it against the recommended tire pressure for your particular vehicle. This information can usually be found in your vehicle’s owner manual, on the driver’s side doorjamb, or even on the inside of your gas cap. If the reading from your tire pressure gauge is lower than the recommended pressure, you will need to add air until it matches the recommended PSI.
Conversely, if the reading is higher than the recommended pressure, you may need to release some air until it matches the recommended PSI. Remember to always check your tire pressure when the tires are cold, such as in the morning before you begin driving. With a little bit of practice, working a tire pressure gauge will become second nature to you and help keep you safe on the road.
Read the Gauge and Record the Pressure
Once you’ve properly attached the gauge to your tire valve stem and have ensured that no air is escaping, it’s time to read the gauge and record the pressure. Make sure to look at the gauge straight-on and perpendicular to the valve stem to avoid any reading errors. The pressure reading will appear on the gauge in either PSI (pounds per square inch) or kPa (kilopascals).
If the reading falls within the recommended range provided by the manufacturer or on your vehicle’s tire information placard, then you’re good to go. However, if the reading shows that the tire is underinflated or overinflated, then it’s time to adjust the tire pressure accordingly. Remember that the recommended tire pressure can vary depending on the type of vehicle, tire size, and overall driving conditions.
By regularly checking your tire pressure, you’ll help extend the life of your tires and ensure a safer driving experience.
Repeat for all Tires and Check Your Owner’s Manual
When it comes to maintaining your car, checking tire pressure should be high on your list. So, step 4 is essential. Once you have read the pressure of the first tire, move to the next tire and repeat the process.
It’s vital to check the pressure of all four tires since they can have different levels, leading to uneven wear and tear. For a more accurate reading, leave the tire gauge on the valve stem for a couple of seconds longer, and it will give a more precise reading. Moreover, it’s imperative to keep track of your tire’s pressure level since under-inflated tires lead to lower fuel efficiency, and worse, it may cause a blowout, which can be dangerous while driving.
After you finish checking all the tires, it’s time to cross-check your measurement with your owner’s manual since it shows the recommended pressure levels for your specific car’s model. This helps you avoid exceeding the tire pressure limit, ensuring your car operates smoothly, and you have a comfortable and safe ride. Overall, it’s a quick and straightforward process that will benefit your car and save you money in the long run.
Step 5: Refill or Adjust Pressure
After checking the pressure of your tires with a gauge, it’s time to either refill or adjust the air pressure as necessary. If your tires require more air, remove the cap from the valve stem and attach the nozzle of your air supply to it. If the tire has too much air, use the gauge to release air from the valve stem slowly.
It is important to regularly check tire pressure, as underinflation can lead to inefficiency and wear, while overinflation can cause uneven wear and less grip on the road. Keeping your tires at the recommended pressure level ensures optimal performance and safety while driving. So if you want to know how to work a tire pressure gauge, remember to use the tool to check your tire pressure, identify if the tire needs more or less air, and act accordingly.
Add Air as Needed or Reduce Pressure If Necessary
Now that you’ve inspected your tires and identified any issues with their pressure, it’s time to take action and either refill or adjust them. In some cases, you may simply need to add a bit of air using a tire pressure gauge and an air pump. Other times, you may need to reduce the pressure if you find that your tires are overinflated.
It’s critical to ensure that you refill or adjust your tires according to the recommended pressure levels for your vehicle, which can be found in your owner’s manual or on the inside of the driver’s side door. Keep in mind that the ideal tire pressure can vary based on factors such as the weight of your vehicle, the type of tires you have, and the climate you’re driving in. Don’t skimp on this step, as improperly inflated tires can increase your risk of accidents, reduce your fuel efficiency, and compromise your vehicle’s handling.
By staying on top of your tire pressure, you can stay safe and enjoy a smoother ride on the road.
Final Thoughts
Overall, learning how to work a tire pressure gauge is a simple but necessary task for any driver. By following these steps and having a basic understanding of how your tire pressure gauge works, you can ensure that your tires are properly inflated at all times. Remember to always check your tire pressure regularly and adjust accordingly, especially in extreme temperatures or when carrying a heavy load.
Your tire pressure gauge is a valuable tool that can save you money and increase your safety on the road. So take the time to learn how to use it and make it a regular part of your vehicle maintenance routine. Your tires (and your wallet) will thank you in the long run!
Check Your Tire Pressure Monthly and Before Long Trips
In conclusion, checking tire pressure is a simple yet crucial task that every driver should perform regularly. It not only enhances safety but also improves the car’s fuel economy and reduces the wear and tear on the tires. It’s recommended to check your tire pressures at least once a month, preferably when the tires are cold.
And before embarking on a long trip, always ensure that the tires are correctly inflated and have sufficient tread depth. Remember that overinflated or underinflated tires can cause accidents, affect handling, and increase braking distances. Hence, investing a few minutes in checking your tire pressure can prevent potential mishaps and save you money in the long run.
Keep your tires properly inflated to keep you and your passengers safe on the road!
Don’t Forget to Replace Your Valve Caps
Valve caps may seem like a small and insignificant part of your car, but they play an important role in ensuring your tires are properly inflated and keeping debris from getting inside the valve stem. It’s easy to forget about them, but regularly checking and replacing valve caps will not only keep your tires safe but may also improve your gas mileage. Plus, valve caps come in a variety of fun designs, allowing you to add a bit of personal flair to your car.
So, don’t underestimate the power of a small valve cap and remember to replace them when necessary. Your tires and your wallet will thank you.
Conclusion
In conclusion, working a tire pressure gauge is like playing a game of precision and accuracy. Just like aiming for the bullseye in darts, you want to aim for the correct pressure in your tires. With a little practice, a steady hand, and a bit of patience, you can become a master at checking your tire pressure.
And remember, maintaining the right pressure in your tires not only improves fuel efficiency and tire longevity, but also ensures a smooth and safe ride. So let’s get to it and start gauging those tires like a pro!”
FAQs
What is a tire pressure gauge and how does it work?
A tire pressure gauge is a device used to measure the air pressure inside a car’s tires. To use it, push the nozzle onto the valve stem and the gauge will display the pressure reading.
Why is it important to check tire pressure regularly?
Maintaining proper tire pressure can improve fuel efficiency, extend tire lifespan, and improve handling and safety on the road.
How often should I check my tire pressure?
It is recommended to check tire pressure at least once a month, or before a long road trip.
Can I use any tire pressure gauge on my vehicle’s tires?
It is recommended to use the type of tire pressure gauge specified by the vehicle manufacturer for accurate readings.
Is it possible to over-inflate or under-inflate tires with a tire pressure gauge?
Yes, it is possible to over-inflate or under-inflate tires if the gauge is not calibrated or used correctly. Always follow the instructions carefully and ensure the gauge is accurate.
Can I check tire pressure when the tires are cold or hot?
It is recommended to check tire pressure when the tires are cold, as the pressure can increase when the tires are heated from driving.
What should I do if my tire pressure gauge displays a different pressure than the recommended pressure for my vehicle?
Adjust the pressure accordingly by adding or releasing air until it matches the recommended pressure for your vehicle.
