When it comes to installing or fixing ceiling lights, safety should always be your top priority. One way to ensure safety is by using a voltage tester. This simple tool can help you identify whether the wiring in your ceiling light is live or not, preventing any accidents or electrocutions.
In this blog, we’ll take a closer look at using a voltage tester on a ceiling light and the steps you need to take to do it safely and effectively. Whether you’re a DIY enthusiast or a professional electrician, this guide is a must-read for anyone looking to keep their home safe and secure. So, let’s get started and learn how to use a voltage tester on a ceiling light like a pro!
What is a Voltage Tester?
A voltage tester is a tool used by electricians and DIY enthusiasts to check if electrical wires or devices are live. It’s a crucial device to ensure safety when working with electricity. If you’re looking to install a ceiling light, you’ll need a voltage tester to confirm that the wires are not live before you start working on it.
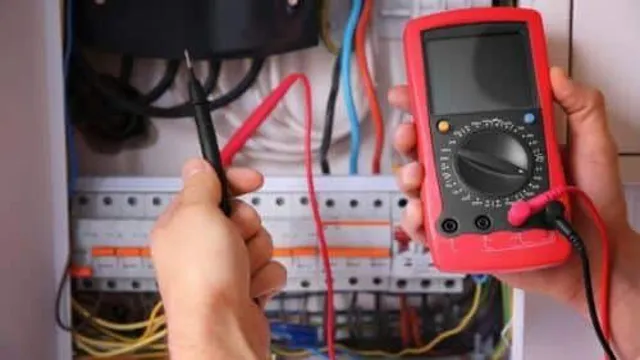
To use the voltage tester on a ceiling light, start by turning off the circuit breaker or removing the fuse to the room where the light is installed. Next, remove the light fixture and locate the wires. Turn your voltage tester on and touch the probes to the wires.
If the tester beeps or lights up, this indicates that the wires are still live and you should proceed with caution. If the tester doesn’t beep or light up, you can safely begin your work on the ceiling light. Remember to always use caution when working with electricity and never touch live wires.
– Definition and Types
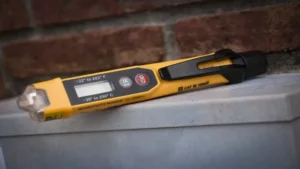
A voltage tester is an electrical tool used to test the presence of electricity in a circuit. It works by measuring the voltage level in an electrical circuit and indicating whether it’s present or not. This tool comes in different types, including non-contact voltage testers, circuit testers, and digital multimeters.
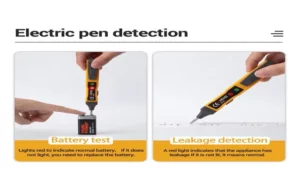
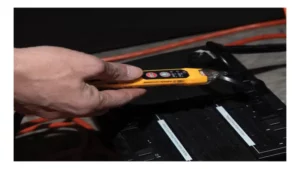
The non-contact voltage testers are the most popular type and are used to detect electric fields around a wire or cable without touching it. These testers are simple to use, portable and do not require making any physical contact with the cable. Circuit testers, on the other hand, can detect weak currents and are commonly used in the automotive industry.
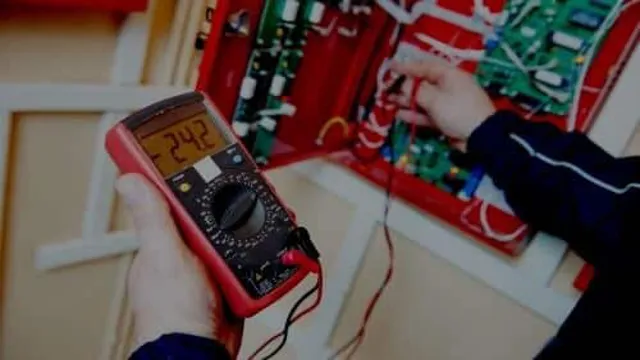
Lastly, digital multimeters are the most advanced type of voltage tester as they can measure multiple electrical quantities and are suitable for advanced electrical work. Overall, these voltage testers are essential tools for anyone working with electrical equipment, and they help ensure safety and reliability in electrical systems.
– Safety Precautions
A voltage tester is a tool used to detect the presence of an electric current in a wire, circuit, or device. It allows you to check whether a wire or outlet is dangerous before working with it. Voltage testers come in different types, including contact and non-contact testers.
Contact testers require touching the wire or circuit with a metal probe to test the voltage, while non-contact testers can detect voltage without making physical contact. When using a voltage tester, safety should be the top priority. Always wear protective gear, switch off the power supply, and double-check the tester’s accuracy before handling an electric circuit.
Remember, electricity is extremely dangerous, and a mistake can cause severe injury or even death. Therefore, it’s crucial to take necessary precautions and use a voltage tester whenever you’re working with power tools or electrical equipment.
Preparing for Testing
When preparing to test a ceiling light with a voltage tester, it’s important to take safety precautions. Turn off the power to the circuit at the circuit breaker or fuse box before testing. Once the power is off, remove the light fixture’s cover to access the wiring.
Before using the voltage tester, make sure it is working properly by testing it on a known live circuit. Once the tester is confirmed to be working, touch the tester probes to each wire in the ceiling box to determine if there is voltage present. If there is no voltage, the problem may be with the light fixture itself.
If there is voltage, continue testing and troubleshooting until the issue is resolved. Remember, always use caution when working with electricity and consult a professional if you have any doubts or concerns.
– Turn off the Power
When it comes to preparing for testing, turning off the power is a crucial step that should never be overlooked. Whether you’re testing a piece of machinery or electrical equipment, it’s essential to ensure that there’s no risk of electrocution or other hazards that could cause injury or damage. So, before you begin testing, take the time to turn off the power completely.
This means shutting down the main power supply, unplugging any cords or cables, and switching off any backup batteries or generators. It’s also a good idea to use a voltage detector to check for any residual electrical current that may still be present, as this can pose a serious risk if it comes into contact with any metal components or other conductive materials. By taking these simple steps to turn off the power, you can ensure that you’re ready to take on your testing task with confidence and safety.
– Remove the Cover Plate
When preparing to test a device, the first step is to remove the cover plate. This step is essential because it allows easy access to the inner components of the device. However, it’s important to note that this step should only be done by a qualified technician, as it can be dangerous.
Before removing the cover plate, the technician should ensure that all power sources to the device are turned off and that all cables and wires are disconnected. Once the cover plate is removed, the technician can begin testing the device for any defects or malfunctions. It’s vital to follow all safety protocols to ensure that the testing process runs smoothly without any risk of injury.
Overall, removing the cover plate is a crucial step in preparing for testing as it allows access to the inner workings of the device.
– Identify the Wires
When preparing to test your electrical wiring, the first step is to identify the wires. This can be a bit daunting, but with the right tools and knowledge, it can be done safely and efficiently. It’s important to turn off the power source before beginning this process to prevent electrocution.
Once you’ve done that, identify the type of wires you’re working with. There are typically three types: hot wires, neutral wires, and ground wires. Hot wires are usually black or red and carry the electrical current, neutral wires are white and complete the circuit, and ground wires are green or bare and provide a safety backup.
To determine which wire is which, you can use a voltage tester or multimeter. Simply touch the end of the tool to the wire and it will indicate whether the wire is hot or not. Once you’ve identified the wires, mark them accordingly and proceed with caution.
Testing electrical wiring can be dangerous, so it’s important to take all necessary safety precautions.
Testing the Voltage
One of the most important things to do before working on any electrical component is to test the voltage to ensure it’s safe to proceed. If you’re wondering how to use a voltage tester on a ceiling light, it’s a fairly simple process. First, turn off the power to the fixture by flipping the switch in the circuit breaker box.
Next, remove the cover plate from the light switch and carefully remove the switch from the wall. Place the voltage tester on the wires leading to the switch and turn the power back on from the circuit box. If the tester shows a voltage reading, the power is still on, and you’ll need to turn off the circuit breaker again before continuing.
If there’s no voltage present, proceed with caution, and continue to test the wires leading to the light fixture to ensure there’s no live current. Always keep safety in mind when working with electricity, and if you’re unsure, it’s best to call in a professional electrician to complete the work.
– Touching the Wires
When it comes to electrical devices and wiring, it’s important to be careful and take all the necessary precautions. This includes testing the voltage before touching any wires. Voltage is a measure of the electrical potential difference between two points in a circuit, and it’s essential in determining the safety and functionality of a device.
To test the voltage, a voltmeter is the ideal tool to use. It’s a handheld device that measures the difference in potential between two points by connecting two probes to the desired points. If the voltmeter reading is too high, it means that too much electricity is flowing through the wires, posing a risk of electrocution and other safety hazards.
In such cases, it’s necessary to turn off the power source before making any further repairs or adjustments. Remember, your safety should always come first, and taking the time to test the voltage can prevent dangerous accidents from happening.
– Interpreting the Results
When testing the voltage of an electrical device, it is important to have an understanding of the results. The voltage is a measure of the electrical potential difference, or the force that drives the electrical charge flow in a circuit. The results of the test will determine the health and functionality of the device.
A low voltage reading may indicate an issue with the power supply or a fault within the circuit, whereas a high voltage reading may result in damage to the device or a potential safety hazard. It is important to follow the manufacturer’s guidelines and specifications when interpreting the results, as each device may have different voltage requirements. Overall, testing the voltage is a crucial step in ensuring the safe and efficient operation of an electrical device.
Final Tips and Reminders
Using a voltage tester on a ceiling light may seem daunting at first, but with a little practice and guidance, it can be a simple and worthwhile task. To start, make sure that the power to the light fixture is turned off at the circuit breaker. Next, use a voltage tester to check for any remaining electrical current before touching any wires.
Once you have confirmed that it is safe, remove the light fixture cover and carefully inspect the wiring. Use the voltage tester to ensure that there are no live wires and that the connections are secure. When replacing the cover, make sure it fits snugly and securely to prevent any potential electrical hazards.
Remember to always prioritize safety and caution when working with electrical components. By following these simple steps, you can confidently use a voltage tester on your ceiling light fixture without any worries.
Conclusion
In conclusion, using a voltage tester on a ceiling light may seem like a daunting task, but it’s actually quite simple – think of it as giving your light switch a health check-up! Make sure to turn off the power to your light fixture before testing, and always follow the manufacturer’s instructions for your chosen voltage tester. A wise electrician once said, “a little zap of knowledge goes a long way in keeping your home and family safe!” So, go ahead and give your ceiling light the volt-check it deserves, and you’ll have a brighter, safer home in no time.”
FAQs
What is a voltage tester and why do I need one for my ceiling light?
A voltage tester is a tool that checks the presence of electrical current in a circuit. You need one for your ceiling light to ensure that the circuit is not live before you start working on it, reducing the risk of electrocution or damage to the light fixture.
How do I use a voltage tester on a ceiling light fixture?
First, turn off the circuit breaker that powers the ceiling light. Then, hold the voltage tester near the wires in the light fixture to confirm that there is no current present. If the tester indicates that the circuit is live, do not proceed with any work on the fixture until the circuit is fully turned off.
Can I use any type of voltage tester on my ceiling light?
No, you should use a non-contact voltage tester specifically designed for electrical work. These testers sense the electrical field around the wires without making contact, allowing you to safely detect the presence of current.
What should I do if my voltage tester indicates that there is current in the circuit?
If your voltage tester indicates that there is current in the circuit, turn off the circuit breaker completely before proceeding. You may need to check to see if the wiring connections are secure or if there is a problem with the breaker or wiring.
Is it safe to work on my ceiling light without a voltage tester?
No, it is not safe to work on electrical fixtures without first ensuring that the circuit is not live. Using a voltage tester can prevent accidents and injury by helping you avoid electrical shocks or fires.
Do I need to use a voltage tester every time I work on my ceiling light?
Yes, it is recommended to use a voltage tester every time you work on your ceiling light to ensure you are safe from electric shock or other electrical hazards that could cause property damage or harm.
Can I use a voltage tester to check for other electrical hazards in my home?
Yes, voltage testers can be used to check for the presence of electrical current in outlets, switches, and other fixtures throughout your home. This makes them a valuable tool for DIY electrical projects and routine maintenance.
