How to Use Pry Bar: Tips and Tricks for Effortlessly Removing Nails and Staples
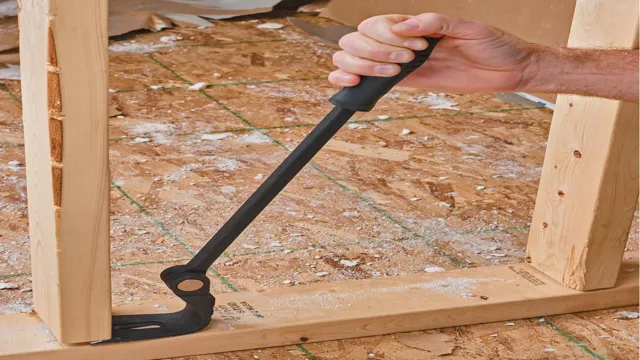
Have you ever struggled to remove a stubborn nail or pry open a sealed crate? If so, you may have reached for a trusty pry bar. While pry bars are incredibly useful tools, they can also be incredibly dangerous if used improperly. In this blog post, we’ll discuss how to use a pry bar safely to avoid injury and damage to surfaces.
We’ll cover everything from selecting the right pry bar for the job to proper technique and safety precautions. So, whether you’re a DIY enthusiast, professional carpenter, or just someone who occasionally needs to pry something open, read on to learn how to use a pry bar safely and effectively.
What is a Pry Bar?
If you’ve never used a pry bar before, it might seem like an intimidating tool. However, once you understand how to use it, it can be a valuable addition to your toolbox. At its most basic, a pry bar is simply a long, flat metal tool with a curved end.
It’s designed to help you lift or separate objects that might be stuck or secured in place. When using a pry bar, it’s important to keep in mind that you’re trying to use leverage to your advantage. This means that you want to position the pry bar so that you can apply force in a way that will help you achieve your goal.
For example, if you’re using a pry bar to remove a nail, you’ll want to position the bar so that you can apply force against the nail’s head. By doing this, you’ll be able to leverage the bar to pry the nail out of its hole. With a little practice and patience, you’ll find that using a pry bar is a simple and effective way to get the job done.
Definition and Types
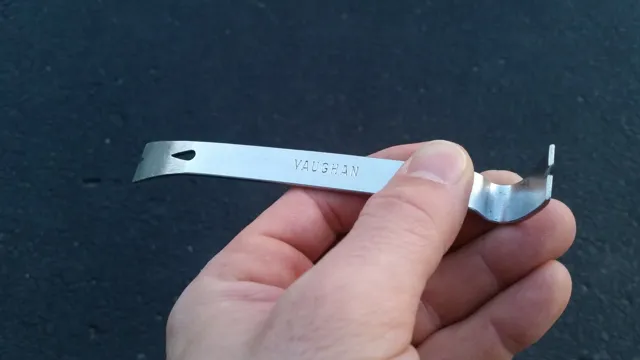
A pry bar, also known as a crowbar, is a versatile tool commonly used for digging, prying, and dismantling materials. It is made of hard steel and has a textured grip handle for better control and comfort. A pry bar typically has a flat and curved end, which can be used for different purposes.
The flat end is suitable for prying materials and breaking objects, while the curved end is used for leverage and digging. There are several types of pry bars available in the market, ranging from small handhelds to large crowbars. Some pry bars come with a hammerhead on one end, making it an excellent tool for demolition work.
In conclusion, a pry bar is a must-have tool for every DIY enthusiast or professional tradesman. Its versatility makes it an indispensable tool that can help you tackle a wide range of tasks with ease.
Always Wear Safety Gear
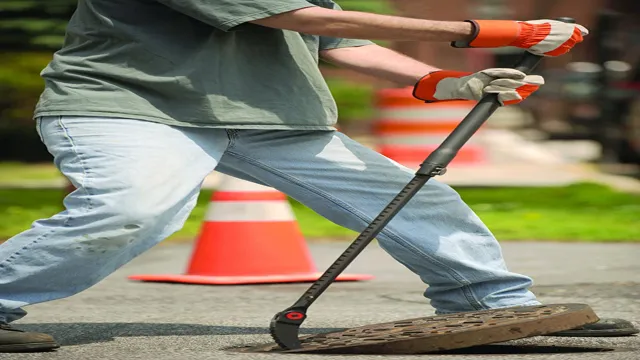
When it comes to using a pry bar, always wear safety gear. A pry bar is a versatile tool used for various purposes, such as removing nails, prying open wooden crates, or demolishing walls. It is important to use safety gear, such as gloves and safety glasses, to protect yourself from injuries.
You should also make sure that the pry bar is in good condition before using it. Inspect the tool for cracks, bends, or other damages that may compromise its performance. Properly positioning yourself while using a pry bar is also essential.
Make sure you have a stable footing and use your body weight to apply pressure on the bar, instead of just your arms and shoulders. By taking proper safety measures, you can use a pry bar effectively and without any harm to yourself or others.
List of Safety Gear Needed
When engaging in any activity that could potentially cause harm, it’s always important to prioritize safety by wearing the appropriate gear. Whether you’re riding a bike or working with power tools, safety gear is an essential component to protect yourself from injuries. The list of safety gear required depends on the activity you are doing, but there are some staples that you should never be caught without.
These often include helmets, gloves, eye protection, and sturdy footwear. For activities that involve loud noises, like power tools or shooting, ear protection is also necessary. And for work that involves potential exposure to chemicals, masks and respirators are a must.
Remember, even the most experienced and skilled people can have accidents. It’s important to always wear the proper safety gear to minimize the risk of injury and ensure that you stay safe and healthy. So, next time you’re engaging in an activity, don’t forget to ask yourself: “Am I protected?”
Steps to Use A Pry Bar
If you’re looking to use a pry bar, the first step is to make sure you have the right tool for the job. Pry bars come in different sizes and shapes, so ensure that the one you’re using is appropriate for your project. Next, position the pry bar in the right position or angle.
This can be done by placing the tool against the object you want to pry and then adjusting the angle until you find the correct one. It’s important to ensure that the pry bar is positioned securely to avoid accidents. Once you’ve found the right position, use the leverage from the pry bar to loosen or remove the object.
Remember to use caution and observe safety measures when using a pry bar. With a little patience and practice, you’ll be using a pry bar like a pro in no time!
Selecting the Right Pry Bar for the Job
When it comes to using a pry bar, there are a few steps to keep in mind to ensure safety and efficiency. First, you’ll want to select the right pry bar for the job. Choose a pry bar that is the appropriate size for the task at hand, keeping in mind both the length and width of the bar.
Next, make sure to position the bar correctly. Use the wedge-shaped end to insert it into the gap between the two objects you want to separate. Then, use the leverage of the bar to apply enough force to create a gap between the objects.
Be sure to use caution when using a pry bar and wear gloves to protect your hands from slipping or pinching. Finally, once you’ve completed the task, carefully remove the pry bar and inspect it for any damage or wear and tear. With these steps in mind, you’ll be able to effectively use a pry bar and complete your project with ease.
So, before you get started, make sure you have the right pry bar for the job and follow these simple steps for safe and efficient use.
Preparing and Positioning the Work Area
A pry bar is a versatile tool commonly used in construction, remodeling, and other DIY projects. But before using it, it’s essential to prepare and position your work area to ensure maximum safety and efficiency. First, clear the area of any clutter or obstacles that may hinder your movement.
Next, choose the appropriate pry bar based on the task at hand – a smaller pry bar for light-duty work and a longer pry bar for heavier tasks. When holding the pry bar, make sure to grip it firmly and keep a balanced stance to avoid losing control. Start the task by placing the pry bar at the edge of the material you want to lift or remove and apply pressure in a steady motion.
Remember to work slowly and carefully to prevent any accidents or damages. With these steps in mind, using a pry bar can be a straightforward and effective way to tackle various projects around your home or worksite.
Proper Positioning and Grip of the Pry Bar
If you’ve ever used a pry bar before, you know how important it is to have the proper positioning and grip to do the job effectively. To start, make sure you get a firm grip on the pry bar with both hands. You’ll want your dominant hand closer to the end of the bar where the leverage will occur, while your other hand can grip closer to the middle of the bar for support.
Once you have a good grip, position the pry bar at a 45-degree angle to the object you’re prying. This way, you’ll have the best leverage to lift or move the object. It’s also important to note that you should never use the pry bar as a hammer or let it slip out of your hands while in use.
With the right grip and positioning, you can make the most out of your pry bar and get the job done efficiently.
Using the Pry Bar to Remove Nails or Open Sealed Containers
A pry bar is a versatile tool that can be used for several purposes, one of which is removing nails. If you’re planning to use a pry bar to remove nails, the first step is to position the tool on the nail head and insert the pointed end between the material and the nail. Next, position the tool at a 45-degree angle and leverage it to loosen the nail.
Repeat the process until you can pull the nail out of the material. Additionally, pry bars can also be used to open sealed containers like paint cans or wooden crates. To do this, insert the pointed end into the gap between the lid and the container, then pry it open by applying incremental pressure.
With patience and a bit of force, the lid will eventually come off. Remember to wear gloves and eye protection when using a pry bar to avoid injuring yourself. Using a pry bar can take some practice, but once you master it, you’ll find that it’s an essential tool in your arsenal.
Tips and Tricks for Using a Pry Bar
If you’re wondering how to use a pry bar, here are some tips and tricks that can help. First, make sure you choose the right size and type of pry bar for the job. A smaller pry bar may be better for more delicate or precise tasks, while a larger one can handle heavier-duty jobs.
Next, position the pry bar carefully to avoid damaging materials or injuring yourself. You can use a rocking motion to gently ease the pry bar in and create leverage. If you encounter resistance, try tapping the bar gently with a hammer to loosen stubborn materials.
Always use caution when using a pry bar and wear protective gear like gloves and eye goggles to minimize the risk of injury. By following these simple tips, you can use a pry bar effectively and efficiently for a variety of tasks around your home or workplace.
Avoiding Damage to the Wall or Material Being Removed
When using a pry bar, it’s important to take steps to avoid damaging the wall or material you’re trying to remove. One tip is to start by finding the weakest point in the structure so that you can focus your efforts there, rather than randomly prying at different spots. It’s also a good idea to use a pry bar that is correctly sized for the job.
If you use a pry bar that is too large, you may end up causing more damage than necessary. Additionally, you can try using a protective piece of material to cover the wall or surface that you are prying against. This can help prevent scratches, dents, or other types of damage from occurring.
Ultimately, taking the time to prepare properly and approach the job with care will help ensure that you are able to remove the material you need without causing any unnecessary damage to the surrounding area. So, always remember to be gentle and thoughtful when using a pry bar.
Using a Wedge or Shim to Aid in Removal
One helpful tip when using a pry bar is to incorporate a wedge or shim to aid in removal. This will help you lift the desired object with greater ease without putting excessive strain on the pry bar itself. Place the wedge or shim underneath the base of the pry bar to increase the angle of the lever, thereby reducing the force required to remove the item.
Be sure to choose a sturdy wedge or shim that will not break or crumble under pressure. Additionally, make sure that the wedge or shim is the right size to fit securely beneath the pry bar. By using this simple yet effective technique, you can efficiently remove heavy objects without risking damage to your tools or causing unnecessary strain on your body.
Using Heat to Soften Adhesives
Using a pry bar can be a helpful tool when it comes to removing adhesives, but did you know that using heat can make the process even easier? By applying heat to the adhesive first, such as with a hair dryer or heat gun, the adhesive softens up and becomes more pliable, making it easier to remove. This can also prevent damage to the surface underneath the adhesive, since less force is needed to remove it. Keep in mind that different adhesives may require different levels of heat, so be sure to research the best temperature range for your specific adhesive.
With the combination of heat and a pry bar, removing adhesives can be a much smoother process.
Conclusion and Final Thoughts
In conclusion, using a pry bar isn’t just about brute force and ignorance – it’s a skill that requires finesse and strategy. Like a chess grandmaster, you need to carefully position and maneuver your pry bar to get the desired outcome. Whether you’re removing nails, prying open a door, or just showing off your DIY prowess, remember the key to success: approach your pry bar like a ninja, not a sledgehammer.
Happy prying!”
FAQs
What is a pry bar used for?
A pry bar is a tool used for leveraging and removing objects such as nails, screws, and boards.
How do you use a pry bar to remove nails?
To remove nails with a pry bar, place the curved end of the bar under the nail head and firmly lift up while applying pressure on the nail shank with the back of the pry bar.
Can a pry bar be used for demolition work?
Yes, pry bars are commonly used for demolition work as they can easily break apart materials such as concrete and tile.
How do you choose the right size pry bar for the job?
Select a pry bar size based on the size and strength of the item you are trying to pry, as well as the amount of leverage you need. Longer pry bars provide more leverage, but also require more strength to use.
Is it safe to use a pry bar to open a stuck door?
While pry bars can be used to open a stuck door, it’s important to use caution and not damage the surrounding frame or cause injury.
Can a pry bar be used as a substitute for other tools?
Pry bars can be used as a substitute for certain tools such as chisels or hammers for specific tasks, but it’s not recommended to use them as a general replacement.
How do you properly store a pry bar to prevent rust and damage?
It’s best to clean and dry a pry bar before storing it, and to keep it in a dry place away from moisture and extreme temperatures. A coated or painted bar may also provide additional protection from rust.

