How to Make a Pry Bar: Step-by-Step Guide and Tips for DIY Enthusiasts
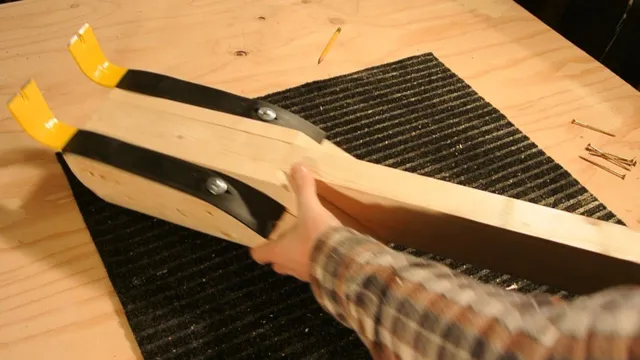
Pry bars, also known as crowbars, are an essential tool in any DIY enthusiast’s toolkit. However, sometimes finding the perfect pry bar for a specific task can be a daunting task. Fortunately, making your own pry bar is a straightforward process that requires only a few key tools and some elbow grease.
In this blog post, we’ll explore the step-by-step process of making a pry bar that is customized to your precise specifications. Whether you’re using it for demolition work or prying off stubborn nails, this DIY project is sure to come in handy for years to come. So, let’s grab our tools and get to work!
Gathering Materials
If you’re looking to make your own pry bar, the first step is gathering the materials you’ll need. You’ll want to start with a sturdy piece of steel, ideally around 1/2 inch thick and 12-18 inches long. You’ll also need a rough file, a grinder, a vice, and some eye protection.
Once you have those things, it’s time to get started. Clamp the steel in the vice and use the grinder to shape the end of it into a wedge shape. You can use the rough file to smooth out any rough edges.
Next, heat the steel with a torch until it’s red-hot, then quench it in oil to harden it. Finally, use the grinder to sharpen the wedge-shaped end to a point. And there you have it – your very own pry bar! It may take some practice to get the shape and point just right, but with a little bit of patience and effort, you can create a tool that will be useful for years to come.
Choose the Right Steel
When it comes to gathering materials for your steel-based project, it’s important to choose the right type of steel. The quality and strength of your finished product will depend largely on the steel you use, so it’s crucial to do your research. Carbon steel is a common choice for its affordability and durability, but there are also other types of steel to consider such as stainless steel, alloy steel, and tool steel.
Depending on the specific application of your project, different types of steel may be more suitable. For example, if you’re building something that will need to withstand harsh environments or corrosive materials, stainless steel would be a better choice. It’s important to carefully consider your options before settling on a type of steel, as it can make a significant impact on the success and longevity of your project.
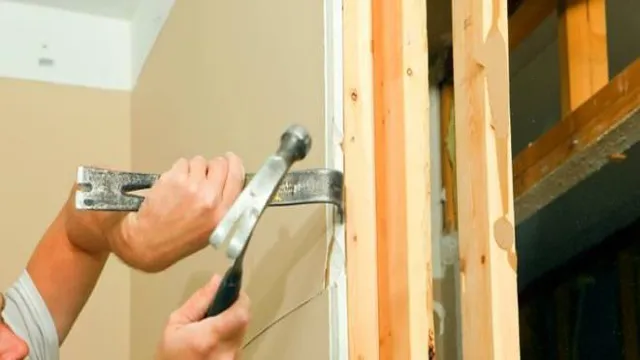
Measuring and Cutting
When it comes to measuring and cutting materials for your project, it’s important to gather everything you’ll need before you start. This includes measuring tools, such as a measuring tape or ruler, and cutting tools, like scissors or a utility knife. Having everything on hand will prevent you from having to stop mid-project to retrieve something you’ve forgotten.
Before you begin measuring and cutting, make sure you have a clear plan for what you want to create and the dimensions you’ll need to achieve that goal. If you’re unsure, take the time to sketch out your project on paper and determine the precise measurements you’ll need. This will save you time and resources, and ensure that your project turns out exactly how you envision it.
Remember, measuring twice and cutting once is always the best practice to ensure accuracy and minimize waste.
Shaping and Forming
If you’re looking to create your own pry bar, there are a few key things to keep in mind. First and foremost, you’ll need to choose the right materials. Steel is the most common choice for pry bar construction due to its strength and durability.
Once you have your steel, you’ll need to shape it to the desired size and shape of your pry bar. This will typically require the use of a forge, which will allow you to heat the steel to a high temperature that makes it easier to work with. From there, you’ll need to use a series of shaping and forming tools to manipulate the steel into the right shape.
Depending on the design you’re going for, you may need to use a hammer, chisel, or other tools to create the desired shape. It’s important to take your time during this stage, as accuracy and precision are key. Once you’ve shaped your pry bar, you’ll need to grind and sharpen the edges to ensure a clean, precise edge that can handle whatever tasks you plan to use it for.
With a little patience and effort, you can create a high-quality pry bar that is perfect for a wide variety of tasks.
Heat the Steel
When it comes to shaping and forming steel, one of the most critical steps is heating it to the proper temperature. Heat is used to make the steel more malleable and easier to manipulate into the desired shape or form. The amount of heat required depends on the type of steel and what you aim to do with it.
If the steel is too cool, it will be difficult to shape, and if it is too hot, it can become damaged or lose its strength. You need to heat it to just the right temperature to get the desired results. Once heated, you can then start the process of shaping and forming the steel through various techniques such as forging, casting, or rolling.
Getting the heating right is an essential first step to creating high-quality steel products that meet your specific needs.
Bend the Ends
When it comes to shaping and forming metal, one technique you can use is to bend the ends. This involves carefully bending the tips of a piece of metal to achieve the desired shape. Whether you’re working on a DIY project or a professional job, this technique can be used to create a variety of shapes and angles.
But be careful not to overbend or underbend the metal ends, as this can result in an uneven or unsightly finish. With a little bit of practice, however, you can become adept at using this technique to create perfectly-shaped metal pieces that are strong, durable, and aesthetically pleasing. So if you’re looking for a way to create curves, angles, or other shapes in metalworking, consider giving the bend-the-ends technique a try.
Forge the Head
When it comes to blacksmithing and metalworking, shaping and forming metal is a critical part of the craft. One of the fundamental techniques for shaping metal is to forge the head. This technique involves using a hammer and an anvil to form the metal into the desired shape.
Blacksmiths use a variety of techniques, including drawing, rounding, tapering, flattening, and bending, to forge the head. They carefully heat the metal to its critical temperature, allowing it to be worked easily, before starting the forging process. The blacksmith then uses the hammer to strike the metal, slowly shaping it into the desired shape.
Forging the head requires incredible skill, precision, and patience, but the result is always worth the effort. By carefully shaping and forming the metal, blacksmiths can create stunning pieces of art that are both functional and beautiful. So, if you’re interested in blacksmithing and metalworking, learning how to forge the head is a must.
Finishing Touches
After shaping and smoothing the pry bar to your liking, it’s time to add some finishing touches that will make it more durable and easier to use. The first step is to apply a coat of sealant or paint to protect the metal from rust and corrosion. You can also choose to add rubber or plastic grips to the handle to improve grip and reduce hand fatigue.
Another important detail is to mark the pry bar with your name or initials, especially if you plan to use it on a job site with other workers. This will help prevent theft or loss, and also add a personal touch to your tool. Finally, it’s a good idea to test the pry bar’s strength and functionality before using it in a demanding task.
Try prying open different objects with varying resistance levels to ensure that the pry bar is up to the challenge. By following these tips, you can make a pry bar that not only looks great, but performs even better.
Grind the Edges
Grinding the edges is the final step in achieving a polished and refined look to any project. Whether it be a woodworking project or a DIY home renovation, grinding the edges can make a huge difference in the overall appearance. Essentially, this process involves smoothing out any rough edges on the surface of your workpiece using an abrasive tool.
This can be done by hand or with a power tool, depending on the project and the level of precision needed. By grinding the edges, you not only create a smoother and more even surface, but you also remove any imperfections that could compromise the long-term durability of your work. So, next time you’re putting the finishing touches on a project, don’t forget to give it a good grind!
Add a Handle
When it comes to finishing touches, adding a handle to your creation can make a big difference. Handles not only offer a functional aspect by allowing for easier carrying and handling, but they can also add an aesthetic element to your design. There are numerous handle options available, from leather straps to metal hardware, each with its own unique style.
When choosing a handle, consider the weight and size of your creation to ensure it can safely carry the load. Additionally, think about the overall design and choose a handle that complements it. By adding a handle, you can elevate your creation to the next level and make it both functional and visually appealing.
Conclusion
In summary, making your own pry bar is a great way to save some money and get a customized tool that suits your needs. Just remember to use sturdy materials, take the time to measure and cut carefully, and give it a good test run before putting it to use. With a little bit of effort and creativity, you’ll have a trusty pry bar that will become your go-to tool for all sorts of projects.
So go ahead and pry open doors, remove nails, or lift heavy objects with ease – you’ve got this!”
FAQs
What materials do I need to make a pry bar?
To make a pry bar, you will need a piece of steel, a grinder, a cutting tool, and a hammer.
Can I make a pry bar without a grinder?
While a grinder can make the process easier, you can still make a pry bar without it. You can use a hacksaw or file to shape the steel.
What size should my pry bar be?
The size of your pry bar will depend on your intended use. A standard size is 18 inches in length and 1 inch in width.
How do I shape the steel for my pry bar?
Using a cutting tool, cut the steel to the desired length. Then, use a grinder or file to shape one end into a wedge. For the other end, shape it into a curve to make a comfortable grip.
How do I harden the steel for my pry bar?
Heat the steel to a high temperature and then quench it in oil or water. This will make the steel harder and more durable.
Can I make a pry bar without welding?
Yes, you can make a pry bar without welding. Instead, you can use a mechanical connection such as a bolt or rivet to attach the wedge-shaped end to the handle.
How do I maintain my pry bar?
To maintain your pry bar, keep it clean and dry when not in use. If it becomes rusty, use sandpaper to remove the rust and then apply a rust-inhibiting oil.

