Ready to give your car’s brakes some much-needed love but don’t want to pay the big bucks for a professional mechanic? Fortunately, you don’t need a crew of experts to keep your car’s brakes functioning correctly and safely. With the right tools and a little know-how, you’ll be able to bleed your brake system with ease. One man brake bleeder kits are an excellent solution for car owners looking to do routine brake maintenance on their own.
But how do you use one properly? Don’t sweat it. In this guide, we’ll go over the steps you need to know to use a one man brake bleeder kit correctly.
Preparation
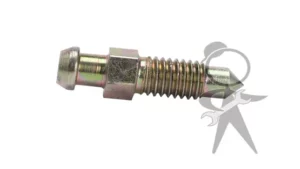
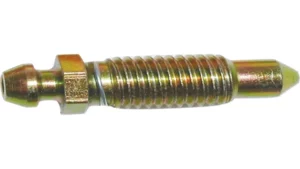
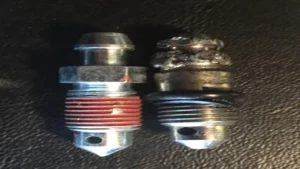
Preparation is key when it comes to using a one-man brake bleeder kit. First, make sure that the brake fluid reservoir is clean and filled with enough fluid to prevent air from getting into the brake lines. Locate the bleeder valve on the brake caliper that you want to bleed and inspect it for any damage or rust.
Before you start, it’s highly recommended to attach the one-man brake bleeder kit to the valve and check if it fits properly. Once everything is in place, start by loosening the valve and fitting the kit onto the valve. Top up the kit with brake fluid, and then slowly pump the brake pedal a few times until a steady amount of fluid starts to flow out of the valve.
Keep checking the fluid level to ensure that it doesn’t run out. After the brake pedal feels firm, close the bleeder valve and move on to the next one. Make sure to repeat the process until all brake calipers have been bled effectively.
By preparing yourself and the vehicle, you can safely and efficiently use the one-man brake bleeder kit to improve your vehicle’s braking system.
Gather Necessary Materials
Preparing for a project requires gathering all the necessary materials before starting. Whether it’s for a DIY project or a work-related task, it’s important to have everything on hand to avoid delays or interruptions. Start by creating a list of all the materials you need and check to make sure you have everything before starting.
The list should include all the tools, equipment, and supplies needed for the project. It’s important to consider aspects like the quality of the materials, the size, and the quantity needed. Make sure you have all the right sizes, and take into account that some materials may need to be cut to size before use.
Organize your materials in a clean and tidy workspace to help you stay focused and motivated to complete the project. By following these steps, you’ll be ready to start your project with confidence knowing you have everything at hand.
Locate and Lift Car
Before attempting to locate and lift a car, it’s essential to prepare yourself and your equipment properly. Firstly, ensure that you have all the necessary tools to complete the task. This includes jacks, jack stands, and a tire iron.
It’s also essential to find a safe location to begin the process. Choose a level area away from traffic, and ensure that the ground is stable and can handle the weight of the car. Before attempting to lift the car, ensure that it’s in park or first gear with the handbrake on.
This will prevent the car from rolling while you work. Additionally, it’s important to wear appropriate clothing, such as work boots and gloves, to ensure your safety. By taking the time to adequately prepare for the task ahead, you can ensure that you stay safe and complete the job successfully.
Remember: safety first!
Set-Up
If you’re a DIY mechanic, then you know how crucial it is to bleed your brakes regularly to maintain safety on the road. With a one-man brake bleeder kit, you can easily do this job alone without needing the help of another person. The first step in using this tool is to find a level surface to work on and park your car on it.
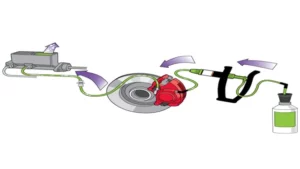
Next, connect the bleeder hose to the brake bleed screw located at the caliper. Then, attach the other end of the hose to the collection bottle that comes with your kit. Once you have everything set up, start by pumping the brakes several times until the pedal hardens.
After that, open your brake bleed screw until the fluid starts flowing into the bottle. Finish by closing the bleed screw, releasing the brake pedal, and checking the brake fluid level. With a one-man brake bleeder kit, bleeding your brakes is a simple task that you can do in your garage without the help of a professional mechanic.
Attach Bleeder Bottle to Brake Caliper
When it comes to bleeding your brakes, attaching a bleeder bottle to the brake caliper is a crucial step in the process. To do this, you’ll need to gather all the necessary tools and equipment, including the bleeder bottle itself. Once you have everything you need, you’ll need to locate the bleeder valve on your brake caliper and loosen it with a wrench.
Next, attach the bleeder bottle to the valve, making sure it’s securely in place. From there, you’ll be ready to begin the bleeding process, which involves pumping the brake pedal and opening and closing the valve to release the air pockets in your brake lines. With patience and a steady hand, you’ll be able to effectively bleed your brakes and ensure your vehicle’s safety on the road.
So, why wait? Get started with attaching your bleeder bottle to your brake caliper today!
Attach Clear Tube and Valve
When it comes to setting up your inflatable paddle board, attaching the clear tube and valve is an important step. First, locate the clear tube and make sure there are no kinks or twists in it. Then, slide one end of the tube onto the valve of the board and tighten the clasp to secure it in place.
Next, attach the other end of the tube to the included pressure gauge. This will allow you to accurately measure the pressure in your board as you inflate it. Finally, make sure the valve is in the closed position before using the pump to inflate your board.
By following these simple steps, you can easily attach the clear tube and valve to prepare your inflatable paddle board for a fun day on the water.
Fill Reservoir with Brake Fluid
When it comes to braking, safety should always be the top priority. That’s why making sure your vehicle has enough brake fluid is crucial. To fill the reservoir with brake fluid, the first step is to set-up the vehicle in a safe area with a level surface.
Next, locate the brake fluid reservoir and remove the cap. It’s important to use the recommended type of brake fluid for your specific vehicle. Check the owner’s manual or consult a professional mechanic if you’re unsure.
Slowly pour the brake fluid into the reservoir, being careful not to spill any on surrounding components. Keep an eye on the fluid level and add more as needed. Once the reservoir is filled, replace the cap securely.
Remember, ensuring that your brakes have the appropriate amount of brake fluid can make all the difference in avoiding an accident.
Bleeding Process
If you’re looking to bleed your brakes by yourself, then you’ll need a one-man brake bleeder kit. Using this type of kit can be easy and convenient, but it takes a bit of know-how to get started. Begin by opening the hood and locating the brake fluid reservoir.
Make sure it’s full and check for any damage or leaks. Then, attach the kit to the brake caliper and pump it until the brake fluid starts flowing through the hose into the catch can. Next, open the bleeder valve and let the fluid flow out while keeping an eye on the reservoir to ensure it doesn’t run dry.
Finally, close the valve, disconnect the hose, and repeat the process for the other brakes. Remember to take things slowly and don’t rush the process. As you get more comfortable with bleeding brakes, you’ll be able to do it faster and with ease.
Start with the Furthest Brake Caliper
When it comes to bleeding your brakes, it’s essential to start with the furthest brake caliper from the master cylinder. This process ensures that all air bubbles are removed from the brake lines to ensure maximum braking power. To do this, first, find the brake caliper furthest from the master cylinder and attach a clear tubing to the bleed valve.
Next, fill the master cylinder with brake fluid and have a partner slowly pump the brake pedal while you open the bleed valve to release the air bubbles and old brake fluid. Repeat this process until the brake fluid flows out steadily and without air bubbles. Once you have bled all of the calipers, check for any leaks, and top up the brake fluid as needed.
Incorporating this simple process into your regular vehicle maintenance routine can not only increase your peace of mind on the road but also increase the overall safety of your vehicle. By starting with the furthest brake caliper and working your way towards the closest, you eliminate the chance of air bubbles getting trapped in the brake lines. Adequately bleeding the brakes is vital to ensure that your vehicle can stop quickly and effectively in an emergency situation.
Think of it like a garden hose. If there’s a kink or air bubble in the line, the water won’t flow smoothly or as efficiently as it should. Similarly, any air bubbles in the brake lines could reduce your vehicle’s stopping power, putting you and your passengers at risk.
So, ensure that your brakes are in top condition, and start with the furthest brake caliper next time you need to bleed your brakes.
Open the Valve and Pump the Brake Pedal
When it comes to maintaining your vehicle’s braking system, bleeding the brakes is a crucial step that can’t be overlooked. This process involves opening the valve to allow air and old brake fluid to escape while pumping the brake pedal to push new fluid through the system. By doing this, you’ll ensure that your brakes work as effectively as possible and are free from air pockets that can impact their performance.
Bleeding your brakes may seem intimidating, but with the right tools and knowledge, it’s a task that any car owner can handle. Just remember to take your time and follow the manufacturer’s instructions carefully. Not only will you enhance your vehicle’s safety, but you’ll also prolong the lifespan of your brake components.
So, if your brakes are feeling spongy or unresponsive, it’s time to give them a little TLC and bleed them to enjoy a smooth and secure ride.
Close Valve and Refill Reservoir
When it comes to bleeding the brakes on your vehicle, one of the key steps in the process is to close the valve and refill the reservoir. This step helps to ensure that there is no air left in the brake lines, which could prevent your brakes from working properly. To start, you’ll need to loosen the bleeder valve and have a friend or assistant pump the brakes until no more air bubbles come out.
Once this is done, you can close the valve again and refill the reservoir to the proper level with fresh brake fluid. It’s important to take your time during this step to make sure that you don’t introduce any more air into the system, which could undo all the work you’ve done so far. By following these steps carefully, you can ensure that your brakes are functioning properly and safely, helping you to avoid accidents on the road.
Repeat Process for Each Caliper
When performing a brake bleed, it’s essential to repeat the process for each caliper. This ensures that all the air and old fluid is removed from each component, which is crucial for maintaining brake performance and safety. To begin bleeding each caliper, start with the furthest from the master cylinder.
Use a clear hose attached to the bleeder valve and submerge the other end in a container of brake fluid. With the help of an assistant, press the brake pedal and hold it down. Then, open the bleeder valve, and the fluid will flow through the hose and into the container – ensure the assistant doesn’t release the brake pedal until the valve is tightly closed.
Repeat this process until the fluid runs clear with no air bubbles. Once this is complete, move on to the next farthest caliper and repeat the process until all the calipers have been bled. Remember to check the fluid level regularly and to replace the cap securely on the brake fluid reservoir.
Regular brake maintenance ensures optimal safety and vehicle performance, giving you peace of mind when out on the road.
Final Checks
After you finish bleeding your brake system with a one-man brake bleeder kit, it’s important to do some final checks to ensure that everything is working properly. Start by checking your brake pedal for proper firmness. If it feels soft or spongy, it may be an indication that there is still air trapped in the system.
In this case, you may need to bleed the brakes again or seek assistance from a mechanic. Next, take your car for a test drive in a safe location with minimal traffic and test your brakes under different conditions. Apply the brakes gently and then more firmly to check for any unusual sounds or vibrations.
If everything seems to be working fine, you should be good to go. Remember to always take brake safety seriously, and if you have any doubts or concerns, it’s better to err on the side of caution and seek professional help. By using a one-man brake bleeder kit and following these final checks, you can help ensure a safer, smoother ride for yourself and your passengers.
Check Brake Fluid Level
When it comes to maintaining the safety of your vehicle, checking the brake fluid level is a crucial final check to make. Brake fluid is responsible for transferring force from the brake pedal to the brakes themselves, allowing your car to come to a stop. Without sufficient brake fluid, your brakes may not work at all, which can be extremely dangerous.
To check the brake fluid level, first, locate the brake fluid reservoir under the hood. Then, remove the cap and visually inspect the fluid level. If the level appears low, you’ll want to add more fluid until it reaches the appropriate level.
It’s essential to use the right type of brake fluid for your vehicle, so be sure to consult your owner’s manual or ask a professional to avoid any issues. Ensuring the proper brake fluid level can help prevent accidents and keep you and your passengers safe on the road.
Test Brakes for Functionality
When it comes to ensuring your vehicle is safe to drive, there are few things more important than properly functioning brakes. Test brakes for functionality by checking the brake pedal and monitoring for any strange noises or vibrations while driving. Ensure that the brake pads are in good condition and replace them if they are too worn down.
If you notice any issues with your brakes, it’s essential to have them serviced immediately to avoid any potential accidents on the road. Remember, brakes are critical to your safety and others, so don’t take any risks! Give them a thorough examination before hitting the highway. Keywords: test brakes for functionality, vehicle safety, brake pedal, brake pads.
Conclusion and Safety Tips
Congratulations, you’ve successfully mastered the art of brake bleeding with a one man brake bleeder kit! With a little bit of patience and perseverance, you’ve saved yourself time and money by being able to perform this important maintenance task on your own. And let’s face it, being able to say you successfully bled your own brakes is sure to impress your friends and family. So go ahead, enjoy the peace of mind that comes with properly bled brakes, and pat yourself on the back for a job well done.
Happy driving!”
FAQs
What is a one-man brake bleeder kit?
A one-man brake bleeder kit is a tool used to bleed the brakes of a vehicle by allowing a single person to do the job without the need for assistance.
How does a one-man brake bleeder kit work?
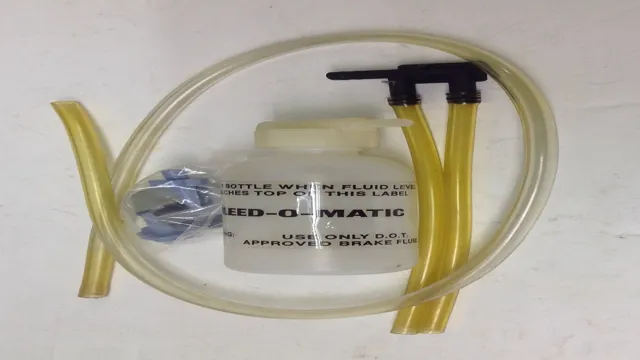
A one-man brake bleeder kit uses a vacuum pump to suck out the air and old brake fluid from the brake lines, allowing fresh fluid to fill the lines. The kit typically comes with a reservoir, a hose, and a pump.
Is it necessary to have a one-man brake bleeder kit?
No, it is not necessary to have a one-man brake bleeder kit, but it can make the brake bleeding process easier and less time-consuming, especially for people working alone.
How do you use a one-man brake bleeder kit?
To use a one-man brake bleeder kit, start by filling the reservoir with fresh brake fluid. Then, connect the hose and pump to the brake bleeder valve and start pumping the vacuum. Once the old fluid is sucked out, close the valve and fill the brake fluid reservoir.
Can a one-man brake bleeder kit be used for all types of vehicles?
Yes, a one-man brake bleeder kit can be used for all types of vehicles, including cars, trucks, and motorcycles. However, some kits may require specific adapters for particular vehicle models.
Can a one-man brake bleeder kit fix soft brakes?
Yes, a one-man brake bleeder kit can help fix soft brakes by removing air from the brake lines, which can cause the brake pedal to feel spongy or soft.
How often should you use a one-man brake bleeder kit?
It is recommended to use a one-man brake bleeder kit every two years or as needed when performing a brake system flush or maintenance.
