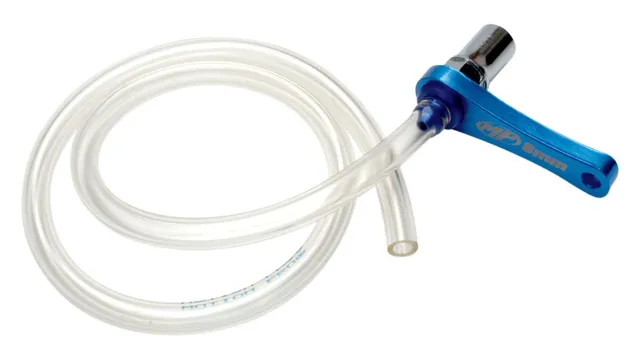
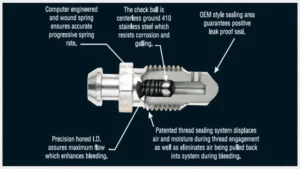
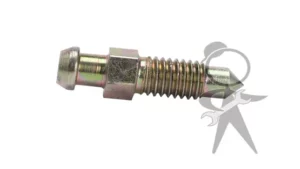
Do you want to ensure your motorcycle has a safe and reliable braking system? Then the Motion Pro brake bleeder is a tool you must have in your garage. This innovative product is designed to simplify the brake bleeding process, which is essential to get rid of air bubbles that might be trapped in the brake lines and impact the efficiency of the brakes. If you are not familiar with the brake bleeding process, don’t worry, the Motion Pro brake bleeder is easy to use.
It is a simple tool that comes with clear instructions, so you can start bleeding your brakes in no time. With its user-friendly design, the Motion Pro brake bleeder allows you to perform the brake bleeding process alone, without requiring the assistance of another person. The Motion Pro brake bleeder is versatile and compatible with various types of motorcycles.
You can use it on sportbikes, cruisers, touring bikes, and even dirt bikes. It is also suitable for all skill levels, from beginner to expert, and ensures a smooth and efficient brake bleeding process. Using the Motion Pro brake bleeder will help you ensure that your brakes are functioning correctly, making your rides safer and more comfortable.
Don’t underestimate the importance of the brake system in your motorcycle, and take advantage of this fantastic tool to maintain and improve it. With the Motion Pro brake bleeder, you’ll have the peace of mind you need to enjoy your ride.
Preparation
When it comes to using the Motion Pro brake bleeder, preparation is key. The first thing you’ll need to do is gather all the necessary tools and supplies. This includes the brake bleeder itself, a clear plastic hose, a container to catch the old brake fluid, and fresh brake fluid to replace what you’ll be flushing out.
It’s also important to make sure your vehicle is level and that you’ve removed the old brake fluid from the master cylinder reservoir. Once you’re fully prepared, it’s time to connect the brake bleeder to the brake caliper and start the bleeding process. Remember to work slowly and carefully to avoid introducing air bubbles into the system, and don’t forget to keep an eye on the master cylinder reservoir to make sure it doesn’t run dry.
With a little patience and attention to detail, you’ll be able to use the Motion Pro brake bleeder with ease and confidence, leaving you with a smoothly functioning braking system and maximum safety on the road.
Tools and Equipment Required
One of the keys to a successful DIY project is proper preparation. Before starting any project, it’s essential to gather all the tools and equipment required. The necessary tools and equipment can vary depending on the project, so it’s important to research what is needed before beginning.
Once you have a list of required tools and equipment, ensure that you have everything available before starting, as interruptions can be detrimental to the flow of your project. Always use high-quality, appropriate tools for the job to ensure the best possible outcome. Remember, using the right tools can make the difference between a smooth project and a frustrating one.
Don’t forget to keep safety in mind when using power tools or working with potentially hazardous materials. Proper preparation and safety measures may take extra time, but they are crucial for a successful DIY project.
Step-by-step Procedure
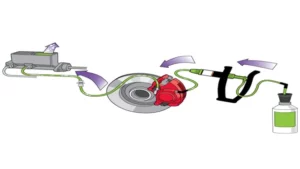
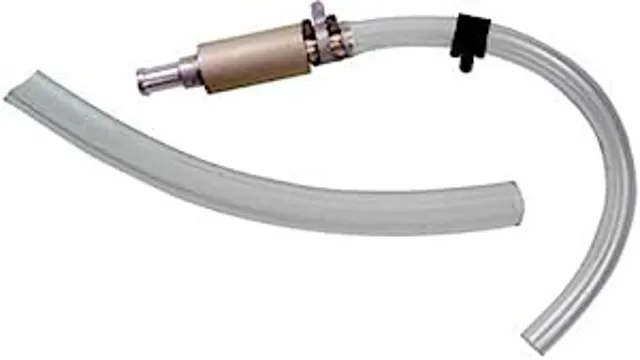
If you’re wondering how to use a Motion Pro brake bleeder, don’t worry, it’s actually quite simple! First, make sure your brake fluid reservoir is filled to the correct level. Then, attach the bleeder tool to your brake caliper or wheel cylinder. Next, attach the clear tubing to the bleeder tool and submerge the other end of the tubing into a container with brake fluid.
Now, slowly loosen the bleeder valve while pressing down on your brake lever or pedal. Fluid should start to flow through the clear tubing, with any air bubbles rising to the surface. Keep the pedal or lever depressed until all bubbles have stopped, then tighten the bleeder valve and remove the bleeder tool.
Repeat this process for each brake caliper or wheel cylinder until all air bubbles are removed and a stream of fluid is flowing steadily. And that’s it – you now know how to efficiently bleed your brake system with a Motion Pro brake bleeder!
1. Prepare the Brake Caliper
Preparing the brake caliper is a crucial step in maintaining your vehicle’s brake system. The first step in this process is to remove the brake pads from the caliper. This can be done by loosening the guide pin bolts with a wrench and then sliding the brake pads out of the caliper.
Once the pads have been removed, you can begin to inspect the caliper for any signs of wear or damage. Check the piston and the sealing boots for any cracks or leaks. If you notice any damage, it’s important to replace the caliper immediately.
If everything looks good, you can move on to cleaning the caliper. Use a wire brush or sandpaper to remove any rust or debris from the caliper surface. Then, wipe down the caliper with a clean cloth and brake cleaner to remove any oil or grease.
By following these steps, you can ensure that your brake caliper is in good shape and ready to perform at its best.
2. Attach the Brake Fluid Reservoir
In order to successfully install the brake fluid reservoir, there are a few steps you must follow. First, locate the appropriate mounting location for the reservoir near the brake master cylinder. Once you’ve found a suitable location, make sure the mounting bracket is installed properly before attaching the reservoir.
It’s important to ensure a secure fit to prevent any leaks in the system. Once the bracket is in place, attach the reservoir firmly to the bracket. Ensure that all connections are tight, and that the level of brake fluid is at the manufacturer’s recommended level.
It’s also important to check for any leaks before moving on to the next step. Overall, attaching the brake fluid reservoir is a crucial step in ensuring the proper functioning of your braking system, so be sure to follow these steps closely for optimal safety and performance.
3. Bleed the Brake System
Bleeding the brake system is an essential process that ensures your vehicle’s brakes work correctly. The procedure involves removing old brake fluid that may be contaminated with air bubbles and replacing it with fresh, clean fluid. Bleeding the brake system should be carried out if you notice that your brakes feel spongy or unresponsive.
To begin, you’ll need to locate the brake bleed valves, typically found at each wheel. Then, connect a clear tube to the bleed valve and submerge the other end of the tube in a container of brake fluid. Have someone sit in the driver’s seat to pump the brake pedal a few times and hold it down.
Open the valve to release the old brake fluid and air bubbles. Repeat this process until you see only fresh, clean brake fluid coming out of the valve, ensuring that you do it for all four wheels and in the correct order. Remember, bleeding the brake system can be tricky, and if you’re unsure, it’s always best to consult an expert.
In conclusion, bleeding the brake system is crucial in keeping you safe on the road, so be sure to do it regularly to maintain your vehicle’s performance levels.
Final Thoughts
In conclusion, learning how to use a Motion Pro brake bleeder can be a game-changer for those who value having a smooth and responsive braking system. It’s important to follow the instructions carefully and take your time to properly bleed each brake line. Remember to keep a close eye on the fluid levels and make sure to top up as needed.
Using a Motion Pro brake bleeder can save you time and money by allowing you to do this maintenance task yourself. By taking the time to master this skill, you’ll be able to enjoy a safer and more enjoyable riding experience. So don’t wait, grab a Motion Pro brake bleeder and start improving your braking system today!
Safety Precautions
When it comes to safety precautions, it’s important to always be vigilant, especially in hazardous environments where accidents can happen. Incorporating safety protocols into your daily routine can be the difference between life and death. One simple way to ensure safety is to always wear proper protective gear, such as helmets, goggles, and gloves.
Additionally, taking a short break and ensuring that you stay hydrated can help reduce the risk of accidents caused by exhaustion or dehydration. It’s also important to always follow the rules and regulations in your workplace or environment. By adhering to safety guidelines, you not only protect yourself but also those around you.
Remember, safety should always be your top priority.
Regular Brake Maintenance
In conclusion, regular brake maintenance is crucial for the safety and longevity of your vehicle. Neglecting to keep up with this important aspect of car ownership can lead to costly repairs, accidents, and even fatalities. By having your brakes inspected and serviced on a regular basis, you can identify and address any issues before they become major problems.
Additionally, choosing high-quality brake pads and rotors can greatly extend the life of your braking system. Remember, your brakes are what allow you to stop your car safely and effectively, so it’s important to take care of them. Make sure to schedule regular brake maintenance appointments with your trusted mechanic, and never hesitate to address any concerns you may have.
Your safety on the road is invaluable, and by prioritizing your brakes, you can ensure that you’ll stay safe and sound for many miles to come.
Conclusion
In conclusion, it is clear that time management skills are essential for success in both personal and professional situations. By prioritizing tasks, setting achievable goals, and minimizing distractions, one can increase productivity and reduce stress. However, it is important to recognize that time management is not a one-size-fits-all approach; what works for one person may not work for another.
Therefore, it is crucial to experiment with different methods and find what works best for each individual. By implementing effective time management strategies, individuals can achieve their goals and lead a more fulfilling life. So, take control of your time and maximize your potential!
Conclusion
In conclusion, using the Motion Pro brake bleeder is as simple as ABC. Just connect the tool to your brake system, pump the lever a few times, and watch as the air bubbles are expelled with ease. It’s the perfect solution for any DIYer looking to bleed their own brakes without the hassle of messy hoses and manual pumps.
So go ahead, give your brakes the love they deserve and make your riding experience smoother than ever with the Motion Pro brake bleeder. Trust us, your bike (and your nerves) will thank you for it!”
FAQs
What is the Motion Pro brake bleeder used for?
The Motion Pro brake bleeder is used to remove air bubbles from the brake lines, ensuring proper brake functioning.
Can I use the Motion Pro brake bleeder on my motorcycle?
Yes, the Motion Pro brake bleeder can be used on any motorcycle with hydraulic brakes.
Is it difficult to use the Motion Pro brake bleeder?
No, the Motion Pro brake bleeder is very easy to use and comes with instructions.
How often should I bleed my brakes with the Motion Pro brake bleeder?
It is recommended to bleed your brakes every 1-2 years or whenever you notice spongy braking or decreased performance.
What type of brake fluid should I use with the Motion Pro brake bleeder?
You should use the brake fluid recommended by your motorcycle’s manufacturer.
Can I use the Motion Pro brake bleeder on my car’s brakes?
Yes, the Motion Pro brake bleeder can be used on cars with hydraulic brakes.
Is it safe to bleed my brakes myself with the Motion Pro brake bleeder?
As long as you follow the instructions carefully and take safety precautions, it is safe to bleed your brakes yourself with the Motion Pro brake bleeder.
