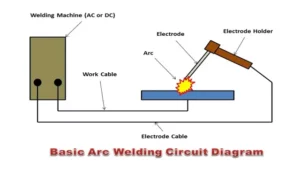
Do you want to start welding, but don’t know where to begin? Using a welding machine may seem intimidating at first, but with the right knowledge and practice, anyone can learn how to weld. In this blog, we will guide you through the process of how to use a welding machine step by step. Welding machines come in different types, but the basic principles remain the same.
First, you need to ensure your safety by wearing protective gear, including gloves, a welding helmet, and a jacket. Once you have your safety gear on, you need to prepare your workspace by cleaning the surface area you will be welding on and ensuring there are no flammable materials nearby. Next, it’s time to set up your welding equipment.
Adjust the settings on your welding machine according to the type and thickness of the metal you will be welding. If you are unsure about the settings, consult your welding machine manual or seek advice from an experienced welder. Now it’s time to start welding.
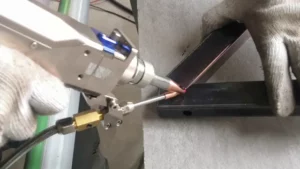
Hold the welding torch at a 20-30 degree angle and aim it towards the metal. Press the trigger and begin moving the torch in a back and forth motion while maintaining a consistent distance from the metal. The heat from the torch will melt the metal, causing it to fuse together.
Finally, complete your weld by letting it cool and then inspecting it for any imperfections. If there are any, go back and make the necessary adjustments. Learning how to use a welding machine takes time and practice, but with patience and persistence, anyone can master it.
Don’t let your fear hold you back from discovering the world of welding. Put on your safety gear, set up your workspace, adjust your machine settings, and start welding!
Safety Precautions
Learning how to use a welding machine step by step can be an exciting experience, but it is crucial to prioritize safety precautions. Before starting, ensure that you have proper protective gear such as gloves, goggles, and welding masks. You should also have a clear understanding of the different types of welding machines available and their functions.
To use a welding machine correctly, you need to have the right knowledge of the specific welding techniques required for the project. It’s important to ensure that the welding area is well-ventilated to avoid inhaling any toxic fumes. Besides, you should always ensure that the workspace is clean and free from any hazardous items that may cause an accident.
By following these safety precautions, you can confidently use a welding machine and get the desired results without endangering your health and safety.
Wear Protective Gear
When participating in any activity that could potentially lead to injury, it’s important to take the necessary precautions to protect yourself. One of the most crucial safety measures is wearing appropriate protective gear. Whether you’re riding a bike, playing a contact sport, or doing construction work, helmets, pads, gloves, and other gear can go a long way in preventing injury.
Not only do they provide physical protection, but they can also give you peace of mind and boost your confidence while engaging in the activity. Remember, accidents can happen at any time, so it’s better to be safe than sorry. Don’t underestimate the importance of wearing the proper protective gear to keep yourself safe and injury-free.
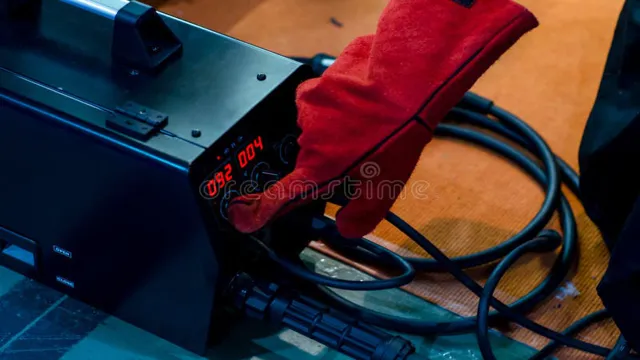
Make Sure Work Area is Clear
As you begin any project, a crucial step in ensuring your safety is making sure the work area is clear. This precaution can prevent trips, falls, and other accidents that could lead to injury. Take a moment to survey the area and remove any obstacles such as tools, boxes, or debris that may be lying around.
Check for any potential hazards such as exposed wiring or sharp objects and make sure they are dealt with appropriately. Keep in mind that a cluttered workstation can affect your productivity and your safety. By taking the time to clear and organize your workspace, you can create a clear and concise environment that will allow you to focus on the task at hand and reduce the risk of accidents.
Remember, ensuring a clear and safe workspace should be your top priority before starting any job.
Preparing the Welding Machine
When it comes to using a welding machine, the first step is to prepare the machine properly for the task at hand. First, ensure that you have the right type of welding machine for the specific job you need to do. Next, make sure that the machine is properly grounded so that you minimize the risk of electrical shock or other accidents.
Check the power supply for any issues, and make sure that you have enough power to operate the welding machine effectively. Take a close look at the welding electrodes and ensure that they’re clean and in good condition to avoid any problems during the welding process. Finally, double-check that all the necessary safety gear is on hand and ready to use.
By taking these steps, you’ll be able to use a welding machine safely and effectively, getting the job done right the first time.
Connect the Power Source
“power source” Before you start welding, it’s essential to prepare your welding machine. The first step is to connect the power source correctly. Your welding machine needs a steady and reliable power supply to work effectively.
Therefore, ensure that the power outlet you’re plugging your machine into matches the voltage requirements of your welding equipment. Typically, welding machines require a high voltage power supply, so check the manufacturer’s guidelines to avoid damaging your device or endangering your safety. You should also inspect the electrical cord and plug to ensure they’re not frayed, worn out, or damaged, as this could cause a short circuit or electrical shock.
Remember, safety should always come first when using welding equipment, so make sure everything is in good working condition before you plug in your machine.
Select the Welding Rod
When it comes to welding, selecting the welding rod can be a crucial step in achieving the desired results. It’s important to choose a rod that matches the type of metal being welded and the type of weld being performed. Many factors come into play when selecting the right welding rod, including the type of metal, the thickness of the metal, and the desired outcome of the weld.
Once the welding rod has been selected, properly preparing the welding machine is the next step in ensuring a successful weld. This involves cleaning the machine, ensuring the welding cables are properly connected, and setting the welding machine to the correct voltage and amperage. Taking the time to properly prepare the welding machine can make all the difference in achieving a strong, high-quality weld.
Setting Up the Welding Machine
Are you new to welding and wondering how to use a welding machine step by step? Don’t worry, the process is not as complicated as it may seem. Setting up the welding machine is the first step in the process. First, make sure that the machine is powered off and unplugged.
Next, select the appropriate electrode for the job you are working on. This will depend on the type and thickness of the metal you are welding. Once you have selected the electrode and inserted it into the machine, adjust the amperage to the appropriate level.
This is also dependent on the metal you are welding, so make sure to consult a welding chart to determine the correct amperage for the job. Finally, connect the ground clamp to the workpiece, making sure it is securely attached. Once all of these steps are complete, turn on the machine and you’re ready to start welding! Now that you’ve got the machine set up, it’s time to get to work.
Ensure Proper Polarity
When setting up your welding machine, it is essential to ensure proper polarity. This simply means that the electrode and workpiece are connected to the correct terminals on the machine. Using the wrong polarity can result in a weaker, poorly welded joint.
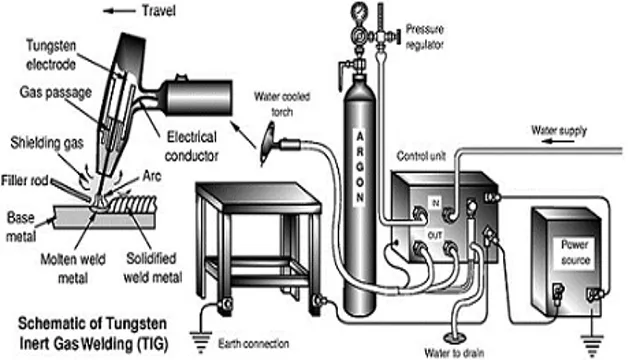
So, how do you determine the correct polarity? It depends on the type of welding you are doing. For example, in MIG welding, the workpiece should be connected to the positive (+) terminal, while the electrode should be connected to the negative (-) terminal. In TIG welding, it is the opposite, with the electrode connected to the positive terminal and the workpiece to the negative.
By paying attention to the correct polarity and making adjustments accordingly, you can ensure a strong, reliable weld that meets your needs.
Adjust the Amperage
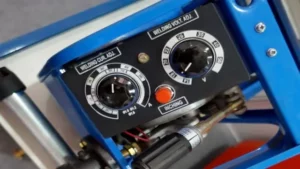
When it comes to welding, setting up the welding machine is critical for getting the job done right. One essential aspect of machine setup is adjusting the amperage. The amperage determines the power output of the welder, and it needs to be adjusted based on the thickness and type of metal being welded.
Too much amperage can melt the metal, while too little can result in an incomplete weld. The best way to determine the appropriate amperage is to refer to the manufacturer’s recommendations or consult with a welding professional. Understanding how to adjust the amperage properly is crucial for producing quality welds that are strong and reliable.
So, take the time to learn how to adjust the amperage on your welding machine to ensure that you produce consistent and high-quality results every time.
Beginning to Weld
Learning how to use a welding machine step by step can be intimidating for beginners. However, with practice and proper guidance, you can become a skilled welder. The first step in beginning to weld is to choose the right welding machine for the type of project you are working on.
There are various types of welding machines available, including MIG, TIG, and Stick welding machines. Once you have selected your welding machine, ensure that you follow the manufacturer’s instructions on how to set it up. This includes installing the correct welding wire or electrode, attaching the welding torch or gun, and adjusting the voltage, amperage, and wire feed speed settings.
Next, ensure that you wear the appropriate safety gear, such as welding gloves, safety glasses, and a welding helmet to protect yourself from sparks, fumes, and radiation. Finally, before beginning to weld, practice on scrap metal to perfect your technique and ensure that you are comfortable with the welding machine’s operation. With these steps in mind, you can begin your welding journey and hone your skills over time.
Start the Arc
Starting a welding project can be both exciting and intimidating. Before you begin welding, it’s important to ensure you have the right safety gear, including a welding mask, gloves, and appropriate clothing. Once you have your safety gear, it’s time to start the arc.
This is done by striking the welding electrode against the metal to create the spark needed to initiate the welding process. It’s important to hold the electrode at a 10-15 degree angle and maintain a consistent distance from the metal to ensure a strong and even weld. As you continue to weld, move the electrode in a circular or weaving motion to create a wider weld.
Remember to monitor the heat of the metal to avoid overheating and use filler material to strengthen the weld. With practice and proper technique, you can master the art of welding and create strong and durable welding projects.
Move the Welding Rod Slowly
If you’re just starting out in the world of welding, it’s important to remember to move the welding rod slowly as you begin. This may seem like a simple tip, but it can make a big difference in the outcome of your weld. Moving too quickly can cause the weld to be weak and poorly formed, while moving too slowly can cause the metal to melt and distort.
Finding the right speed for your welding rod can take some practice, but it’s worth the effort to ensure a strong and clean weld. As you become more experienced, you’ll learn to adjust your speed based on the type of metal and the thickness of the material you’re welding. But for beginners, the key is to start slow and steady, and gradually increase your speed as you gain confidence and skill.
So remember: move the welding rod slowly, and you’ll be on your way to creating strong and durable welds in no time!
Maintain Proper Angle
When it comes to beginning to weld, it’s important to maintain the proper angle. This can make all the difference in the quality of your weld and the strength of the bond it creates. The angle you hold your electrode at can determine how deep the weld penetrates the metal, and also how much heat is generated.
If you hold your electrode at too shallow of an angle, the weld will be weak and may not even penetrate the metal. On the other hand, if the angle is too steep, you risk burning through the metal and creating holes. It’s important to find the right angle for your particular situation and to practice maintaining it consistently.
This may take some trial and error, but with practice, you’ll find the sweet spot that creates a strong, smooth weld.
Continue Welding
If you’re new to welding, don’t be intimidated by the process. Welding is an essential trade skill that can be learned with practice and patience. To begin welding, you’ll need a welding machine, welding helmet and gloves, a welding table, and a metal to weld.
Before striking the arc, it’s important to properly prep your welding surface, removing any rust, dirt, or debris that could affect the quality of your weld. Once your surface is clean, secure your metal to your welding table and put on your safety gear. Next, position the welding gun at the joint you want to weld, and pull the trigger to strike the arc.
From there, make small, steady movements with the gun along the joint, allowing the metal to bond together. Keep in mind that practice makes perfect when it comes to welding. Don’t be discouraged if your first few welds aren’t perfect.
With time and repetition, you’ll become more comfortable and confident in your welding abilities.
Finishing the Weld
Now that you have established good welding techniques, it’s time to finish the weld. You want to ensure the final product is seamless and sturdy. To do this, you will need to clean up any excess flux or splatter from your weld.
You can use a wire brush or a chipping hammer to remove the debris. Once you have cleaned up the weld, inspect it to ensure it’s free of any defects. If there are any defects, you may need to grind the weld down and start again.
If everything looks good, you can move on to the final step, which is to cool down the weld. You can use compressed air or water to cool down the weld. Congratulations! You have successfully completed a weld using a welding machine step by step.
With practice and patience, you can master this craft and create beautiful welds that will last a lifetime.
Allow to Cool
Now that the welding process is complete, it’s time to allow the welded material to cool. Cooling helps to solidify the weld and ensure its strength. The length of time required for cooling depends on the type of material being welded.
Small and thin material require less time to cool, while larger and thicker materials need more cooling time. For instance, steel materials may need between 10 to 30 minutes of cooling time, while aluminum may require 5 to 10 minutes. During cooling time, it’s essential to avoid touching or moving the welded material to prevent any possible deformities.
Once the welded material has cooled off entirely, it is time to assess the quality of the weld to ensure the expected outcome is achieved.
Clean the Welded Area
After completing the weld, it’s important to clean up the welded area to ensure a high-quality finish. Firstly, remove all the slag and spatter left on the surface of the weld using a wire brush. This helps to get rid of all the debris and unwanted bits left behind after the welding process.
Secondly, smooth out the weld bead by grinding it down with an angle grinder. This evens out the surface, making it easier to paint or coat. Lastly, clean the area using a solvent to remove any remaining oil, dirt, or grime.
This ensures optimal adhesion when finishing the weld. Overall, taking the time to clean up the welded area after welding ensures a professional-looking finish while enhancing the longevity of the weld.
Disconnect the Power Source
When finishing a weld, it’s important to disconnect the power source first. This is crucial for safety reasons and to prevent any unwanted accidents. It’s easy to get caught up in the excitement of the project and forget about the power still running through the welder, but it’s important to stay focused and diligent.
Make sure to turn off the machine and unplug it from the power source before anything else. Even if you’re just taking a quick break, it’s better to be safe than sorry. Disconnecting the power source also helps to make sure that you’re not wasting energy, as leaving the machine on for extended periods of time can cause unnecessary wear and tear.
So, whether you’re finishing up a big project or just taking a break, always remember to disconnect the power source first.
Conclusion
If you’re looking to become a master of welding, there are a few key steps to keep in mind. First, make sure you choose the right welding machine for the job at hand – there are lots of different types out there, so don’t be afraid to do your research. Once you’ve got your machine all set up, remember to take safety seriously – welding can be a dangerous business, so make sure you’re wearing the right protective gear at all times.
Finally, remember that practice makes perfect – the more time you spend honing your welding skills, the better you’ll become. So what are you waiting for? Get out there and start welding!”
FAQs
What is a welding machine used for?
A welding machine is used to join two pieces of metal together using heat and pressure.
What are the different types of welding machines?
There are several types of welding machines, including MIG, TIG, Stick, and Plasma cutters.
What safety precautions should be taken when using a welding machine?
Safety precautions when using a welding machine include wearing protective clothing, eye and face protection, and ensuring proper ventilation in the workspace.
How do I set up a welding machine?
To set up a welding machine, you need to plug it in, select the appropriate settings, and attach the grounding clamp and welding electrode.
What are some common mistakes to avoid when using a welding machine?
Common mistakes to avoid include welding too hot, not cleaning the metal properly before welding, and not setting the machine to the appropriate settings.
How do I troubleshoot a problem with my welding machine?
To troubleshoot a problem with your welding machine, check the power source, the connections, and the settings to ensure they are all correct.
What maintenance steps should I take to keep my welding machine running smoothly?
Maintenance steps include keeping the machine clean and dry, inspecting and replacing worn parts, and regularly testing the machine’s performance.
