As a car owner, you must have at least once experienced a soft brake pedal while driving or heard a squeaking noise when applying the brakes. This can be a daunting and unsafe experience, as it can cause accidents and injuries. One of the primary reasons for such issues is air in the braking system.
Therefore, it is essential to bleed the brakes regularly. But bleeding brakes can be a complex and tedious task, especially if you are doing it manually. Luckily, there is a convenient solution – using a vacuum brake bleeder kit.
In this blog, we will discuss in detail how to use a vacuum brake bleeder kit to keep your braking system in top condition. So, let’s dive in and take a closer look at this essential tool that every car owner should have in their arsenal.
Preparation
Using a vacuum brake bleeder kit can be a quick and easy way to bleed your brakes. However, before beginning the process, it’s essential to properly prepare. First, you’ll want to make sure you have all the necessary tools and equipment, including the vacuum brake bleeder kit, brake fluid, and a wrench.
It’s also important to ensure that your car is on a level surface and that the brake fluid reservoir is full. Next, you will need to choose the appropriate adapter for your vehicle and set up the vacuum brake bleeder kit according to the manufacturer’s instructions. It’s important to pay close attention to the kit’s pressure gauge and not exceed the recommended pressure.
Finally, you’ll want to have a container ready to catch any excess brake fluid that is expelled during the bleeding process. By properly preparing, you can ensure a smooth and efficient brake bleeding process that will help keep you safe on the road. Remember to always follow the manufacturer’s instructions and take necessary safety precautions when working on your vehicle.
Ensure the brake fluid reservoir is full
When preparing to check and maintain your brakes, it’s essential to ensure that the brake fluid reservoir is full. This vital component in your vehicle’s braking system holds the brake fluid that allows your brakes to function correctly. Low brake fluid levels can lead to brake failure, so it’s crucial to keep an eye on the fluid levels and top it up when necessary.
Checking your brake fluid levels is relatively easy and can be done by simply locating the reservoir under the hood. Open the cap, and you’ll see a small indicator line that shows you where the fluid level should be. If it’s below the line, top it up with the appropriate brake fluid recommended for your vehicle.
Failing to check your brake fluid regularly and keeping it topped up can lead to unsafe driving conditions, so be sure to add this to your vehicle maintenance checklist.
Lift or jack up your car and remove the tires
If you’re planning to do some maintenance work on your car, then one of the first steps you’ll need to take is lifting or jacking up your vehicle and removing the tires. But before you dive in, it’s important to prepare for the job properly. First, make sure you have all the tools you need, including a good quality jack, jack stands, lug wrench, and wheel chocks.
Safety should always be your top priority, so be sure to wear appropriate clothing and shoes, and work in a well-lit and open space. Additionally, make sure your car is parked on a level surface and engage the emergency brake. Then, use the wheel chocks to secure the tires that will remain on the ground and proceed to jack up your car one wheel at a time.
Once you have the car lifted and supported with jack stands, you can safely remove the wheels and start working on your maintenance tasks. Remember to always follow the manufacturer’s instructions for lifting and lowering your vehicle, so that you can work safely and efficiently.
Setting Up the Bleeder Kit
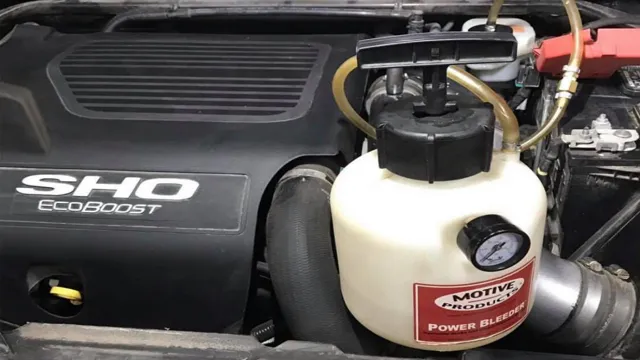
Using a vacuum brake bleeder kit can be intimidating, but with a little bit of preparation, it can be a breeze. First, make sure you have the correct bleeder kit for your vehicle. Then, locate the brake master cylinder and remove the cap.
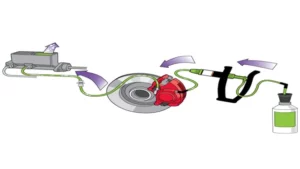
Attach the bleeder kit to the master cylinder, and make sure the hoses are securely attached. Once everything is in place, pump the brake pedal a few times to create pressure in the brake lines. Then, turn on the vacuum pump and open the bleeder valve on the brake caliper.
You should see brake fluid and air bubbles being drawn out of the system. Once the fluid runs clear and all air is removed, close the bleeder valve, turn off the vacuum pump, and remove the bleeder kit. With these simple steps, you can confidently use a vacuum brake bleeder kit to keep your brakes functioning at their best.
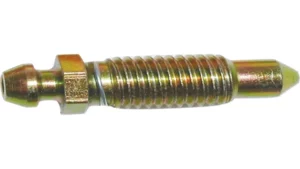
Prepare the bleeder screws by cleaning them
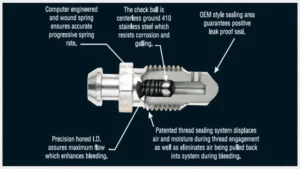
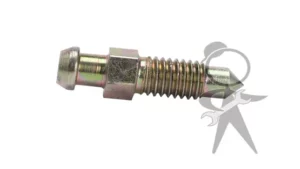
Preparing the bleeder screws is an important step when setting up the bleeder kit. It’s essential to make sure that the screws are clean and free from any dirt, debris, or corrosion that may have built up over time. This is because any impurities can cause problems with the bleeding process and affect the performance of your brake system.
To clean the bleeder screws, start by using a wire brush or a piece of sandpaper to remove any visible rust or dirt. Then, wipe the surface clean with a cloth soaked in brake cleaner, making sure to remove any remaining debris. Once the screws are clean, you can use the bleeder kit to begin the brake bleeding process.
Remember to be careful and follow the manufacturer’s instructions carefully to ensure that you bleed the brakes correctly and safely. With your bleeder kit and freshly cleaned bleeder screws, you can rest assured that your brake system will operate smoothly and reliably, providing you with safe and efficient stopping power on the road.
Attach the bleeder kit to the brake bleeder screw on one of the brakes
Bleeder kit If you’re looking to bleed your brakes, a bleeder kit is essential. The first thing you’ll need to do is attach the bleeder kit to the brake bleeder screw on one of the brakes. This screw is usually located on the brake caliper, and it’s important to make sure the kit is attached securely.
Once you’ve attached the kit, it’s time to move on to bleeding the brakes. Make sure to follow the instructions that come with the kit, as they will provide you with valuable information on how to properly bleed your brakes. It’s important to note that bleeding your brakes can be a messy job, so make sure you have plenty of rags and brake fluid on hand to clean up any spills.
By properly setting up your bleeder kit, you can ensure that you get the job done right and keep your brakes working in top condition. So, take your time, follow the instructions, and you’ll be on your way to better brakes in no time.
Connect the vacuum hose to the bleeder kit and switch on the vacuum pump
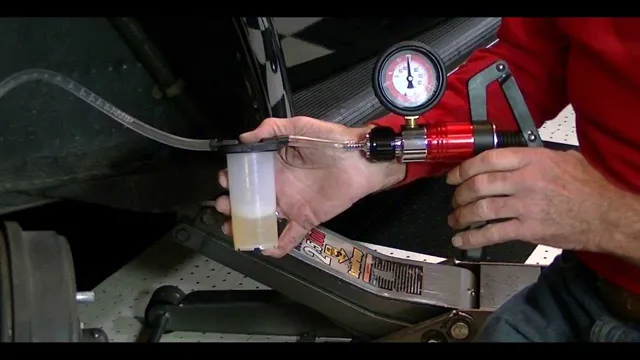
Setting up the bleeder kit is an essential step in performing brake bleeding safely and effectively. To start, grab the bleeder kit and attach the vacuum hose to it. Make sure that the hose fits tightly and securely so it won’t accidentally come loose while in use.
Next, connect the other end of the hose to the brake bleeder valve. Remember to pick the valve that matches your car model and manufacturer specifications. Double-check the connection before proceeding.
Once everything is in place, switch on the vacuum pump. This will create a vacuum within the brake system, causing the brake fluid to flow through the hoses and into the collection bottle. Depending on your model, you may need to adjust some settings to achieve the desired results.
This process will help remove any air bubbles or trapped air from the brake lines, providing a safer, more reliable brake system. Keep in mind that while using the bleeder kit, it’s important to work in a well-ventilated area and wear protective gear to prevent any accidents. With this tool and a little bit of patience, you’ll be ready to tackle any brake bleeding issues that come your way.
Bleeding the Brakes
If you want to ensure your vehicle’s brakes are in their best possible shape, bleeding the brakes is a process you should get familiar with. When you bleed the brakes, you remove any air or moisture that has become trapped inside the brake lines, which could cause reduced braking performance and serious safety concerns. One method of bleeding the brakes is to use a vacuum brake bleeder kit.
This kit works by attaching the tool to the brake caliper or wheel cylinder, creating a vacuum that sucks out any air and fluid from the brake lines. This makes the process easier and faster than manually pumping the brakes. However, it’s essential to follow the manufacturer’s instructions carefully, such as checking brake fluid levels before starting the process, so you can be sure you’re doing it right.
So, when it comes to maintaining your vehicle’s brakes, bringing your awareness to how to use a vacuum brake bleeder kit can be a smart move.
Open the bleeder screw and allow the pump to create a vacuum
Bleeding the brakes is an essential maintenance task for any vehicle owner. Failure to properly bleed the brakes can lead to reduced stopping power or even a complete brake failure. To begin the process, locate the bleeder screw on each brake caliper.
Using a wrench, loosen the bleeder screw and attach a vacuum pump to the nipple. Pump the vacuum pump until all air bubbles have been removed from the brake fluid. This process is critical to ensuring that the brake lines are free of air pockets that can disrupt the hydraulic pressure that stops the car.
Once the air has been removed, securely tighten the bleeder screw to prevent any further air from entering the brake lines. Always reference the vehicle’s manual for the correct procedure, as the specific method may vary based on the make and model. A well-maintained brake system guarantees the passenger’s safety and the driver’s peace of mind.
Remember, neglecting brake maintenance can result in catastrophic consequences, so it is critical to ensure that the process is performed correctly.
Pump the brakes until no more air bubbles are seen in the brake fluid
Bleeding the brakes is a process necessary for any vehicle owner who wants to maintain the safety and proper functioning of their brakes. Simply put, it involves removing air bubbles that have become trapped in the brake fluid. The presence of these bubbles reduces the efficiency of the brakes – and can seriously compromise safety – since air can be compressed, whereas brake fluid cannot.
A variety of methods exist for bleeding brakes, but one of the most common is the pump and hold method. This involves pumping the brakes until no more air bubbles are seen in the brake fluid. It’s essential to use the right technique during this process to get rid of all the air bubbles effectively.
With enough patience and attention to detail, anyone can bleed their brakes and keep their vehicle safe and reliable for the road ahead.
Repeat the process on the remaining brakes
Bleeding the brakes is a crucial maintenance task that every vehicle owner should consider. After bleeding one brake, you should repeat the process on the remaining brakes. Start with the one farthest from the master cylinder and work your way to the nearest.
This will ensure that there is no air in the braking system, allowing for proper brake performance and response. It’s essential to pay attention to the brake fluid level and regularly top it up as needed. Brake fluid attracts moisture over time, which can lead to brake line corrosion and reduced braking efficiency.
By bleeding your brakes regularly, you’ll not only maintain your vehicle’s safety but also extend its longevity. Don’t forget to tighten all the bleeder valve screws securely to prevent any air from entering the system. By incorporating this simple maintenance task into your routine, you can keep your brakes in top-notch condition and never compromise on your vehicle’s safety.
Conclusion
In conclusion, using a vacuum brake bleeder kit is like giving your car a spa day for its brakes. The process may seem daunting at first, but with the right tools and a little patience, you can easily give your brakes the TLC they deserve. Just like how a facial mask clears out impurities from your skin, the vacuum brake bleeder kit sucks out any air bubbles and contaminants from your brake lines.
So, sit back, relax, and let the vacuum do the work for you – your brakes (and your car) will thank you for it!”
FAQs
What is a vacuum brake bleeder kit?
A vacuum brake bleeder kit is a tool used to remove air bubbles from a vehicle’s brake system by creating a vacuum in the system.
Why is it important to use a vacuum brake bleeder kit?
It’s important to use a vacuum brake bleeder kit to ensure that there are no air bubbles in the brake system. Air bubbles in the brake system can cause the brakes to fail or make them less effective, which can be very dangerous.
How do I use a vacuum brake bleeder kit?
To use a vacuum brake bleeder kit, first, locate the brake bleeder valve on your vehicle. Attach the kit to the valve using the appropriate adapter, then turn on the vacuum pump and wait for the fluid to start flowing into the reservoir. Once the fluid is flowing, open the bleeder valve until the fluid starts to bubble, then close it again and move on to the next brake.
Do I need any special tools to use a vacuum brake bleeder kit?
Yes, you will need some special tools to use a vacuum brake bleeder kit, including a vacuum pump, a reservoir, and an adapter that fits your vehicle’s brake bleeder valve.
Can I use a vacuum brake bleeder kit on any type of vehicle?
Yes, you can use a vacuum brake bleeder kit on any type of vehicle, as long as you have the appropriate adapter to fit the brake bleeder valve.
How often should I use a vacuum brake bleeder kit?
It’s a good idea to use a vacuum brake bleeder kit whenever you perform any maintenance on your vehicle’s brake system, or at least once a year as part of your regular maintenance schedule.
Is using a vacuum brake bleeder kit difficult?
No, using a vacuum brake bleeder kit is not difficult, but it does require some basic knowledge of your vehicle’s brake system and some patience. Following the instructions carefully and taking your time will ensure that you get the best results.
