How to Use a Right Angle Drill: Tips and Techniques for Efficient Drilling
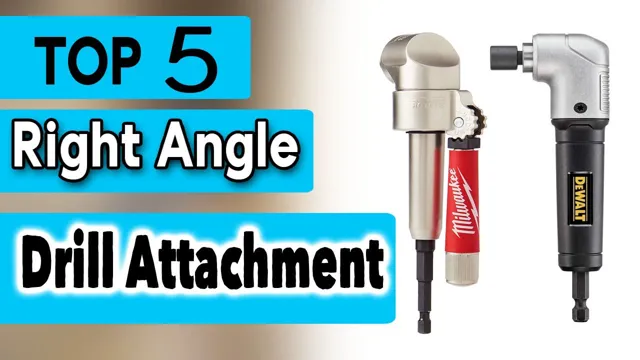
If you’re a DIY enthusiast or a professional, chances are you’ve stumbled upon tasks that require awkward angles and tight spaces. Traditional drills may be bulky and challenging to use in situations like this, but thankfully, there’s a solution! The right angle drill is an excellent tool that can come in handy in a wide range of situations. Whether you’re installing cabinets or drilling a hole in a floor joist, the right angle drill can make your work easier and more efficient.
In this blog post, we’ll guide you through everything you need to know about using a right angle drill and how to get the most out of it. From choosing the right bits to maneuvering the tool at tricky angles, we’ll cover it all. Let’s dive right in!
What is a Right Angle Drill?
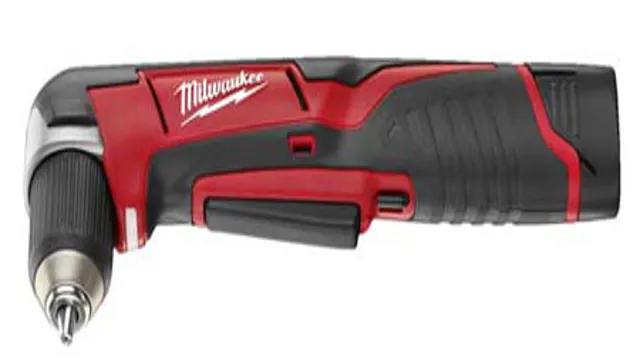
If you are wondering how to use a right angle drill, it is crucial to first understand what it is. A right angle drill is a power tool with a 90-degree angled design that allows it to fit into tight spaces where a regular drill cannot reach. It is ideal for drilling holes or driving screws at awkward angles, making it ideal for carpentry, plumbing, and electrical work.
Using a right angle drill is relatively straightforward, but it requires a bit of practice to get used to its unique shape and feel. First, attach the drill bit or driver to the chuck, and then select the appropriate speed and torque settings. Hold the drill firmly with both hands, and align it with the workpiece, making sure to keep it steady at all times.
Once you have positioned the drill correctly, activate the trigger, and let the drill do the work. With a bit of practice, you will be able to use a right angle drill like a pro, and tackle even the trickiest drilling jobs.
Understanding the Tool
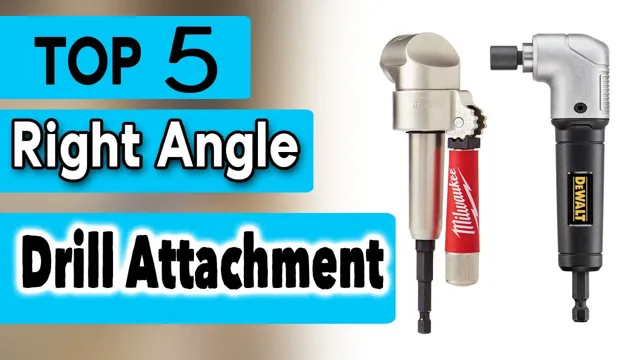
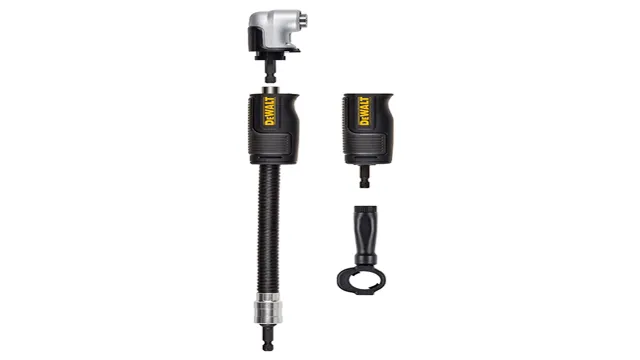
A right angle drill is a specialized tool designed for drilling in tight spaces or awkward angles where a regular drill cannot reach. This tool has a unique shape, allowing users to drill perpendicular to the surface, even if there isn’t much room. Essentially, it is a drill attached to a right angle attachment that allows the drill bit to be positioned at a ninety-degree angle to the drill motor, making it easy to use in tight or awkward spaces.
Despite its limited applications, a right angle drill can still be an invaluable tool in the toolbox of professionals and DIYers alike. Whether you are an electrician, plumber, or a handyman working on a home renovation project, having a right angle drill can make these often challenging tasks much more manageable.
Components of a Right Angle Drill
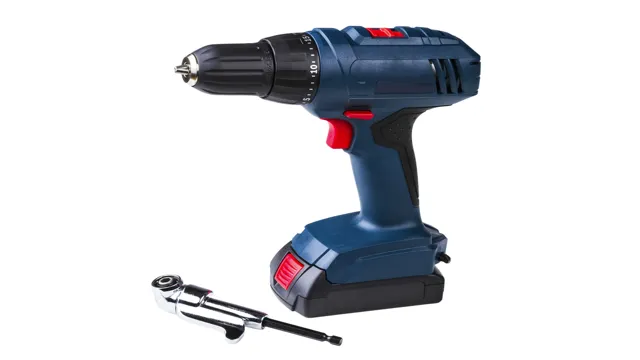
A right angle drill is a handy tool that will make your job easier if you need to drill in tight spaces or at odd angles. Its unique shape allows for greater flexibility and control, and it’s perfect for DIY projects, construction work, or even automotive repairs. But, what are the components that make up this essential tool? First, the chuck is where you insert the drill bit.
It’s important to choose a chuck that can accommodate a variety of bit sizes. Second, the motor is the heart of the tool. Ensure it has enough power to handle your drilling needs.
Finally, the clutch is a vital component that prevents overdriving and helps protect both the tool and your workpiece. Other features, such as the on/off trigger, variable speed settings, and comfortable grip, add to the overall functionality and ease of use of a right angle drill. With these components working together, you can tackle any drilling job with confidence and precision.
Preparing for Use
If you’re about to use a right angle drill for the first time, it’s important to prepare appropriately. Start by selecting the right drill bit for your project, taking into account the size and type of material you’ll be drilling into. It’s also important to choose the right angle attachment, ensuring that it fits snugly onto your drill and is compatible with your bit.
Before you start drilling, put on eye and ear protection and ensure that your work area is clear of debris and clutter. It’s also a good idea to practice getting comfortable with your drill’s grip and balance before starting your project. Once you’ve taken these steps, you’ll be ready to safely and accurately use your right angle drill to get the job done.
Safety Precautions
When it comes to using any equipment, safety should always be a top priority. Before using your device, take the time to familiarize yourself with the owner’s manual and any safety instructions. Make sure to wear any necessary personal protective equipment such as gloves or eye protection.
Ensure that the area you will be using the equipment is clear of any obstacles or hazards. It’s also vital to check that the equipment is in good working condition and that any routine maintenance has been performed. Checking the equipment before use can prevent any accidents from occurring.
Remember, the use of equipment can be dangerous, and safety should never be disregarded. By taking the proper measures and putting safety first, you can use your equipment confidently and avoid any unwanted injuries.
Choosing the Right Accessories
Choosing the right accessories is a crucial aspect of preparing for use. Whether it’s a phone case, screen protector, or headphones, picking the right accessories can enhance your device’s functionality and longevity. Before purchasing any accessories, first, determine your needs and preferences.
Assess the tasks you will perform with your device and pick the accessories that complement these functions. For instance, if you are a music lover, getting a pair of headphones with a noise-cancellation feature can enhance your listening experience. If you constantly use your device outdoors or in rugged environments, choose a protective case that can safeguard your device against dust, water, and impact.
Remember that purchasing cheap accessories might seem like a bargain, but it can end up costing you more in the long run if they fail to protect your device or perform as required. Therefore, invest in high-quality accessories that are compatible with your device and can serve you for an extended period.
Setting Up the Drill
Before you start using a drill, it is important to prepare it for use to ensure that it operates smoothly and efficiently. The first step in preparing your drill is to make sure that it is fully charged or that it has a fully charged battery installed. This will prevent any interruptions or delays during your task.
Next, check the drill bits to make sure they are sharp and secure. Dull or loose bits can lead to accidents or poor performance. Finally, adjust the torque setting to match the task you will be performing.
This setting is important because it controls the amount of force the drill applies and will prevent the drill from damaging your workpiece or causing injury. By taking the time to properly prepare your drill, you can ensure a safe and productive experience.
Using the Drill
Are you wondering how to use a right angle drill? Well, it’s not as difficult as it may seem. First, determine what size and type of bit you need for your project. Then, insert the bit into the chuck of the drill.
Make sure it is securely tightened. Next, choose the appropriate speed setting for your drill based on the material you will be drilling into. Engage the drill slowly and gradually increase speed as needed.
When using a right angle drill, use caution and allow the drill to do most of the work. Avoid putting too much pressure on the drill which can cause it to overheat and potentially harm the user. By following these simple steps, you can effectively and safely use a right angle drill for all your DIY needs.
Positioning the Drill
Positioning the drill correctly is crucial to prevent injuries and ensure accuracy when drilling. The first step is to secure the workpiece in place using clamps or a vice. Next, adjust the depth stop on the drill to control the depth of the hole.
Make sure the drill bit is the correct size and suitable for the material being drilled. Hold the drill firmly with both hands and position it perpendicular to the surface. Start drilling slowly, increasing the speed gradually while maintaining a steady pressure.
To avoid overheating, withdraw the drill periodically to remove any debris and cool the bit. Take breaks between long drilling sessions to prevent fatigue and ensure safety. By following these steps, you can achieve professional results and increase the lifespan of your drill bit.
Adjusting the Speed and Torque
When using a drill, it’s important to adjust the speed and torque to get the best results. The speed of a drill is measured in rotations per minute (RPM), and the torque refers to the twisting force applied by the drill. The speed and torque settings you use will depend on the type of material you are drilling through.
For example, if you are drilling through wood, you’ll want to use a higher speed and lower torque to avoid splintering the wood. On the other hand, if you’re drilling through metal, you’ll want to use a lower speed and higher torque to avoid damaging the metal. It’s also important to keep the drill steady and use the correct drill bit for the job.
By adjusting the speed and torque of your drill, you can ensure that you get the best possible results and avoid any damage to your materials.
Drilling Techniques
As a novice in drilling, it is understandable to feel intimidated by the task at hand. However, using the right techniques makes all the difference. When using the drill, place the bit on the desired spot and position the drill perpendicular to the surface to prevent it from wandering or slipping.
Then hold the drill firmly, switch it on and start drilling at a low speed. As you continue, gradually increase the speed to avoid overheating or breaking the bit. It’s advisable to pause on occasion to clear the dust and check the depth of the hole.
Remember, practice makes perfect. With time, you’ll become adept at using the drill and master advanced techniques like drilling into angled surfaces. Keyword: drilling techniques.
Maintenance and Storage
When it comes to using a right angle drill, there are a few things to keep in mind to ensure proper maintenance and storage. One of the most important things to do is to regularly clean the drill to prevent debris build-up and damage to the motor. It’s also important to store the drill in a dry, cool place to prevent rust and corrosion.
When changing bits, be sure to securely tighten them to prevent slipping and potential injury. It’s also a good idea to periodically check and replace the drill’s battery if it’s a cordless model to ensure optimal performance. By following these simple maintenance and storage tips, your right angle drill will last longer and continue to provide reliable service for all your drilling needs.
Cleaning the Drill After Use
After using a drill, it’s essential to clean it properly to maintain its longevity. Neglecting to clean it after use can lead to rust and damage to your drill. It’s quite simple to clean your drill, all you need is a dry cloth to remove any dust or dirt, followed by a slightly dampened cloth to wipe the drill’s exterior.
Make sure to remove any debris from the chuck as well, as this can cause issues during future jobs. Once you’ve finished cleaning, you must store your drill in a dry place, preferably in a case or a toolbox. This will keep it protected from dust and moisture, and ensure it’s ready for use next time.
Remember, cleaning your drill after each use and storing it properly can save you time and money in the long run, as it will prevent the need for costly repairs and replacements.
Storing the Drill Safely
Storing your drill safely is essential for maintaining its longevity and ensuring it performs at its best every time you need it. It’s important to keep your drill in a dry and cool place, away from any moisture or humidity that could cause damage. But, it’s not just about the physical storage location for your drill.
Proper maintenance is also crucial to preventing any damage or malfunction. After each use, wipe down your drill with a clean cloth and store it in a case or tool bag to protect it from the elements. Additionally, make sure to regularly check and replace any worn out or damaged parts to ensure your drill is always functioning properly.
At the end of the day, investing a little bit of time in the proper storage and maintenance of your drill will save you money in the long run and make sure you’re always ready to tackle any project that comes your way.
Conclusion
In conclusion, using a right angle drill is like having a Swiss Army knife in your toolbox – it’s versatile and can handle a variety of tasks. However, just like any other tool, it requires skill and patience to use it effectively. So, the next time you need to tackle a tricky drilling job, grab your right angle drill and remember to keep your grip firm, your angles sharp, and your eyes on the prize.
With a little practice, you’ll be drilling like a pro in no time!”
FAQs
What is a right angle drill, and how does it differ from a regular drill?
A right angle drill is a tool with a 90-degree angled head that allows for drilling in tight and hard-to-reach spaces, whereas a regular drill has a straight head.
Can a right angle drill be used with standard drill bits?
Yes, most right angle drills have a chuck that can hold standard drill bits.
How do I know which chuck size to choose for my right angle drill?
Check the owner’s manual or the chuck itself to determine the chuck size of your right angle drill. The most common sizes are 1/4 inch and 3/8 inch.
What kind of jobs can a right angle drill be used for?
A right angle drill can be used for drilling through wood, metal, and plastic, as well as for driving screws, sanding, and polishing.
What safety precautions should I take when using a right angle drill?
Always wear eye protection and avoid loose clothing or jewelry that could get caught in the drill. Keep the drill away from children and pets, and always turn off the drill and unplug it when not in use.
Can a right angle drill be used for heavy-duty drilling jobs?
It depends on the model and power of the drill. Some right angle drills are designed for heavy-duty drilling, while others are better suited for lighter jobs.
How do I maintain my right angle drill?
Keep the drill clean and free of debris, and store it in a dry place. Check the chuck regularly for signs of wear or damage, and replace any worn out parts. Lubricate the drill periodically to ensure smooth operation.

