How to Use a Right Angle Drill Attachment: Tips and Techniques for Efficient Drilling
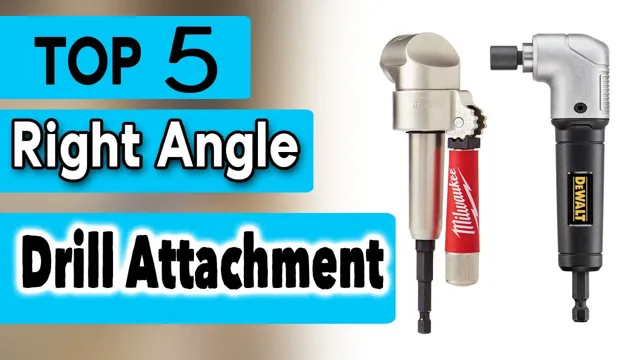
Have you ever encountered a project that required you to drill holes in tight or awkward spaces? Perhaps, you’ve found yourself in need of a tool that can make it easier to reach those difficult spots? Enter the right-angle drill attachment, a handy tool that lets you drill at almost any angle. This nifty tool allows you to drill in areas where access is limited, such as between joists, inside cabinets, and behind walls, saving you both time and effort. Its angled design gives you greater maneuverability and flexibility, all while maintaining the power and precision needed for a successful project.
Whether you’re a DIY enthusiast or a professional contractor, a right-angle drill attachment will undoubtedly become one of the most valuable tools in your arsenal. In this blog post, we’ll give you a comprehensive guide on how to use this attachment, so you can breeze through your next project with ease. Stay tuned!
What is a Right Angle Drill Attachment?
Are you tired of struggling with tight spaces and hard-to-reach areas while drilling? Then a right angle drill attachment might be just what you need. This innovative tool is designed to fit into narrow gaps and tight corners, making it ideal for DIY enthusiasts and professionals alike. Using a right angle drill attachment is easy.
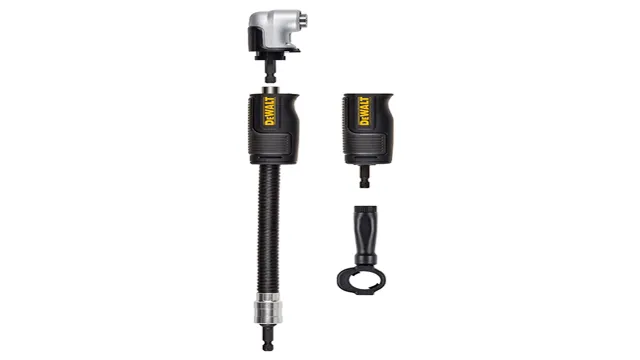
Simply attach the device to your drill and adjust the angle to suit your needs. The flexible shaft allows you to maneuver the drill with precision, making it perfect for challenging projects. Whether you’re installing cabinet hardware, drilling holes in wood or metal, or tightening screws in tight spaces, a right angle drill attachment can help you get the job done quickly and efficiently.
So why struggle with awkward angles and inaccessible areas? Invest in a right angle drill attachment today and take your DIY projects to the next level!
Definition of a Right Angle Drill Attachment
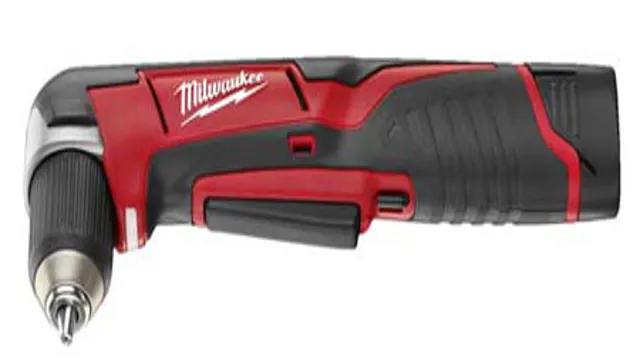
A right angle drill attachment is a device used to change the direction of a traditional drill at a 90-degree angle. This tool is particularly helpful when drilling in tight spaces or corners that a regular drill might not be able to reach. It is a handy tool to have in your toolbox, especially if you frequently undertake DIY projects.
The right-angle drill attachment typically attaches to the chuck of your regular drill, allowing you to adjust the angle in which you approach the work surface. This device works best with shorter drill bits and is ideal for jobs like drilling holes for pipe installations, electrical work, and other similar tasks. With a right-angle drill attachment, you can work in awkward areas with ease, saving you both time and energy.
So the next time you’re faced with a task where your regular drill might not cut it, consider investing in a right-angle drill attachment and experience the benefits firsthand.
Types of Right Angle Drill Attachments
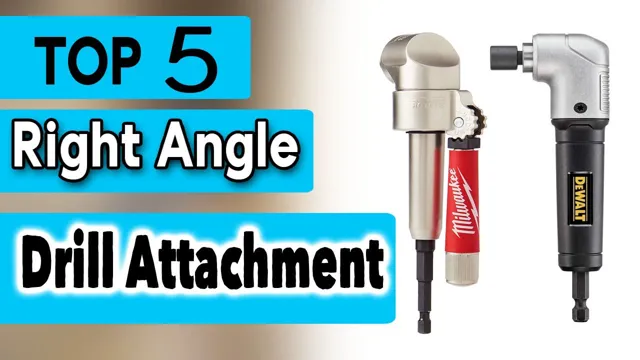
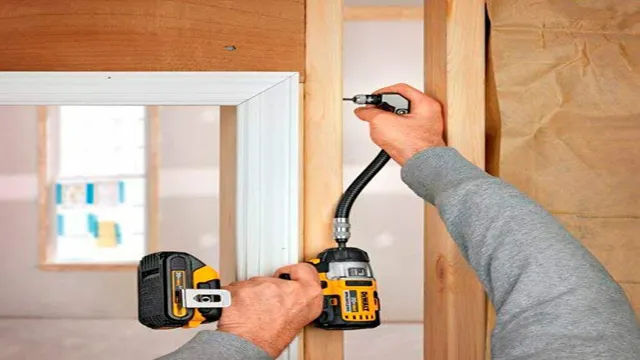
A right angle drill attachment is a versatile and useful tool that can assist with tasks that a normal power drill may not be able to reach. These attachments can be used in a variety of applications such as woodworking, construction, and metalworking. There are several types of right angle drill attachments that you can choose from depending on the task at hand.
One type is the offset attachment, which extends the drill chuck away from the drill body, allowing for more flexibility when working in tight spaces. Another type is the 90-degree attachment, which enables the drill to reach into confined or hard-to-reach areas. A third type is the angle attachment, which allows the drill bit to be set at different angles, making it perfect for drilling holes at various inclinations.
All in all, right angle drill attachments are a perfect accompaniment to any tool kit, as they can aid in completing many challenging drilling tasks with precision.
Advantages of Using a Right Angle Drill Attachment
A right angle drill attachment is a handy tool for reaching tight spaces that regular drills can’t reach. These attachments allow drills to function in awkward angles that regular drills cannot and are especially useful for drilling pilot holes or screws in tight spaces. Its compact size and versatility make it a great tool for DIY enthusiasts and construction workers alike.
With a right angle drill attachment, you can save time and energy by reaching corners and awkward angles with ease. Its ability to drill in tight spaces ensures that you won’t have to worry about damaging your workpiece or injuring yourself while trying to reach inaccessible areas. Whether you’re a professional or a DIY enthusiast, a right angle drill attachment is a must-have in your toolbox.
It’s a tool that can significantly improve your work and save you valuable time and effort.
How to Attach a Right Angle Drill Attachment?
Right angle drill attachments are incredibly useful when working in tight or hard-to-reach areas. Fortunately, attaching one is not too difficult. First, make sure the drill is unplugged to avoid any accidents.
Next, detach the chuck from the drill by turning it counterclockwise. Take the right angle attachment and slide it into the drill, making sure it clicks in place. Then, attach the chuck to the right angle attachment by turning it clockwise.
Make sure it is tightly secured. Finally, insert the drill bit into the chuck and tighten it. Now your right angle drill attachment is ready to use! Remember to always wear the appropriate safety gear, especially when working in confined spaces.
With the right technique, using a right angle drill attachment can be a great way to save time and effort on DIY projects or construction tasks. Happy drilling!
Step by Step Guide to Attaching a Right Angle Drill Attachment
Attaching a right angle drill attachment is a straightforward process that can be done in a few simple steps. First, loosen the chuck of your drill and remove any bit that may be in it. Then, insert the shank of the right angle drill attachment into the chuck, and tighten the chuck securely to hold it in place.
Next, adjust the angle of the attachment to fit your needs by loosening the screws, adjusting the angle, and tightening them back up. Finally, attach the bit you wish to use to the end of the right angle attachment and you’re ready to go. It’s worth noting that not all right angle drill attachments are created equal, and you’ll want to be sure you’re using the correct attachment for your needs.
Some attachments are designed for use in tight spaces, while others may have a higher torque rating for tougher jobs. Overall, attaching a right angle drill attachment is a simple process that can greatly expand the capabilities of your drill. Whether you’re a DIY enthusiast or a professional contractor, having the ability to work in tight spaces can save you time and effort.
So grab your drill, your right angle attachment, and get to work!
Safety Precautions When Attaching a Right Angle Drill Attachment
Attaching a right angle drill attachment can be an excellent solution when you’re drilling in tight, hard-to-reach spaces. However, safety should always be a top priority when working with power tools. To start, make sure you have the proper gear, like safety glasses and gloves, to protect yourself from debris and heat.
Then, ensure that the drill’s power is off before you attach the right angle drill attachment. Double-check that the attachment is securely in place before turning the power on. Remember to read the manufacturer’s instructions thoroughly, so you know how to safely use the drill attachment and what precautions to take.
Keep in mind that a poorly attached drill attachment can lead to a serious accident, so you should always take your time and be cautious. By following these simple steps, you can safely attach your right angle drill attachment and tackle your project with confidence.
How to Use a Right Angle Drill Attachment?
Using a right angle drill attachment can be a life-saver when you need to drill in tight or hard to reach spaces. But how do you use it? First, make sure your drill is unplugged or the battery is removed before attaching the right angle drill head. Once you have done that, align the attachment with the drill’s chuck and slide it in.
Tighten it securely with a chuck key or by hand. Next, determine the tool or bit that you want to use in the drill. Fit it into the attachment’s chuck and tighten it securely before adjusting the attachment’s angle to work in the tight space.
You can do this by pulling the collar towards you and rotating the attachment to the desired angle. Once aligned, simply drill as you normally would with your drill. It’s important to remember that a right angle drill attachment is designed to work with low torque applications, so avoid overloading it with heavy-duty drilling.
And when you’re finished, remove the attachment from the drill and label it for future use. With a little practice, using a right angle drill attachment can be an easy and convenient solution for drilling in hard-to-reach spaces.
Step by Step Guide to Using a Right Angle Drill Attachment
If you need to drill holes in tight spaces but can’t fit a regular drill in there, a right angle drill attachment can be a lifesaver. Here’s a step-by-step guide on how to use it. First, attach the right angle drill to your regular drill by inserting the shank into your regular drill’s chuck.
Then, choose the drill bit you need for the job and insert it into the chuck on the right angle attachment. Once the attachment is connected, adjust the angle of the drill head to the desired position. To use the drill, hold onto the regular drill’s handle and pull the trigger to turn it on.
The right angle attachment will turn as well, allowing you to make your hole in a tight space. Remember to have a firm grip on both the attachment and regular drill to ensure maximum control and safety. With this simple tool, you can tackle all sorts of drilling tasks in tight spaces with ease.
Tips and Tricks for Using a Right Angle Drill Attachment
If you’re looking to tackle tough drilling tasks in tight spaces, a right angle drill attachment can be a game-changer. But how do you use it effectively? The first and most important step is to read the instruction manual carefully. These attachments can be tricky to manipulate at first, but with some practice, you can get the hang of it.
When drilling, start slowly and steadily to ensure accuracy and precision. It’s also important to understand the limitations of the attachment, as it may not be suitable for all types of drilling. Additionally, make sure to use the correct size and type of bit for your task.
By following these tips and tricks, you’ll be able to make the most out of your right angle drill attachment and tackle those tough to reach drilling tasks with ease.
Maintenance of Right Angle Drill Attachment
Using a right angle drill attachment can make tasks like drilling in tight spaces much easier and more efficient, but it is important to properly maintain the attachment to ensure long-term use and optimal performance. One of the most important things you can do is regularly lubricate the attachment with the appropriate oil or grease. This will help prevent wear and tear on the gears and other moving parts.
Additionally, it is important to keep the attachment clean and free from debris, especially after use. This can be done by wiping it down with a soft cloth and using a small brush or compressed air to clean any hard-to-reach areas. Finally, be sure to periodically check the attachment for any signs of damage or wear, such as cracked housing or loose gears.
By following these simple maintenance tips, you can enjoy reliable use of your right angle drill attachment for years to come.
Cleaning and Storage of a Right Angle Drill Attachment
Maintaining a Right Angle Drill Attachment is essential to ensure it works effectively and lasts long. To clean the attachment, it’s recommended to use a soft cloth or brush to remove debris. Avoid harsh chemicals that can damage the surface or bearings.
It’s also vital to lubricate the attachment periodically. Applying oil to the bearings will prevent rust and ensure smooth operation. When not in use, store the attachment in a cool, dry place to prevent moisture buildup.
Remember that the attachment has delicate gears and components, so avoid dropping it or subjecting it to unnecessary force. By following these simple maintenance steps, you can keep your Right Angle Drill Attachment in top condition and make it last longer, so you can tackle all the hard-to-reach drilling tasks with ease.
Common Issues with a Right Angle Drill Attachment and How to Fix Them
Maintaining your right angle drill attachment is essential to keep it running smoothly and prevent any potential issues that may arise. Start by cleaning the attachment after each use to remove any dust or debris that may have accumulated on it. Use a dry cloth or brush to wipe it down, then store it in a dry and secure place to prevent any damage.
It’s also important to inspect the attachment regularly for any signs of wear and tear, such as cracks or dents in the housing or blade. Replace any damaged parts immediately to ensure your attachment continues to operate safely. Additionally, lubricate your attachment regularly according to the manufacturer’s recommendations.
This will help to reduce friction and prevent overheating, which can cause the attachment to malfunction. Finally, store your right angle drill attachment properly when not in use. Keep it in a dry and secure place, and avoid exposing it to extreme temperatures or humidity.
By following these maintenance tips, you can prevent common issues with your right angle drill attachment and ensure it operates safely and efficiently for years to come.
Conclusion
So there you have it folks, the perfect tool for drilling in tight spaces and corners – the right angle drill attachment! With its compact and versatile design, it allows you to get your drill into those hard-to-reach places with ease. Plus, with its ability to pivot and adjust to different angles, this attachment lets you work smarter, not harder. So the next time you find yourself struggling to get your drill where you need it to be, just remember – the right angle attachment is your secret weapon for success!”
FAQs
What is a right angle drill attachment used for?
A right angle drill attachment is used to drill at a 90-degree angle in tight or confined spaces.
Can a right angle drill attachment be used with any type of drill?
No, a right angle drill attachment is typically designed to be used with a specific type of drill, such as a corded or cordless drill.
How do you attach a right angle drill attachment to a drill?
To attach a right angle drill attachment, simply insert the end of the attachment into the chuck of the drill and tighten it securely.
What are some common applications for a right angle drill attachment?
Some common applications include drilling holes in cabinetry, framing, and furniture, as well as installing electrical boxes and plumbing fixtures.
How do you maintain a right angle drill attachment?
To maintain a right angle drill attachment, keep it clean and free from debris, lubricate moving parts as needed, and store it in a dry, protective case when not in use.
Can a right angle drill attachment be used for driving screws?
Yes, many right angle drill attachments have a hex key chuck that can be used for driving screws and other fasteners.
Are there any safety precautions to keep in mind when using a right angle drill attachment?
Always wear eye protection and follow the manufacturer’s instructions for safe use of the attachment, including recommended speed and torque settings.

