Have you ever tried bleeding your brakes on your own but ended up frustrated with the results? Don’t worry, you’re not alone. Brake bleeding can be a tricky process, especially if you’re new to it. Fortunately, using a brake bleeder vacuum pump can make the job much easier.
In this step-by-step guide, we’ll go over all the necessary steps to properly bleed your brakes using a vacuum pump. We’ll cover everything from assembling the brake bleeder, attaching it to the brake line, and pumping out all the old brake fluid. By the end of this guide, you’ll have a better understanding of how to use a brake bleeder vacuum pump and be able to perform brake bleeding like a pro.
So, grab a cup of coffee and let’s get started!
What is a brake bleeder vacuum pump?
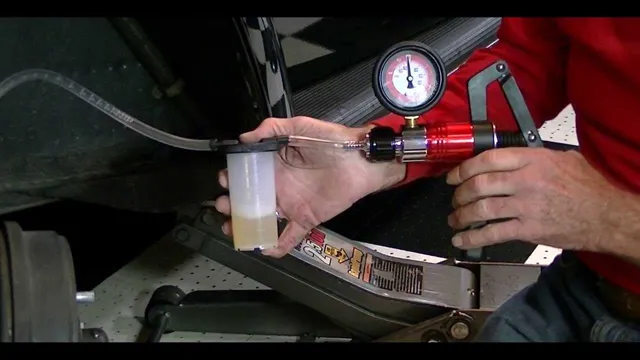
If you plan on doing your own brake system maintenance, a brake bleeder vacuum pump can be a useful tool to have. Essentially, it allows you to remove air bubbles and old brake fluid from your brake lines, resulting in a more efficient and safe braking system. Using a brake bleeder vacuum pump is a fairly straightforward process.
First, locate your brake bleeder valve, which is typically located around the brake caliper. Then, attach the vacuum pump to the valve and begin pumping until all of the air bubbles and old fluid have been extracted from the brake line. Keep an eye on the fluid reservoir, as you’ll need to replace any fluid that’s removed during the process.
By utilizing this tool and following the proper steps, you can help ensure that your brake system is functioning at its best, keeping you safe on the road.
-Definition and function
A brake bleeder vacuum pump is a tool used to remove air bubbles from the brake lines of a vehicle. It functions by creating a vacuum within the brake system, which draws old and contaminated brake fluid out of the system while allowing new, fresh fluid to be introduced. Brake bleeder vacuum pumps are especially useful for maintaining the proper operation of a vehicle’s brakes, as air bubbles within the brake lines can reduce the effectiveness of the brakes and lead to potentially dangerous situations.
If you’re looking to maintain the safety and reliability of your vehicle, a brake bleeder vacuum pump is an essential tool to have in your garage. So, get yourself a quality brake bleeder vacuum pump and ensure that your vehicle’s brakes are functioning smoothly and reliably.

Materials needed
If you’re looking to learn how to use a brake bleeder vacuum pump, one of the first things you’ll need is the pump itself. This type of pump essentially allows you to suck out any air or moisture that might be present in your brake lines, helping to ensure a safer and more efficient braking system. In addition to the pump, you’ll also need a bleeder kit, which typically includes hoses, fittings, and other attachments to help you connect the pump to your brake lines.
You’ll also need some basic tools to remove the wheels, as well as a brake fluid reservoir to keep the system topped off as you work. It’s important to note that using a brake bleeder vacuum pump can be a bit tricky, so it’s best to consult with a professional or reference a tutorial before diving in. With the right equipment and knowledge, however, this tool can be incredibly useful for maintaining your vehicle’s braking system.
-Brake bleeder vacuum pump
If you’re planning to change your brake fluid, it’s important to also bleed the brakes to remove any air bubbles and ensure proper functioning. To do this, you’ll need a brake bleeder vacuum pump. This tool creates suction to draw out old brake fluid and air from the brake lines, making it an efficient and effective method for brake bleeding.
In addition to the vacuum pump, you’ll also need a container to catch the old fluid, fresh brake fluid to refill the system, and a wrench to loosen and tighten the bleeder valve. Make sure to read the instructions for your specific vacuum pump and follow proper safety protocols, such as wearing gloves and eye protection. With the right materials and a little bit of know-how, you can confidently bleed your brakes and ensure your vehicle is operating safely and smoothly.
-Brake fluid
If you want to change your brake fluid, you’ll need a few materials. First and foremost, you’ll need the brake fluid itself, which should be specified in your vehicle’s owner’s manual. You’ll also need a brake bleeder kit, which can be purchased at any auto parts store.
Other essential tools include a socket set, pliers, a wrench, and a turkey baster or syringe to remove the old fluid. It’s also important to have a container to catch the old fluid, as well as gloves and safety goggles to protect yourself from splatters. Changing brake fluid can be a messy and potentially dangerous process, so it’s essential to take all the necessary precautions and have the proper equipment on hand.
By having all the required materials, you’ll be able to get the job done quickly and effectively, keeping your brakes in top condition and ensuring your safety on the road.
-Wrench or pliers
When it comes to fixing things around the house, having the right tools is essential. One of the most basic tools you need in your toolbox is either a wrench or pliers. While they may seem interchangeable, they both serve different purposes.
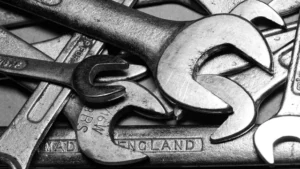
A wrench is a tool used to tighten or loosen bolts and nuts, whereas pliers are used to grip, twist, or cut objects like wires or small metal parts. When choosing between a wrench and pliers, consider the task at hand. If you need to loosen or tighten a bolt or nut, a wrench is your best bet.
On the other hand, if you need to grip or cut something, pliers are the better choice. It’s essential to have both tools in your toolbox to handle multiple tasks correctly. When purchasing wrenches or pliers, make sure to choose the correct size for the task at hand.
Using the wrong size tool can lead to damage, injury, or failure to complete the job. So, keep both wrenches and pliers in your toolbox and use them according to the requirements of the task you’re trying to complete, and remember, always select the right tool for the job!
-Clear tubing
If you’re looking to work on a DIY project that requires some clear tubing, here are some materials that you might need to get the job done. Firstly, you’ll obviously need the clear tubing itself – this can come in different sizes and thicknesses, so make sure to pick the one that best suits your project. Additionally, you may also need some connectors or fittings, depending on what you’re using the tubing for.
These can include things like plastic or metal couplings, clamps, or barbed fittings that allow you to attach the tubing securely to other components. Finally, depending on the nature of your project, you might also need tools such as a tubing cutter or wire snips to customize the tubing to the right length and shape. With these materials on hand, you’ll be ready to start experimenting with clear tubing and creating all kinds of DIY projects that showcase its unique properties.
-Catcher for old brake fluid
When performing brake maintenance, one of the essential tools to have in your arsenal is a catcher for old brake fluid. This nifty device helps prevent the leakage of fluids and protects your workspace from contamination and damage. To make a catcher for old brake fluid, you need a few materials, such as an empty soda bottle, a flexible rubber hose, a threaded metal cap, and a sharp utility knife.
First, cut a hole in the bottle’s side using the knife and then insert the rubber hose through the hole, sticking out on both sides. Attach the cap to one end of the hose, and your catcher is ready to use. Simply place the open end of the hose into the brake fluid reservoir, and the other end into the soda bottle.
Voila, you now have a hassle-free way of removing brake fluid without creating a mess. It’s a cheap and straightforward solution that can save you time and money in the long run. So, the next time you’re doing some brake maintenance, don’t forget to use your homemade brake fluid catcher to simplify the process!
Step 1: Prepare the Brake System
If you’re wondering how to use a brake bleeder vacuum pump, the first step is to prepare your brake system. This means ensuring that your brake fluid reservoir is filled to the appropriate level and that there is no air in the system. You should also inspect your brake lines and calipers for any signs of damage or wear.
Once you’ve done this, you can attach the vacuum pump to the bleeder valve on your brake caliper or wheel cylinder. Make sure the pump is securely attached and turn it on. The vacuum created by the pump will draw out any air and fluid in the system.
You should continue pumping until you see clear fluid flowing through the hose. Once you’ve finished bleeding the brakes, be sure to check your brake pedal for any sponginess or inconsistencies. By following these steps, you’ll be able to use a brake bleeder vacuum pump to maintain your vehicle’s brakes and ensure safe driving.
-Lift the vehicle
The first step in preparing your brake system is to lift the vehicle. This is an essential step that allows you to access the brakes and perform the necessary maintenance or repairs. Before you start, make sure you have a safe and stable place to work, and that the vehicle is in park with the parking brake engaged.
A hydraulic jack and jack stands can be used to lift the vehicle off the ground. Once the vehicle is in the air, place the jack stands under the frame or axles to secure it. It is important to ensure that the vehicle is securely lifted and supported before working on the brakes to prevent accidents.
Be sure to follow the manufacturer’s instructions when using the hydraulic jack and jack stands. With the vehicle lifted and secured, you can now move on to the next step of preparing your brake system.
-Remove the brake fluid reservoir cap
Before you start any brake maintenance work, it is essential to prepare the brake system, and the first step in doing this is to remove the brake fluid reservoir cap. As a car owner, it is crucial to know where the brake fluid reservoir is located, which is usually near the firewall on the driver’s side under the hood. The brake fluid plays a critical role in stopping your vehicle by transmitting hydraulic force to the brake pads or shoes, which then press against the rotors or drums.
When you remove the brake fluid reservoir cap, it relieves pressure in the system, allowing air to escape while preventing the fluid from being pushed back into the reservoir as you push the piston back into the caliper. Always check the reservoir beforehand to ensure the brake fluid level is within the recommended range. If the brake fluid level is low, add the appropriate fluid before starting any brake-related repairs or maintenance.
Remember, failing to drain the fluid system properly or exposing the brake fluid to air can cause various problems, including reduced stopping power, brake fade, and even brake failure.
Step 2: Connect the Brake Bleeder Vacuum Pump
Now that you’ve set up your brake bleeder vacuum pump, it’s time to connect it to your vehicle’s brake system. Start by ensuring that the pump’s gauge reads zero before you proceed. Then, locate the master cylinder reservoir and take off the cap.
Attach the pump’s hose to the bleeder valve on the brake caliper, and pump the handle until you see brake fluid start to flow through the hose. You should see air bubbles rise to the surface of the fluid as the vacuum pressure works to pull air out of the brake lines. Keep pumping until the fluid runs clear and no more bubbles appear.
Once you’ve finished, disconnect the pump and replace the reservoir cap. Congratulations! You’ve now successfully used a brake bleeder vacuum pump to remove air from your vehicle’s brake system, ensuring optimal braking performance and safety on the road.
-Attach the clear tubing to the brake bleeder valve
In order to properly bleed your brakes, you’ll need to connect your brake bleeder vacuum pump. The first step in doing so is to attach the clear tubing to the brake bleeder valve. This is a critical step, as it ensures that the vacuum pump is able to properly suck out any air or old brake fluid that may be trapped in the system.
When attaching the tubing, be sure to tighten it securely around the valve to prevent any leaks. Once the tubing is in place, you can move onto the next step of connecting the vacuum pump. With the tubing securely attached, you’ll be well on your way to fully bleeding your brakes and ensuring that your vehicle is able to stop safely and reliably on the road.
-Connect the other end of the tubing to the vacuum pump
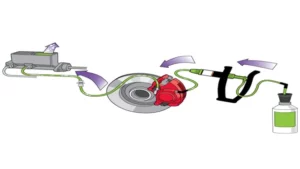
The second step in bleeding your brakes is connecting the brake bleeder vacuum pump. Start by finding the vacuum pump and connecting one end of the tubing to it. Then, take the other end of the tubing and connect it to the brake bleeder valve.
Make sure the tubing is securely connected to both the pump and the valve to avoid any leaks. The vacuum pump will be responsible for creating the necessary vacuum pressure in the brake lines, pulling out any air or moisture that may be trapped inside. This step is crucial to achieving a successful brake bleed, so take your time to ensure everything is properly connected before moving on to the next step.
By properly connecting the pump, you’re one step closer to efficiently and effectively bleeding your brakes.
Step 3: Open and Close the Bleeder Valve
Now that you have connected the brake bleeder vacuum pump and primed it, it’s time to open and close the bleeder valve. This step is crucial to ensure that there is no air left in the brake lines, which could cause the brakes to fail and lead to a dangerous situation. To open the valve, grab a wrench and turn it counterclockwise.
This will release the brake fluid and any air bubbles trapped inside. You will see the fluid and bubbles flow through the clear tubing into the reservoir. Once the fluid flows steadily with no bubbles, it’s time to close the valve.
Use the wrench to turn the valve clockwise until it is tight. Remember to check the fluid level in the reservoir periodically as you work. With this step, you are one step closer to fully bleeding your brake system and ensuring safe and reliable braking performance.
-Open the bleeder valve
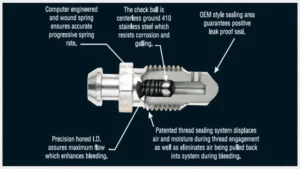
When bleeding the brakes, it is essential to open and close the bleeder valve. The bleeder valve is a small valve located on the brake caliper or wheel cylinder. It allows air and brake fluid to escape, which is necessary to remove any air bubbles from the system.
To begin, locate the bleeder valve and place a clean catch container beneath it. Then, using a wrench, slowly turn the valve counterclockwise to open it. Keep an eye on the brake fluid level in the master cylinder, as it may drop quickly.
Once brake fluid starts to flow from the valve, close it quickly by turning it clockwise. Make sure the valve is tightly closed, as any air leaks can interfere with the effectiveness of the brakes. Repeat this process for each brake until every wheel has been bled.
Opening and closing the bleeder valve is a crucial step in the brake bleeding process, and taking the time to do it correctly can help ensure your brakes are working smoothly and efficiently.
-Activate the brake bleeder vacuum pump
When activating the brake bleeder vacuum pump, it’s important to open and close the bleeder valve properly to ensure that air bubbles are effectively removed from the brake lines. First, locate the bleeder valve on the caliper or wheel cylinder and attach the vacuum pump to it. Next, open the valve and observe any fluid or air bubbles coming out.
It’s important to close the valve before air gets sucked back into the brake lines. Repeat this process until no more air bubbles appear in the brake fluid. One thing to note is that the process may take some time and patience, but it’s crucial to properly bleed the brakes to ensure your safety on the road.
Remember, failing to properly bleed the brakes can lead to reduced braking power and increased stopping distance, which can be very dangerous. So, take your time and make sure that you’re doing it correctly for your own safety and peace of mind.
-Wait until all old brake fluid is removed from the system
Once you’ve connected your brake bleeding kit according to the manufacturer’s instructions and removed the old brake fluid, the next step is to open and close the bleeder valve. Start with the brake farthest from the master cylinder, which is usually the passenger rear brake. Locate the bleeder valve and attach the end of the bleeding kit hose to it.
Place the other end of the hose into a container to catch the brake fluid. Have a helper keep an eye on the brake fluid level in the master cylinder reservoir and add more fluid as needed. Using a wrench, slowly turn the bleeder valve counterclockwise to open it.
As your helper presses down on the brake pedal, fluid and air bubbles will flow out of the bleeder valve and through the hose. Once your helper has depressed the brake pedal all the way to the floor, have them hold it there while you close the bleeder valve by turning it clockwise. Repeat this process until no more air bubbles are coming out of the hose and the brake pedal feels firm.
Then, move on to the next brake, working your way closer to the master cylinder. Keep in mind that it’s important to wait until all old brake fluid is removed from the system before continuing with this step to ensure the best results.
-Close the bleeder valve
Before moving on to the next step, it’s important to close the bleeder valve. This valve is typically located on the caliper and is used to release any air that may have entered the brake system during the bleeding process. Failing to close the valve can result in air being sucked back into the system, undoing all of your hard work.
To close the bleeder valve, use a wrench to tighten it until you feel some resistance, but be careful not to overtighten it as this can cause damage to the valve. Once it’s closed, move on to the next brake and repeat the bleeding process. By following these steps carefully, you’ll ensure that your brakes are free from air bubbles and functioning properly.
Step 4: Refill with New Brake Fluid
After successfully removing the old brake fluid from the system by using a brake bleeder vacuum pump, it’s essential to refill it with fresh brake fluid. Start by locating the brake fluid reservoir and opening the cap. Then, using a funnel, pour the new brake fluid into the reservoir.
Bleed the brake system once more, ensuring that all the air bubbles are removed. Keep in mind that using the appropriate brake fluid type is essential, so consult your vehicle manual or a professional mechanic if you are unsure of the correct type to use. Lastly, check the brake pedal for any abnormalities before driving your vehicle to ensure that the brake system is working correctly.
With the help of a brake bleeder vacuum pump and the proper techniques, you can easily maintain the health of your vehicle’s brake system and keep yourself safe on the road.
-Remove the vacuum pump and tubing
Now that we have removed the old brake fluid, it’s time to refill the system with fresh fluid. Before starting, make sure that the reservoir is completely empty and free of any debris or fluid remnants. Then, use a funnel to pour new brake fluid into the reservoir until it reaches the MAX level.
You can find the specific type of brake fluid that your vehicle requires in the owner’s manual or by checking with your local auto parts store. It’s essential to use the correct type of fluid because different makes and models require different viscosity and chemical compositions. Once you’ve filled the reservoir, you can begin reattaching the wheels and lowering the car.
Remember to double-check all the connections and fittings before taking your vehicle out for a test drive. By following these steps, you can ensure your brake system is functioning correctly and keeping you safe on the road.
-Refill the brake fluid reservoir with new fluid
Brake fluid is an essential component when it comes to ensuring the safe operation of your vehicle’s brakes. Without it, the braking system simply won’t work, which can lead to dangerous situations on the road. That’s why refilling the brake fluid reservoir with new fluid is such an important step when performing brake maintenance.
Over time, brake fluid can become contaminated with moisture, which can cause the fluid to break down and become less effective. By replacing the old brake fluid with new fluid, you’ll help ensure that your brakes are working at their best. It’s important to use the type of brake fluid specified in your vehicle’s owner manual to prevent any compatibility issues and to top up the reservoir to the recommended level.
If you’re unsure about how to add new brake fluid, consult your owner manual or seek assistance from a mechanic. A word of caution: brake fluid is highly corrosive, so it’s vital to handle it with care and avoid spilling it. With proper care, however, refilling your brake fluid reservoir is a straightforward process that can help keep you safe on the road.
Step 5: Test the Brake System
Now that you’ve properly bled the brake system, it’s time to test it out. One of the best ways to ensure that your brakes are working correctly is to use a brake bleeder vacuum pump. With this tool, you’ll be able to draw a vacuum on the brake system and see if there are any leaks or issues.
To use the vacuum pump, attach the pump to the brake bleeder valve and pump until the gauge reaches the correct pressure. Then, open the valve and watch the gauge to see if the pressure drops. If it does, that means there’s a leak somewhere in the system that needs to be fixed.
It’s important to note that this tool should only be used after the brake system has been properly bled. It’s also a good idea to check the brake pedal for correct firmness and to take the car for a test drive to ensure that the brakes are safely and effectively stopping the vehicle. With a brake bleeder vacuum pump, you can be confident that your brakes are in top condition and ready for the road ahead.
-Pump and check the brake pedal
After bleeding the brake system, it’s essential to test it before hitting the road. Start by pumping the brake pedal to check if it feels spongy or firm. A spongy feel means there’s air present in the brake system and needs further bleeding.
If the brake pedal feels firm, start the engine and press the brake pedal down. The pedal should hold its position without sinking to the floor, indicating that the system is working correctly. Alternatively, drive the vehicle at a low speed and test the brakes by applying moderate pressure to the pedal.
The car should stop smoothly and without any noises. It’s crucial to test the brakes after bleeding, as any failure can lead to severe accidents on the road. Therefore, ensure your safety by conducting a thorough brake system test before getting back behind the wheel.
-Check the brake fluid level
After you check the brake fluid level, it’s time to test your brake system to ensure everything is working properly. The first step is to test the brake pedal. Start by putting your car in park and pressing down on the brake pedal.
If you feel any sort of pulsation or unusual vibration, there may be a problem with your brake rotors. Next, you’ll want to test the handbrake. Simply pull up on it to check the tension and release it to ensure it disengages properly.
If you notice any difficulty in pulling it up or releasing it, it’s time to have it checked by a mechanic. It’s also a good idea to test your brakes at a low speed by slowly applying pressure to the pedal and feeling for any unusual noises or sensations. If everything checks out, you’re good to go.
Just remember, it’s always better to be safe than sorry when it comes to your brakes.
Are you looking to wrap up your writing with finesse? Look no further than the conclusion. This oft-overlooked section can be the key to leaving a lasting impression on your reader. Whether you’re crafting an academic essay or a short blog post, a strong conclusion can tie together your ideas and leave a memorable final thought.
But how do you craft an effective conclusion? Let’s explore some tips and techniques to help you write a conclusion that leaves a lasting impression. From restating your thesis to leaving the reader with a sense of wonder, there are many ways to approach the art of conclusion writing. So why not make every word count with the power of a well-written final paragraph? Let’s dive in.
Conclusion
In conclusion, using a brake bleeder vacuum pump may seem intimidating at first, but with a little know-how and practice, it can be as easy as pumping gas. Just remember to follow all safety precautions and take your time to ensure a smooth and successful brake bleeding process. And if all else fails, just pretend you’re a mechanic and say things like “I’ll have that brake bleeding like a pro in no time!” Confidence is key, even if you have no idea what you’re doing.
“
FAQs
What is a brake bleeder vacuum pump and how does it work?
A brake bleeder vacuum pump is a tool used to bleed air out of a vehicle’s brake system. It works by creating a vacuum pressure that sucks the brake fluid and air out of the system. This process helps prevent air bubbles from forming in the brake lines, which can interfere with proper braking.
Can a brake bleeder vacuum pump be used for all types of brake systems?
No, not all brake bleeder vacuum pumps are compatible with all types of brake systems. It is important to check the manufacturer’s specifications before using the pump on your particular brake system.
How do I attach a brake bleeder vacuum pump to my vehicle’s brake system?
This will vary depending on the type of pump you have and your vehicle’s brake system. Generally, you will need to locate the brake bleeder valve on your vehicle, attach the pump to the valve using the appropriate tubing, and then pump the vacuum until all air is removed from the system.
What are the benefits of using a brake bleeder vacuum pump?
Using a brake bleeder vacuum pump can help ensure that your vehicle’s brake system is operating properly and safely. It can also prevent brake failure due to air bubbles in the brake lines, and extend the lifespan of your brake components.
Can a brake bleeder vacuum pump be used by a novice mechanic?
Yes, a brake bleeder vacuum pump can be used by anyone with basic mechanical skills. However, it is important to follow the manufacturer’s instructions carefully and take all necessary safety precautions.
How often should I use a brake bleeder vacuum pump on my vehicle?
This will depend on your vehicle and how frequently you drive it. As a general rule, it is a good idea to bleed your brakes at least once a year to maintain optimal brake performance.
What should I do if I encounter problems while using my brake bleeder vacuum pump?
If you encounter any problems or difficulties while using your pump, refer to the manufacturer’s troubleshooting guide or contact their customer support for assistance. It is important to address any issues promptly to avoid potential brake failure.
