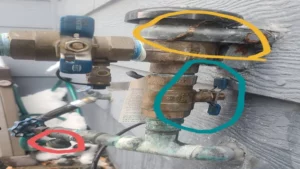
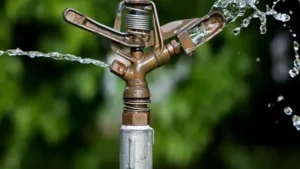
You’ve invested a lot of time and money into your lawn, garden, or crops, and your irrigation system is an essential component in maintaining their health. But do you know if your water sprinkler system is working correctly? It’s crucial to ensure your sprinkler system is functioning correctly before the hottest and driest months of the year to save you from costly repairs and water wastage. This is where regularly testing your water sprinkler system comes in.
Think of it as a routine health checkup for your irrigation system — it ensures your system is running correctly, distributes water evenly, and helps identify issues before they escalate into significant problems. Discover why testing your water sprinkler system should be a regular component of your landscaping routine, and how it can help save you time, money, and ensure your lawn or garden maintains it’s lush and vibrant appearance.
Why Testing is Important
Maintaining a water sprinkler system is crucial to keep your property adequately irrigated all year round. One of the easiest ways to ensure the efficiency of the system is by performing regular testing. Before testing, turn off the water supply and remove any dirt or debris that may have accumulated over time.
Then, turn on one zone at a time and check for any leaks, damaged or clogged sprinkler heads, or uneven watering patterns. Check the water pressure as well to ensure that it is within the recommended range. Additionally, test the rain sensor to make sure it is working correctly.
Regular testing and maintenance help to detect issues early on and prevent costly repairs in the future. By doing so, you can keep your lawn healthy and green, saving you both time and money in the long run.
Preventing Drought Damage to Your Lawn
Testing is a crucial step to prevent drought damage to your lawn. Before taking any measures to save your grass, it’s essential to first determine the root cause behind the dying grass. Conducting a soil test can help you identify the nutrient deficiencies that may be limiting plant growth, as well as the pH levels and soil texture, which may be preventing grass from developing a robust root system.
Testing also helps in choosing the right grass type for your area, ensuring that you have a water-efficient grass that can withstand drought conditions. Overall, testing can save you a lot of time, money, and effort in the long run, allowing you to target the specific issue and implement the appropriate solution. Don’t wait until it’s too late; test your soil and take proactive measures to keep your lawn looking lush and green all year round.
Avoiding Water Waste and High Utility Bills
When it comes to avoiding water waste and high utility bills, testing is a crucial step that can’t be skipped. It’s essential to know whether your pipes, faucets, and toilets are leaking or not. Small leaks may seem insignificant, but over time they can waste a lot of water, which will ultimately show up on your utility bill.
Moreover, water waste is a problematic issue, especially in areas that experience drought and water scarcity. By testing your plumbing fixtures and addressing any leaks immediately, you can save precious water and save money in the long run. Additionally, testing allows you to catch potential issues early on, which prevents expensive repairs later.
So, don’t overlook the importance of testing if you want to avoid water waste and high utility bills.
Step-by-Step Guide to Testing Your System
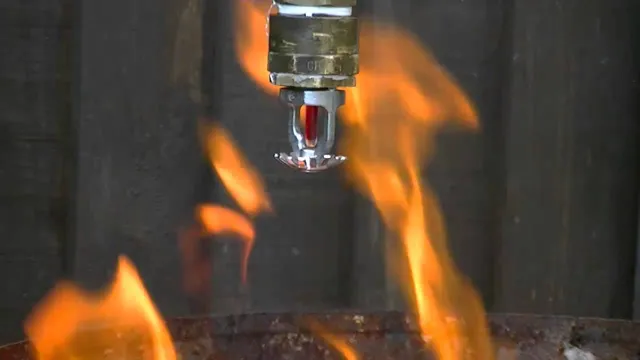
Testing your water sprinkler system is a crucial step to ensure it is ready to use in case of a fire emergency. Here’s a step-by-step guide on how to test your water sprinkler system. Start by activating the main control valve and ensuring water is flowing through the system.
Next, check for any leaks and verify that each sprinkler head is properly positioned, clear of obstructions, and covers the intended area. Once everything is set up, run a full system test by activating the alarm valve and monitoring the system’s response. Take note of any issues or failures and address them promptly.
Remember to test your system yearly. Testing your water sprinkler system regularly will give you peace of mind knowing that it’s in proper working condition and could save your property and business in case of an emergency.
Step 1: Check the Water Pressure
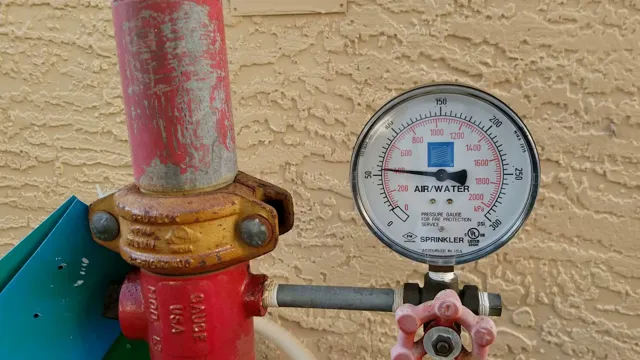
If you’re experiencing low water pressure in your home, it could be due to a problem with your plumbing system. Before embarking on any repairs or replacements, it’s essential to test your water pressure to determine the root cause of the problem. To do this, you’ll need a pressure gauge that can be attached to your home’s main water supply.
Simply open up a faucet and attach the gauge to the spout, then note the reading on the gauge. If the pressure is below 40 PSI or above 80 PSI, you may have a problem that requires attention. Low pressure can be caused by a clogged or damaged pipe, while high pressure can lead to burst pipes and other plumbing problems.
Overall, testing your water pressure is an essential first step in diagnosing and resolving any issues with your plumbing system.
Step 2: Test Each Zone Separately
Testing your irrigation system is a crucial step in maintaining a healthy lawn, and the second step is to test each zone separately. This ensures that each zone is receiving sufficient water and that there are no issues with your system. Begin by turning on one zone and checking if the sprinkler heads are all popping up and rotating correctly.
If not, there may be a clog or a broken head that needs fixing. You can also check if the water pressure seems adequate. Repeat this process for each zone to identify any specific problems and make any necessary repairs.
By testing each zone individually, you can ensure that your entire lawn is getting the necessary hydration for optimal health. Don’t forget to keep an eye out for any leaks or irregularities that may arise during the testing process. With a little bit of effort, you can ensure that your irrigation system is working correctly and keeping your lawn looking its best.
Step 3: Inspect Sprinkler Heads for Damage
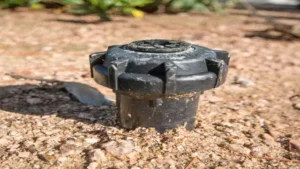
When it comes to maintaining your irrigation system, one important step is inspecting your sprinkler heads for damage. Over time, sprinkler heads can become clogged, bent, or broken, leading to inefficient watering or even water waste. To check your sprinkler heads, first turn on your system and observe each head as it sprays.
Look for any areas of over- or under-watering, signs of leaks, or irregular spray patterns. Next, inspect each head for physical damage, such as cracks, chips, or missing parts. If you notice any issues, it’s important to address them promptly to avoid further damage to your system or wasting water.
In some cases, a simple adjustment or cleaning may be all that’s needed, but in others, you may need to replace damaged parts or even the entire head. By regularly inspecting your sprinkler heads, you can help ensure your irrigation system continues to operate at peak efficiency, while also conserving water and saving money on your water bills.
Additional Tips for Maintaining Your System
Maintaining your water sprinkler system is crucial for ensuring it stays in tip-top shape and functions properly. One way to test your system is by doing a pressure check. This can ensure that each sprinkler head is putting out an equal amount of water pressure.
First, turn off your water supply and attach a pressure gauge to the test cock on the system. Then, turn your water supply back on and note the reading on the gauge. Compare this reading to what the manufacturer recommends for your system.
If the pressure is too low or too high, you may need to adjust your water pressure or replace some of the sprinkler heads. Additionally, it’s important to inspect your sprinkler heads regularly. Look for any damage or clogs that may be preventing them from functioning correctly.
Maintaining your system will not only extend its lifespan but also ensure it effectively protects your lawn and garden.
Regular Maintenance Schedule
When it comes to maintaining your heating and cooling system, sticking to a regular maintenance schedule is crucial, but there are additional tips you can implement to ensure your system runs efficiently. One important factor is changing your air filters every 1-3 months, depending on usage. A dirty filter can cause your system to work harder and decrease its lifespan.
Another tip is to keep your outdoor unit clear of debris and vegetation to prevent any damage or obstruction. Additionally, consider having a professional perform a comprehensive tune-up and inspection annually to catch any potential issues before they become bigger problems. By implementing these additional tips, you can help prolong the life of your system and improve its overall performance.
So, when was the last time you changed your air filter?
Winterizing Your Sprinkler System
“Maintaining Your Sprinkler System” Maintaining your sprinkler system can ensure that it is performing at its best and avoid costly repairs. Besides winterizing your system, there are many other tips that you should follow to keep your sprinklers in top shape. Firstly, regular inspection is critical to ensuring that your sprinklers are working correctly.
Check for damaged heads and pipe leaks which can cause significant damage to your lawn. Secondly, ensure that your system is programmed accurately and that the cycles you set are not too frequent, which can cause over-watering. Moreover, proper scheduling of your sprinklers is crucial as watering during the day under hot sun rays can lead to water loss due to evaporation.
Finally, make sure that plants and grass around the sprinkler heads are trimmed short to ensure that the water sprays over the intended area and not on things like hedges or bushes. By following these tips in tandem with winterizing your sprinkler system, you’ll be able to maintain a beautiful lawn and avoid costly repairs, and in doing so, boost the lifespan of your sprinkler system.
Conclusion
Testing a water sprinkler system is essential to ensure that your lawn and garden remain lush and green all summer long. But it’s not just a matter of turning on the faucet and hoping for the best. No, my water-savvy friends, testing a sprinkler system requires a keen eye, careful monitoring, and a whole lot of patience.
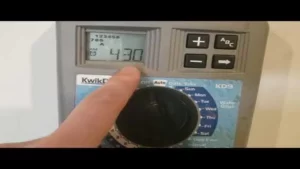
To test your system, start by examining each sprinkler head individually, looking for any leaks or clogs. Then, turn on the system and walk the perimeter of your lawn several times, checking for even coverage and any dry spots. Don’t forget to test the timer and make adjustments as necessary.
But testing a sprinkler system isn’t just about making sure your grass looks good. It’s about taking control of your water usage and making sure you’re not wasting this precious resource. So the next time you’re out there with your hose and sprinkler, take a minute to appreciate the power of water and the role it plays in keeping our planet healthy and vibrant.
And in the immortal words of Bob Marley, “Let’s get together and feel alright.”
FAQs
What is a water sprinkler system?
A water sprinkler system is a device used to irrigate lawns or gardens by spraying water through a network of pipes and sprinkler heads.
Why is it important to test a water sprinkler system?
Testing a water sprinkler system is important to ensure that it is working properly and effectively, helping to conserve water and reduce the risk of damage to your lawn or garden.
How often should a water sprinkler system be tested?
A water sprinkler system should be tested at least once a year, preferably before the start of the watering season, to ensure that it is in good working order.
What are some common problems that can occur with water sprinkler systems?
Common problems with water sprinkler systems include leaks or blockages in the pipes, broken sprinkler heads, and faulty controller units.
How can I test my water sprinkler system for leaks?
To test for leaks in your water sprinkler system, turn on the main water valve and check for any signs of water seepage or pooling around the sprinkler heads or pipes.
What should I do if I find a leak in my water sprinkler system?
If you find a leak in your water sprinkler system, it is important to have it repaired promptly to avoid wasting water and damaging your lawn or garden.
How can I ensure that my water sprinkler system is working efficiently?
To ensure that your water sprinkler system is working efficiently, regularly check and clean the sprinkler heads, adjust the watering schedule based on weather conditions, and consider upgrading to a water-efficient system.
