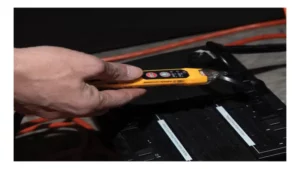
It’s that time of year again, where twinkling lights adorn the streets and homes of neighborhoods everywhere. However, there’s nothing more frustrating than trying to hang up your Christmas lights, plugging them in, and realizing that only half of them are working. Instead of spending countless hours trying to pinpoint the faulty bulb, why not invest in a voltage tester to ensure that your lights are working properly before even attempting to hang them up? Not only will this save you time in the long run, but it will also ensure that your lights are shining bright all throughout the holiday season.
In this blog post, we’ll take a closer look at how to test your Christmas lights with a voltage tester, providing some helpful tips to make sure your display is the envy of the neighborhood.
What is a Voltage Tester?
Christmas is a time for celebration and creating beautiful memories. Decorating your homes with Christmas lights is one of the most popular traditions. However, it is important to check these lights before putting them up, to prevent any electrical mishaps or fire hazards.
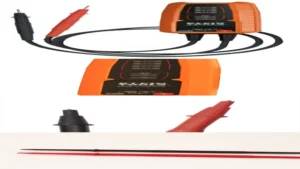
This is where a voltage tester comes in handy. A voltage tester is an incredibly useful tool that can be used to check for live wires and detect voltage in electrical circuits. It works by coming into direct contact with the conductor and indicating the presence of a voltage.
Testing Christmas lights for voltage is easy with a voltage tester. Simply place the tester probe on the live wire and let the indicator light up to confirm that it is live and ready to use. By testing your Christmas lights with a voltage tester, you can make sure that your lights are safe to use and enjoy during the holiday season.
So, if you’re unsure about the safety of your Christmas lights, using a voltage tester is the best way to ensure they are safe and avoid any mishaps.
Definition of Voltage and Resistance
A voltage tester is a simple but essential tool for anyone working with electrical circuits. It is used to measure the voltage or potential difference between two points in a circuit. Voltage is the force that pushes electric charges through a conductor, and is measured in volts.
Resistance, on the other hand, is the opposition to the flow of current, and is measured in ohms. When a voltage tester is used to measure the voltage in a circuit, it shows the amount of electrical potential difference between two points. The tester has a probe that is inserted into the circuit at various points, and the voltage display shows the reading it detects.
Voltage testers are useful for a range of electrical tasks, from checking the continuity of a circuit to diagnosing problems with electrical appliances. They are a simple and affordable tool that can help keep you safe while working with electricity.
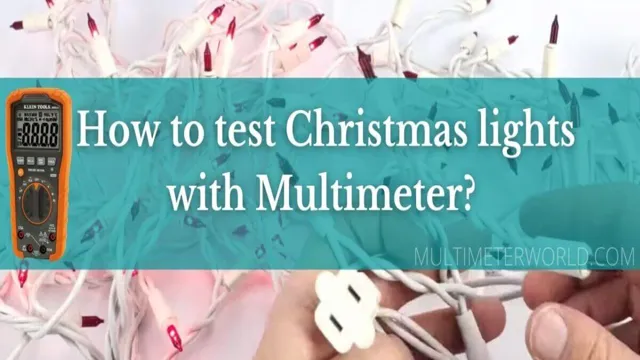
How Voltage Tester Works
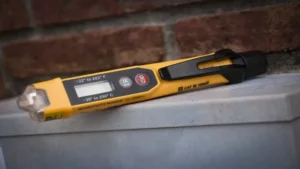
A voltage tester is an essential tool for detecting electrical voltages in circuits, outlets, appliances, and other electrical devices. It is used to identify whether a wire or outlet is live or not, helping electricians and DIY enthusiasts to avoid electric shocks and potential fires. The most common type of voltage tester is a non-contact voltage tester, which works by detecting the presence of electric fields.
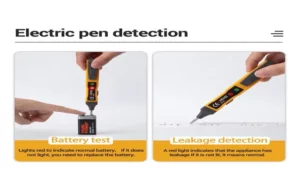
It is a small handheld device with a probe and a LED indicator that flashes or beeps when it detects a voltage. The probe of the voltage tester is held near a wire, outlet or circuit breaker to check if there is electricity flowing or not. If there is a voltage present, the LED light will light up and the beeper will sound, alerting the person using the tester that there is voltage in the area.
In conclusion, a voltage tester can save lives and protect against electrical hazards by detecting the presence of electrical energy.
Step-by-Step Guide for Testing Christmas Lights
If you’re eager to deck your halls with Christmas lights but unsure if all your strings are in working order, don’t worry, we’ve got you covered! Testing your light strings is essential to ensure you don’t end up with a half-lit tree. To test your Christmas lights with a voltage tester, here’s what you need to do. Begin by unplugging all your lights and checking them for any visible damage like frayed wires, broken sockets, or missing bulbs.
Once you’ve given them a once over, plug them back in but leave them switched off. Turn on its voltage tester, then place the probe at the base of the first bulb, making sure you touch the metal contacts. If you hear a beep or see the tester’s neon light glowing, it means that the bulb and its wiring are in good condition.
Move through the strand one bulb at a time, checking each one and marking any bad lights as you go. When you encounter a non-working bulb, make sure to replace it with a new one before retesting the strand to ensure the whole circuit works correctly. By following these simple steps, you’ll have a brilliantly lit Christmas display!
Step 1: Turn off the Christmas Lights
When it comes to testing your Christmas lights, the first step is to turn them off. This might seem obvious, but it’s an important safety measure to follow before you start handling the wires and bulbs. Once you’ve turned off the lights, unplug them from the outlet to ensure no electricity is still flowing through them.
Next, carefully inspect the wires for any signs of damage or wear and tear. If you notice any frayed or exposed wires, it’s best to discard those lights and replace them with new ones. After you’ve checked the wires, it’s time to test the bulbs themselves.
The easiest way to do this is to plug the lights back in and look for any bulbs that are not lighting up or are flickering. Replace any faulty bulbs as needed to ensure that your Christmas lights are in top working order. By following these simple steps, you can enjoy a safe and festive holiday season with a beautifully illuminated home.
Step 2: Set the Voltage Tester to AC
When you’re testing Christmas lights, it’s important to set your voltage tester to AC in order to get an accurate reading of the electrical current. AC stands for alternating current, which is the type of electricity that flows through most household outlets. Setting your voltage tester to AC mode ensures that you’re measuring the correct type of current and can determine whether your Christmas lights are working properly.
To do this, make sure your voltage tester is turned off, then locate the setting or dial that controls the mode. Set it to AC and turn it back on before testing your Christmas lights for voltage. By setting your voltage tester to the correct mode, you can diagnose any issues with your Christmas lights and keep your display shining brightly all season long.
Step 3: Touch the Probes to the Wires
To test your Christmas lights, the next step is to touch the probes of the tester to the wires. This is where you’ll find out if the wires are conducting electricity or not. Before beginning this step, make sure that the probes are firmly touching the wires but not the insulation.
Once this is done, you need to activate the test button and observe the results on the test meter. If the lights are working properly, you should expect to see a reading between 120 and 140 volts. Conversely, if there is no reading, it means that the lights are not conducting electricity.
The reason for this could be due to a faulty bulb, a blown fuse, or even a tripped circuit. Whatever the case may be, testing the wires is a crucial step in ensuring that your Christmas lights are safe and functional.
Step 4: Check the Reading
When it comes to testing Christmas lights, one important step is checking the reading. After you’ve plugged in your lights and checked each bulb for damage, it’s time to ensure the current flowing through the lights is correct. To do this, you’ll need a multimeter – a device that measures voltage, current, and resistance.
Set your multimeter to AC voltage and place the probes on the positive and negative terminals of your light string. You should see a reading close to the voltage listed on the packaging. If the reading is significantly higher or lower, there may be a problem with your lights, such as a blown fuse or damaged wiring.
By checking the reading, you can ensure that your lights are functioning properly and avoid any potential hazards.
Precautions when Testing Christmas Lights
If you’re planning to test your Christmas lights with a voltage tester, there are some precautions you should keep in mind. First and foremost, make sure the lights are unplugged and turned off before attempting to test them. Additionally, wear rubber gloves and shoes to avoid any possible electrical shocks.
It’s also important to have a good understanding of how to use the voltage tester properly, as well as understanding the type of bulbs and voltage required for your specific lights. Remember to inspect the wires and cords for any signs of damage before plugging them back in and using them. By taking these safety measures, you can ensure a safe and successful testing of your Christmas lights with a voltage tester.
Wearing Protective Gear
When it comes to testing Christmas lights, wearing protective gear is a must. You never know what could go wrong, especially if you’re handling electrical equipment. Gloves, goggles, and long-sleeved clothing can all help protect you from any potential accidents.
Additionally, double-checking the wiring and connections beforehand can prevent any mishaps. It’s important to remember that safety should always come first, no matter how excited you may be to decorate for the holidays. By taking the necessary precautions and wearing the proper gear, you can enjoy a hassle-free and injury-free experience while testing your Christmas lights.
Avoiding Moisture Exposure
When it comes to testing your Christmas lights, moisture exposure is something you want to avoid at all costs. After all, no one wants the hassle of dealing with faulty lights or risking an electrical hazard. To ensure that your lights are safe to use, it’s important to take proper precautions before testing them.
One way to do this is to store your lights in a dry place when not in use. Additionally, make sure your hands are dry before handling any electrical components and avoid testing your lights in wet or damp conditions. If you do need to test your lights in outdoor conditions, be sure to use a waterproof outlet and plug.
By taking these simple steps, you can help prevent any potential mishaps and enjoy a safe and bright holiday season.
Checking the Power Source
When it comes to testing your Christmas lights, one of the first steps is to check the power source. Before plugging in your lights, make sure the outlet you plan to use is in good condition and can handle the load of your Christmas lights. If you’re using an extension cord, make sure it’s designed for outdoor use if you plan to use them outside, and make sure it’s not frayed or damaged in any way.
Additionally, make sure your lights are compatible with the voltage in your home; using lights with the wrong voltage can cause damage to your home’s electrical system or your lights themselves. By taking these precautions and ensuring your power source is secure, you can enjoy your Christmas lights safely and without worry.
Conclusion
So, there you have it – you now know how to test your Christmas lights with a voltage tester like a pro! Remember, safety first, always wear gloves and make sure to unplug the lights before testing. When it comes to holiday decorations, there’s nothing worse than a string of unlit Christmas lights. But with the power of a voltage tester in your hands, you’ll be able to identify any faulty bulbs and get those lights shining in no time! Happy testing, and may your holiday season be filled with bright and merry lights!”
FAQs
What is a voltage tester?
A voltage tester is a tool used to determine if electrical circuits are live or not.
Can you test Christmas lights with a voltage tester?
Yes, you can test Christmas lights with a voltage tester to determine if they are working properly.
How do you test Christmas lights with a voltage tester?
To test Christmas lights with a voltage tester, you need to first turn off the power source, then touch the two probes of the tester to the two metal contacts in the light socket.
What should you do if the voltage tester indicates the Christmas lights are faulty?
If the voltage tester indicates the Christmas lights are faulty, you should unplug the lights and inspect them for any damage or loose connections.
How often should you test your Christmas lights with a voltage tester?
It is recommended to test your Christmas lights with a voltage tester before each use to ensure they are safe and working properly.
Is it safe to use a voltage tester on Christmas lights?
Yes, it is safe to use a voltage tester on Christmas lights as long as you turn off the power source and follow the manufacturer’s instructions.
Can a voltage tester be used for other electrical devices besides Christmas lights?
Yes, a voltage tester can be used for other electrical devices such as outlets, switches, and appliances to check for live voltage.

