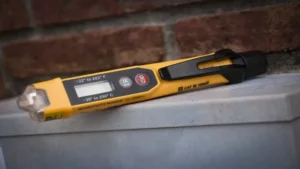
Have you ever experienced the frustration of flipping a light switch, only to find that the bulb doesn’t illuminate? It can be confusing to know whether it’s a problem with the bulb, the fixture, or the switch itself. Luckily, one simple tool can help you diagnose the issue: a voltage tester. By using this inexpensive device, you can determine if power is flowing through your circuit and isolate any problems with the switch.
In this blog, we’ll dive into the process of testing a light switch with a voltage tester and provide tips to help you troubleshoot any issues you encounter along the way. Whether you’re a homeowner or a DIY enthusiast, this guide will equip you with the knowledge you need to tackle this common electrical problem with confidence.
What You Will Need
If you’re trying to figure out if your light switch is working correctly, you can use a voltage tester to test it. Here are the things that you will need: a voltage tester, a screwdriver, and access to the circuit breaker. Before starting, it’s essential to switch off the power to the light switch’s circuit at the circuit breaker.
Then, remove the switch cover with the screwdriver to expose the wiring and feel free to use your voltage tester to check the circuit’s voltage. Place the tester on the exposed wires and determine if the light switch is receiving power. If the tester lights up, that means there’s power going through the circuit and the light switch is working, and vice versa.
Overall, it takes just a few minutes to use a voltage tester to check the light switch, making it an easy and convenient way to confirm that your light switch is functional.
Voltage Tester
To use a voltage tester, you’ll need a few basic things. First and foremost, you’ll need the voltage tester itself. These tools are essential for anyone who wants to check the voltage of different electrical components, including wires, outlets, and switches.
There are many different types of voltage testers available, so you’ll need to select one that fits your specific needs. You’ll also need to have a basic understanding of how to use the tester and how to interpret the results. This may involve reading instructions or watching online tutorials.
Finally, you’ll need to exercise caution and be aware of potential hazards when working with electricity to avoid injury or damage to your home. With the right tools and knowledge, however, using a voltage tester can be a simple and effective way to test your electrical system and ensure that everything is functioning properly.
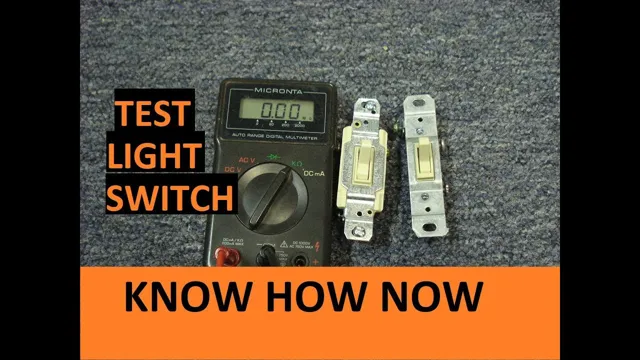
Screwdriver
To use a screwdriver effectively, you’ll need a few things beyond the tool itself. Firstly, it’s important to have the right screwdriver bits for the job at hand. Using a Phillips head screwdriver on a flathead screw can be frustrating, so make sure you have both types (and any other specific ones your task requires).
Additionally, keeping a sturdy work surface and a good set of safety glasses on hand is always recommended. It’s essential to ensure that your work area is stable and safe, as one wrong move can result in serious injury. If you’re working on a larger project, having a tool belt or organizer can also be helpful for keeping your tools organized and easily accessible.
Overall, having the necessary tools and taking appropriate safety precautions will help you successfully use a screwdriver and complete your project.
Electrical Tape
Electrical tape is a versatile and essential tool for any electrical job. It comes in a variety of colors and widths to suit any need, and it’s easy to use. Before you start using electrical tape, you’ll need a few things.
First and foremost is the tape itself. You’ll want to make sure you have enough tape on hand to complete your project without running out. A pair of scissors or a utility knife will be necessary to cut the tape to the right length.
You may also want to have a wire stripper and a pair of pliers handy. The wire stripper will make it easier to remove the insulation from the wire, making it easier to connect. The pliers will help you bend and shape the wire as needed.
With these tools and some electrical tape, you’ll be ready to tackle any electrical project that comes your way.
Preparing for Testing
If you’re having issues with a light switch not working, it’s crucial to first test it with a voltage tester. To begin, turn off the power to the light switch by flipping the breaker that controls that specific switch. Once you’ve ensured the power is off, remove the switch cover plate, making sure to not touch any wires.
Now, take your voltage tester and place one lead on the ground wire and the other on the terminal screw. If the tester reads zero volts, the power is off. However, if it does read a voltage, you either haven’t turned off the right breaker or there’s an issue with the wiring.
If there’s no power, touch one lead to the terminal screw and the other to the other wire. If the tester reads a voltage, the switch is working correctly, and the issue may be with the light bulb or fixture. But if there’s still no voltage, then there’s likely a problem with the switch that requires further investigation.
By following these steps, you can determine if the light switch is the source of the problem and how to proceed with repairs.
Switch Off the Power
When preparing to test electrical equipment, the first step is to switch off the power. This may seem obvious, but it is a crucial safety step that should not be overlooked. Turning off the power ensures that you are not at risk of electrocution and also prevents any damage to the equipment you are testing.
Before you begin, make sure you know exactly which circuits or breakers to switch off. Use caution and follow proper safety procedures at all times. By taking these important steps, you can ensure a safe and successful testing process.
Remember, safety should always be a top priority when working with electricity.
Locate the Circuit Breaker Box
Preparing to test the circuit breaker box requires some basic knowledge of its location within your home. The circuit breaker box is typically found in the basement, utility room or garage. Once you have identified its location, familiarize yourself with the individual circuit breakers.
Each circuit breaker should be labeled with the area or appliance it corresponds to. This will make it easier to locate which breaker needs to be reset in case of an outage. It is also important to ensure that the circuit breakers are properly marked, as this can prevent accidents and avoid confusion when working with electrical systems.
Taking the time to prepare for testing can save you time and headaches in the long run.
Identify the Switch Circuit
When preparing to test a switch circuit, there are a few steps you should take to ensure a successful outcome. First, it is important to identify the specific circuit you will be testing. This can often be done using an electrical diagram or by visually inspecting the circuit and tracing the wire connections.
Once you have identified the circuit, you will need to gather the necessary tools and equipment for testing. This may include a multimeter, voltage tester, and other testing instruments. It is also important to take safety precautions before testing, such as turning off power to the circuit and wearing protective gear.
By properly preparing for testing, you can ensure accurate results and avoid potential safety hazards.
Testing the Light Switch
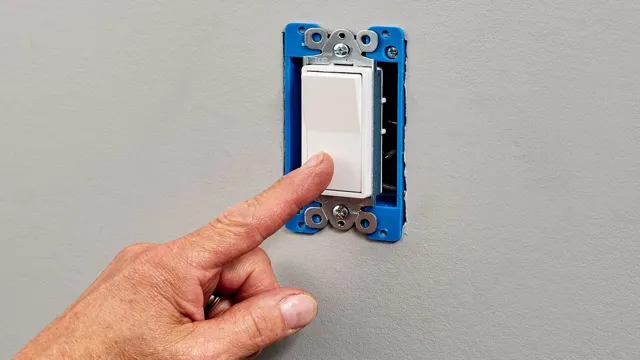
If you’re experiencing issues with a light switch, the first thing you should consider is testing it with a voltage tester. Before beginning any work, turn off the power to the switch at the breaker. Then, remove the switch plate and locate the two screws that hold the switch in place.
Carefully pull the switch out of the box and use a voltage tester to check for power. Simply touch one probe to each screw and the tester will indicate if there’s power flowing through the switch. If there’s no power, the issue may be with the wiring or the fixture itself.
Testing a light switch with a voltage tester is a crucial step in diagnosing the problem and determining the best course of action to fix it. By taking the time to properly test your switch, you can save yourself time and money in the long run.
Confirm the Power is Off
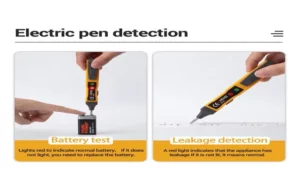
Confirming that the power is off is a crucial step when testing a light switch. This is because electricity can be dangerous and can cause serious injuries or even death if mishandled. One easy way to confirm that the power is off is by using a non-contact voltage tester.
Once you’ve turned off the breaker at the electrical panel, you simply press the tester against the wires and it will indicate whether the wire is live or not. If there is no power, you can safely proceed with testing the light switch. However, if the tester indicates there is power, do not proceed and call a licensed electrician instead.
Safety always comes first when working with electricity, so take your time and double-check that the power is off before testing your light switch.
Remove the Switch Plate Cover
When it comes to testing a light switch, the first step is to remove the switch plate cover. This can easily be done with a flathead screwdriver by gently loosening the screws in the corners of the plate. Once the plate is removed, the inner workings of the switch will be visible.
It is important to use caution during this step to prevent any damage to the switch or injury to yourself. Once the cover is off, you can proceed with testing the switch. This may involve using a multimeter to check for continuity or simply flipping the switch on and off to see if the light responds accordingly.
Remember, safety should always be a top priority when dealing with electrical components. So, take your time and proceed with caution. By following these steps, you should be able to determine if there is an issue with the light switch and take the necessary steps to fix it.
Test the Wires
Testing the wires of a light switch is a crucial step in ensuring that the circuit is safe and functioning properly. To start, it is essential to turn off the power to the switch by turning off the circuit breaker or removing the fuse. Afterward, unscrew the switch cover and use a voltage tester to determine whether the wires are live or not.
A live wire will produce a reading on the tester, indicating that it is unsafe to work with. In this case, it is best to call a licensed electrician to handle the task. Once you’ve confirmed that the wires are not live, use a wire stripper to strip the insulation off the ends of the wires.
Twist the exposed wires together, and then use a wire nut to secure them. Afterward, turn the power back on, and test the switch by flipping it on and off to ensure that the circuit is complete. By testing the wires of your light switch, you can ensure that your electrical system is safe and hazard-free.
Interpreting the Results
Testing a light switch with a voltage tester can be a simple process, but interpreting the results can sometimes be confusing. If the voltage tester shows no voltage, it means that there is no electricity flowing through the switch. This could be due to a faulty switch or a problem with the wiring.
If the voltage tester shows voltage, it means that there is electricity flowing through the switch. However, this doesn’t necessarily mean that the switch is working properly. The switch could be stuck in the on or off position, which would cause the light to not turn on or off.
It’s important to test the switch with a voltage tester during different times of the day and in various conditions to ensure accurate results. In conclusion, testing a light switch with a voltage tester is a great way to determine whether the switch is working properly or not. However, interpreting the results can sometimes be tricky, so it’s important to be thorough and take other factors into consideration as well.
Continuity Test
Continuity Test The continuity test is an important electrical testing procedure that helps to determine whether a circuit is complete or not. It involves checking for any breaks or faults in the circuit that could cause problems such as power outages or equipment failure. To interpret the results of a continuity test, you need to first understand what the test measures.
A continuity test checks for low impedance or resistance in a circuit, indicating that the circuit is complete and that electrons can flow freely through it. If the test shows a high impedance or resistance, this indicates that there is a break or fault in the circuit, which needs to be repaired before it can function properly. When interpreting the results of a continuity test, it’s important to look at the values and compare them to the expected values for the particular circuit being tested.
With this information, you can identify any issues and take appropriate action to fix the problem, ensuring that the circuit functions as intended.
Voltage Test
In any electrical system, a voltage test is essential to determine if there is a problem with the circuit. A voltage test measures the amount of electrical potential that flows through a circuit and is an important step in determining the issue with an electrical system. Understanding the results of a voltage test is crucial in assessing the overall health of an electrical circuit.
When interpreting the results, you should first compare the measured voltage to the expected voltage of the circuit. If the measured voltage is lower than expected, there may be a resistance issue in the circuit, possibly due to a damaged component or connection. If the voltage is higher than expected, there could be a risk of overheating or damage to components.
It is important to note that any voltage level above the expected reading can be dangerous and should be addressed immediately. A voltage test can provide valuable information and should be performed regularly to ensure the safety and performance of your electrical system.
Conclusion
Testing a light switch is not rocket science, but it does require some basic knowledge and the right tools. A voltage tester is a handy gadget that can help you determine whether your light switch is working properly or not. Follow these steps: turn off the power supply, remove the faceplate and screws, carefully pull the switch out of the box, test the wires with the voltage tester, and replace the switch.
Voila! You have successfully tested your light switch and prevented any potential electrical hazards. Remember, safety always comes first! So always turn off the power and use caution when dealing with electrical components. Now go forth and switch on the light, for the power is yours!”
FAQs
What equipment do I need to test a light switch with a voltage tester?
To test a light switch with a voltage tester, you will need a voltage tester, a screwdriver, and safety gloves.
How do I prepare for testing a light switch with a voltage tester?
Before testing the light switch with a voltage tester, turn off the power supply to the switch and verify that it is off. Use a non-contact voltage tester to confirm there is no voltage in the area.
How do I use a voltage tester to test a light switch?
Insert one probe of the voltage tester into the hot wire connector, and the other probe into the neutral wire connector. Turn the power supply back on and flip the switch. The voltage tester should indicate voltage within the acceptable range for the electrical system.
What is the acceptable voltage range for testing a light switch with a voltage tester?
The acceptable voltage range for testing a light switch with a voltage tester is typically between 110-120 volts for a standard electrical system.
Can I test a light switch without a voltage tester?
It is not recommended to test a light switch without a voltage tester as this could be dangerous. Always use appropriate equipment and follow safety guidelines.
What if my voltage tester does not detect any voltage in the light switch?
If the voltage tester does not detect any voltage in the light switch, it is possible that the switch is not properly wired or there is a problem with the electrical system. Consult a licensed electrician for further assistance.
Is it safe to test a light switch with a voltage tester without turning off the power supply?
No, it is not safe to test a light switch with a voltage tester without turning off the power supply. Always follow safety guidelines and turn off the power supply before testing any electrical equipment or systems.
