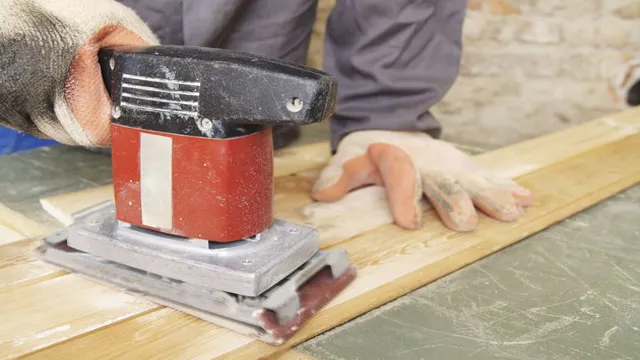
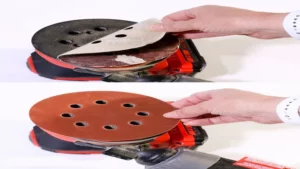
Looking to revamp your kitchen cabinets without breaking the bank? If you’re on a budget, sanding your cabinets might be the perfect solution for giving your kitchen a fresh new look! But sanding can be a daunting task, especially if you don’t have the right tools and techniques. So, we’re here to guide you through the process of sanding your cabinets with an orbital sander to help you achieve a professional look. With our step-by-step instructions and tips, you can say goodbye to outdated cabinets and hello to a modern kitchen in no time!
Safety First
If you’re planning to sand cabinets with an orbital sander, it’s crucial to put safety first. Before starting, make sure you wear protective gear like safety glasses, a dust mask, and earplugs. Ensure the sandpaper is properly attached to your orbital sander to prevent it from coming loose during use.
Select the right sandpaper grit, starting with a coarse grit, then gradually moving on to finer grits to achieve a smooth finish. Move the sander in straight, even strokes, and avoid applying too much pressure to prevent damaging the wood surface. After sanding, remove all dust and debris from the surface of the cabinets before applying paint or stain.
Following these steps will help to ensure that you sand your cabinets safely and effectively with an orbital sander.
Wear Eye and Respiratory Protection
“Eye and Respiratory Protection” When it comes to staying safe on the job, wearing eye and respiratory protection should be your top priority. These precautions are especially important in industries that involve hazardous materials or activities like welding, woodworking, or spray painting. Proper eye protection can prevent dust, debris, and harmful chemicals from getting into your eyes, while the right respiratory equipment can keep you from inhaling hazardous fumes or particles.
Not only do these safety measures protect your health in the short term, but they can also prevent long-term damage like lung disease or vision loss. So, always make sure you wear the proper eye and respiratory protection on the job – it could save your life.
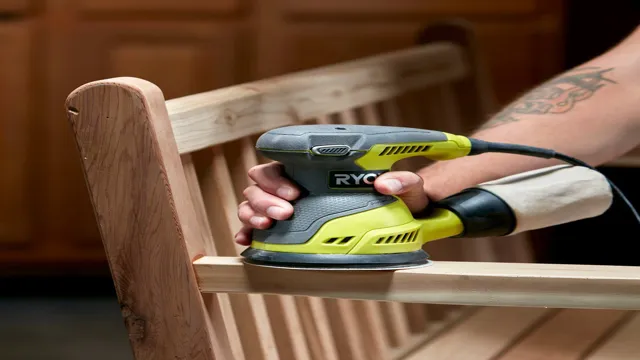
Preparation
If you’re looking to refinish your kitchen cabinets, using an orbital sander is the way to go. But before you begin sanding, it’s important to prepare the cabinets properly. Start by removing all hardware, including knobs and hinges.
This will ensure that you don’t accidentally sand them down or scratch them. Use painter’s tape to cover any areas that you don’t want to sand, such as walls or countertops. Next, use a mixture of warm water and dish soap to clean the cabinets thoroughly.
This will remove any dirt, grease, or grime that may interfere with the sanding process. Once the cabinets are clean and tape is in place, it’s time to start sanding with your orbital sander. Remember to start with a rough grit sandpaper and gradually work your way up to a finer grit, to achieve the smoothest finish possible.
With a bit of preparation and the right tools, sanding your cabinets can be a simple and satisfying DIY project.
Remove Hardware and Doors
When preparing for a home renovation project, removing hardware and doors is an important step that should not be overlooked. Not only will this make the process smoother and more seamless, but it will also help protect your furnishings and finishes from damage. To begin, take a good look at all of the doors and hardware in the room where you’ll be working.
Use a screwdriver to carefully remove any knobs, hinges, locks, and other hardware. This will make it easier to paint or stain the doors and hardware separately, and will prevent any unwanted drips or spills from ruining anything else in the room. Next, take the doors off their hinges and set them aside in a safe, clean area.
This will also make it easier to work on the room, and will give you more space to maneuver if needed. With these preparations in place, you can confidently begin your home renovation project knowing that your furniture and finishes are protected and that your work will be easier and more efficient.
Clean Cabinets
Cleaning cabinets can be a time-consuming task, but preparing before you start can make the process go more smoothly. To begin, remove any items from the cabinets and place them on a nearby surface. If you have a large number of items, consider categorizing them to make it easier to put them back in their proper place once you’re finished cleaning.
Next, check to see if there are any sticky or greasy spots on the cabinets. These can be tough to clean, so you may want to use a degreaser or all-purpose cleaner to help get the job done. Finally, gather all of the necessary cleaning supplies, including a sponge or microfiber cloth and a bucket of warm water.
With a little bit of preparation, cleaning your cabinets will be a breeze!
Choose Proper Sandpaper
If you’re tackling a cabinet refinishing project, it’s important to choose the proper sandpaper for your orbital sander. The grit of the sandpaper will determine how rough it is and how much material it can remove from the surface. If you’re starting with a rough or heavily painted surface, you’ll want to begin with a low-grit sandpaper, such as 60 or 80 grit.
As you work your way up through the grits, you can move to finer sandpapers, such as 120 or 150 grit, to smooth out any scratches or unevenness. It’s important to keep in mind that the higher the grit, the smoother the surface will be, but it will also take longer to sand. Make sure to change out your sandpaper frequently to ensure efficiency and effectiveness.
With the right sandpaper, your cabinets will look brand new in no time!
Start with Coarser Grit Sandpaper
When it comes to sanding, choosing the proper sandpaper is crucial for achieving a smooth, even finish. One tip for getting started is to begin with coarser grit sandpaper. This gives you a better foundation for smoothing out rough or uneven surfaces before moving onto finer grits.
So, how do you choose the appropriate grit level? Well, for rough surfaces or surfaces with old paint, start with a grit between 60 and 100. For surfaces that just need a light sanding or have a newer coat of paint, opt for a grit between 120 and 150. Remember, don’t skip grit levels as each level prepares the surface for the next.
You want to avoid using a fine grit too soon, as it won’t have enough power to remove the rough spots. Choosing the proper sandpaper can seem confusing, but with a little know-how, you can achieve great results.
Move onto Finer Grit Sandpaper
When it comes to sanding, using the proper grit sandpaper is crucial to ensure a smooth finish. It’s important to start with a coarser grit and gradually move onto finer ones. This is where selecting the right sandpaper comes into play.
If you’re working on a project with rough surfaces or deep scratches, start with a 60-80 grit sandpaper. As you progress, work your way up to a 120-150 grit sandpaper for a smoother finish. Finally, move onto a 220-400 grit sandpaper for a polished result.
Remember to keep an eye on your sandpaper and change it often to achieve the best results. By using the appropriate grit sandpapers for your project, you can ensure a high-quality, professional-looking finish.
Sanding Technique
If you want to know how to sand cabinets with an orbital sander, it is important to follow a few simple steps to ensure a smooth and even finish. First, remove all hardware and clean the cabinet surfaces thoroughly. Then, start with a coarse grit sandpaper, such as 80 grit, and sand in the direction of the grain.
Use light pressure and keep the sander moving to avoid uneven marks. After the cabinet has been sanded with coarse grit, switch to a fine grit sandpaper, around 220 grit, to smooth out the surface and remove any remaining roughness. Be sure to clean off all dust and debris before staining or painting the cabinets.
Using an orbital sander can save you a lot of time and energy, and with a bit of practice, you can achieve a professional-looking finish on your cabinets.
Attach Sandpaper to Orbital Sander
Attaching sandpaper to an orbital sander is an essential step before starting any sanding project. To begin, ensure that the sander is switched off and unplugged. Then, select the appropriate grit sandpaper and attach it securely using the manufacturer’s instructions.
It’s crucial to ensure that the sandpaper is smoothly and evenly attached to prevent any bumps or inconsistencies that could affect the final outcome. Once it’s firmly attached, it’s best to test out the sander on a small section before starting the entire project. This will help to identify any issues before they become more noticeable.
Remember to wear appropriate safety gear, such as protective eyewear and a mask, to protect yourself from harmful particles. By using the correct sandpaper and attaching it correctly, you can achieve a smooth, professional finish on any sanding project.
Start Sanding Cabinet Surface
Before you start sanding your cabinet, it’s important to understand the correct technique to achieve the best results. First, you’ll need a sanding block or sandpaper to create smooth and even surfaces. Start with a coarse grit sandpaper and move up to a finer grit as you work to achieve the desired finish.
Hold the sanding block firmly and move it in circular motions over the surface of the cabinet. Be sure to apply even pressure and avoid sanding at an angle to prevent scratches on the surface. As you sand, wipe away any dust and debris with a clean cloth to ensure a smooth finish.
With the right technique, your cabinet will be prepped and ready for a fresh coat of paint or stain. Remember, patience and attention to detail are key for a successful sanding job.
Move Sander in Circular Motion
When it comes to sanding, the proper technique is essential to achieving a smooth and even finish. One effective technique is to move the sander in a circular motion. This helps to prevent swirl marks and ensures that the entire surface is sanded evenly.
To do this, start by placing the sander flat against the surface and turning it on. Then, use a circular motion to move the sander across the surface, making sure to overlap each pass to prevent missed spots. It’s also important to apply even pressure and avoid applying too much pressure in one spot, as this can cause uneven sanding and damage to the surface.
With this technique, you can achieve a professional-quality finish on your sanding project.
Apply Even Pressure
When it comes to sanding, one of the most important techniques to remember is to apply even pressure. This means using the same amount of pressure across the entire surface that you are sanding, continuously checking to make sure you aren’t using too much or too little. If you use too much pressure, you risk creating uneven areas or even gouging the surface.
On the other hand, if you use too little pressure, you may not achieve the desired effect or may need to sand for a longer time. It’s important to keep in mind that the type of sandpaper you are using will also impact how much pressure you need to use. For example, a coarser grit may require more pressure while a finer grit may require less.
Applying even pressure and keeping a consistent sanding motion will result in a smoother surface and a more professional look. So next time you are sanding a DIY project, remember to take your time and apply even pressure for the best results!
Sand in the Direction of the Grain
When it comes to sanding techniques, sanding in the direction of the grain is crucial for achieving a smooth and even surface. Sanding against the grain can cause scratches, tear-outs, and an uneven finish. Sanding with the grain allows the sandpaper to follow the natural pattern of the wood, resulting in a more polished and refined look.
It’s important to use the right type of sandpaper as well, starting with a coarse grit and gradually moving to finer grits for a more refined finish. By taking your time and sanding with the grain, you’ll be able to achieve a professional look that will last for years to come. So, the next time you’re sanding, remember to work with the natural grain of the wood to ensure a smooth and flawless finish.
Finishing Touches
When it comes to sanding cabinets with an orbital sander, there are a few essential steps to follow to ensure you get the perfect finish. First, make sure to clean your cabinets thoroughly before you start sanding. You can use a tack cloth to remove any dust or debris from the surface.
Once your cabinets are clean, start sanding by using an orbital sander with medium-grit sandpaper. Sand in the direction of the wood grain to prevent any scratches or swirl marks. After sanding, wipe down the cabinets with a damp cloth to remove any remaining dust.
If you want a smoother finish, you can follow up with a fine-grit sandpaper and repeat the process. Remember to take your time and be patient. Sanding cabinets can be a time-consuming task, but the end result will be worth it.
Inspect for Any Rough Spots
When it comes to finishing touches for any project, it’s important to pay attention to even the smallest details. One thing you don’t want to overlook is inspecting for any rough spots. These can be tiny imperfections that are barely noticeable, but they can make a big difference in the overall look and feel of your work.
To ensure everything is as smooth as possible, run your hand over the surface and feel for any bumps or rough areas. If you find any, use sandpaper or a fine-grit sanding sponge to gently smooth them out. This will not only make your project look more polished but will also ensure that it is comfortable to handle.
By taking the extra time to inspect and perfect your work, you’ll be proud to show it off and say you did it yourself!
Apply Stain or Paint (Optional)
If you’re looking to give your wooden furniture or deck an extra layer of protection and a new look, applying a stain or paint is a great option. Not only will it help extend the life of the wood, but it can also add a pop of color or enhance the natural beauty of the grain. Before you start, make sure the surface is clean and dry.
Sand any rough spots or uneven areas and remove any dust or debris. Then, choose the type of stain or paint that will work best for your needs. Stains are great for highlighting the wood’s natural color while also providing UV protection and waterproofing.
Paints offer a wider range of colors and finishes and provide a thicker and more durable layer of protection. Whatever you choose, make sure to follow the manufacturer’s instructions and apply in thin, even coats to avoid drips or bubbles. With a little bit of time and effort, your wooden furniture or deck can look brand new again.
Conclusion
Now that you’ve successfully sanded those old, tired cabinets with your trusty orbital sander, you’re probably feeling pretty proud of yourself. And you should be! With a little time, patience, and some elbow grease, you’ve breathed new life into your kitchen or bathroom without breaking the bank. So go ahead, bask in the glow of your handiwork, and enjoy the compliments that are sure to come your way.
After all, there’s nothing more satisfying than transforming something old and worn into something fresh and beautiful. Cheers to the power of the orbital sander and your own DIY skills!”
Sanding Cabinets with Orbital Sander is Easy and Efficient
If you’re looking for an easy and efficient way to sand your cabinets, an orbital sander is the way to go. Not only will it save you time, but it will also give you an even finish. The key to achieving a smooth and even surface is to start with a low-grit sandpaper and work your way up to a higher-grit paper.
This will remove any imperfections or bumps in the surface. Once you’ve sanded all the surfaces, use a tack cloth to remove any dust or debris. Then, you can apply your desired finish to your cabinets.
Whether you’re staining or painting, the sanded surface will allow for a better adhesion of the finish. Remember to take your time and use caution when sanding around the edges and corners to avoid damaging the wood. With an orbital sander, achieving beautifully finished cabinets has never been easier.
FAQs
What are the benefits of using an orbital sander for cabinet sanding?
Orbital sanders are gentle on the surface and do not create swirl marks. They can also be used to sand in tight spaces.
Can I use an orbital sander for refinishing old cabinets?
Yes, an orbital sander can be used for refinishing old cabinets. However, it is important to use the right sandpaper grit for the job.
What is the best sandpaper grit to use for sanding cabinets with an orbital sander?
The best sandpaper grit to use for sanding cabinets with an orbital sander is between 120 and 150 grit.
How can I remove old paint or stain from cabinets using an orbital sander?
To remove old paint or stain from cabinets using an orbital sander, start with a low grit sandpaper and work up to a higher grit until the surface is smooth.
Can an orbital sander be used for sanding edges and corners of cabinets?
Yes, an orbital sander can be used for sanding edges and corners of cabinets if you attach a corner sanding attachment.
How often should I change the sandpaper on my orbital sander when sanding cabinets?
It is recommended to change the sandpaper on the orbital sander every 15-20 minutes or when the sandpaper is worn down.
Can I use my orbital sander to polish the surface of the cabinets after sanding?
Yes, you can use an orbital sander with a polishing pad to polish the surface of the cabinets after sanding.
