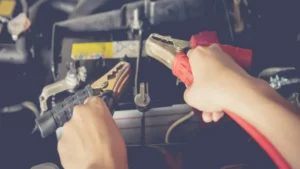
Do you have a car battery charger that stopped working properly? If you’re frustrated with trying to jump-start your car with a dead or dying battery, you’re not alone. Fortunately, there’s no need to give up just yet! Rather than running out to purchase a new charger, why not consider repairing it instead? With a little bit of effort and know-how, you can get your charger back in working order in no time. In this blog, we’ll show you step-by-step how to repair a car battery charger in an easy and efficient manner.
No need to be an expert to get the job done!
Introduction
If you’re experiencing issues with your car battery charger, don’t worry! It’s common for chargers to break or malfunction occasionally and fortunately, repairs can be made at home with just a few simple steps. Before beginning any repair work, make sure the charger is unplugged and all safety precautions are followed such as wearing gloves and eye protection. The first step is to check for loose connections, frayed wires, or a damaged plug.
If any of these issues are detected, replace the damaged part immediately. If there are no visible signs of damage, try testing the charger with a voltmeter to see if it’s producing a current. If the charger is not producing any power, the problem may be with the transformer, which can be replaced with a new one.
By following these steps, you can easily repair your car battery charger and get back on the road. Remember to always take precaution and seek professional help if needed.
What is a Car Battery Charger?
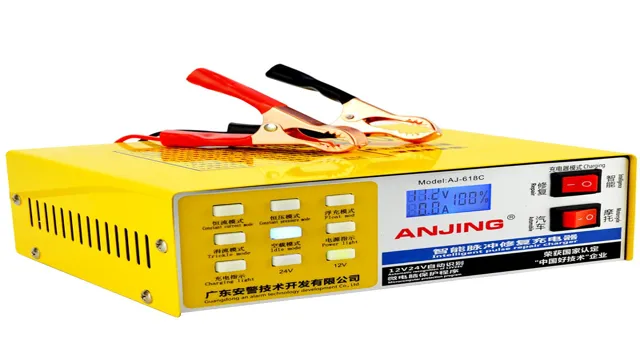
A car battery charger is a device that helps to recharge or maintain the charge of a car battery. It works by delivering an electrical charge to the battery to restore its energy. This can be helpful if your battery is low on charge or has completely drained, as you can use the charger to bring it back to life.
There are different types of car battery chargers available, including trickle chargers, portable chargers, and jump starters, each designed for specific purposes. Using a car battery charger is a simple process that can save you time and money in the long run, as it can help extend the life of your car battery and prevent the need for frequent replacements. So, if you’re looking for a way to keep your car battery in good condition, investing in a car battery charger is definitely worth considering.
Common Problems with Car Battery Chargers
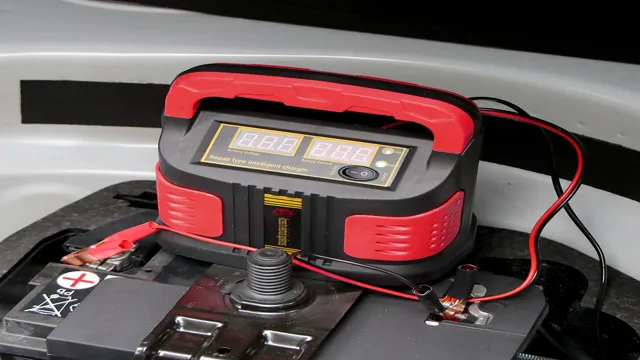
Car Battery Chargers Car battery chargers are essential tools for ensuring that your vehicle’s battery is always running at optimal levels. However, like any other electronic device, they are prone to a few common problems that may hinder their performance. Some of the most common issues that people face with car battery chargers include overcharging, undercharging, malfunctioning displays, and damaged cables.
Overcharging can lead to the battery overheating and potentially exploding, while undercharging can result in a battery that is unable to hold a charge for an extended period. Malfunctioning displays can lead to incorrect readings and prevent you from knowing the true state of your battery, while damaged cables can cause electrical faults and even pose a safety hazard. Knowing how to identify and address these issues can go a long way in ensuring that your car battery charger serves you well and keeps your vehicle’s battery running smoothly.
Diagnosing the Problem
When it comes to repairing a car battery charger, the first step is to diagnose the problem. Often, a dead battery is the culprit, but it could also be a faulty electrical connection or a malfunctioning charger. The best way to determine the issue is to use a multimeter.
With the charger unplugged, check the voltage reading of the battery. If it reads below 12 volts, it may need charging. If the battery is fully charged but still not starting the vehicle, then the charger may not be functioning properly.
Check the electrical connections to ensure they are snug and free of corrosion. If all else fails, it may be time to replace the battery charger. By identifying the issue, you can save time and money in the repair process.
Checking the Power Source
When you encounter issues with your electronic devices, the power source can often be the culprit. Without power, the device won’t function, so it’s important to check if the power supply is working properly. You can start by checking if the device is properly plugged in or if the battery is charged.
You can also check if the power outlet is live by testing it with another device. If you still can’t identify the problem, it may be a problem with the device’s internal power components, which may require professional help. It’s important to diagnose the issue with the power source first before assuming it’s a bigger problem.
By doing so, you can save yourself from unnecessary expenses and potentially fix the issue on your own.
Checking the Fuse
If you are experiencing trouble with your electrical appliances, checking the fuse is the first step in diagnosing the problem. A blown fuse is the most common cause of electrical issues and can be easily fixed by replacing it. A fuse acts as a safety device, protecting your appliances from power surges and overloads.
When the current exceeds the fuse’s rated capacity, it melts the fuse wire, breaking the circuit and cutting off the electricity supply. To check the fuse, turn off the power supply, remove the fuse, and inspect it for signs of damage or blackening. If the fuse appears intact, use a multimeter to test its continuity.
A continuity reading indicates that the fuse is working properly, while a zero reading signifies a blown fuse. Replacing the fuse is a simple task that can save you the expense of calling an electrician. However, if replacing the fuse does not solve your problem, it may be an indication of a more significant issue with your electrical system that requires professional attention.
Checking the Battery Clamps
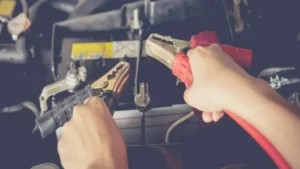
When your car won’t start, diagnosing the problem can be a frustrating and time-consuming task. One common culprit could be the battery clamps. Check them to see if they are tight and free of corrosion, and ensure that they are connected properly to the battery terminals.
Loose or corroded clamps can prevent the battery from providing enough power to start the engine, so it’s important to fix any issues with them before moving on to other potential causes. If you need to replace any of the clamps, make sure to use the right size and type for your battery. Don’t let a simple issue with the battery clamps keep you from getting where you need to go.
Take a few minutes to check them, and you might just save yourself a lot of time and hassle in the long run. So, always keep a check on your battery clamps to avoid any issues with your car.
Repairing the Charger
If you own a car battery charger, chances are it has seen some wear and tear over time, and may need some repairs. Repairing your car battery charger is a task that can be done at home if you have some basic electrical knowledge and tools. The first thing you should do is to check the charger’s fuse.
A blown fuse is a common problem with chargers, and replacing it can fix the problem. Another issue could be with the cables and the clamps. Ensure that all the connections are tight and secure.
If the cables are frayed or damaged, replace them with new ones. It’s also essential to check the charger’s battery connectors and make sure they are clean and free from corrosion. Finally, you can test the charger with a voltmeter to check the voltage output, ensuring it’s working correctly.
By following these simple steps, you can repair your car battery charger and get back to charging your car battery in no time.
Replacing the Fuse
When your phone charger stops working, it’s likely due to a blown fuse. Although it may seem daunting, replacing the fuse is a simple and cost-effective solution to repairing the charger. First, unplug the charger from the wall and any device it may be connected to.
Remove the rubber casing on the charger, which will reveal the fuse. Carefully remove the fuse and replace it with a new one of the same size and type. Once inserted, put the casing back on and plug the charger back in to test if it’s working again.
Remember to dispose of the blown fuse properly and never replace it with a higher-rated fuse as this could cause further damage to your charger. By replacing the fuse, you’ll save money in the long run and prolong the life of your charger.
Replacing the Battery Clamps
Replacing the battery clamps on a charger is a common repair needed for many people. Often times, the clamps become worn or damaged over time, which can prevent the battery from charging properly. When this happens, it’s important to replace them as soon as possible to ensure your battery stays charged and in good condition.
To replace the clamps, you’ll need a few basic tools. First, you’ll need a screwdriver to remove the old clamps. Once the old clamps are removed, you’ll need to install the new clamps by screwing them in place.
Be sure to tighten the screws securely to prevent them from coming loose while charging. Once the new clamps are in place and secure, plug in your charger and test it to make sure everything is working properly. With the new clamps installed, your battery should charge as it did when it was new, giving you peace of mind that your battery is always ready when you need it.
Replacing the Power Cord
If your power cord is not working correctly or has been damaged, you may need to replace it. A faulty power cord can make it challenging to charge your electronic devices, which can cause significant inconvenience. The good news is that replacing the power cord is relatively easy and can be done in just a few simple steps.
First, ensure that you have the correct replacement cord with the right specifications for your device. Unplug the old cord from the power source and the device before removing it. Then, plug in the new power cord and make sure it is securely attached.
Finally, plug the new cord into a power outlet and test it to ensure that it is working correctly. It’s essential to take extra precautions when handling electronic devices with power cords to avoid any damage or injury. By replacing a faulty power cord, you can save yourself time and money while ensuring that your devices remain fully charged and ready to use when you need them.
Conclusion
In conclusion, repairing a car battery charger may seem like a daunting task, but with the right tools and knowledge, it can be as easy as jumpstarting a car. Just remember to unplug the charger, check the fuse, inspect the wiring, and replace any faulty components. And if you still can’t fix it, don’t worry, there’s always a punny auto mechanic out there who can recharge your batteries.
Keep calm and charge on!”
FAQs
What are the symptoms of a faulty car battery charger?
Symptoms of a faulty car battery charger can include a dead or weak battery, slow charging, and burning or overheating of the charger.
How can I test my car battery charger?
You can test your car battery charger by using a multimeter to check the voltage output. If the voltage output is significantly below the charger’s stated output, it may be faulty.
Can a car battery charger be repaired?
Yes, a car battery charger can often be repaired. Common issues include blown fuses and faulty internal components.
What tools do I need to repair a car battery charger?
You will typically need a multimeter, soldering iron, screwdrivers, and replacement fuses or components depending on the issue.
Should I repair or replace my car battery charger?
This depends on the severity of the issue and the cost of the repair. If the cost of repairs is significantly less than the cost of a new charger, it may be worth repairing.
How do I safely repair a car battery charger?
Always unplug the charger and wear gloves and safety glasses. Follow the manufacturer’s instructions and only use replacement parts recommended for your specific charger.
Can I prevent damage to my car battery charger?
Yes, you can prevent damage by avoiding overcharging, keeping the charger clean and dry, and using it only as instructed.
