We’ve all been there – it’s time to change the oil filter on your car, but you don’t have a wrench to remove it. Don’t panic! Removing an oil filter without a wrench is easier than you think. You don’t need to be a mechanic or have any special tools to get the job done.
In fact, there are several methods you can use depending on what you have available. Not having a wrench on hand is no longer an excuse for putting off this essential car maintenance task. Let’s explore some tips and tricks for removing an oil filter without a wrench.
What You’ll Need
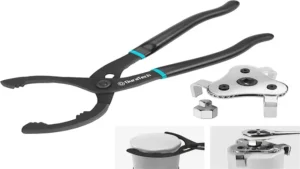
Removing an oil filter without a wrench can be a challenge, but it’s definitely doable. To get started, you’ll need a few key items: a pair of slip joint pliers, a filter wrench strap, and some gloves to protect your hands. Make sure you have a drain pan or old rags handy as well, since oil may spill out when you remove the filter.
Before attempting to remove the filter, warm up your engine for a few minutes to loosen the oil and make it easier to drain. Once the engine is warmed up, locate the oil filter and use the pliers to grip it firmly and turn it counterclockwise. Be careful not to damage the filter or your engine while doing this.
If the filter is too tight to turn by hand, wrap the filter wrench strap around it and use the slip joint pliers to help turn the strap and loosen the filter. Once the filter is loose, unscrew it the rest of the way by hand and let the remaining oil drain into the pan or onto the rags. Now that you’ve successfully removed the oil filter without a wrench, you can replace it with a new one.
Make sure to lubricate the rubber seal around the new filter with some fresh oil before screwing it on. Tighten the filter by hand until it’s snug, then turn it an additional half-turn to ensure a good seal. Finally, refill your engine with fresh oil and dispose of the old oil and filter responsibly.
With a little patience and the right tools, you’ll be able to handle your next oil change like a pro, even without a wrench.
Gloves, Safety Glasses
If you’re taking on a DIY project that involves the use of power tools or hazardous materials, it’s essential to outfit yourself with the proper safety gear. Two of the most common items you’ll need are gloves and safety glasses. Gloves come in a variety of materials, including latex, nitrile, and leather, and serve to protect your hands from sharp edges, chemicals, and hot surfaces.
When choosing gloves, be sure to select a pair that fits snugly but still allows for a full range of motion. Safety glasses are another crucial item that shouldn’t be overlooked. They protect your eyes from flying debris, dust, and harmful chemicals.
Look for glasses with shatterproof lenses and a comfortable, secure fit. With the right gloves and safety glasses, you’ll be able to tackle your DIY project with confidence, knowing that you’re doing everything you can to avoid injury.
Oil Catching Container
If you’re planning to change your car’s oil by yourself, you’ll need an oil catching container. This container is designed to collect used oil and keep your work area clean. Here’s what you’ll need to get the job done.
First, you’ll need an oil filter wrench to remove the old filter and replace it with a new one. A socket wrench set will also come in handy to remove the oil drain plug. Next, you’ll need a funnel to pour new oil into the engine without spilling it, and an oil filter plier to ensure a secure fit.
Finally, you’ll need an oil catching container, which can be purchased from your local auto parts store or online. Make sure to choose a container that can hold at least five quarts of oil to accommodate the amount of oil in your engine. With these tools in hand, you can successfully change your car’s oil and save money on mechanics’ fees.
Rubber Strap Wrench
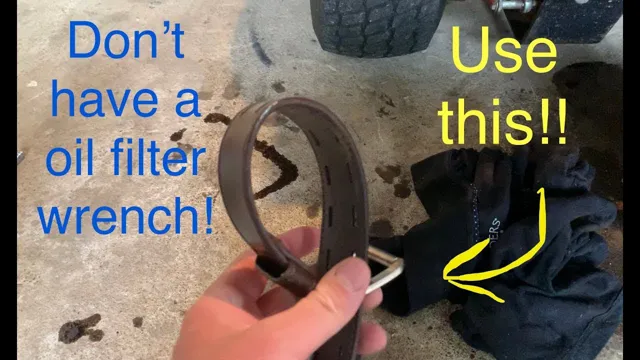
If you’ve ever struggled with opening a jar or tightening a stubborn bolt, then a rubber strap wrench may be just what you need. This tool is a type of adjustable wrench that uses a loop of rubber to grip onto surfaces securely without causing damage. To use a rubber strap wrench, you’ll need to have one in your toolbox.
They can be found at most hardware or home improvement stores and come in a variety of sizes and strengths, so choose the one that fits the job. Once you have the wrench, simply wrap the rubber loop around the object you need to turn and apply pressure to the handle to turn the object. The rubber strap provides a strong grip that won’t slip, making it an essential tool for anyone who needs to tackle tough jobs around the house or in the garage.
So next time you find yourself struggling with a stubborn jar or bolt, reach for a rubber strap wrench and make the job a little bit easier.
Step-by-Step Instructions
If you find yourself in a situation where you need to remove your oil filter, but you don’t have an oil filter wrench, don’t panic! There are still ways to get the job done. First, try using a pair of pliers to grip and twist the filter counterclockwise. Be careful not to apply too much pressure as this could damage the filter and make the situation worse.
If that doesn’t work, try using a screwdriver to puncture a hole in the filter. This will release the pressure and make it easier to twist off with your hand. Just be sure to have a drain pan underneath the filter to catch any spilled oil.
Another option is to use a rubber strap wrench, which is designed for situations like this. It’s flexible and creates a tight grip on the filter for easy removal. Remember to always wear gloves when working with oil, as it can be messy and potentially harmful to your skin.
With a little bit of elbow grease and some creativity, you can successfully remove your oil filter without having an oil filter wrench on hand.
Step 1: Let Engine Cool
When it comes to maintaining your car’s engine, there are a few simple steps you can take to ensure it runs smoothly for years to come. The first step is to make sure the engine is cool before starting any maintenance or repairs. This is important because working on a hot engine can be dangerous and cause burns.
So, wait until the engine has had time to cool down before getting started. You can check the temperature using a temperature gun or by simply touching the hood of the car. Once the engine has cooled, you can move on to the next steps in maintaining your car’s engine.
By following these simple steps, you can keep your engine running smoothly and avoid costly repairs down the line. So, take the time to let your engine cool down before getting started and enjoy the peace of mind that comes with a well-maintained car.
Step 2: Locate Oil Filter
Now that you’ve located the drain plug and drained the oil, it’s time to move on to the next step in changing your oil filter. The oil filter is typically located near the oil pan, but it can vary depending on the make and model of your vehicle. You may need to refer to your car’s manual or an online guide to determine the exact location.
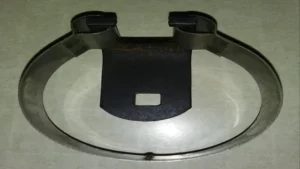
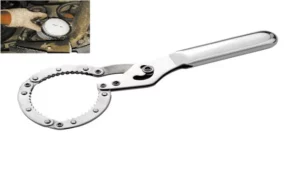
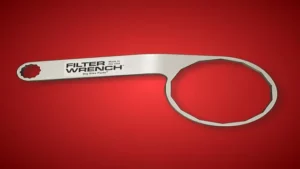
Once you’ve located the oil filter, you’ll need a filter wrench to remove it. This is a specially designed tool that fits over the filter and allows you to loosen it. Make sure you have the correct size wrench to avoid damaging the filter.
Once you’ve loosened it, you can remove the filter by hand. Be prepared for some oil to spill out, so have a container ready to catch it. It’s important to properly dispose of your used oil and filter, so check with your local auto shop or recycling center for proper disposal methods.
With the filter removed, you’re one step closer to completing your oil change and keeping your car running smoothly.
Step 3: Prepare Work Area
Preparing the work area is essential to ensure a smooth and efficient process when undertaking any project. The first thing to do is to clear the area of any unnecessary items or clutter that may impede your progress. Once the area is clean, determine the required tools and equipment and gather them together.
Ensure that all the equipment is in good working order and fully charged. If you don’t have a dedicated workspace, find a suitable working area where you won’t be disturbed. Set up your work area in such a way that you have everything easily accessible, making it easy to move from one task to another.
By preparing your work area in advance, you can save time and effort and avoid unnecessary interruptions. So, take the time to get your workspace organized, and you’ll be more productive and efficient.
Step 4: Wrap Rubber Strap Wrench Around Filter
Now that you’ve located the oil filter, it’s time to remove it with a rubber strap wrench. The rubber strap wrench is a fantastic tool that can help you grip the oil filter tightly, allowing you to turn it without slipping. To use the rubber strap wrench, wrap it around the oil filter and make sure it’s snug.
You can adjust the tightness by moving the handle of the wrench. Once you have the rubber strap wrench securely in place, apply pressure and turn it counterclockwise until it begins to loosen. This may take some effort, but be patient and keep applying pressure until the filter is completely removed.
With the rubber strap wrench, you’ll be able to remove even the most stubborn oil filters with ease and efficiency. So, put some muscle into it and remove that old filter!
Step 5: Tighten Wrench and Turn Counter-clockwise
When it comes to tightening a wrench and turning it counter-clockwise, there are a few important steps to follow. First, make sure you have the correct sized wrench for the job. Next, place the wrench on the bolt that needs to be tightened and make sure it is securely in place.
Once you have the wrench properly positioned, use your hand to tighten it as much as you can. This will ensure that the wrench doesn’t slip while you are turning it counter-clockwise. Once the wrench is tightened as much as possible, you can begin turning it in the desired direction.
Make sure you keep a firm grip on the wrench to prevent it from slipping or becoming dislodged. It’s important to remember that turning the wrench counter-clockwise is usually required to loosen the bolt or nut, so be prepared to use some force to accomplish this. Ultimately, by following these simple steps, you’ll be able to loosen and remove bolts and nuts with ease.
Step 6: Remove Filter and Clean Area
Once you have replaced the filter in your HVAC system, it’s time to remove it and clean the area. This crucial step ensures that your filter is correctly installed and that your HVAC system is functioning at optimal levels. Start by turning off the power to your HVAC system to avoid any accidents.
Then, remove the access panel and carefully slide the filter out of its slot. Take a close look at the filter to see if it needs replacing, cleaning or disposal. Next, clean the area around the slot using a clean cloth or vacuum.
Ensure there is no dirt or debris left behind. Once the area is clean, slide the filter back into its slot and secure the access panel. Finally, turn the power back on to your HVAC system and sit back, knowing that your system is running efficiently, providing you with a comfortable atmosphere you can enjoy.
Remember to replace your filter regularly to keep your system running smoothly and reduce energy costs.
Alternative Methods
Have you ever found yourself in a situation where you need to remove an oil filter, but you don’t have an oil filter wrench? Don’t worry, there are a few alternative methods that you can try. One way is to use a rubber band. All you have to do is wrap a rubber band tightly around the filter and then try to loosen it with your hands.
The rubber band will give you a better grip, and it should make the filter easier to turn. Another method is to use a pair of pliers. You can use them to grip the filter and turn it counterclockwise.
This technique may require a bit more force, but it should work if the filter isn’t too tight. If you don’t have pliers, you can also try a screwdriver. Simply place it through the filter and use it as a lever to loosen the filter.
Whatever method you choose, be sure to take your time and use caution to avoid damaging your vehicle. With a little patience and creativity, you can remove that stubborn oil filter in no time – no wrench required!
Using a Screwdriver
If you ever find yourself without a screwdriver, don’t panic! There are alternative methods you can use to tackle the task at hand. One option is to use a butter knife or even a pair of scissors as a makeshift screwdriver. Simply fit the blade into the screw head and turn it slowly, being careful not to slip and damage anything around it.
Another option is to use a coin, like a penny or a dime, as a makeshift screwdriver. Place the edge of the coin into the screw head and twist it until it starts to loosen. It may take a bit longer to get the job done, but in a pinch, these alternative methods can be a lifesaver.
Just remember to exercise caution and take your time, as these tools may not be as precise as a screwdriver and can easily slip if not used properly.
Using a Hammer and Chisel
If you’re looking to carve stones and sculpt sculptures, then using a hammer and chisel may seem like the only way to go. But did you know that there are alternative methods you can use that can be just as effective and efficient? One such method is using power tools like a grinder or a Dremel. These tools can help you create precise cuts and shapes with minimal effort on your part.
Another alternative method is using sandblasting to etch designs into the surface of the stone. This method helps to create depth and texture in your work, providing a unique and interesting finish. Ultimately, the method you choose will depend on your skill level, the type of stone you’re working with, and the desired outcome.
So, experiment with various techniques to find the best one that suits your needs and preferences. With some patience and practice, you’ll soon discover the perfect method to create stunning stone sculptures.
Wrapping Up
Removing the oil filter without a wrench may seem like a daunting task, but with the right tools and techniques, it can be done easily. One way to remove an oil filter without a wrench is to use a rubber band. Wrap the rubber band around the filter and twist it in the direction of the arrows printed on the filter.
This should loosen the filter and make it easier to unscrew by hand. Another method you can try is to use a pipe wrench or channel locks. These types of wrenches can be adjusted to fit the filter and provide extra leverage for twisting it loose.
However, be careful not to apply too much force as this can damage the filter or cause it to snap off. In conclusion, removing an oil filter without a wrench is possible if you have the right tools and a little bit of patience. By following these tips and techniques, you can save time and money by changing your oil filter on your own.
Conclusion
Next time you find yourself in a bind without an oil filter wrench, don’t panic. Simply grab a strong rubber band, jam it around the filter and give it a twist. Voila – the filter will come loose with ease, just like a magician pulling a rabbit out of a hat.
So remember, when life hands you lemons, use a rubber band to change your oil filter instead.”
FAQs
1. Do I really need an oil filter wrench to remove the oil filter? Answer: While an oil filter wrench makes the job easier, you can also remove the oil filter by hand if you have a good grip and some elbow grease. 2. Can I use a strap wrench to remove the oil filter? Answer: Yes, a strap wrench is a good alternative to an oil filter wrench and can provide enough grip to remove the filter. 3. What is the best way to loosen a stubborn oil filter? Answer: Try using a rubber band around the filter for extra grip or tapping the end of a screwdriver with a hammer to loosen the filter. 4. Are there any household items I can use to remove the oil filter? Answer: Yes, a pair of pliers or even a sturdy rubber glove can provide enough grip to turn the oil filter off. 5. How tight should the oil filter be when I replace it? Answer: You should consult your car’s manual for specific torque settings, but generally, the filter should be hand-tightened snugly, but not over-tightened. 6. What should I do if the oil filter is stuck and won’t budge? Answer: You can try using a specialized oil filter removal tool, such as a claw-type wrench, or taking the car to a professional mechanic for assistance. 7. How often should I change my oil filter? Answer: It is recommended to replace your oil filter with every oil change, which typically occurs every 5,000 to 10,000 miles, depending on your car and the type of oil used.
