Have you ever found yourself frustrated with hose clamps that just won’t budge? Removing crimp hose clamps can be a tedious task, especially if you’re not equipped with the right knowledge and tools. But don’t let that deter you from tackling this DIY project! With a bit of patience and the right techniques, you can easily remove crimp hose clamps without breaking a sweat. In this step-by-step guide, we’ll walk you through the process so that you can remove even the tightest of clamps with ease.
So grab your tools and let’s get started!
Tools Required
If you need to remove crimp hose clamps, there are a few tools that you’ll need to make the job easier. Firstly, you’ll need a pair of pliers with a wire cutter function. These will help you to cut through the crimp on the clamp.
You’ll also need a flathead screwdriver to pry open the clamp once you’ve cut through it. To avoid any messy spills, it’s a good idea to have a bucket or container to catch any excess fluid that may leak out of the hose. A rag or towel will also come in handy to clean up any spills or leaks.
If you’re planning to reuse the hose, you’ll need a hose clamp kit to secure it back in place. Remember to choose the right size and material for your specific hose. With these tools on hand, removing crimp hose clamps should be a breeze.
Pliers
If you’re going to tackle any DIY project, chances are you’ll need a good set of pliers. They come in a variety of sizes and shapes, each designed for a specific task. Don’t be overwhelmed by the selection – here are the essential types of pliers you should have in your toolbox.
First, there are slip-joint pliers, which are versatile and adjust to grip objects of various sizes. They’re great for everything from tightening a loose faucet to bending wires. Needle-nose pliers have a pointed tip that’s perfect for grabbing small items or reaching into tight spaces.
These are ideal for delicate electrical work or crafting. Finally, there are locking pliers, also known as Vise-Grips. These have a locking mechanism that allows for a strong grip on stubborn bolts or pipes.
With these three types of pliers on hand, you’ll be prepared for any project that comes your way.
Flathead Screwdriver
When tackling DIY projects at home, having the right tools is crucial for success. One of the most basic yet essential tools that every homeowner should have in their toolkit is a flathead screwdriver. This versatile tool is perfect for removing screws with a single line groove, and it’s a must-have for any repair job or installation project.
While there’s no shortage of tool options available, a flathead screwdriver is an absolute must-have tool. It’s a simple tool that consists of a long, flat blade with a single line groove on it. The blade can vary in size, but typically ranges from 3 to 12 inches long.
Additionally, the handle of the screwdriver is usually made of plastic or rubber to provide a comfortable grip. Whether you’re an experienced DIYer or a beginner, owning a flathead screwdriver is essential. It’s suitable for all kinds of projects, from simple home repairs to more complex installation jobs.
Plus, it’s relatively affordable and widely available, making it a convenient tool to have in your arsenal. In conclusion, if you’re looking to invest in a versatile and reliable tool that will help you tackle numerous DIY projects around the house, a flathead screwdriver is a great place to start. So, go ahead, add it to your toolkit, and have peace of mind knowing that you’re ready for any job that comes your way!
Step 1: Identify the Clamp Type
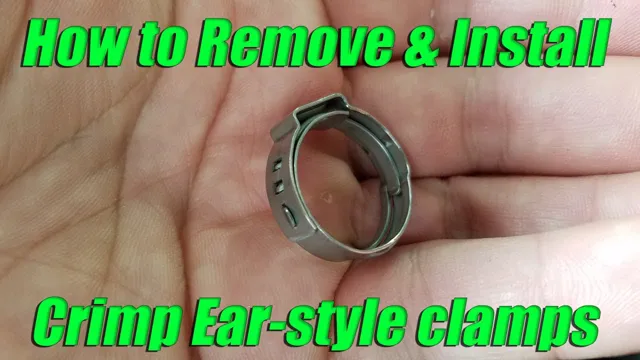
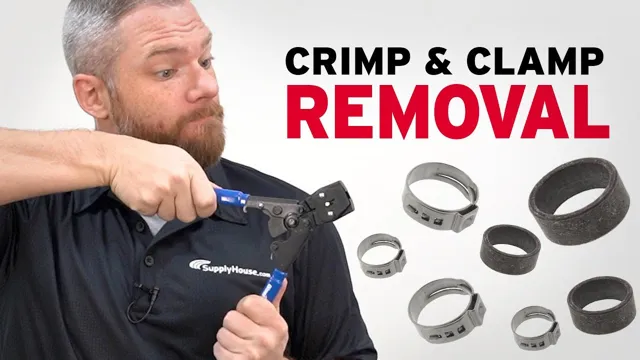
If you’re wondering how to remove a crimp hose clamp, the first step is to identify the type of clamp you are dealing with. There are two main types of crimp hose clamps – ear clamps and stepless clamps. Ear clamps have two “ears” that fold over the hose and are held in place by a crimping tool.
Stepless clamps, on the other hand, are a continuous band that can be tightened and adjusted. Once you have identified the type of clamp, you can select the appropriate tool for removal. For ear clamps, you will need a pair of pliers or a specialized ear clamp removal tool.
For stepless clamps, a pair of locking pliers or hose clamp pliers should do the trick. With the right tool and a bit of know-how, you can remove crimp hose clamps quickly and easily.
There are two types of crimp hose clamps, the ear type, and the double-ear type
When it comes to crimp hose clamps, there are two types to choose from- ear type and double-ear type. It’s essential to know the clamp type you’re working with before attempting to use it. Ear type clamps are the most commonly used hose clamps, and they have a single ear that clamps down on the hose.
The double-ear type clamp, as the name suggests, has two ears that clamp on to the hose. The double-ear type clamp is known for providing a more secure grip than the ear type clamp. To differentiate between the two clamp types, you should examine the clamp’s ears.
If the clamp has a single ear, it is an ear type clamp. On the other hand, if it has two ears, then it’s a double-ear type clamp. Identifying the clamp type is the first step towards using it correctly, and it will save you a lot of time and effort in the long run.
Step 2: Position the Pliers Correctly
When it comes to removing crimp hose clamps, correctly positioning the pliers is essential. Start by selecting the pliers that best suit the job at hand, for instance, long-nose pliers with a bent tip or specially designed hose clamp pliers. Once you have the right tool, position the pliers in such a way that they are facing the clamp’s crimped side.
Then, use the pliers’ jaws to grip the clamps’ ear, which holds the clamp in place. To ensure you have positioned the pliers correctly, test the grip’s tightness to ensure the pliers have locked onto the clamp firmly. Remember that the grip strength should be strong enough to hold the clamp while not so tight as to damage the clamp or the hose it secures.
When positioning pliers, be careful not to position them near sharp edges or objects that may puncture or damage the hose. With the pliers positioned correctly, you’re one step closer to removing the crimp hose clamp.
Position the pliers on the crimp ears of the clamp
When it comes to replacing a hose on your vehicle or fixing a leak, it’s important to have the right tools and know-how. One of the significant tools you’ll need is a pair of pliers to clamp the hoses back together. But, it’s essential to position the pliers correctly on the crimp ears of the clamp to avoid damaging the hose or creating a poor seal.
Make sure that you align the pliers’ jaws with the crimp ear and squeeze gently but firmly. Remember, the pliers’ jaws should not touch each other and, ideally, should completely cover the ear. With the right positioning, you can get a secure clamp that will withstand high pressure and prevent leaks.
So, always pay attention to the proper positioning of your pliers to make sure your hoses stay secure.
Make sure the pliers are perpendicular to the clamp ends to avoid damage
When it comes to using pliers on clamp ends, it’s crucial to position them correctly to avoid damage. The first thing you need to do is make sure that the pliers are perpendicular to the clamp ends. In simple terms, this means holding the pliers at a right angle to the clamp.
If the pliers aren’t perpendicular, there’s a high risk of causing damage to the clamp ends, which can lead to leaks and other issues down the road. So take your time and make sure that you’re holding the pliers correctly before proceeding with the clamp. Remember, a little bit of extra effort now can save you a lot of trouble in the future.
Keyword: pliers
Step 3: Squeeze the Pliers Handles
If you’ve ever wondered how to remove crimp hose clamps, look no further than step three – squeezing the pliers handles. This step is crucial in actually releasing the grip of the clamp on the hose. Start by positioning the pliers so that the jaws are on either side of the clamp’s ear.
Then, use steady pressure to close the handles of the pliers. As you squeeze, you’ll begin to feel the clamp loosen its hold on the hose. Keep applying pressure until the clamp is completely released and can be easily slid off the hose.
Remember to take it slow and steady, and don’t force the pliers or apply too much pressure too quickly, or you could damage the hose. With this step complete, you’ll be one step closer to successfully removing a crimp hose clamp and replacing it with a new one.
Squeeze the pliers’ handles until the ears deform and start to separate from the hose
When it comes to removing a hose from a connector, using pliers might seem daunting, but it’s actually a straightforward process. The third step that you need to take is to squeeze the pliers’ handles until the ears deform and start to separate from the hose. It might seem like a lot of pressure, but the pliers are designed to handle it.
Applying even pressure throughout the handles will help to ensure that you don’t bend or warp the connector or the hose. As you squeeze, you’ll see the small ears on the sides of the connector start to move away from the hose. This is a good sign that you’re on the right track.
Keep squeezing until the ears have fully separated from the hose. This will allow you to easily remove the hose and move on to the next step in the process. By taking your time and being patient, you’ll get the hose off with ease and be ready to move on to the next task.
Whether you’re a professional mechanic or a DIY enthusiast, successfully removing a hose from a connector is an accomplishment that is always worth celebrating.
Step 4: Remove the Clamp
If you need to remove crimp hose clamps, the fourth step is to release the clamp. This requires a bit of strength and patience, but it’s essential to separate the hose from the fitting. First, locate the raised area on the clamp, which indicates the point of release.
You can use a screwdriver, pliers, or a specialized clamp release tool to pry the clamp open. Press down on the raised area and pull the clamp away from the connection point. Be careful not to damage the hose or fitting in the process.
Once the clamp releases, you can remove the hose and continue with your repairs or maintenance. Remember to discard the old clamp, as reusing it can compromise the seal and cause leaks. By following these steps, you can remove crimp hose clamps efficiently and safely.
Use a flathead screwdriver to separate the remaining clamp from the hose
If you’re in the process of repairing a hose, the next step is removing the clamp. To do this, you’ll need a flathead screwdriver. Take the screwdriver and insert it into the gap between the hose and the clamp.
Twist it and push it until the clamp loosens enough for it to come off. If the clamp is really tight, you may need to put some extra force into it. Be careful not to damage the hose with the screwdriver as you work.
Once you’ve separated the clamp from the hose, you’re ready to move on to the next step. With this easy technique, you’ll have the clamp off in no time, and you can proceed with fixing your hose. Remember that safety should always be a top priority when handling any tools.
Discard the clamp properly and avoid leaving it in the environment
When it comes to using clamps in woodworking, it is essential to know how to remove and discard them properly. This will not only ensure the safety of everyone in the workspace but also prevent harm to the environment. The fourth and final step in using clamps is the removal process.
To avoid any accidents, it is best to loosen the clamp slowly and carefully. You should never force the clamp open or move it suddenly. Once the clamp is sufficiently loosened, it can be safely removed from the woodworking piece.
However, it is not enough to just discard the clamp anywhere. It is crucial to dispose of it correctly and avoid leaving it in the environment. This means putting it in the appropriate trash bin or recycling it if possible.
Remember, we all have a responsibility to protect our environment, and properly disposing of woodworking tools like clamps is a small yet crucial part of this effort.
Step 5: Replace the Hose
Now that you’ve removed the old crimp hose clamps, it’s time to replace the hose itself. First, make sure you have the correct size and type of hose for your particular project. Then, slide the new hose onto the barbed fitting, making sure it fits snugly.
Don’t forget to tighten any hose clamps that came with your new hose to ensure a secure fit. If you’re reusing old clamps, be sure to inspect them for any damage or wear and replace as needed. Once you’ve finished securing the new hose, it’s time to test it out.
Turn on the engine and check for any leaks or abnormalities. Congratulations, you’ve successfully replaced your crimp hose clamps and secured your hose for a better performing system!
Inspect the hose for damages
When it comes to inspecting your hose, it’s essential to be thorough. Check every inch of the hose, starting from where it connects to the washer and ending at the spray gun. Look for any cracks, splits, or bulges that could lead to leaks.
Additionally, if the hose feels stiff or inflexible, it may be a sign that the material is wearing thin and could burst soon. If you do detect any damage, it’s best to replace the entire hose rather than trying to patch it up. A new hose is a small investment that can save you lots of money down the road by preventing water damage to your property.
Don’t neglect your hose, or you may end up with a soggy mess on your hands!
Replace the hose if you observe any damage to avoid leaks and accidents
When it comes to hoses in our homes or vehicles, it’s easy to overlook their importance until something goes wrong. Any damage to a hose can lead to leaks, which can be hazardous and costly. That’s why it’s crucial to replace any damaged hose immediately.
If you spot cracks, bulges, or any other visible damage to the hose, it’s time to swap it out. Don’t take any chances with your safety or the integrity of your property. A hose might not be the most exciting thing to replace, but a little preventative maintenance can go a long way.
Stay safe and take care of your hoses – your home and car will thank you.
Conclusion
So there you have it, my clever hose clamp removing compatriots. Whether your crimp clamps are giving you grief or they just need to be replaced, with these simple steps you can say goodbye to frustration and hello to a successfully completed project. Just remember to be patient, persistent, and to always have a trusty pair of pliers on hand.
With these tricks up your sleeve, you’ll be a crimp clamp removal expert in no time!”
Removing crimp hose clamps can be a simple process with the right tools and steps
Now that the old hose is removed and the hose clamp is off, it’s time to replace the hose. Before doing so, it’s important to inspect the area where the hose will be attached to ensure there is no damage or debris. You may also want to apply a small amount of lubricant to the inside of the hose to make it easier to slide onto the fitting.
Place the new hose onto the fitting, making sure it goes on smoothly and evenly. Once the hose is in place, secure it with a new hose clamp. Tighten the clamp with your pliers or clamp tightening tool, making sure it is snug but not too tight.
And voila! You have successfully replaced your hose. Remember to check for any leaks or issues before operating your equipment or vehicle.
Take precautions to avoid damage to the hose and discard the clamp properly
After removing the old clamp and damaged hose, it’s time to replace it with a new one. But before you do, it’s crucial to take precautions to avoid any damage to the hose. First, make sure the new hose matches the right specifications for your vehicle or appliance.
Second, carefully slide the new hose into place, avoiding any kinks or twists in the process. Be gentle and don’t force the hose into place, or you might cause it to burst or become damaged. Once in position, secure the hose in place with a new clamp.
But don’t just throw away the old one! Discard the clamp properly, along with any other damaged components, to prevent any harm to the environment. Finally, make sure to inspect the hose regularly and replace it as needed to avoid any potential hazards or malfunctions. Remember, taking the proper precautions during hose replacement can ensure the longevity and effectiveness of your equipment.
FAQs
What are crimp hose clamps and why are they used?
Crimp hose clamps are devices used to secure hoses onto fittings. They are used because they provide a secure and tight seal.
How do crimp hose clamps work?
Crimp hose clamps work by compressing the hose onto the fitting using pliers or a crimping tool, creating a tight seal.
Can crimp hose clamps be reused?
No, crimp hose clamps should never be reused as they have already been compressed and will not provide the same level of security the second time around.
What size crimp hose clamp do I need for my hose?
The size of crimp hose clamp needed for your hose will vary depending on the diameter of your hose. It is important to measure the diameter of your hose before purchasing a crimp hose clamp.
How do I remove crimp hose clamps?
To remove crimp hose clamps, use a pair of wire cutters to cut them off. Be sure to wear safety glasses and use caution when cutting so as not to damage the hose or fitting.
Can I use a different type of clamp instead of a crimp hose clamp?
Yes, there are other types of hose clamps available, such as screw clamps or spring clamps, that can be used instead of crimp hose clamps.
What do I do if a crimp hose clamp is too tight or won’t fit on my hose?
If a crimp hose clamp is too tight or won’t fit on your hose, try using a different size or type of clamp. Or, consult with a professional to ensure you are using the correct size and type of clamp for your application.
