How Long to Leave Clamps on Glued Wood: A Comprehensive Guide

Have you ever finished gluing together a woodworking project, only to start wondering how long to leave the clamps on? It’s a common question among woodworkers, and the answer is not always straightforward. As with most things in woodworking, it depends on various factors, including the type of wood, the glue used, and the temperature and humidity in your workshop. Leaving the clamps on for too long or not long enough can affect the strength of the bond, so it’s essential to get it right.
In this blog post, we’ll dive into the specifics of how long to leave clamps on glued wood and what factors to consider. Let’s get started!
Understanding Wood Glue and Clamping
If you’re wondering how long to leave clamps on glued wood, it depends on a few factors. Firstly, the type of wood glue you’re using will affect drying time. PVA glue usually requires around 30 minutes to an hour to dry, while polyurethane glue may take up to 24 hours.
In addition, the thickness and size of the wood pieces you’re gluing together will also impact drying time. Generally, it’s best to leave clamps on for at least a few hours to ensure a strong bond. However, make sure not to overtighten the clamps as this can cause damage to the wood and weaken the bond.
You can check if the glue is dry by tapping the wood with your finger – if it feels hard and doesn’t leave an indent, it’s likely ready to be unclamped. Remember to always follow the manufacturer’s guidelines for the specific wood glue you’re using to ensure the best results.
Types of Wood Glue
When it comes to woodworking, choosing the right wood glue is just as important as selecting the right type of wood. There are several types of wood glue available, each with specific properties and areas of application. The most common types of wood glue are polyvinyl acetate or PVA glue, epoxy glue, hide glue, and cyanoacrylate or superglue.
PVA glue is ideal for general woodworking projects and can be used on most types of wood. Epoxy glue, on the other hand, is stronger and creates a waterproof bond, making it ideal for outdoor projects. Hide glue is a traditional wood glue with a long history of use in the furniture industry and is ideal for restoring antique furniture.
Superglue is the quickest drying glue and is useful for small woodworking projects. To ensure the glue creates a strong bond, clamping is crucial. Adequate pressure and time are necessary for the glue to dry and set properly.
Overall, understanding the different types of wood glues and clamping techniques is essential to ensuring a successful woodworking project.

Clamps and their Purpose
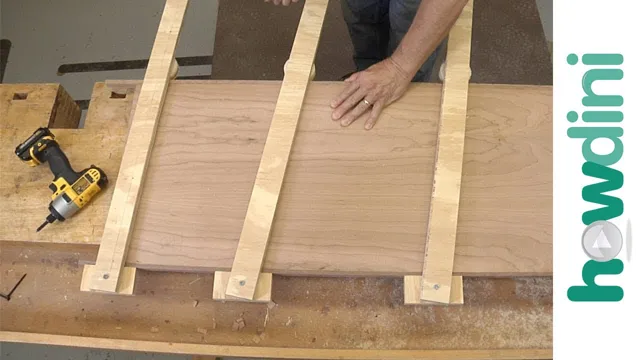
Clamps When working with wood glue, clamps are an essential tool for ensuring a strong bond between wood pieces. Clamps come in various sizes and shapes, each with a specific purpose. The most common type of clamp used in woodworking is the bar clamp.
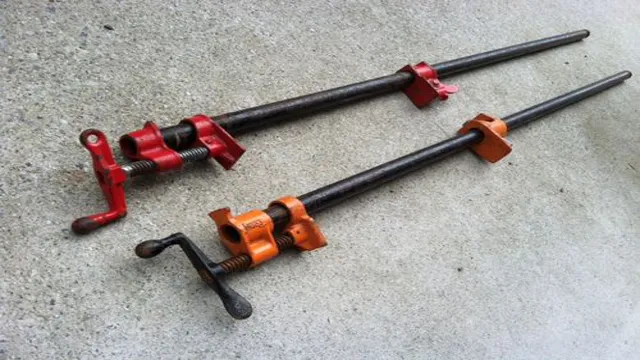
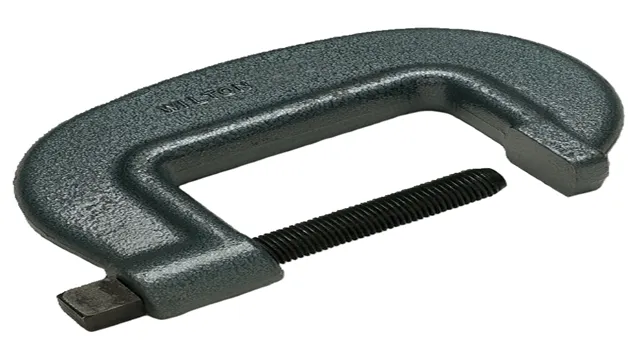
It consists of two long bars connected by a screw mechanism that allows you to adjust the clamp’s length. Bar clamps are ideal for clamping together large or irregularly shaped pieces of wood. Other types of clamps include C-clamps, spring clamps, and pipe clamps.
Each of these clamps is best suited for a specific type of project depending on the size and shape of the wood pieces involved. Using clamps correctly is crucial for ensuring an effective glue joint. When applying glue, be sure to spread it evenly on both surfaces of the wood and clamp the pieces tightly together.
Avoid squeezing out too much glue, as excess glue can lead to a weak bond. The amount of time required for the glue to dry will depend on the type of glue used and the temperature and humidity of the workspace. Remember to remove the clamps carefully once the glue has dried completely to avoid damaging the wood.
Overall, clamps are critical tools for achieving a strong bond when working with wood glue. Choosing the right type of clamp will depend on the size and shape of the project, and using them correctly will ensure a successful outcome. So, next time you’re working on your woodworking project, don’t forget your clamps!
Factors Affecting Clamp Time
When it comes to woodworking, one of the most important aspects of creating a sturdy structure is the glue-up process. But how long to leave clamps on glued wood can be a tricky question to answer. Several factors can affect clamp time, including the type of wood being used, the humidity in the environment, the type of glue used, and the temperature.
For example, a hardwood like oak requires longer clamp time than a softwood like pine. Similarly, high humidity can slow down the drying time of glue, requiring longer clamp time. Temperature also plays a significant role, with colder temperatures slowing down the glue drying process.
It’s essential to follow the manufacturer’s recommended clamp time and ensure the glue is completely dry before removing the clamps. Rushing the clamp time can result in weak joints or even complete failure of the project. Therefore, take the time to assess the factors that affect clamp time and adjust accordingly to create a long-lasting, sturdy structure.
Wood Type and Moisture Content
When it comes to woodworking, the type of wood you’re using and its moisture content play a big role in determining the appropriate clamp time for your project. Different types of wood have varying levels of density, which can affect the amount of time needed for glue to dry and set properly. Likewise, wood that is too moist can also impact the clamp time.
This is because as the moisture evaporates, the wood can shrink, leading to cracks and structural issues. To avoid these problems, it’s important to use a moisture meter to test your wood before beginning your project. Additionally, applying a pre-glue coating to the wood can help control the moisture levels, improve adhesion, and reduce clamp time.
Overall, understanding the ins and outs of wood types and moisture content will help ensure a successful woodworking project.
Glue Type and Application Process
When it comes to woodworking, one of the most important steps is gluing pieces together. However, getting the right glue type and applying it properly can be tricky. One factor that affects the clamp time, or the time it takes for the pieces to bond, is the type of glue used.
For example, PVA glue dries faster than hide glue, which needs more time to set. Temperature and humidity also play a role, as higher temperatures and lower humidity can speed up the drying process. Another factor is the amount of adhesive used, as too much or too little can affect the bond strength and clamp time.
To ensure a successful bond, it’s important to follow the manufacturer’s recommended application process and consider these factors when selecting and applying glue. With the right glue and techniques, you can create strong and long-lasting woodworking projects.
Clamp Time Guidelines
When it comes to woodworking, gluing pieces of wood together is a common technique. The use of clamps is essential to keep the two pieces of wood in place while the glue dries. But how long should you leave the clamps on the glued wood? The answer depends on various factors, such as the type of glue you are using, the type of wood you are gluing, and the humidity and temperature of your workspace.
As a general guideline, most woodworkers suggest leaving the clamps on for at least 30 minutes to an hour for PVA and yellow glue. However, some experts recommend leaving the clamps on overnight for the best results. On the other hand, if you are using epoxy glue, you can remove the clamps in as little as 5-10 minutes.
It is important to note that removing the clamps too soon can cause the glued wood to shift or separate, while leaving them on for too long can create uneven pressure and damage the wood. As such, it is crucial to do your research and follow the manufacturer’s recommendations.
Manufacturer Recommendations
When it comes to clamping times, manufacturers often provide guidelines based on specific types of adhesive. Following these recommendations is crucial to ensure optimal bond strength and durability. Typically, clamp times can vary anywhere from a few minutes to several hours, depending on the type of adhesive used and the materials being bonded.
For example, cyanoacrylate adhesives, also known as superglue, require only a few seconds of clamp time, while epoxies may require several hours. It’s important to note that deviations from the recommended clamp time can result in weaker bonds or even complete failure. Additionally, external factors such as temperature and humidity can affect the effectiveness of the adhesive and should be taken into consideration when determining the appropriate clamp time.
By following the manufacturer’s recommendations for clamp time, you can ensure that your adhesive bonds are strong and long-lasting.
Common Practice Guidelines
When performing surgery, one important aspect to consider is how long to apply the surgical clamp. The clamp helps stop the flow of blood, which is necessary in certain operations, but leaving it on for too long can cause damage to the surrounding tissue. Guidelines recommend that the clamp be left on for no more than 90 minutes and ideally no longer than 60 minutes.
Anything beyond that time frame can lead to tissue damage, impaired healing, and longer recovery times for the patient. It’s important for surgeons to monitor the clamp time closely and adhere to these guidelines to ensure the best possible outcome for the patient.
Tips for Successful Clamping
When it comes to successful woodworking projects, clamping is one of the most important steps. But how long should you leave clamps on glued wood? As a general rule of thumb, it’s recommended to leave clamps on for at least 30 minutes to an hour, depending on the type of wood and the ambient temperature. However, always consult the adhesive product’s instructions for specific clamp time recommendations.
It’s also important to ensure that you’re using enough clamps to evenly distribute the pressure across the surface area. Too little pressure can result in weak joints that may break apart over time. Additionally, using protective blocks between the clamp and the wood can help prevent damage to the surface.
Overall, taking the time to properly clamp your glued wood can lead to stronger, more durable creations that will last for years to come.
Prepare Your Materials
When it comes to successful clamping, there are a few key tips to keep in mind to ensure that your materials are properly secured. Firstly, make sure that the materials you are clamping are clean and free from any debris that could affect the placement of the clamp. It’s also important to choose the right size and type of clamp for the materials you are working with – a clamp that is too small or too weak can lead to slippage and uneven force distribution, while a clamp that is too large or too strong can damage or warp the material.
Additionally, take care to position the clamp at the correct angle to apply even pressure, and be mindful of any pressure points or vulnerable areas that could be damaged by the clamp. By following these tips and taking the time to prepare your materials properly, you can achieve a secure, stable clamp that will help you to complete your project with ease.
Properly Position Clamps
Properly positioning clamps is crucial to ensure a successful woodworking project. Firstly, it’s crucial to select the right type of clamp for your project. There are various types of clamps available like spring clamps, bar clamps, C-clamp, pipe clamps, and hand screws.
Once you have selected the right clamp, positioning them correctly becomes the next step. Make sure that the clamp is parallel to the workpiece and situated at the right angle. You should never position a clamp on the edge of the workpiece, as it can damage the surface by leaving marks.
Additionally, clamps should not be placed too far apart, as it can cause the boards to bow. By following these tips, you will guarantee a successful woodworking project while keeping your workpieces intact.
Remove Excess Glue
When it comes to woodworking and other DIY projects, clamping is an essential step for a successful outcome. However, simply clamping isn’t enough to guarantee a strong bond. It’s crucial to remove any excess glue before it dries.
Excess glue can harden and create uneven surfaces, making it difficult to achieve a clean finish. Removing excess glue can be done with a simple tool known as a glue scraper or simply with a chisel. Be careful not to damage the wood while scraping, and take the time to ensure all excess glue is removed.
It may seem like a small step, but it can make a big difference in the final result of your project. By utilizing this tip, you’ll ensure that your clamped pieces remain smooth and even, providing a strong bond that will stand the test of time. So, next time you’re working on a project, don’t forget to remove any excess glue before it dries for the best possible outcome.
Conclusion
In conclusion, leaving clamps on glued wood for the appropriate amount of time is like waiting for a perfectly brewed cup of coffee. You can’t rush the process and expect a satisfying outcome. Patience is key in ensuring that your wooden creation holds up to your high standards.
So, take a sip of your coffee and relax as you watch the glue dry, knowing that your hard work will pay off in the end.”
FAQs
1. How long should clamps be left on glued wood? A: It’s recommended to leave the clamps on for at least an hour, but it ultimately depends on the type of glue used and the thickness of the wood. Check the manufacturer’s instructions for more specific guidance. 2. Can leaving clamps on for too long damage the wood? A: Yes, leaving clamps on for too long can actually cause damage to the wood. It can compress the fibers and create indents or marks. Be sure to remove the clamps once the recommended drying time has passed. 3. What type of clamps are best for woodworking projects? A: There are many types of clamps available, but bar clamps and pipe clamps tend to be the most popular for woodworking projects. They provide even pressure and are adjustable to fit different sizes of materials. 4. Are there any tips for using clamps to ensure a strong bond? A: Yes, make sure that the surfaces being glued together are clean and free of debris. Apply pressure evenly with the clamps and use enough glue to create a strong bond. Also, be sure to follow the recommended drying time for the type of glue being used. 5. Can multiple clamps be used on the same piece of wood? A: Yes, it’s possible to use multiple clamps on the same piece of wood to provide even pressure across the entire surface. Just be careful not to overdo it and damage the wood with too much pressure. 6. Is it necessary to clamp every joint when working with wood? A: It’s not always necessary to clamp every joint, but it’s generally a good practice to ensure a strong bond. Use your judgment based on the size and complexity of the project. 7. How can you tell when the glue has fully cured? A: The glue will typically dry to a hard, tacky consistency and change color once it’s fully cured. Check the manufacturer’s instructions for more specific guidance on the type of glue being used.

