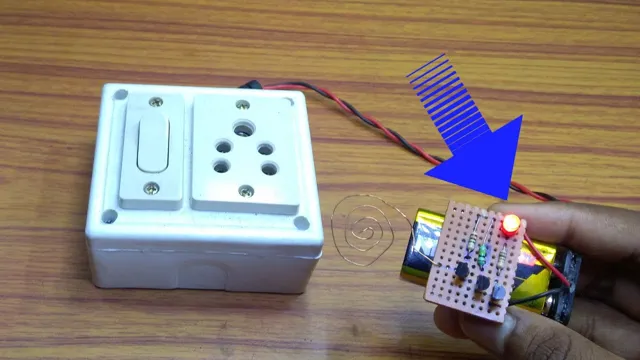
Have you ever found yourself needing to test for voltage but didn’t have a voltage tester handy? Don’t worry, making your own non-contact voltage tester is easier than you think. With just a few simple materials that can be found at any hardware store, you can build a device that will allow you to test for voltage without even touching the wires. Not only is this convenient, but it’s also much safer than using a traditional voltage tester.
In this blog post, we will guide you step-by-step on how to make your very own non-contact voltage tester. Get ready to become your own DIY electrician!
Introduction
If you’re looking to make a non-contact voltage tester, you’ve come to the right place! This handy tool lets you check electrical circuits without touching any wires, making it a safer and more efficient alternative to traditional testers. To make your own, you’ll need a few key components – a high impedance amplifier, a voltage regulator, and an LED indicator. Don’t worry if you’re not an electrical expert – there are plenty of guides available online that walk you through the process step by step.
Once you have the components assembled, you can calibrate the device by adjusting a potentiometer until the LED glows when near a voltage source. With a little bit of tinkering and some patience, you’ll have your very own non-contact voltage tester up and running in no time. So why not give it a try and take control of your electrical safety?
What is a non-contact voltage tester?
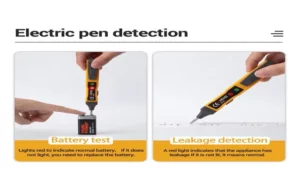
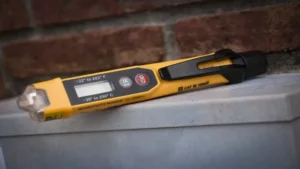
A non-contact voltage tester is a handheld device that detects the presence of voltage in electrical circuits without touching them. In other words, it can tell you if there is any live electrical current in a particular area without requiring any direct contact. This device is commonly used by electricians and DIY enthusiasts to check the status of electrical outlets, switches, and fixtures.
Non-contact voltage testers use a sensor that detects the electromagnetic field generated by live wires, and often feature visual and audible indicators to alert the user of the presence of voltage. This handy device can help identify potential hazards and prevent electrical accidents. If you’re working with electricity, it’s always a good idea to have a non-contact voltage tester in your toolkit.
Why make a DIY non-contact voltage tester?
Making a DIY non-contact voltage tester might seem like a daunting task, but it can be a practical and cost-effective solution for anyone working with electrical appliances or circuits. In today’s world, electricity plays a significant role in our daily lives, and it is crucial to check for voltage before handling any electrical appliance or circuit. A non-contact voltage tester is a device that detects voltage without physical contact with the electrical conductor, making it a safer option.
By making a DIY non-contact voltage tester, you can save money and customize the features to suit your specific needs. Additionally, it is an excellent opportunity to learn about electronics while ensuring safety in your electrical dealings. In this blog post, we will dive into the reasons why making a DIY non-contact voltage tester is a great idea, and provide a step-by-step guide on how to make one.
Materials Needed
To make a non contact voltage tester, you’ll need a few materials to get started. The most important item is a voltage detector probe which can be found at most hardware stores or online. You’ll also need a battery and a small LED bulb to test the voltage.
Other handy items to have on hand are electrical tape, wire strippers, and a small screwdriver. Once you have your materials, you’re ready to begin assembling your non contact voltage tester. This tool is essential for any DIYer or electrician as it allows you to detect the presence of an electrical current without having to touch the wires directly, ensuring your safety during any electrical project.
By following the proper steps and using the right materials, you can easily create your own non contact voltage tester in no time!
List of materials needed for DIY non-contact voltage tester
If you’re planning to make your own non-contact voltage tester, here’s a list of materials you’ll need. Firstly, you’ll need a high impedance amplifier, specifically an operational amplifier or op-amp. This component is essential for detecting voltage as it allows the tester to detect fluctuations in voltage, even at low levels.
You’ll also need a light-emitting diode or LED, which will serve as the visual indicator that voltage is present. To power up your circuit, you’ll need batteries, preferably two 9-volt batteries. You’ll also need a few resistors and capacitors to regulate the voltage and current levels in your circuit.
Finally, you’ll need a few wires to connect all the components together. With these basic materials, you’ll be able to assemble a functional non-contact voltage tester that can detect AC voltage levels without having to touch or make any physical contact with the electrical system.
Building the Voltage Tester
If you’re looking for a quick and easy way to test for voltage without having to physically touch any wires, then making a non-contact voltage tester might be just what you need. To begin, gather the necessary materials: a battery, a resistor, some wire, and an LED light. Then, attach the wire to the resistor and LED, connecting the other ends to the battery (making sure the LED is connected to the wire, not directly to the battery).
Once you have completed the circuit, test your voltage tester by holding the wire near a live wire. If the LED lights up, then it’s working correctly. This is an excellent tool to have on hand if you’re working with electrical circuits and want to ensure your safety.
Just remember to always exercise caution and follow proper electrical safety procedures when working with electricity.
Step 1: Prepare the materials
As we begin our journey to building a voltage tester, the first step is to prepare all the necessary materials. Some essential items required for this project include a breadboard, a voltage regulator, resistors, capacitors, and a voltmeter. You’ll also need wires, a soldering iron, and solder to connect everything together.
It’s crucial to double-check your materials list before getting started to ensure you have everything you need. Building a voltage tester may seem daunting, but with the right materials, it can be a fun and straightforward project. So, gather your materials, roll up your sleeves, and let’s get started!
Step 2: Assemble the voltage tester circuit
To assemble the voltage tester circuit, you’ll need a few crucial components, including a battery, a LED light, and a resistor. Start by attaching the resistor to the LED’s positive leg and then connecting the negative leg to the battery. It’s important to ensure that the voltage rating of the resistor is appropriate for the LED, as this can impact the circuit’s efficiency and performance.
Once you’ve made these initial connections, you’ll then need to connect a probe to each end of the circuit to allow you to measure the voltage. You can use alligator clips to connect the probes, or you can attach them using solder. Finally, you should enclose the circuit in a protective casing or housing to prevent any accidental contact with the electrical components.
By following these steps, you’ll have assembled a reliable and effective voltage tester that can be used to measure the voltage of a variety of different electrical systems.
Step 3: Build the probe
When building a voltage tester, the probe is an essential component. To begin, gather a few materials such as a screwdriver, a length of wire, and a small LED light. First, strip one end of the wire and wrap it around the screwdriver, looping it around a few times.
Secure the wire in place by twisting it around itself. Next, attach the LED light by twisting the other end of the wire around the base of the light. The final step involves insulating the screwdriver handle with electrical tape to avoid any accidents.
To use the voltage tester, touch the screwdriver tip to the circuit or wire being tested, and the LED light will illuminate if there is voltage present. This simple yet effective probe can be a great asset when working with electrical circuits, as it helps identify potential hazards and ensure your safety. With a little bit of patience and some basic tools, building the probe for your voltage tester becomes a breeze!
Step 4: Test the voltage tester
Now that you’ve finished building your voltage tester, it’s time to put it to the test. Before testing it on an outlet or electrical source, it’s important to first ensure that the tester itself is working properly. To do this, you’ll need to conduct a simple test using a known voltage source.
The most common and readily available source for this is a 9-volt battery. To start the test, touch the negative lead of the voltage tester to the negative terminal of the battery, and the positive lead to the positive terminal. If the tester is functioning properly, the light should turn on or the meter should register a voltage reading.
If it doesn’t, go back and check your wiring and connections. It’s important to note that you should never test your voltage tester on an electrical source without first conducting this simple test. This can be dangerous and potentially cause harm to both yourself and the electrical device you’re testing.
By testing your voltage tester beforehand, you can ensure that it’s working properly and accurately measure the voltage of your electrical source.
Using the Voltage Tester
If you’re planning on doing some electrical work, it’s important to know how to use a voltage tester to check for live wires. One simple way to make a non-contact voltage tester is to use an LED and some resistors. First, gather a green LED, two 22k ohm resistors, a 9-volt battery, and a piece of wire.
Begin by connecting one end of each resistor to the LED’s longer lead and the other end to the battery’s positive terminal. Touch the battery’s negative terminal to the LED’s shorter lead. You can then use the wire to test for voltage by holding it close to the wire or terminal you want to test.
If there’s voltage, the LED will light up. It’s important to remember that this type of tester only detects the presence of voltage, not the amount. Always take the necessary precautions when working with electricity and test wires before touching them.
How to safely use the non-contact voltage tester
If you’re looking to use a non-contact voltage tester, consider these precautions before getting started. The first step is to familiarize yourself with the device and to ensure that the batteries are fully charged. Then, it’s important to hold the tester close to the wire and not to touch it to avoid shocks.
When testing, always start on the lower voltage setting and work your way up. Additionally, always keep your fingers and other body parts away from the metal tips of the tester, and be careful not to accidentally touch anything that is grounded while holding the tester. Remember, proper use of the voltage tester can help keep you safe and prevent electrical harm.
Examples of where to use the voltage tester
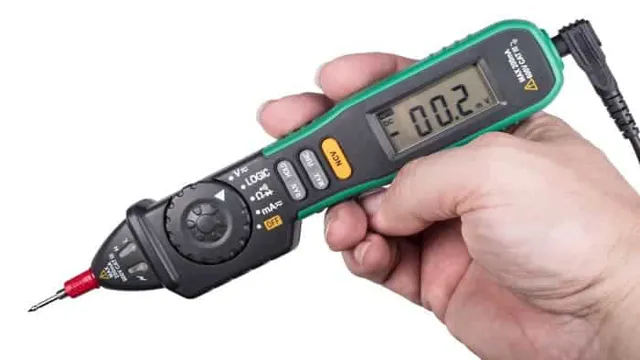
A voltage tester is a handy tool that can be used for electrical inspections and maintenance. There are several situations where a voltage tester can be used, such as testing for the presence of voltage in an electrical outlet, checking the continuity of a circuit, verifying the proper functioning of a light switch or dimmer, and tracing wires. Voltage testers come in different forms, including non-contact testers, neon testers, and digital testers.
Depending on the type of tester, the user may need to touch the test leads to the object being tested or simply hold the tester close to the object. The main advantage of using a voltage tester is safety, as it helps identify potential electrical hazards and prevent accidents. By using a voltage tester, one can ensure that the electrical system is working as expected and avoid costly repair bills.
Conclusion
So there you have it, folks! Making a non-contact voltage tester may seem like a complicated task, but with a few basic tools and a little bit of know-how, you can create a handy tool for testing electrical circuits without even touching them. As with any DIY project, just be sure to take the proper safety precautions and follow the instructions carefully. And who knows? Maybe you’ll impress all your friends with your newfound electrical expertise.
Just don’t go shocking yourself in the process!”
Recap of the steps to make a non-contact voltage tester
Using the non-contact voltage tester you just made is simple and straightforward. Start by turning on the device and holding it close to the electrical source you want to test. The proximity sensor will detect any electrical current, and the indicator light will flash or beep to alert you.
Remember never to touch the electrical source when testing for voltage with this tool. The advantage of this device is that it is entirely safe to use, and you don’t have to make direct contact with the electrical source to detect voltage, which can be potentially hazardous. This voltage tester is portable, making it ideal to carry around and use whenever needed.
With this homemade non-contact voltage tester, you can quickly and conveniently identify electrical currents, making it a valuable tool for any DIY electrical project.
Importance of safety when handling electrical materials
When it comes to dealing with electrical materials, safety should always be the number one priority. One way to ensure your safety while working with electrical materials is by using a voltage tester. This tool can detect if there is any electrical current running through a wire or an item by measuring the voltage.
It’s important to make sure the voltage tester is working properly before use, so ensure that the batteries are charged and the leads are connected tightly. When you’re ready to use the voltage tester, make sure to hold it correctly and touch it to the wire or item that you want to test. Always take necessary precautions and use appropriate protective gear such as gloves, goggles, and closed-toe shoes.
By using a voltage tester, you can help prevent accidents and injury while working with electrical materials.
FAQs
What materials do I need to make a non-contact voltage tester?
You will need a high-impedance amplifier, a pickup coil, and a rectifier circuit.
Can I use a non-contact voltage tester to detect voltage in AC and DC circuits?
It depends on the design of your tester. Some testers are only able to detect AC voltage, while others can detect both AC and DC voltage.
How accurate are non-contact voltage testers?
Non-contact voltage testers are typically accurate within a range of ±10-15% of the measured voltage.
What is the range of voltage that a non-contact voltage tester can detect?
The range of a non-contact voltage tester can vary, but most testers are able to detect voltage between 50-1000 volts.
Can a non-contact voltage tester detect voltage through insulation or walls?
Some advanced non-contact voltage testers are able to detect voltage through insulation or walls, but this feature is not standard in all testers.
Is it safe to use a non-contact voltage tester to detect voltage in live electrical circuits?
Yes, non-contact voltage testers are designed to be safe to use in live electrical circuits as they do not require direct contact with the circuit.
How do I know if my non-contact voltage tester is working properly?
You can test your non-contact voltage tester by using it to detect voltage in a known live circuit. If it detects the voltage accurately, then it is working properly.
