If you’re a car enthusiast, you know how frustrating it can be to deal with a spongy or unresponsive brake pedal. Chances are, you may need to bleed your brakes to get them working properly. While there are many ways to do this, using a pressure brake bleeder is an easy and effective method that many DIY mechanics swear by.
A pressure brake bleeder is a tool that can pressurize your brake system, forcing air out and improving your brake pedal response. While you can purchase a brake bleeder kit, making your own pressure brake bleeder can save you a lot of money and offer the satisfaction of completing the project yourself. With a few basic parts and some easy-to-follow instructions, you can make your own pressure brake bleeder.
In this guide, we’ll walk you through the steps so you can get your brakes working like new again. Whether you’re a seasoned DIY mechanic or just starting out, this project is a great way to improve your car’s performance and learn more about how your brake system works. So, sit back, grab some tools, and let’s get started!
Overview of Pressure Brake Bleeders
If you’re a car enthusiast, you already know how frustrating it can be to have air in your brake system. That’s why many people turn to pressure brake bleeders to get the job done right. A pressure brake bleeder uses pressure to force brake fluid through the brake lines and flush out any air bubbles.
To make a pressure brake bleeder at home, you’ll need a few tools and some basic DIY skills. The key component is a pump that can create the necessary pressure. This can be a hand pump or a compressed air pump.
You’ll also need a fluid reservoir, a bleeder valve adapter, and some clear tubing. With these tools in hand, you can easily create a pressure brake bleeder that will save you time, money, and frustration in the long run.
What is a pressure brake bleeder?
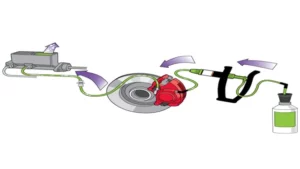
A pressure brake bleeder is a device that assists in the brake bleeding process. This tool increases the pressure in the brake system, enabling the mechanic to flush out any air or moisture trapped inside. The bleeder has a pressurized tank that is connected to the brake system through a hose.
When the pressure is increased, the brake fluid is forced out through the bleeder valves, effectively ridding the system of any unwanted substances. One major advantage of using a pressure brake bleeder is that it ensures all the air in the system is eliminated, resulting in brakes that feel firm and responsive. Additionally, it saves time and effort spent in traditional bleeding methods, such as manual bleeding with an assistant pumping the brake pedal.
Using a pressure brake bleeder reduces the chances of errors during the process, making it a reliable tool for professional mechanics. Overall, a pressure brake bleeder is an essential tool for any mechanic who wants to ensure that a brake system is functioning smoothly and safely.
Why use a pressure brake bleeder over other methods?
Pressure brake bleeders are becoming increasingly popular as a way to flush out the old brake fluid and replace it with new, fresh fluid. They are often used by automotive mechanics and car enthusiasts alike, as they offer several advantages over other methods. For one, they are quick and easy to use, requiring only a minimal amount of effort and time.
Additionally, pressure bleeders are capable of removing virtually all the old brake fluid from the system, resulting in a cleaner and more efficient brake system. Unlike other methods, pressure brake bleeders are also much safer, as they eliminate the need for manual bleeding, which can be a messy and dangerous process. Overall, pressure brake bleeders are a great investment for anyone who wants to keep their brake system in tip-top shape, ensuring maximum safety and reliability on the road.
Materials Needed
Making a pressure brake bleeder doesn’t require too many materials, and the entire process is relatively simple. First and foremost, you’ll need a container that’s airtight and can hold at least two liters of brake fluid. Next, grab a one-liter plastic bottle and a bicycle valve.
You’ll also need a pipe that fits over the valve and can be connected to the container. A ball valve, hose clamp, and Teflon tape will also come in handy. Once you have all the materials collected, you’re ready to start building your pressure brake bleeder.
It’s a cost-effective way to ensure that your brakes are working correctly without needing to go to the mechanic. Not to mention, this DIY project is great for those who love to tinker and want to learn more about how brakes work on a car.
List of required materials
The first step in any DIY project is always to gather the materials you need. When it comes to the list of required materials for your project, it can be overwhelming if you’re not sure where to start. Thankfully, we’ve compiled a list of the basic materials needed for most DIY projects.
First, you’ll need the right tools. This includes a hammer, screwdrivers (both flat head and Phillips), pliers, a measuring tape, and a level. Next, make sure you have enough sandpaper, paint brushes, rollers, and a painter’s tape for any painting you’ll be doing.
If your project involves drilling, you’ll also need a drill and drill bits. Other commonly used items include saws, nails, screws, wood glue, and wood filler. It’s important to make sure you have all the necessary materials before starting your project to avoid delays or having to make multiple trips to the hardware store.
Cost of materials
When it comes to undertaking a DIY project, understanding the materials required for the job is crucial. Depending on the task at hand, you may need tools, adhesives, paints, hardware, and building materials. Of course, the cost of materials will vary depending on what specific items you need, as well as the quality and quantity required.
It is a good idea to plan ahead, create a list of the materials you need, and compare prices from different suppliers to get the best deal. Keep in mind that purchasing materials in bulk or opting for a lower quality may save you money initially, but this could end up costing you more in the long run. It’s important to strike a balance between affordability and durability to ensure your project is a success.
Step-by-Step Instructions
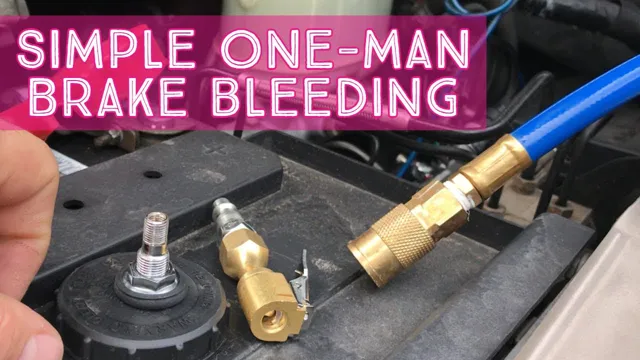
If you want to perform a brake bleed on your car, a pressure brake bleeder can make the process simple and quick. While you can purchase a pressure brake bleeder, you can also make one at home with a few materials. First, you’ll need to acquire a brake fluid reservoir cap that fits your car’s brake reservoir.
Next, get a pressure sprayer tank that can hold around two gallons of liquid and a tire valve stem. Drill a hole in the center of the brake fluid reservoir cap and attach the tire valve stem. Thread the cap onto the reservoir and attach the sprayer to the valve stem.
Then, fill the tank with brake fluid and pump the sprayer to pressurize the system. Attach a hose to your car’s brake bleeder valve and open it, allowing the fluid to flow until it appears clean. This technique eliminates any air bubbles that might cause spongy brakes and ensures reliable brake operation.
Follow these step-by-step instructions to create a DIY pressure brake bleeder and perform a brake bleed on your car with ease.
Preparing the brake bleeder
To prepare your brake bleeder, follow these simple step-by-step instructions. Firstly, ensure that the bleeder kit you have is complete and all the required components are present. Inspect the hose for cracks or wear and replace it if necessary.
Secondly, attach the hose to the bleeder and the other end to the brake caliper or wheel cylinder. Next, fill the brake reservoir with new brake fluid to the specified level. Then loosen the bleeder screw and connect the bleeder bottle to it.
Ensure that the bleeder valve cap is closed. Finally, pump the brake pedal to pressurize the system and then open the bleeder screw to release the old brake fluid. Keep topping up the brake fluid reservoir as required throughout the process.
The main keyword in this process is “brake bleeder.” Proper preparation of your brake bleeder is essential to ensure efficient and safe brake maintenance.
Attaching the bleeder to the brake line
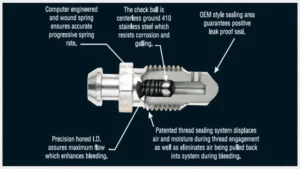
Attaching the bleeder to the brake line is an essential step in bleeding your car’s brake system. To begin with, get a wrench and use it to loosen the bleeder valve located on the brake caliper or wheel cylinder. Next, connect the appropriate bleeder to the valve’s threads.
Ensure it is tightly attached to avoid any leakage when bleeding the system. A rubber hose can also be attached to the valve and fed into a container to collect the old brake fluid. Once everything is set, pump the brake pedal a few times to pressurize the system before opening the valve.
While pressing the brake pedal down, turn the bleeder valve counterclockwise with a wrench and wait for brake fluid to flow through the attached tubing. Keep an eye on the fluid and replace or add it as needed until only clean, clear fluid is coming out of the system. Finally, tighten the bleeder valve and disconnect it, ensuring that the valve is not leaking any fluid.
By following these simple steps, you’ll be able to successfully bleed your car’s brake system and ensure your safety while driving.
Applying pressure to the bleeder
Applying pressure to the bleeder is a vital step when bleeding brakes on a vehicle. You’ll need a wrench, a clear plastic tubing, and a container to collect the old brake fluid. First, locate the bleeder valve on the caliper or the wheel cylinder, then ensure that all the connections are tight.
Next, attach one end of the clear plastic tubing to the bleeder valve and the other end to the container. Then, loosen the bleeder valve by turning it counterclockwise. Have a helper pump the brake pedal a few times, and then ask them to hold it down.
Using the wrench, tighten the bleeder valve once again, and ask your helper to release the brake pedal. Repeat this process until clean brake fluid flows through the tubing and into the container. Applying consistent pressure to the bleeder is crucial to avoid sucking air into the brake system, leading to unreliable brakes.
Always remember that safety is a top priority, so make sure you understand how to perform this task correctly or seek professional assistance.
Releasing the brake fluid
If you want to release the brake fluid in your car, it’s important to follow the proper steps to ensure your safety and the safety of others on the road. First, locate the brake fluid reservoir under the hood of your car and remove the cap. Next, use a turkey baster or a brake bleeding kit to remove the air from the brake lines.
Once you’ve done that, you can open the bleeder valve on each brake assembly and allow the old fluid to drain out. It’s important to use a container to catch the old fluid and dispose of it properly. After each assembly is drained, refill the reservoir with new brake fluid as needed.
Once you’ve completed this process for all four brake assemblies, check the brake pedal for pressure and test your brakes before driving your car. Remember to always exercise caution when working on your brakes, and don’t hesitate to seek professional help if you’re unsure about anything. Stay safe on the road, and happy driving!
Troubleshooting and Tips
If you’re thinking of making your own pressure brake bleeder, it’s actually pretty simple! All you need is a large syringe (at least 60 mL), a bleed valve, and a piece of clear hose. First, attach the hose to the bleed valve and slip the other end over the syringe nozzle. Then, fill the syringe with brake fluid and push out any air bubbles to make sure it’s completely filled.
Attach the valve to your brake’s bleeder screw and tighten it securely. Connect the hose to the brake and open the bleeder screw until brake fluid starts to flow. Then, it’s just a matter of pumping the syringe to force the brake fluid through the lines, removing any trapped air in the process.
This is a great way to save money and ensure your brakes are working efficiently. So next time you need to bleed your brakes, try making your own pressure brake bleeder!
Common problems with pressure brake bleeders and how to fix them
Pressure brake bleeders are an excellent way to maintain your vehicle’s braking system. However, like all mechanical tools, they come with their share of issues. One common problem is air pockets that can create spongy brakes or brake fade.
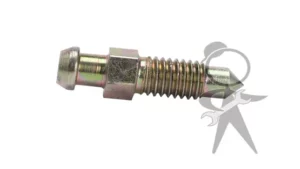
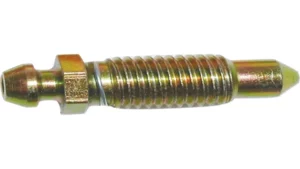
To fix this, you can try tapping the brake’s caliper or master cylinder while bleeding the brakes. Another issue is a clogged or damaged bleeder valve. In this case, you should replace the valve or try clearing the blockage by using brake cleaner.
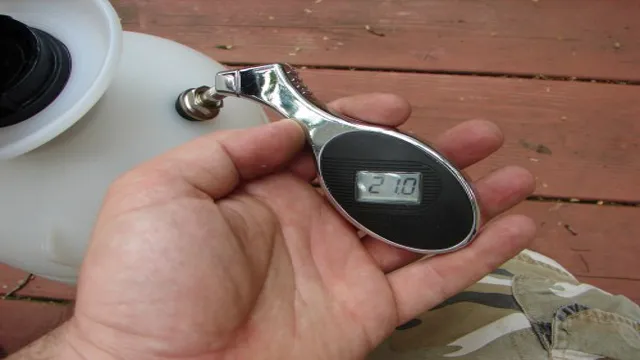
Sometimes, the pressure gauge can malfunction, giving false readings. A quick fix is to check the gauge’s calibration, and if it still doesn’t work, replace the gauge altogether. Finally, if you experience fluid leaks, check all hoses and fittings for damage or loose connections.
Tighten any loose fittings, and replace any damaged hoses or connectors. By troubleshooting these common issues, you can ensure that your pressure brake bleeder is functioning correctly, and your vehicle’s brakes are in great condition.
Best practices for using a pressure brake bleeder
When it comes to using a pressure brake bleeder, there are a few common troubleshooting issues that can arise. One of the most important things to keep in mind is to make sure that you have connected all the hoses properly and that there are no leaks. If there are any leaks, air can enter the system and prevent you from effectively bleeding the brakes.
Another issue that can arise is that you may not have the bleeder set to the correct pressure. It’s important to carefully read the instructions for your specific brake bleeder and set it to the correct pressure before beginning. Additionally, it’s important to make sure that the reservoir is properly filled with brake fluid and that you are using the correct type of fluid for your vehicle.
Following these tips and being mindful of potential issues can help ensure that you have success when using a pressure brake bleeder.
Conclusion
Congratulations, you are now a pressure brake bleeder expert! With just a few simple steps and some inexpensive materials, you have revolutionized your brake bleeding process and saved yourself time and frustration. You can now enjoy a smooth, safe ride with confidence, knowing that your brakes are in top working condition. And who knows, maybe you’ll even become the neighborhood mechanic, impressing your friends and family with your newfound brake bleeding prowess.
So go ahead, make your own pressure brake bleeder and hit the road with peace of mind.”
FAQs
What is a pressure brake bleeder and how does it work?
A pressure brake bleeder is a tool used for bleeding the brake system of a vehicle. It pressurizes the brake system, allowing air to be forced out of the system through the brake bleeder valves.
What are the benefits of using a pressure brake bleeder?
Using a pressure brake bleeder makes bleeding the brake system quicker and easier than traditional methods. It also ensures that the brake system is bled properly and completely.
How do I use a pressure brake bleeder on my vehicle?
First, fill the pressure brake bleeder with brake fluid and attach it to the brake system’s master cylinder reservoir. Then, pressurize the system to the correct level and open the bleeder valves on each brake caliper or cylinder until all air bubbles are eliminated.
Can I make my own pressure brake bleeder?
Yes, you can make your own pressure brake bleeder using materials like a garden sprayer, a pressure gauge, and a bleeder kit.
Is it safe for me to use a pressure brake bleeder on my vehicle?
Yes, using a pressure brake bleeder is safe, as long as you follow the manufacturer’s instructions and take appropriate safety precautions.
What should I do if I encounter a problem while using a pressure brake bleeder?
If you encounter a problem while using a pressure brake bleeder, stop the process immediately and consult the manufacturer’s instructions or seek assistance from a professional mechanic.
Do I need to bleed the brake system with a pressure brake bleeder after replacing brake components?
Yes, it is recommended to bleed the brake system with a pressure brake bleeder after replacing any brake components to ensure proper function and safety.
