Brake bleeding is an essential part of keep your car’s braking system in top-notch condition. It ensures that there is no air trapped in the braking system, which can reduce its effectiveness. While most people prefer to go to the mechanic for this job, it is something that you can easily do at home.
However, the process becomes a bit tricky if you’re a one-man team. It can become frustrating to consistently pump the brake pedal while simultaneously opening and closing the bleeder valve. But don’t worry, you can make yourself a DIY one-man brake bleeder to make the job a breeze! In this blog post, we’ll guide you through the step-by-step process of creating the perfect brake bleeder using simple household tools and materials.
Trust us, with this DIY brake bleeder, brake bleeding will no longer be an annoyance, but a simple and rewarding task!
What is a brake bleeder?
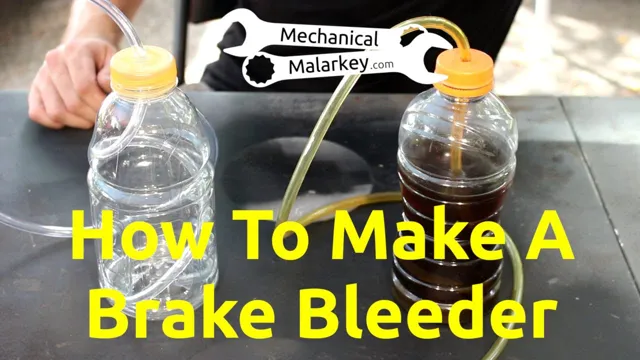
A brake bleeder is a tool that is used to remove air bubbles from the brake system of a vehicle. This is important because air bubbles can cause the brake system to function improperly, leading to reduced braking power and potentially dangerous situations on the road. One of the easiest ways to make a one-man brake bleeder is by using an old glass jar and a piece of clear tubing.
Simply fill the glass jar with brake fluid and attach the tubing to the bleeder valve. Then, open the valve and pump the brake pedal until all of the air bubbles are removed from the system. The clear tubing allows you to see the bubbles as they are being removed, ensuring that you have removed all of the air from the system.
With this simple setup, you can easily and safely bleed your brake system on your own without the need for a second person. So, if you’re looking for a way to keep your brake system in top condition, consider making your own one-man brake bleeder today!
Understanding the importance of brake bleeding
As a car owner, it’s crucial to understand the importance of brake bleeding to ensure your vehicle’s safety. A brake bleeder is a tool that helps remove air bubbles from your brake system. Air bubbles in your brake lines can cause a loss of pressure, resulting in reduced braking power and an increased risk of accidents.
Without regular brake bleeding, your brakes may feel soft, spongy or unresponsive. A brake bleeder works by attaching to the bleed screw on each brake caliper and allowing you to pump fresh brake fluid through the system while releasing any air bubbles. It’s typically a simple process that can be done at home with just a few basic tools.
Remember, your brakes are one of the most important safety features of your vehicle, and ensuring they are operating correctly is crucial to keeping you and your passengers safe on the road.

What you’ll need for your DIY brake bleeder
Are you looking to save some money by doing your own brake bleeding? With the right tools and a little bit of know-how, making a DIY one-man brake bleeder is easier than you might think. Here are the must-have items you’ll need to get started: Firstly, a clear plastic bottle with a tight-fitting lid to hold the brake fluid. You’ll also need clear tubing that fits snugly over the brake bleeder valve.
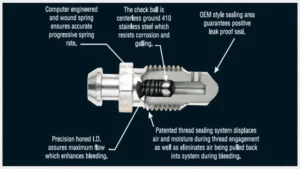
A wrench or socket set to loosen and tighten the valve, and a bottle cap to make a pressure cap to fit on top of the bottle. In addition, a long piece of clear tubing to go from the pressure cap to the brake bleeder valve will also be necessary, as well as an adapter to fit the tubing to the valve. A one-way check valve will also need to be purchased or found.
Lastly, a board or another sturdy object to support the clear fluid bottle during the bleeding process. The process of making a DIY brake bleeder can seem daunting at first, but with the right tools and a little bit of patience, you’ll be able to take on the challenge. By creating a simple one-man brake bleeder, you’ll be able to save money and time while ensuring your brakes are working properly.
Gathering materials and tools
When it comes to making your own brake bleeder, you’ll need to gather a variety of materials and tools. First and foremost, you’ll need a container to hold the brake fluid, as well as a clear vinyl hose that’s large enough to attach to the brake caliper bleeder valve. Additionally, you’ll need a wrench or socket set to loosen and tighten the bleeder valve, and a bottle or can with a small opening to catch the used brake fluid.
To create pressure in the brake system, you’ll need a hand pump or vacuum pump, depending on your preference. Finally, make sure you have plenty of rags or paper towels on hand to clean up any spills or drips. By having all of these materials and tools on hand, you can confidently make your own brake bleeder and save some money on professional bleeding services.
Step-by-step guide to making your brake bleeder
If you’re looking for a cost-effective way to bleed your brakes, a DIY brake bleeder can come in handy. Making a one man brake bleeder gives you the convenience of being able to bleed your brakes without help. The first step is to gather the materials you’ll need, including a brake bleeder kit, tubing, a 1-liter bottle, a drill with various bit sizes, and a file.
Once you have everything, drill a hole in the bottle’s lid using a 1/4″ bit and then file the edges for a smooth finish. Next, attach the tubing to the bleeder kit’s valve, then run it through the bottle’s lid hole, and finally, attach it to the brake bleeder valve. Fill the bottle with fresh fluid, pump the brakes until all the bubbles are eliminated from the tubing, and look for any leaks before finishing the process.
Using this DIY brake bleeder is an affordable way to bleed your brakes safely, without having to pay for extra assistance or equipment.
Building the bleeder bottle and hose
If you’re a DIY mechanic, building your brake bleeder can be a great way to save money. It’s a simple process that can be completed in a few easy steps. First, you’ll need to gather your materials.
This includes a plastic bottle, a length of clear tubing, and a one-way valve. The plastic bottle should have a cap that can be sealed tightly. Once you have your materials, you can begin to assemble your bleeder.
Start by cutting a small length of tubing and attaching it to the one-way valve. Next, attach the valve to the bottle cap. Ensure that the valve is positioned so that air can leave the bottle, but not enter it.
Finally, attach the clear tubing to the valve and the other end to your brake caliper or wheel cylinder. Once you have everything assembled, you’re ready to start bleeding your brakes. By using your homemade bleeder, you can easily remove air from your brake lines, ensuring your brakes are functioning at their best.
This can prevent accidents and unnecessary repair costs down the road. So why wait? Go ahead and build your brake bleeder today!
Replacing the bleeder valve
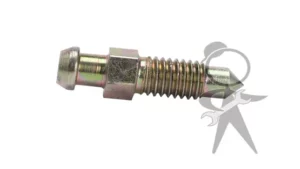
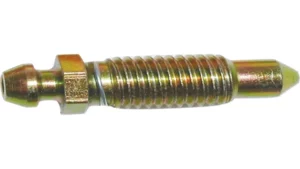
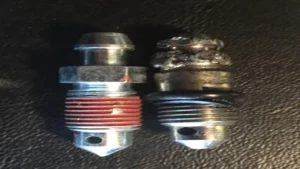
If you want to successfully bleed your brakes, it’s important to make sure that your bleeder valve is in good working condition. If you notice that your valve is damaged or worn out, it’s time to replace it. Here’s a step-by-step guide to replacing your bleeder valve and getting your brakes back in shape.
First, you’ll need to gather the necessary materials including a brake line wrench, a new bleeder valve, a clean rag, and brake fluid. Begin by locating the bleeder valve, which is typically located near the wheel. Next, use the brake line wrench to loosen the valve and remove it from the line.
Quickly replace the old valve with the new one and use the wrench to tighten it. Finally, make sure to clean up any excess brake fluid with the rag. That’s it! By replacing your bleeder valve, you’ll be able to properly bleed your brakes and keep them functioning at their best.
Connecting everything together
If you’re a DIY enthusiast, making your brake bleeder is a perfect way to cut costs while keeping your brakes in top condition. It’s a simple task that you can complete in a few easy steps. First, gather your materials, which include a vacuum pump, a brake bleeder kit, a wrench, and a clean rag.
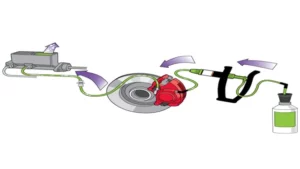
Next, locate your brake fluid reservoir and remove the lid. Then, connect the vacuum pump to the brake bleeder kit and attach the kit to the brake bleeder valve on the brake caliper. Turn on the vacuum pump and wait for air bubbles to stop flowing out of the valve.
Lastly, release the valve and tighten it back up with your wrench. Refill the brake fluid reservoir and test your brakes – they should feel rock-solid! By making your brake bleeder, you can save money and gain the satisfaction of doing it yourself. So, get started today and stop worrying about your brakes!
Using your DIY brake bleeder
If you’re an avid DIYer and enjoy doing your own car maintenance, you’ve probably heard of a one-man brake bleeder. This handy tool enables you to easily bleed your brakes by yourself, without requiring a second person to help. Wondering how to make one? You’ll need a clear plastic bottle, some rubber tubing, and a bit of patience.
First, fill the bottle with brake fluid and submerge one end of the rubber tubing into it. Then, attach the other end of the tubing to the brake bleeder valve on your car. Next, pump the brake pedal a few times until the air is out of the system, and watch as the old fluid and air bubbles flow into the bottle.
It’s important to keep an eye on the fluid level in the master cylinder and refill it as needed. With your DIY brake bleeder, you’ll save both time and money by being able to do this important brake maintenance task yourself.
Preparing your vehicle for bleeding
Before you start bleeding your brakes, it is crucial to ensure that your vehicle is well-prepared. Begin by parking your vehicle on a flat surface and turning off the engine. Check your brake fluid reservoir to ensure that it is full.
If the brake fluid level is low, top it up with the recommended fluid as indicated in your vehicle’s manual. You should also check your brake pads and rotors for any signs of wear or damage and replace them if necessary. Once you have finished preparing your vehicle, it’s time to use your DIY brake bleeder.
This will allow you to flush your brake lines and get rid of any air bubbles that may have accumulated. Using a brake bleeder kit can be quite straightforward, and you can save yourself a trip to the mechanic. Remember to follow the instructions carefully and work carefully to avoid any accidents.
With a properly working brake system, you can enjoy confident stops and safe driving.
Bleeding your brakes with your DIY bleeder
Bleeding your brakes with your DIY brake bleeder can save you time and money by avoiding a trip to a mechanic. The process of bleeding your brakes involves removing air bubbles from the brake system, which can reduce the effectiveness of your brakes. Begin by ensuring that all four wheels are jacked up, and the car is supported on jack stands.
Attach the brake bleeder to the caliper bleeder valve and crack it open slightly. Then, use a vacuum pump to remove the air bubbles from the braking system. Once all the bubbles have been removed, close the valve and repeat the process for each wheel.
It’s important to check the brake fluid level regularly and top it off as needed. Finally, take your car for a test drive to ensure that the brakes are functioning properly. By using your DIY brake bleeder, you can maintain your car’s braking system and ensure your safety on the road without breaking the bank.
Conclusion and final thoughts
Congratulations, you have now mastered the art of creating your own one-man brake bleeder! Not only will this save you time and money by avoiding a trip to the mechanic, but it also showcases your ingenuity and resourcefulness. Who said DIY solutions were only for craft projects? Now you can confidently tackle any brake maintenance on your own, leaving you with more time and money to focus on other endeavors. Keep on tinkering, my friend!”
FAQs
What materials do I need to make a one man brake bleeder?
To make a one man brake bleeder, you will need a clear plastic tubing, a clean container to collect the old brake fluid, a pre-bled brake master cylinder, and a wrench or pliers to remove the brake bleeder valve.
How do I attach the clear plastic tubing to the brake bleeder valve?
First, locate the brake bleeder valve on your caliper or wheel cylinder and loosen it with a wrench or pliers. Then, slide one end of the clear plastic tubing over the valve and secure it with a zip tie or hose clamp to prevent leaks.
How do I prepare my car for a brake bleed?
First, make sure your car is on a level surface and the engine is turned off. Then, remove the old brake fluid from the master cylinder and fill it with fresh brake fluid. Finally, make sure all the wheels are properly secured and the parking brake is engaged.
How do I bleed the brakes using a one-man system?
Attach the clear plastic tubing from the brake bleeder valve to the container filled with brake fluid. Then, pump the brake pedal several times until it becomes firm, and then hold it down. Open the bleeder valve to allow the old brake fluid and air bubbles to escape. Close the valve and release the brake pedal. Repeat this process until clean brake fluid comes out of the tubing.
How do I know when the brakes are fully bled?
The brakes are fully bled when there are no more air bubbles in the clear plastic tubing, and the brake pedal feels firm and responsive when pressed.
Can I use a one-man brake bleeder on all types of vehicles?
Yes, a one-man brake bleeder can be used on all types of vehicles with hydraulic brakes, including cars, trucks, and motorcycles.
What are the benefits of using a one-man brake bleeder?
Using a one-man brake bleeder is a quick, easy, and cost-effective way to bleed your brakes. It eliminates the need for an assistant, saves time, and ensures that your brakes are working properly and safely.
