Are you tired of spending a fortune on having your brakes bled at the mechanic’s every time they get spongy? What if we told you there’s a way to do it yourself and save some bucks? Building your own brake bleeder kit might seem like a daunting task at first, but it’s simpler than you think. In fact, this could be a fun DIY project, and we’ll show you just how to do it! The brake system of your vehicle plays a critical role in ensuring your safety on the road. Over time, air can get trapped in the system, causing a spongy feel when you press the brake pedal.
Bleeding brakes is a process of removing the trapped air and replacing it with new brake fluid. Purchasing a commercial brake bleeder kit can be expensive, but with a few tools and some DIY skills, you can create your own kit at home. In this blog post, we’ll guide you step-by-step as we show you how to build a one-man brake bleeder kit from scratch.
We’ll also discuss the materials you’ll need and where to buy them. Don’t worry; this won’t require specialized or expensive tools. With a few household items and some basic automotive supplies, you’ll be ready to bleed your brakes like a pro in no time! So, let’s get started and take on this exciting DIY challenge.
By the end of this guide, you will have a fully-functional brake bleeder kit that you can use whenever you need to work on your vehicle’s brakes. Not only will you have saved some money, but you’ll also have acquired a new skill. Are you ready? Let’s kick this project into gear!
Introduction
If you’re looking for a cost-effective way to bleed your brakes at home, then you might be interested in learning how to make your own one man brake bleeder kit. This DIY brake bleeder is a simple and effective tool that allows you to easily purge air from your brake lines without the need for a second person. To get started, you’ll need a few basic supplies such as a clean water bottle, a clear plastic tube, and a brake bleeder valve.
Once you’ve gathered your materials, you’ll need to drill a small hole in the bottle cap and insert the plastic tube. From there, you can attach the valve to the other end of the tube and use it to purge air from your brake lines. It may take a little practice to perfect your technique, but once you get the hang of it, bleeding your brakes will be a breeze.
So why not save yourself some money and give it a try?
What is a brake bleeder kit?
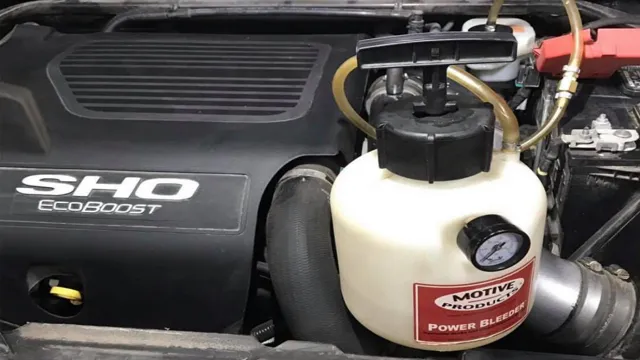
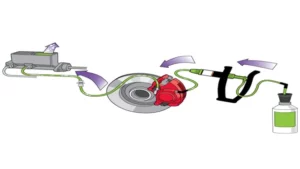
A brake bleeder kit is a tool used to remove air bubbles from your braking system and ensure that your brakes are working efficiently. This kit consists of a container with a hose attached to it that can be placed over the bleeder valve on your brake caliper. When activated, the kit creates a vacuum that pulls any air out of the system and allows you to refill the brake fluid.
This is important because air bubbles can cause spongy brakes that are unable to stop your vehicle in an emergency situation. By using a brake bleeder kit, you can maintain the safety and reliability of your braking system.
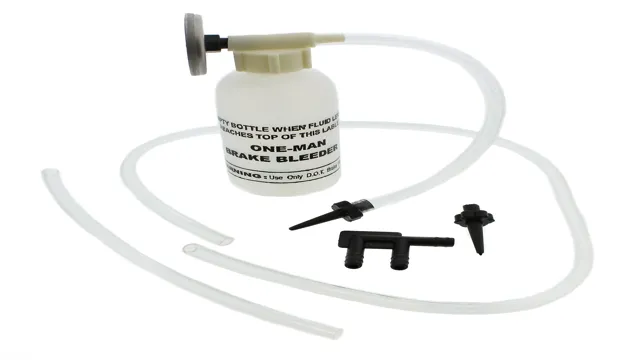
Why do you need a one man brake bleeder kit?
If you’re a car owner or mechanic who wants to maintain your vehicle’s brake system, you need a one man brake bleeder kit. This tool makes brake bleeding a one-person task instead of a two or three-person job. A one man brake bleeder kit is a self-contained device that eliminates air bubbles from the brake lines and helps to ensure that your brakes are functioning properly.
This kit works by purging air from the brake system, which prevents brake fluid from becoming contaminated, reducing the risk of brake failure. The best part is that a one man brake bleeder kit is easy to use, compact, and affordable. With this kit, you can save money on costly professional services and ensure your vehicle’s brake system is always in top condition.
What are the advantages of using a one man brake bleeder kit?
One man brake bleeder kits have become increasingly popular among car enthusiasts and home mechanics because of their many advantages. These kits allow you to easily bleed your brakes without the need for a second person, which makes the process much more convenient and efficient. With a one man brake bleeder kit, you can quickly remove any air from your brake lines, ensuring that your brakes work properly and safely.
Additionally, these kits are affordable and easy to use, and they come with everything you need to get started. Whether you’re a seasoned mechanic or just starting out, using a one man brake bleeder kit can save you time and money, while also making your brake bleeding job more enjoyable. So, if you’re looking for an easy and efficient way to bleed your brakes, be sure to try out a one man brake bleeder kit today!
Materials Needed
If you’re looking to save some money and perform your brake bleeding at home, you might be wondering how to make a one man brake bleeder kit. With just a few affordable materials, you can easily create your own DIY brake bleeder kit. Firstly, you’ll need a clear vinyl hose that fits snugly onto the brake bleed screw.
Secondly, a brake bleeder bottle or jar with a check valve installed to prevent air from entering the brake system. Lastly, a wrench to loosen the bleed screw. Altogether, these materials will create a simple and effective one man brake bleeder kit that will make the brake bleeding process much easier.
Remember to take your time, follow brake bleeding procedures, and test your brakes before getting back on the road. With a little patience and determination, you’ll be able to safely and effectively bleed your brakes at home.
Clear tubing
If you want to add an interesting element to your home décor, using clear tubing can give a unique effect. The materials you’ll need for this project include clear tubing, a saw or scissors to cut the tubing to your desired length, a heating tool to heat the tubing and give it a curved shape, and hooks or other fasteners to mount the tubing to a wall or ceiling. You can also add LED lights to the tubing to make it glow or use colored liquid inside the tubing to create an impressive visual effect.
Clear tubing can be used in a variety of ways to add a modern and sleek look to any room or space. The clear tubing materials are inexpensive and readily available at most home improvement stores. Whether you want to create a DIY chandelier, unique wall art, or something entirely different, using clear tubing is a simple and effortless way to add an unexpected and dramatic element to your home décor.
Brake fluid
When it comes to your car’s brake system, using the right brake fluid is essential for ensuring that your vehicle stops safely and effectively. To properly add brake fluid to your car, you’ll need a few materials on hand. First and foremost, you’ll need a bottle of the appropriate brake fluid for your vehicle, which can usually be found either in your owner’s manual or by checking with a reputable auto parts store.
You’ll also want to grab a funnel to help pour the fluid into the brake reservoir without making a mess. Finally, be sure to have a clean rag or paper towel on hand to wipe up any drips or spills that may occur during the process. By having these materials ready and taking care during the brake fluid replacement process, you can help ensure that your vehicle stays safe on the road and that your brake system continues to function effectively.
Jar or container
When it comes to choosing a jar or container for your storage needs, there are a few materials that you might want to consider. Glass jars are popular because they are sturdy and airtight. This makes them a great choice for storing dry goods like rice, pasta, and flour because they keep out moisture.
Glass jars are also easy to clean and don’t absorb odors. Plastic containers are also a popular choice because they are lightweight and come in a variety of sizes. They are great for storing leftovers in the refrigerator or freezer because they are shatterproof.
However, they are not as airtight as glass jars and are not as heat-resistant. Stainless steel containers are also becoming more popular because they are durable and can withstand high temperatures. They are a great option for storing hot foods because they can go from the stove to the refrigerator without any issues.
Ultimately, the best choice will depend on your specific needs and preferences. Just remember to consider factors like durability, airtightness, and heat resistance to ensure that you choose the right jar or container for your needs.
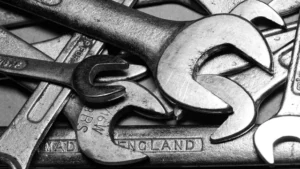
Wrench or pliers
When it comes to DIY projects or fixing things around the house, it’s essential to have the right tools to get the job done. Whether it’s repairing a leaky faucet or assembling furniture, having a set of reliable wrenches or pliers can make the task much more manageable. The materials needed for either option are straightforward: for wrenches, you need a set with various sizes (adjustable wrenches work well for most jobs), while for pliers, you need a pair of slip-joint pliers and a pair of needle-nose pliers.
But which one is better suited for certain jobs? Wrenches are ideal for removing or tightening nuts, bolts, and other fasteners and providing a more secure grip. On the other hand, pliers are perfect for gripping and holding objects or cutting wire. Both tools have their advantages and disadvantages, depending on the task at hand, and it’s crucial to have both on hand to tackle any job that comes your way.
So, whether you’re a seasoned DIY enthusiast or a novice, make sure you have both a set of wrenches and pliers in your toolbox for any situation that arises.
Step-by-Step Guide
Making a DIY one-man brake bleeder kit is easier than you might think. First, gather the necessary materials, including a brake bleeder valve, a length of vinyl tubing, and a container to catch the brake fluid. The next step is to attach the tubing to the bleeder valve and then attach the container to the other end of the tubing.
Before starting the brake bleed, be sure to fill the brake fluid reservoir to the recommended level. Then, begin the bleed by loosening the bleeder valve and pressing the brake pedal repeatedly. Keep an eye on the fluid container, making sure to empty it regularly.
Once you start to see clear fluid coming through the tubing, you can tighten the valve and move on to the next brake line. With a little effort and some basic equipment, you can make your own one-man brake bleeder kit and confidently bleed your brakes on your own.
Step 1: Prepare the brake bleeder kit
If you’re planning to bleed your brakes at home, a brake bleeder kit is essential. The kit should come with a hand pump, a gauge, hoses, and collection bottles. Before you start the process, you’ll need to make sure the bleeder kit is ready to use.
Firstly, you should read the instructions and make sure you have all the components you need. Then, you can fill the pump with brake fluid and attach the correct hose to the caliper or brake bleed screw. Make sure the hoses are secure and the collection bottles are in an appropriate location.
A properly prepared brake bleeder kit will help you conduct the brake bleeding process without any hiccups and ensure that your brakes are working correctly in no time. So, take your time, read the instructions, and prepare the brake bleeder kit correctly.
Step 2: Attach the clear tubing to the brake bleeder screw
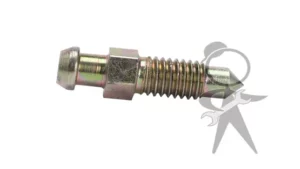
To bleed the brakes, the next step is to attach the clear tubing to the brake bleeder screw. This clear tubing acts as an extension that will allow you to see the air bubbles leaving the brake system and determine if you need to keep bleeding the brakes further. To attach the tubing, you need to locate the bleeder screw, which is usually located near the brake caliper or wheel cylinder.
Then, you can grab the clear tubing and slide it over the end of the bleeder screw until it fits snugly. Be sure to use a wrench to tighten the screw just enough to prevent any leaks but not too tight that it damages the screw. Once attached, crack open the bleeder screw a few turns to allow the brake fluid to flow through the tubing.
You should expect to see air bubbles escaping through the tube as the brake fluid drains out of the system. Once you no longer see any air bubbles, you can close the bleeder screw and move on to the next wheel.
Step 3: Fill the jar with brake fluid
Now that you have cleaned the brake fluid jar and prepared it for filling, it’s time to add the brake fluid. Make sure that you have the right type of brake fluid recommended for your vehicle. Check your owner’s manual or with your mechanic if you’re not sure.
Open the cap of the brake fluid container and slowly pour it into the jar. Be careful not to spill or overfill the jar. As you pour, you can use a funnel to help guide the fluid, if necessary.
Stop filling the jar when it reaches the maximum fill line on the jar. If you don’t have a max fill line, then fill it to about ½ inch below the top rim of the jar. Remember, brake fluid is caustic and can damage the car’s paint, so be careful not to spill it on the car.
Once you have filled the jar with the correct amount of brake fluid, replace the cap and securely tighten it. Your brake fluid jar is now ready to be reinstalled into your car.
Step 4: Open the brake bleeder screw
Now that you have checked and filled the brake fluid reservoir, it’s time to move on to opening the brake bleeder screw. This step is crucial in ensuring that all air bubbles are eliminated from the brake system. Locate the brake bleeder screw, which is usually located on the brake caliper, and place a pan underneath it to catch any brake fluid that may come out.
Use a wrench to gently turn the screw counterclockwise until you start to see brake fluid coming out. Keep turning until there are no more air bubbles. It may take a few seconds or even minutes to achieve this, but it’s better to be thorough than rush through the process.
Don’t forget to tighten the brake bleeder screw once all the air bubbles are gone. This step completes the process of bleeding the brakes. Now, pump the brakes a few times and check the brake pedal.
If it feels firm and responsive, you’ve successfully bled the brakes. Congratulations!
Step 5: Pump the brake pedal
Now that you’ve successfully bled your brakes, it’s time for the final step – pumping the brake pedal. This is an essential step to make sure your brakes function correctly, and it’s not something you want to skip. Pumping the brake pedal creates pressure in the brake lines, ensuring that all the air is pushed out of the system.
Make sure to pump the pedal slowly and steadily, and repeat the process until you feel resistance. Once you’ve done this, check the brake fluid levels and top up if necessary before taking your car out for a test drive. A good way to test your brakes is to find a quiet road and gradually apply pressure to the pedal, ensuring that the car comes to a smooth stop.
Congratulations, you’ve successfully bled your brakes, and you can now drive with complete confidence in your vehicle’s stopping power.
Step 6: Close the brake bleeder screw
As you finish performing the brake bleeding procedure, the next step is to close the brake bleeder screw. This is a crucial step to ensure that air won’t get in your brake system and cause brake failure. Using your wrench, screw back the brake bleeder screw clockwise until it is tight but not too tight that it might damage the screw’s thread.
It’s essential to be cautious not to over tighten, as it may damage the brake components or break the screw. Once the screw is tight enough, remove the tubing from the brake bleeder valve and wipe off any brake fluid residue. Finally, double-check to confirm whether all the screws are tightened correctly and there is no leak whatsoever.
In case you notice any leaks, redo the brake bleeding process and ensure to tighten the screws correctly. With all the bolts tight and no leak, your brake system is now fully operational, making your vehicle safe to drive.
Testing the Brake Bleeder Kit
Making a one man brake bleeder kit can be a daunting task, but with the right tools, it can be done with ease. To test the brake bleeder kit, start by removing the old brake fluid from the brake system and replacing it with new fluid. Next, insert the brake bleeder kit into the brake fluid reservoir and open the valve to allow air to escape.
Use a wrench to tighten the bleeder valve and connect the hose to the bleeder valve. Once connected, pump the brake pedal a few times to create pressure in the brake system. Open the valve on the bleeder kit and allow the old fluid to flow through the hose and into a catch pan.
Continue this process until all the old fluid has been drained from the system. The one man brake bleeder kit should have made the process quick and easy, allowing you to bleed your brakes without the need for a second person. With the help of this brake bleeder kit, maintaining your car’s brake system has never been easier.
How to test the brake bleeder kit
If you’re working on your car’s brakes, then you know how important having a brake bleeder kit is. But before you start using it, you need to make sure that it’s in good working order. So, how do you test a brake bleeder kit? First, make sure that all the components are present and in good condition.
Check for any damages or leaks in the hose and the bleeder valve. Next, fill the kit with brake fluid and attach it to your car’s brake system. Pump the brake pedal a few times and then open the bleeder valve to release any air or old fluid.
If you see bubbles, then there’s air in the brake line and you need to continue bleeding until the fluid comes out without bubbles. Once you’ve finished bleeding the brakes, clean up any spills and put everything away. Remember, a well-maintained brake bleeder kit can save you a lot of time and hassle in the long run.
Tips for troubleshooting
Testing your brake bleeder kit is crucial to ensure that it’s working correctly. Start by connecting the kit to your brake caliper and make sure that the tube is tight to prevent air leaks. Afterward, pump the brake pedal a few times and then open the bleeder valve on the caliper.
Observe the fluid flow from the tube; it should be free of air bubbles, indicating that there is no air in the brake line. If you notice any bubbles, continue pumping the brake pedal to remove the trapped air, then close the bleeder valve and repeat the process until there are no more bubbles. Remember to top up your brake fluid level as you work.
Once the air is completely eliminated, tighten the bleeder valve, disconnect the kit, and test your brakes to ensure they are working correctly. Always remember to test your brake bleeder kit before working on your brakes to prevent any accidents or mishaps.
Conclusion
Congratulations my friend, you are now the one-man brake bleeder king! All it takes is a little ingenuity, some tubing, a jar, and a little bit of time. With this simple DIY kit, you can ensure your brakes are in top shape, and impress your friends with your handy skills. So grab that tubing and get to bleeding, because nothing beats a good brake job – except for maybe a cold beer afterwards.
Remember, with a bit of elbow grease and a DIY attitude, anything is possible. Happy bleeding!”
Benefits of making a one man brake bleeder kit
Brake Bleeder Kit If you are a car enthusiast or just someone who enjoys working on their own vehicle, you may have encountered the need to bleed your brakes at some point. This process can be tricky, as it requires two people to work together to properly bleed the brakes. However, with a one man brake bleeder kit, you can now do it by yourself! This kit offers numerous benefits, such as saving time and money, as you won’t have to wait for someone else to be available to help.
It’s also easy to use and makes the bleeding process more efficient, resulting in better brake performance. So, we decided to test this kit out for ourselves. After trying it out, we were impressed with how easy it was to use and the quick results it provided.
Overall, a one man brake bleeder kit is a great investment for anyone who wants to work on their brakes alone and save time and money while doing it.
Safety precautions to keep in mind
When it comes to testing a brake bleeder kit, safety should always be your top priority. Before getting started, make sure you have a well-ventilated area to work in and wear protective gear like safety glasses and gloves. Begin by checking that all connections are secure and that the brake fluid reservoir is properly filled.
Squeeze the trigger on the pressure pump slowly and steadily, keeping an eye on the gauge to ensure you don’t exceed the recommended pressure. Once you’ve bled the brakes, wrap up by properly disposing of all used materials and cleaning up any spills. Remember, using a brake bleeder kit can be a great way to maintain your vehicle’s braking system but it must be done safely and correctly to avoid any accidents or injuries.
FAQs
What materials do I need to make a one man brake bleeder kit?
To make a one man brake bleeder kit, you will need clear vinyl tubing, a check valve, a brake bleeder bottle, and a container for brake fluid.
Can I use a one man brake bleeder kit on all types of vehicles?
Yes, a one man brake bleeder kit can be used on all types of vehicles including cars, trucks, and motorcycles.
How do I use a one man brake bleeder kit?
To use a one man brake bleeder kit, you will need to fill the container with brake fluid, connect the clear vinyl tubing to the bleeder valve, and then pump the brake pedal until all air bubbles are removed from the system.
Is it safe to use a one man brake bleeder kit?
Yes, it is safe to use a one man brake bleeder kit as long as you follow the instructions carefully and wear appropriate safety gear.
How often should I use a one man brake bleeder kit?
It is recommended to use a one man brake bleeder kit at least once a year to remove any air bubbles and maintain the performance of your braking system.
Can a one man brake bleeder kit fix a spongy brake pedal?
Yes, using a one man brake bleeder kit can help fix a spongy brake pedal by removing any air bubbles in the brake lines.
What should I do if I encounter any issues when using a one man brake bleeder kit?
If you encounter any issues when using a one man brake bleeder kit, it is recommended to consult a professional mechanic for assistance.
