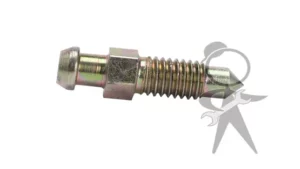
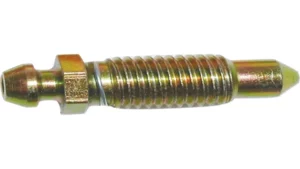
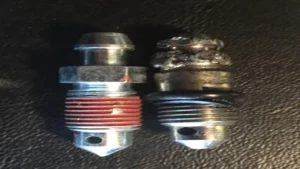
Brakes are an essential component of any vehicle. Ensuring that they are in proper working condition is crucial for the safety of the driver, passengers, and pedestrians. Bleeding brakes regularly prevents air from building up in the brake lines, which can cause the brakes to fail.
Although it is a simple task, getting a brake bleeder pump can be costly. Fear not! In this blog post, we’ll go over how to make a brake bleeder pump at home easily. With a few basic tools and materials, you can create a quality DIY brake bleeder pump that works just as well as commercial ones, saving you time and money.
Let’s dive in!
Introduction
If you’re looking for an easy and inexpensive way to bleed your brake system, making your own brake bleeder pump is a great option. All you need is a few materials and a bit of time. Start by gathering a large syringe, a piece of tubing, and a small jar.
Attach the tubing to the end of the syringe and then to the jar. To use the pump, simply fill the jar with brake fluid and attach the tubing to the brake bleeder valve. Slowly pump the syringe until all the air bubbles have been removed from the system.
This is a simple and effective way to bleed your brakes and ensure that your vehicle is safe to drive. With a little practice, you’ll be able to bleed your brakes in no time, all thanks to your homemade brake bleeder pump.
What is a Brake Bleeder Pump?
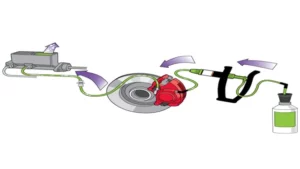
A brake bleeder pump is a tool used in automotive repairs to remove air from the brake lines and ensure that the brakes operate effectively. It works by creating a vacuum that draws the brake fluid through the system, displacing any air bubbles that may be present. This tool is essential for maintaining the safety and reliability of a vehicle’s braking system.
If there is air in the brake lines, the brake pedal may feel spongy or less responsive, which can be dangerous in emergency situations. Using a brake bleeder pump is a simple and efficient way to maintain the functionality of a vehicle’s brakes. So, if you ever notice that your brake pedal has lost its usual firmness or feel, it’s worth considering whether a brake bleeder pump might be necessary to ensure that your vehicle’s braking system is functioning correctly.
Why Do You Need a Brake Bleeder Pump?
Brake Bleeder Pump Introduction: If you’ve ever found yourself pushing down hard on your brake pedal, only to find that it goes all the way to the floor, you know how important it is to have properly functioning brakes. Keeping your brake system in good condition is essential for your safety on the road, and one of the ways to maintain it is by using a brake bleeder pump. A brake bleeder pump is a tool used to remove air from your brake lines.
When air gets into your brake lines, it can cause your brakes to feel spongy and unresponsive, which can be incredibly dangerous. The brake bleeder pump works by creating a vacuum that can suck air out of the brake lines, making your brakes feel more responsive and reliable. Using a brake bleeder pump is a simple process that you can do yourself with minimal equipment.
The pump usually comes with a hose that you attach to the brake bleeder valve. Once you connect the hose, you can start the vacuum on the pump and watch as it sucks out the air. Overall, a brake bleeder pump is an essential tool for anyone who wants to maintain their brake system and stay safe on the road.
By removing air from your brake lines, you can make sure that your brakes work properly and respond quickly in emergency situations. So if you’re looking for a way to keep your brake system in top shape, consider investing in a brake bleeder pump.
Materials Needed
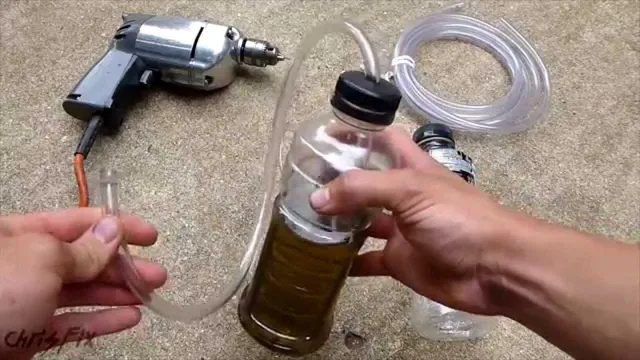
If you’re a DIY enthusiast and want to save money on expensive car maintenance, making a brake bleeder pump is a great idea. Luckily, it’s not too difficult and requires only a few materials: a clean 1-liter plastic bottle with a cap, a length of flexible tubing, a rubber stopper that fits tightly into the bottle cap, a disposable syringe with a catheter tip, and a small piece of sandpaper or emery cloth. Start by drilling a small hole in the center of the cap and then sand the edges of the hole to remove any roughness.
Insert the rubber stopper into the hole, making sure it fits snugly. Next, attach the tubing to the tip of the syringe and then push the other end through the stopper and into the bottle. Finally, fill the bottle with brake fluid and screw the cap on tightly.
Your homemade brake bleeder pump is now ready to use! Simply attach it to the brake bleeder screw and pump the fluid through until it’s free of any air bubbles. With a little patience and practice, you’ll be able to bleed your car’s brakes like a pro.
List of materials
When it comes to starting a new project, one of the first steps is making sure you have all the necessary materials. Depending on what you’re working on, the required materials can vary greatly. For example, if you’re planning a painting project, you’ll need different materials than if you’re starting a woodworking project.
However, there are some general materials that are commonly used regardless of the project. These include things like measuring tools, cutting tools (such as scissors or a utility knife), adhesives (like glue or tape), and various types of fasteners (such as screws or nails). Additionally, you’ll also need materials specific to your project, like paint and brushes for a painting project or lumber and a saw for a woodworking project.
It’s always a good idea to make a list of the materials you’ll need before starting a project so you can make sure you have everything on hand before you begin. This will help ensure a smoother process and prevent any unnecessary delays or frustration.
Step-by-Step Guide
If you’re looking to bleed your brakes, making a brake bleeder pump can save you a lot of hassle and money. The good news is that making one is a relatively simple DIY project that can be completed in just a few steps. The first step is to gather all of the necessary materials, which typically include a hand vacuum pump, tubing, and fittings.
Next, connect the tubing to the vacuum pump and attach the fittings to the end of the tubing. Once you have everything set up, it’s just a matter of connecting the fittings to the brake bleed valves, creating a vacuum, and opening the bleed valves to let air and old fluid escape. With a little patience and some attention to detail, you can make your own brake bleeder pump and enjoy safer, smoother braking in no time.
Step 1: Prepare the container
When preparing a container for use, the first step is to ensure it is clean and ready for planting. Begin by thoroughly washing the container with warm, soapy water. Rinse it well to remove any remaining soap residue.
If your container was previously used, sterilize it to kill any potential disease-carrying organisms. You can do this by soaking it in a solution of 1 part bleach to 9 parts water for 10-15 minutes. Once cleaned and sterilized, allow the container to dry completely before filling it with soil.
This initial step may seem simple, but it is crucial to ensure the health and success of your plants. Taking the time to properly prepare your container will lead to a productive and thriving garden.
Step 2: Assemble the pump
Now that you’ve gathered all the necessary parts to build your pump, let’s move on to assembling it. Make sure you have a clean workspace and all the tools you need before starting. Begin by attaching the pump’s impeller to the motor shaft.
Use the manufacturer’s instructions or guidelines to ensure proper alignment and secure them tightly. Next, attach the pump housing to the impeller, again following the manufacturer’s instructions to ensure everything is aligned correctly. Finally, attach the discharge hose or pipe to the pump housing, this should be a snug fit to prevent any leaks.
Remember to double-check all connections and fittings before filling the pump with water and turning it on. When assembling a pump, it’s important to pay attention to detail and take your time to ensure your pump is working safely and efficiently.
Step 3: Connect the hose
Now that you have your new hose all laid out and ready to go, it’s time to connect it to your spigot or outdoor faucet. First, ensure that the threaded end of your hose matches the size of your spigot. If they don’t match, you may need to purchase an adapter to make them fit together.
Once you have confirmed that the sizes match up, simply screw the threaded end onto the spigot. Make sure that it’s tightened enough to prevent any leaks but not so tight that it damages the hose or spigot. If you have an adjustable wrench, you can use it to tighten the connection.
Congratulations, your hose is now connected and ready to use!
Step 4: Putting it all together
Putting all the pieces of your project together can be exciting and nerve-wracking, but following a step-by-step guide can make the process smooth and pleasant. Firstly, review the objectives and scope, making sure that everything is well-defined, the deliverables are achievable, and all stakeholders are aligned. Secondly, plan the work, breaking it down into tasks and sub-tasks, estimating efforts, and establishing due dates.
Thirdly, execute the plan, monitoring progress, collaborating with the team, and communicating status updates regularly. Fourthly, control the project, verifying the quality, managing risks, and adjusting the plan when necessary. Finally, close the project, presenting the results, celebrating the achievements, collecting feedback, and documenting the lessons learned.
By following these steps, you can increase your chances of success and make the entire experience enjoyable and fulfilling.
Tips for Using Your Brake Bleeder Pump
If you need to bleed the brakes on your vehicle, having a brake bleeder pump can make the process much easier. Fortunately, making a brake bleeder pump is actually quite simple. All you need is a jar with a lid, a rubber hose, and a hand-held vacuum pump.
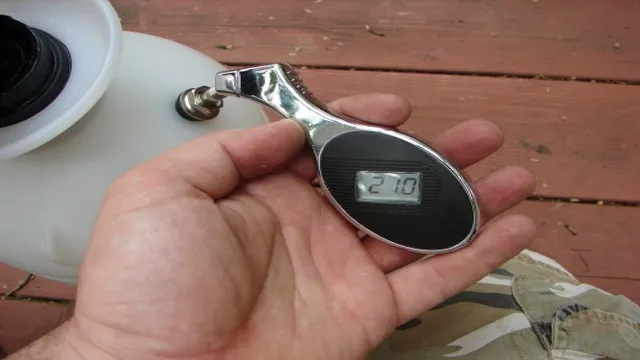
Begin by drilling a hole in the center of the lid that matches the diameter of the rubber hose. Then connect the hose to the bottom of the pump and insert the other end into the hole in the lid. Finally, attach the pump to the top of the jar and you’re ready to go! When using the pump, be sure to keep an eye on the vacuum gauge and periodically check the jar to ensure that there is no brake fluid leaking out.
With a bit of practice, using your brake bleeder pump will become a simple and effective way to keep your brakes in perfect working order.
Tip 1: Use the right type of fluid
When using a brake bleeder pump, it is crucial to use the right type of fluid for your vehicle. Different vehicles require different types of brake fluid, so make sure to check your owner’s manual to determine the correct type for your specific make and model. Using the wrong type of fluid can cause damage to your brake system and compromise your safety on the road.
Additionally, make sure to use fresh brake fluid, as it can absorb moisture over time, which can lead to a decrease in braking performance. By using the correct type of fluid for your vehicle, you’ll be able to maintain the safety and reliability of your brakes, keeping you and your passengers safe on the road. So, remember to always check your owner’s manual and use fresh, appropriate brake fluid when performing any brake maintenance.
Tip 2: Follow manufacturer’s instructions
When using a brake bleeder pump, it’s essential to follow the manufacturer’s instructions carefully. Not only does this ensure that you don’t damage the equipment or your vehicle, but it also guarantees that the pump is working effectively. Make sure to read the instructions thoroughly before starting, and don’t be afraid to double-check if you’re unsure about anything.
Each pump is different, so it’s crucial to know the correct way to use it, including how to assemble it and how to bleed your brakes thoroughly. By following the manufacturer’s guidelines, you’ll get the most out of your pump, and be able to complete the task at hand in a safe and efficient manner. Remember, safety should always be your top priority when working with brake systems.
Tip 3: Keep it clean
When it comes to using your brake bleeder pump effectively, one important tip to keep in mind is to keep it clean. Brake fluid is highly corrosive and can cause damage to the pump if it’s not cleaned properly after each use. Make sure to wipe down the exterior of the pump and any accessories you use with a clean cloth before and after each use.
Additionally, be mindful of any spills or drips that may occur during the bleeding process. These can be cleaned up with a rag and some brake cleaner. By keeping your brake bleeder pump clean, you’ll ensure its longevity and ability to work effectively time after time.
Conclusion
In conclusion, making a brake bleeder pump is easier than you might think. With a little ingenuity, the right tools, and a willingness to get your hands dirty, you too can have a clever and cost-effective solution for bleeding your brakes. And who knows, you might even impress your mechanic friends with your resourcefulness.
Just remember, safety first and don’t get too carried away with your newfound brake bleeding prowess. Happy DIY-ing!”
FAQs
What is a brake bleeder pump used for?
A brake bleeder pump is used to remove air from the brake system and replace it with brake fluid, ensuring proper brake function.
Can I use a vacuum cleaner to bleed my brakes?
No, a vacuum cleaner does not provide the necessary pressure to effectively bleed brakes. A brake bleeder pump or pressure bleeder should be used instead.
How do I use a brake bleeder pump?
First, locate the brake bleeder valve on each brake caliper or wheel cylinder. Attach the pump to the valve and open the valve. Pump the brake pedal until all air bubbles are removed from the brake lines.
Can I bleed my brakes by myself?
It is possible to bleed your brakes by yourself using a brake bleeder pump, but it may be easier with a partner. A partner can pump the brakes while you operate the pump.
Do I need to bleed my brakes after replacing brake pads?
It is not always necessary to bleed your brakes after replacing brake pads, but it is recommended to ensure proper braking performance.
How often should I bleed my brakes?
It is recommended to bleed your brakes every 2 years or whenever brake fluid is replaced.
What type of brake fluid should I use with a brake bleeder pump?
Consult your vehicle’s owner’s manual or a professional mechanic to determine the correct type of brake fluid for your vehicle. Use only the recommended type of brake fluid with your brake bleeder pump.
