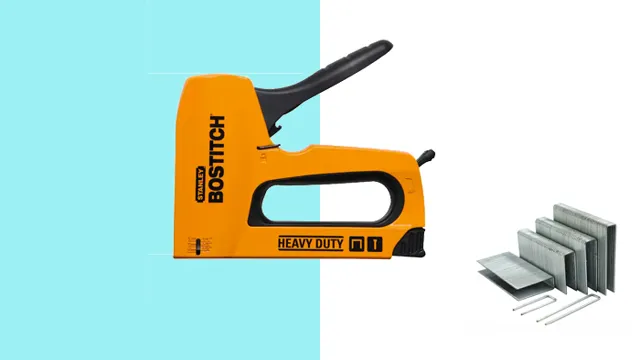
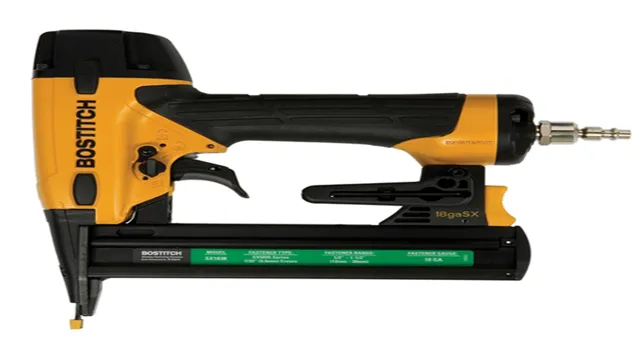
There’s nothing more frustrating than trying to use a staple gun, only to realize it’s not loaded properly. That’s why we’re here to guide you on how to load a Bostitch staple gun. Whether you’re a carpenter, DIY enthusiast, or simply looking to fix things at home, the process can be relatively simple once you know how to do it.
In this blog post, we’ll cover everything you need to know, from preparing your staple gun, to loading the staples correctly. So grab your Bostitch gun and let’s get started!
Types of Staples for Bostitch Staple Guns
If you’re wondering how to load a staple gun Bostitch-style, it’s important to know that different types of staples are used for different jobs. Bostitch staple guns come in a variety of models that work with specific types of staples. For example, some models use heavy-duty staples that are ideal for securing insulation, roofing felt, or carpet padding.
Other models use standard staples that are perfect for household projects like upholstery, carpentry, and general repairs. It’s important to check the label on your Bostitch staple gun to see which type of staples it uses so you can load it correctly. Once you’ve identified the right type of staple, it’s as simple as opening the magazine, inserting the staples, and closing the magazine securely.
With a properly-loaded staple gun, you can tackle all sorts of DIY projects with ease and accuracy.
Standard Staples
When it comes to staple guns, having the right type of staple is crucial for the job. For Bostitch staple guns, there are several types of staples available that are considered “standard staples.” These include 1/4″, 3/8″, and 1/2″ staples.
The 1/4″ staple is perfect for light-duty jobs such as attaching fabric to wood or stapling papers. The 3/8″ staple is a great choice for jobs involving thicker materials like cardboard boxes or insulation. And the 1/2″ staple is suitable for heavy-duty projects like roofing or installing wire mesh.
It’s essential to choose the correct staple size, as using the wrong staple could result in a weak hold or damage to the materials. Whether you’re a DIY enthusiast or a professional handyman, having a variety of standard staples in your toolbox can help you tackle any task with ease.

Heavy Duty Staples
Heavy Duty Staples If you have a Bostitch staple gun, you’re probably familiar with the wide range of staples available. But if you’re looking for heavy-duty staples, there are a few options to consider. First, there are the standard heavy-duty staples, which are great for securing heavy materials like cardboard or thick fabrics.
These staples are typically made of thick, durable metal and are available in a variety of sizes. Another type of heavy-duty staple is the narrow crown staple, which is ideal for jobs that require a strong hold but with less visible damage. These staples are perfect for attaching trim, molding, and furniture frames.
Finally, there are the wide crown staples, which are specifically designed for larger-scale projects like roofing or flooring. These staples are thicker and wider than standard staples, providing a more secure hold for heavy materials. No matter what type of heavy-duty staple you need, Bostitch offers a variety of options to choose from for any job.
Brad Nails
Brad Nails If you’ve got a Bostitch staple gun, then you’ll know just how handy they are for all sorts of DIY jobs. But did you know that there are different types of staples available for these guns, and they all serve different purposes? Firstly, there are standard staples, which are great for general use. They come in a range of sizes, so you can choose the one that’s best for your project.
Next, there are heavy-duty staples, which are ideal for tougher materials such as roofing felt or carpet underlay. These staples are thicker and stronger, so they can withstand more pressure. Then there are brads, which are like small nails.
These are perfect for attaching trim or moulding, as they create a much neater finish than a regular staple. Finally, there are narrow crown staples, which have a smaller crown than regular staples, making them ideal for tighter spaces. So, next time you’re using your Bostitch staple gun, consider which type of staple is best for the job at hand.
Preparing the Staple Gun
If you’re wondering how to load a staple gun bostitch, don’t worry, it’s relatively easy. Start by selecting the right staples for your gun. Make sure the staples match the gun’s specific model, as well as the job you’re planning to use it for.
Once you have the right staples, pull back on the slide located at the back of the gun until it pops out of place. Then, load the staples into the chamber making sure that the arrow printed on the staple matches up with the arrow on the staple gun. Once you finish loading the staples, slide the chamber back into place until you hear a click.
Give your staple gun a test shot on a piece of scrap material to make sure it’s working correctly, and you’re good to go!
Unloading any Existing Staples
Before you can begin using your staple gun, it is essential to ensure that there are no existing staples left inside it. Unloading any existing staples will prevent any accidents or jams from occurring later on. Start by checking the staple magazine and removing any visible staples.
Then, squeeze the handle of the staple gun to release the pusher and push it forward to empty any remaining staples inside. Once the staple gun is empty, you can begin preparing it for use by loading it with your desired staples. By taking the time to properly prepare your staple gun, you can ensure safe and efficient use every time.
Clearing any Jammed Staples
When it comes to clearing a jammed staple gun, it’s crucial to take the necessary precautions to avoid injury to yourself or damage to materials around you. Before beginning, ensure that the staple gun is unplugged, and the staples have been removed. Check the user manual to determine which parts can be safely removed to access the jammed staple.
Utilize a pair of pliers to gently remove the jammed staple or use a flathead screwdriver to push it out from the back. Be careful not to apply excessive force as the staple gun’s delicate parts can easily break. Once the jammed staple has been removed, reassemble the staple gun and test it with a few staples before resuming work.
By following these steps, you’ll be able to maintain your equipment and ensure safety in the workplace.
Loading the Staples
If you’re wondering how to load a staple gun Bostitch, we’ve got you covered. First, ensure your stapler is empty before proceeding. Then, firmly press the latch located at the back of the stapler to open up the staple gun.
Take a look inside to determine the direction in which you need to load the staples. Usually, the staples should be facing downwards with the pointed end facing out. Proceed to load the staples by sliding them into the chamber and ensuring they are secure.
Once this is done, close the stapler and give it a few test firings to ensure that everything is working correctly. By following these instructions, you can successfully load your Bostitch staple gun and be ready for any stapling task that comes your way.
Step-by-Step Guide
Loading staples into a stapler may seem like a small task, but it is an essential one to ensure smooth functioning of your stapler. Here’s a step-by-step guide on how to load your staples correctly. Firstly, locate the staple compartment at the back of your stapler.
Press the release button or slide the loader back to open the compartment. Then, insert the staple strip with the pointy ends facing downwards towards the baseplate of the stapler. Make sure the strip fits snugly into the designated tracks.
Push the loader back into place until you hear a click. You’re all set to start stapling! Remember to check if your staples fit the size and capacity of your stapler to prevent jams or misfires. Following these simple steps can save you time and effort in your stapling tasks.
So, go ahead and load your staples like a pro!
Closing the Staple Gun
Closing a staple gun properly is essential to ensure it works optimally and doesn’t cause any accidents or damage. While loading staples might seem simple, it’s a crucial step to make sure your staple gun is ready to use. Begin by locating the pusher rod near the loading rail, and slide it back towards the handle.
You’ll see a small slot where the staples go, so push them in firmly until they’re loaded correctly. Once the staples are in place, slide the pusher rod forward so that it locks into position. Test it out by pressing the staple gun against a piece of paper or cardboard to make sure the staples come out effortlessly.
If you’re having trouble, double-check that the staples are loaded correctly and the pusher rod is tightly in place. With these steps, loading your staple gun is easy and safe, making sure your projects will be completed without a hitch. So, go ahead and get stapling!
Conclusion
Loading a staple gun may seem like a daunting task, but fear not! With patience and determination (and a bit of practice), you’ll be firing staples like a pro. Just remember to follow the instructions carefully, don’t force anything, and always use the appropriate sized staples for your gun. And if all else fails, just remember what they say: when in doubt, stapler it out!”
FAQs
How do I load staples into a Bostitch staple gun?
To load staples into a Bostitch staple gun, first, make sure the gun is unplugged or unpowered. Locate the pusher rod by opening the front of the magazine and pulling the pusher rod towards you. Insert the staples into the magazine with the sharp points facing down. Push the pusher rod back into place until it clicks.
How many staples can a Bostitch staple gun hold?
The magazine of a Bostitch staple gun can typically hold anywhere from 84 to 210 staples, depending on the model and staple size.
Can I use different sized staples in my Bostitch staple gun?
The type and size of staples that can be used in a Bostitch staple gun depend on the specific model. Refer to the user manual or packaging for the correct staple size and type.
How do I troubleshoot a jammed Bostitch staple gun?
If your Bostitch staple gun jams, first disconnect it from any power source. Remove the staple magazine and clear any jammed staples. Check the magazine for any damage or debris and clean as necessary. Reinsert the magazine and test the gun with a few staples.
Can a Bostitch staple gun be used for heavy-duty projects?
Yes, Bostitch offers heavy-duty staple guns that are designed for tougher materials and projects. Be sure to check the maximum staple length and width for the specific model you are using to ensure it can handle the job.
How often should I oil my Bostitch staple gun?
It is recommended to oil your Bostitch staple gun after every 5000 staples or every week, whichever comes first. Use a high-quality pneumatic tool oil and apply a few drops into the air inlet before use.
What is the warranty on a Bostitch staple gun?
The warranty on Bostitch staple guns can vary by model, but most come with a limited lifetime warranty against any defects in materials or workmanship. Be sure to check the warranty information for your specific model.


