Are you tired of your bench grinder spinning out of control? Do you need to adjust the speed for different projects but don’t know where to start? Installing a speed control for your bench grinder may be the perfect solution for you. Whether you’re a DIY enthusiast or a professional woodworker, having the ability to control the speed of your bench grinder is essential for achieving the perfect finish. It allows you to work on a variety of materials and projects with ease, from sharpening tools to polishing metals.
Installing a speed control may seem daunting, but it’s a straightforward process that can be completed in just a few steps. With the right tools and guidance, you can have your bench grinder running smoothly and efficiently in no time. In this blog, we’ll guide you through the process of installing a speed control for your bench grinder, step by step.
We’ll cover everything from selecting the right speed control for your grinder to wiring it correctly. With our help, you can take your woodworking to new heights and achieve the results you’ve always wanted.
Introduction
Installing a speed control for a bench grinder can be a great way to improve the versatility and functionality of your tool. With a speed control, you’ll be able to adjust the RPMs of your grinder, allowing you to work with a wider range of materials and achieve more precise results. To install a speed control, the first step is to make sure you have the necessary tools, such as a screwdriver and wire cutters.
Then, you’ll need to identify the power source of your grinder and determine whether it’s AC or DC. From there, you’ll need to select a compatible speed control and wire it into your grinder’s power supply. Properly installed, a speed control can be a valuable addition to your bench grinder setup, helping you tackle new projects with ease and precision.
What is a Bench Grinder?
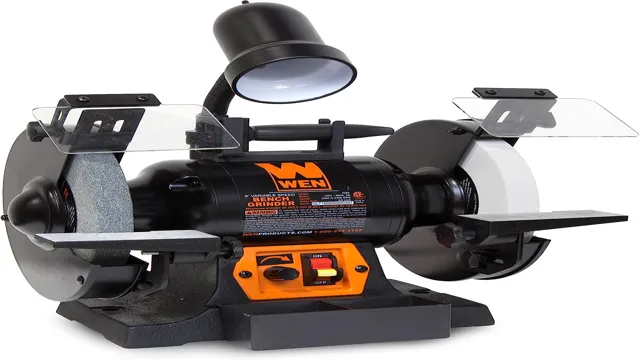
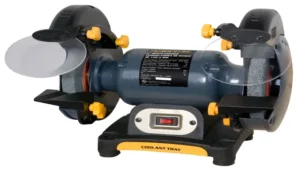
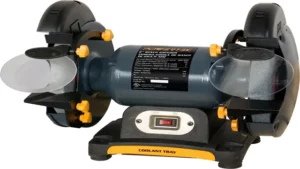
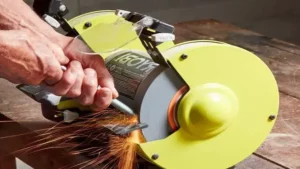
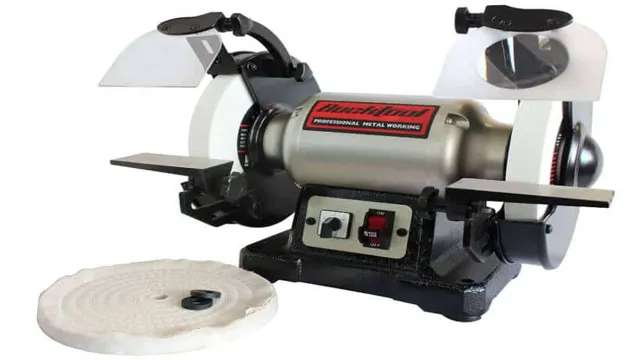
A bench grinder is a tool commonly used to sharpen, deburr, or polish materials. It consists of a motor that drives two wheels, one for grinding and the other for polishing. The grinding wheel provides coarse abrasion, while the polishing wheel is typically finer for a smoother finish.
Bench grinders can be powered by either electricity or manually with a foot pedal. They are available in various sizes, and the size of the grinding wheel usually determines the size of the bench grinder. Bench grinders are very versatile and can be used for a variety of tasks, including grinding down metal and shaping wood.
They are commonly found in workshops or garages where they can be used for a range of applications. Overall, a bench grinder is an essential tool for any DIY enthusiast or professional tradesperson.
Why Install a Speed Control?
If you’re asking yourself why you should install a speed control on your equipment, then you’re in the right place. A speed control, also known as a variable frequency drive (VFD), is essential for controlling the speed of an electric motor. It allows you to adjust the speed of your equipment to match the specific needs of your application and helps you achieve optimal performance.
With a VFD, you can reduce energy consumption, enhance the lifespan of your equipment, and reduce wear and tear on parts. In short, a speed control is a smart investment that can pay off in the long run. So if you’re looking to improve the efficiency of your equipment and save money, installing a VFD should be at the top of your list.
Things You Need
If you’re looking to install speed control for your bench grinder, there are a few things you’ll need to get started. First and foremost, you’ll need the speed controller itself. This can come in many different forms, from basic rotary switches to more advanced electronic controllers with digital displays.
It’s important to choose one that’s compatible with your bench grinder motor and has the necessary voltage and amperage ratings. In addition, you’ll need some basic electrical tools, like wire cutters and strippers, screwdrivers, and pliers. It’s also a good idea to have a multimeter on hand to help you test the connections and make sure everything is wired correctly.
Finally, you’ll need some basic electrical knowledge to get the job done safely and effectively. If you’re not comfortable working with electricity, it’s always best to hire a professional to help you out. With the right tools and knowledge, however, installing a speed controller for your bench grinder can be a relatively simple and straightforward process.
Speed Control Kit
If you’re looking to upgrade the speed of your vehicle, a speed control kit is just the solution you need. But before you go ahead and purchase one, it’s important to know what things you’ll need. First and foremost, you’ll need a high-quality speed control kit that’s compatible with your vehicle.
Next, you’ll need some basic tools to install the kit, such as a wrench set, pliers, screwdrivers, and wire strippers. Additionally, it’s crucial to have a good understanding of your vehicle’s wiring system so that you can easily incorporate the kit into it. Lastly, you’ll need a bit of patience and time to ensure that the installation process is done correctly.
With the right tools and knowledge, installing a speed control kit can be a straightforward process and will provide you with a much-needed boost in speed. So, gear up and get ready to experience a faster ride ahead!
Screwdriver
If you’re looking to do some DIY projects at home, a screwdriver is an essential tool to have. But before you start, it’s important to have a few things on hand. Firstly, make sure you have the correct type of screwdriver.
There are two main types: flathead and Phillips. Flathead screwdrivers have a single blade that fits into a slot in the screw head, while Phillips screwdrivers have a four-star-shaped tip that fits into a corresponding recess in the screw head. It’s important to have different sizes of each type, as the size of the screw will determine the size of the screwdriver you’ll need.
Additionally, consider investing in a set of screwdriver bits that can be used with a power drill. This will make your job easier, speed things up, and ensure more accurate results. Finally, always wear appropriate safety gear, including gloves and eye protection, when you’re working with tools.
By having these things on hand, you’ll be better equipped to tackle any DIY project and make sure your hard work pays off in the end.
Wiring Strippers
When it comes to wiring strippers, having the right tools can make all the difference. There are a few things you’ll need in order to properly strip wires, whether you’re working on a small DIY project or a larger electrical job. First and foremost, you’ll need a good quality wire stripper.
Look for one with a comfortable grip and sharp cutting edge, as this will make the job much easier. You’ll also want a wire cutter, which is essential for snipping off the ends of wires once they’ve been stripped. Finally, having a pair of pliers on hand can be helpful for twisting wires together.
With these basic tools, you’ll be well on your way to properly stripping wires for any electrical project. Just be sure to take your time and work carefully to avoid damaging the wires or yourself in the process. Remember, safety always comes first!
Wire Nuts
Wire nuts are an essential tool for any DIY electrical project. These small plastic caps, also known as wire connectors, come in a variety of sizes and colors to fit different gauge wires. When used correctly, they can securely connect multiple wires and prevent electrical shorts or fires.
However, before using wire nuts, there are a few things you need to know to ensure safety. First, make sure that the wires you are connecting have the same gauge and insulation type. Next, strip the wires’ ends so that they are clean and free of frayed ends.
Then, twist the wires together before placing the wire nut over them and twisting it clockwise until it is tight. Finally, tug on the wires to ensure they are securely held in place. Remember to always use the appropriate size and color wire nut and never overstuff them with too many wires.
With these tips in mind, you can confidently use wire nuts for your electrical projects.
Step-by-Step Guide
Installing speed control for a bench grinder can seem like a daunting task, but it doesn’t have to be. By following a few simple steps, you can do it yourself and have greater control over your grinding tasks. First, make sure you have the right materials, including a speed control module and a bench grinder that is compatible with it.
Next, turn off the power to your grinder and remove any grinding wheels or covers. Attach the speed control module to your grinder according to the manufacturer’s instructions, making sure to secure it tightly and connect all of the wires correctly. Finally, replace any covers or equipment you removed and turn the power back on to test out your new speed control.
With a little patience and attention to detail, you’ll have a safer and more efficient grinding setup in no time.
Step 1: Unplug and Disassemble the Bench Grinder
Bench Grinder If you need to repair or clean your bench grinder, the first step is to unplug and disassemble it. This process may vary depending on the type of bench grinder you have, but generally, you’ll need to remove any guards or covers to access the inner workings. It’s important to be thorough when disassembling the grinder so that you can properly inspect and clean each component.
Make sure to keep track of any screws or parts that you remove, as you’ll need to reassemble the grinder later. Safety is key, so make sure the grinder is unplugged and that you’re wearing proper protective gear like gloves and glasses before starting. Once you’ve disassembled the grinder, you’re ready to move on to the next step in the repair process.
Step 2: Install the Speed Control Kit
The second step in installing a speed control kit is to actually install the kit itself. This may seem like a straightforward task, but it’s important to follow the manufacturer’s instructions carefully to ensure proper installation and function. First, locate the speed control kit and identify all the parts and components.
Then, use the included hardware to attach the control module to the designated area in the vehicle. Next, connect the wiring harness to the control module and the necessary wires in the vehicle. It’s essential to make sure all connections are secure and free of any loose wires or exposed connections.
Finally, reassemble any interior components that were removed during the installation process, and test the speed control kit to ensure it’s functioning correctly. Once you’ve completed this step, you’re well on your way to enjoying a smoother driving experience with enhanced speed control capabilities.
Step 3: Connect the Wires
Connecting the wires is the next crucial step in setting up your electrical circuit. First things first, ensure that you have all the necessary tools and materials including wire strippers, pliers, electrical tape, and wire nuts. Identify which wire is the hot wire and which one is the neutral wire.
Strip both wires to reveal the copper wires and gently twist each one. Take the hot wire and connect it to the brass-colored screw on the outlet and the neutral wire to the silver-colored screw. Tighten the screws on both wires to secure the connections.
Double-check that the wires are connected correctly and not loose. Cover the electrical connections with electrical tape for added safety. And lastly, before turning the power back on, make sure to test the outlet with a voltage tester.
Only switch the power back on when you are confident that all the wiring is secure and safe to use.
Step 4: Reassemble the Bench Grinder
After disassembling and cleaning your bench grinder, it’s time to put it back together. Start by placing the motor assembly back onto the base and securing it with the bolts you removed earlier. Then, attach the arbor and tighten it to the proper torque using a torque wrench.
For safety reasons, ensure that the guards are in the correct position and properly tightened to prevent accidents. Lastly, reattach any other components that you removed, such as the spark guards or tool rests. Double-check everything before turning it back on to ensure that it’s functioning correctly.
Taking the time to properly reassemble your bench grinder will not only prevent accidents but also ensure that it works efficiently and effectively.
Safety Precautions
If you’re planning to install a speed control for your bench grinder, there are a few safety precautions you should keep in mind for a smooth and successful installation process. Firstly, make sure to turn off the power source and unplug the grinder before starting any work. Remove any objects near the grinder, and put on appropriate personal protective equipment such as safety glasses, gloves, and a dust mask.
Next, read the instruction manual for your speed control carefully to ensure you understand the installation process and any potential risks involved. Use the right tools for the job and follow the guidelines listed in the manual. Once you’ve completed the installation, test the speed control before using it to ensure your bench grinder is running smoothly and safely.
Remember, proper safety precautions not only protect you but also ensure the longevity and effective use of your bench grinder.
Turn Off the Power
When it comes to working with electrical appliances or circuits, safety should always be your top priority. One of the most important safety precautions that you should never ignore is turning off the power before you start working on any electrical wiring or device. This is because electricity can be extremely dangerous and can cause serious injury or even death if you come into contact with it.
To ensure that you stay safe, always turn off the power at the circuit breaker or fuse box before you start working on any electrical project. Additionally, make sure that you use the appropriate safety gear such as rubber gloves and protective eyewear to protect yourself from any potential hazards. By taking these simple safety precautions, you can protect yourself and those around you from potential accidents and injuries related to electrical works.
So, the next time you start working on an electrical device or circuit, always remember to turn off the power to stay safe.
Handle the Wires Carefully
When working with wires, it is important to handle them with care and take safety precautions to prevent injury or damage to equipment. One of the most important things to keep in mind is to always turn off the power source before handling any wires. This will prevent electrical shock and potential fires.
Additionally, it’s important to wear protective gear such as gloves and goggles to protect yourself from any hazards. When cutting wires, make sure to use wire cutters and not scissors or other sharp tools that can damage the wires or cause you to accidentally cut yourself. It’s crucial to properly ground wires to prevent electrocution and damage to sensitive equipment.
Remember to never overload circuits and to always follow proper wiring diagrams and instructions. By taking these safety precautions, you can ensure a safe and successful wiring project without any mishaps.
Conclusion
Congratulations, you have successfully learned how to install speed control for your bench grinder! With this newfound power, you can adjust the speed to perfectly match the task at hand. Whether you’re sharpening blades or shaping metal, you can now take the reins and grind with precision. Remember, with great grinding power comes great responsibility, so always wear proper safety gear and never leave your grinder unattended.
Now, go forth and grind with finesse!”
FAQs
What is a speed control for a bench grinder?
A speed control for a bench grinder is a device that allows you to adjust the speed of the grinding wheel.
Why would I need a speed control for my bench grinder?
You might need a speed control for your bench grinder if you want to grind materials that require different speeds or if you want to reduce the risk of overheating your grinder.
How do I choose the right speed control for my bench grinder?
You should choose a speed control that is compatible with your specific bench grinder model and that can handle the voltage and amperage of your grinder.
Can I install a speed control myself?
Yes, you can install a speed control for your bench grinder yourself, but you should be familiar with wiring and electrical safety before attempting to do so.
Are there any risks associated with installing a speed control on my bench grinder?
Yes, if you install the speed control incorrectly or use the wrong type of control, it could damage your grinder or create a safety hazard.
How much does a speed control for a bench grinder cost?
The cost of a speed control for a bench grinder can vary, but generally ranges from $30 to $100 depending on the type of control and the brand.
What are some common brands of speed controls for bench grinders?
Some common brands of speed controls for bench grinders include VFDs (Variable Frequency Drives), Sabretooth, and Dial-In Controls.
