PEX clamps are a popular method for joining PEX tubing in plumbing systems. This alternative to traditional copper or PVC pipes is becoming more and more common due to its flexibility, durability, and ease of installation. However, without proper knowledge of how to crimp PEX clamps, the installation process can become daunting.
But fear not, because we are here to guide you through the process step-by-step. With simple tools and a little practice, you can become an expert in crimping PEX clamps. So, grab your PEX tubing and follow along as we take you through the process of crimping PEX clamps.
Overview of PEX Clamps
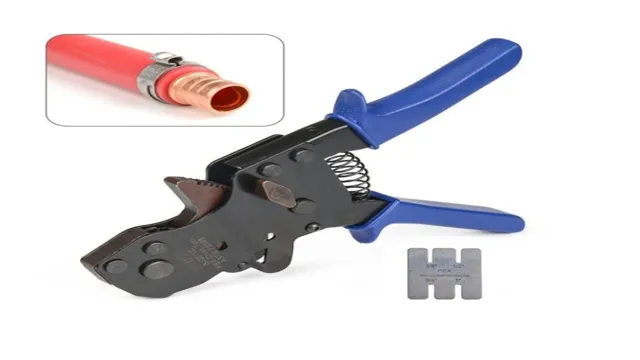
If you’re looking for a reliable and easy-to-install plumbing solution, PEX pipes with crimped PEX clamps are a great option. PEX clamps are used to secure PEX tubing to fittings and valves, creating a tight seal that prevents leaks. The crimping process is simple and can be done with a specialized tool called a PEX clamp cinch tool.
First, slide the clamp onto the tubing, then insert the fitting into the end of the tubing. Position the clamp over the barbs of the fitting, making sure it fits snugly. Finally, use the cinch tool to crimp the clamp tight around the fitting and tubing, creating a secure seal.
The whole process is fast and easy and can be done with minimal experience or training. Plus, PEX pipes and clamps are durable and long-lasting, making them a great investment for any home or building project. With the right tools and a little know-how, anyone can learn how to crimp PEX clamps and enjoy the benefits of this reliable plumbing solution.
What are PEX Clamps?
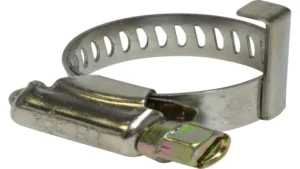
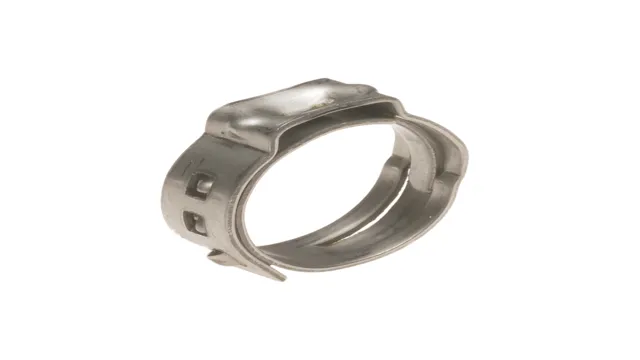
PEX clamps are a type of fastening mechanism used in plumbing with PEX pipes. These clamps are generally made of stainless steel or copper and are used to securely connect PEX pipes to fittings. PEX clamps come in different sizes and types – for instance, some have ear tabs while others have crimp rings.
Regardless of the type of clamp, their primary function is to create an airtight seal between the PEX pipe and the fitting. PEX clamps are quite versatile and can be used in many different types of plumbing systems. They are an excellent choice for DIY enthusiasts because they are easy to install and can be used to repair leaks or replace damaged parts.
If you’re working with PEX pipes and fittings, be sure to choose the right type of clamp for the job to ensure a tight, secure, and long-lasting seal.
Why Use PEX Clamps?
PEX clamps are a popular choice for connecting PEX pipe in plumbing systems. These clamps provide a secure and reliable connection without the need for complex tools or special skills. PEX clamps are made of stainless steel and are designed to fit tightly around a PEX pipe, creating a powerful hold that can withstand high water pressure and temperature changes.
Using PEX clamps is a great choice for DIY plumbers or professionals who want to save time and money on their plumbing projects. The design of these clamps allows for easy installation and removal, making repairs and maintenance a breeze. With the growing popularity of PEX pipes, PEX clamps are a top choice for all kinds of plumbing applications.
Tools Needed for Crimping PEX Clamps
When it comes to working with PEX piping, being equipped with the right tools is key to getting the job done effectively and efficiently. Crimping PEX clamps is a common task that requires a specific set of tools. Firstly, you’ll need a PEX crimp tool, which is designed to compress PEX clamps around the fittings to create a secure seal.
There are various crimp tools on the market, so it’s important to choose one that matches the size of your PEX clamps. You will also need a PEX cutter to cut the PEX piping to the appropriate length. Additionally, having a deburring tool is essential, as it helps to remove any sharp edges or remnants that may be left after cutting the PEX.
Lastly, having a good pair of pliers to help hold the clamps in place while crimping can make the whole process much easier. With these tools on hand, you’ll be well-equipped to crimp PEX clamps with ease and confidence, ensuring your piping system is secure and leak-free.
PEX Crimp Tool
One of the essential tools needed for crimping PEX (cross-linked polyethylene) clamps is a PEX crimp tool. This tool is used to securely attach the PEX fittings to the tubing by compressing the crimp ring around the connection. PEX crimp tools come in different sizes, based on the tubing diameter and the crimp ring size.
It is important to consider the compatibility of the PEX crimp tool with the type of clamps being used. The quality of the PEX crimp tool is also crucial in ensuring a tight and leak-free connection. Investing in a good PEX crimp tool can save time, reduce the risk of errors, and provide reliable results.
So, if you are planning a DIY PEX installation project, don’t forget to add a high-quality PEX crimp tool to your list of tools. Happy crimping!
PEX Clamps
PEX Clamps When it comes to working with PEX plumbing systems, crimping PEX clamps is a crucial step to ensure a secure and leak-free connection. To do this, you’ll need a few essential tools. Firstly, you’ll need a PEX crimping tool, which is designed to compress the ring onto the PEX tubing and fitting.
There are two types of PEX crimping tools- manual and battery-powered. The manual tool requires you to squeeze the handles together to complete the crimp, while the battery-powered tool does the work for you. You’ll also need a pair of adjustable pliers or a pipe cutter to cut the PEX tubing to the desired length, and a PEX clamp removal tool to remove a clamp in case of mistakes.
It’s also essential to have a depth gauge tool or a measuring tape to ensure that the tubing is inserted to the correct depth into the fitting before crimping. With these necessary tools in hand, you’ll be ready to crimp PEX clamps with confidence and achieve a watertight seal.
Marker or Measuring Tape
When it comes to crimping PEX clamps, there are a few tools that you’ll need to get the job done right. One important tool is a marker or measuring tape. Why? Because precision is key when crimping PEX connections.
You’ll need to measure out the exact length of PEX tubing that you’ll need for your particular job, and mark it clearly so that you know exactly where to make your cuts. A measuring tape will help you get accurate measurements, and a marker will ensure that you make your cuts in the right spot. So, before you start crimping PEX clamps, make sure you have a good measuring tape and a reliable marker at your disposal.
With the right tools, you’ll be able to make clean, precise cuts every time – and that means a job well done!
Steps for Crimping PEX Clamps
If you’re looking to connect PEX pipes, one of the best methods is by using PEX clamps. Crimping PEX clamps may seem daunting at first, but it’s actually quite simple. First, make sure to choose the right sized clamp for your particular PEX pipe.
Then, use a crimp tool to fasten the clamp securely around the pipe and fitting. The key is to apply enough pressure to create a tight seal, but not so much that you damage the pipe or fitting. It’s important to crimp in the center of the clamp, and to avoid crimping too close to the edge.
Check for leaks by running water through the pipes and inspecting for any signs of leakage. With a little practice and attention to detail, crimping PEX clamps can be a straightforward and reliable way to connect PEX pipes.
Step 1: Measure and Mark PEX Pipe
PEX clamps are a great way to secure PEX pipes and prevent them from leaking. The process of crimping PEX clamps might seem daunting, but it’s actually quite easy when you know what you’re doing. The first step is to measure and mark the PEX pipe where the clamp will go.
Make sure to measure accurately so that the clamp is secured tightly. Once you have marked the pipe, slide the crimp ring onto the PEX pipe, making sure it is in the correct position. Then, use a crimping tool to squeeze the ring onto the pipe until it is tight.
Repeat the process for all the clamps you need to install. With the right tools and a little bit of practice, crimping PEX clamps can be a breeze. So, don’t be intimidated and give it a try! Remember, a properly crimped PEX clamp can prevent leaks and save you from costly repairs in the future.
Step 2: Slip PEX Clamps onto Pipe
When it comes to crimping PEX clamps, slipping them onto the pipe is an essential step. This may seem simple, but it’s important to ensure that the clamps are properly positioned. Start by selecting the correct size clamps for your PEX pipe.
Then, slide them onto the pipe along with any fittings that will be attached. Make sure to position them about 1/8″ to 1/4″ away from the joint, leaving enough space for the crimping tool to seal the connection. It’s crucial to double-check that the clamps are even and fully seated on the pipe before moving on to the crimping process.
Taking the time to properly position the PEX clamps will result in a secure and leak-proof connection.
Step 3: Position Crimp Ring over the Barb
When it comes to crimping PEX clamps, positioning the crimp ring over the barb is a critical step. The barb is the small, ridged end of the PEX fitting that inserts into the tubing. When you slide the crimp ring over the barb, you’ll notice that it fits snugly into place.
This creates a secure connection that will prevent leaks and other problems down the road. To ensure that you position the crimp ring correctly, you’ll want to make sure that it’s flush against the fitting itself. This will require a bit of pressure, but it’s essential for creating a tight seal.
Once you’ve positioned the crimp ring in place, you can use your crimping tool to secure it into place permanently. Keep in mind that the crimping process will alter the shape of the ring slightly, so you’ll want to make sure that you’re using the correct tool and applying the correct amount of pressure. By taking the time to position the crimp ring correctly, you’ll be able to create a reliable connection that will last for years to come.
Whether you’re dealing with a plumbing project in your home or a larger commercial job, it’s important to follow these steps to ensure that everything is done correctly. With a bit of practice, you’ll be able to crimp PEX clamps with ease and confidence.
Step 4: Crimp the Ring into Place
To properly crimp PEX clamps, it’s important to follow the correct steps. As mentioned earlier, the crimping tool is a crucial component of the process. Once you have positioned the crimp ring, use the tool to crimp it into place.
This will create a secure and leak-free connection between the PEX pipe and fitting. It’s important to ensure that the crimp ring is not over or under crimped, as this can affect the overall integrity of the connection. So, how do you know if you’ve crimped it correctly? You’ll want to double-check that the crimp ring has been completely compressed, and that the tool marks are visible on the ring.
Additionally, make sure that it has been crimped over the fitting teeth on one side and the pipe on the other. With these steps properly followed, you can rest assured that your PEX plumbing system will function properly for a long time to come.
Tips for Successful Crimping
Crimping Pex clamps may seem daunting at first, but with a few tips, you can ensure a successful crimp every time. Firstly, make sure your tool is in good condition. A damaged or worn-out tool can result in improper crimps, leading to leaks and potential damage.
Secondly, prep your Pex tubing by cutting it straight with a tube cutter and smoothing out any rough edges. This will ensure a snug fit in the clamp and reduce the risk of leaks. Thirdly, position the clamp correctly with the tabs facing each other and use even pressure to make the crimp.
Don’t over-crimp, as it may weaken the tubing and lead to failure. Finally, use a go/no-go gauge to check the crimp’s integrity and confirm it has been done correctly. By following these simple tips, you can confidently crimp Pex clamps for a reliable and leak-free plumbing system.
Tip 1: Check for Proper Fit
When it comes to successful crimping, one of the most important tips to keep in mind is checking for proper fit. This is because a crimp that is not properly sized for the wire can result in poor electrical connectivity or even a potential hazard. To ensure a proper fit, it is important to choose the right crimping tool for the job and carefully select the correct size of terminal or connector to match the wire being used.
Additionally, it is important to double-check that the wire is fully inserted into the terminal or connector before crimping. By taking these steps, you can help ensure a safe and reliable electrical connection every time.
Tip 2: Use the Correct Tool
To achieve successful crimping, it’s crucial to use the correct tool for the job. Using the wrong tool can cause damage to the components or lead to an unreliable connection. Each connector has a designated tool that ensures proper crimping.
It’s essential to use the appropriate tool for the connector’s gauge wire and insulation type. It’s also crucial to use a high-quality tool that allows consistent crimping results and won’t wear out quickly. Investing in the right tool can save time and money in the long run and increase the chances of a successful crimping job.
So, always be sure to use the designated tool to ensure a reliable and long-lasting connection.
Tip 3: Use the Proper Amount of Pressure
When it comes to successful crimping, the amount of pressure you use is crucial. Applying too little pressure can cause a weak crimp, while too much pressure can damage the tool or the terminal itself. It is essential to follow the manufacturer’s recommended specifications for the amount of pressure needed for each specific terminal and wire size.
This can be done by adjusting the tool’s settings or using a different die set. Additionally, be sure to hold the tool in a comfortable and stable grip to prevent any sudden movements that could affect the crimping process. By using the proper amount of pressure, you can ensure a secure and reliable crimp that will hold up under stress.
Remember, a crimping tool is a precision instrument, and treating it with care and precision will ensure the best results.
Conclusion
So there you have it folks – crimping PEX clamps is as easy as 1-2- With the right tools and a bit of practice, you’ll be bending and squeezing like a pro in no time. And hey, who knows – maybe someday you’ll be known as the Crimp King or Queen of your neighborhood.
Just remember to always wear protective eyewear and gloves, and never crimp while under the influence. Happy crimping!”
FAQs
What tools do I need to crimp PEX clamps?
You will need a PEX crimp tool, PEX clamps, and PEX tubing.
Can I reuse PEX clamps?
No, PEX clamps cannot be reused. Once they have been crimped, they cannot be removed without cutting them off.
How tight should I crimp PEX clamps?
PEX clamps should be crimped until the sides of the clamp are touching. This ensures a secure seal.
Can I use a regular crimping tool for PEX clamps?
No, you need a PEX crimp tool to properly crimp PEX clamps. Regular crimping tools may damage the clamp or tubing.
How do I know if I have crimped the PEX clamp correctly?
You can check for a properly crimped PEX clamp by ensuring the sides of the clamp are touching and the clamp is centered on the crimp connection.
What size PEX clamps should I use?
The size of the PEX clamp should match the size of the PEX tubing being used. Common sizes include 1/2″, 3/4″, and 1″.
Can I crimp PEX clamps by hand?
It is not recommended to crimp PEX clamps by hand as it may result in an improperly crimped connection and a leak. It is best to use a PEX crimp tool for the most secure connection.
