“Is your car battery giving you trouble lately? Are you struggling with poor performance, reduced power output, or even no start-ups at all? Chances are, your battery clamps could be the culprit. Battery clamps are the essential components that make sure the battery’s electrical connection stays secure and stable. Over time, they can corrode or wear out, affecting the battery’s performance and preventing you from starting your vehicle.
Worry not; replacing faulty battery clamps is a simple DIY task that anyone can do with the right tools and some basic knowledge. In this guide, we’ll walk you through the process of how to change battery clamps step by step, so you’ll never have to call a mechanic again for this simple task.”
Introduction
Changing battery clamps is a simple and easy process that can be done with a few basic tools. First, you will need to disconnect the battery by removing the negative cable. Once that is done, loosen the clamp bolts with a wrench and remove the old battery clamps.
Clean the terminals with a wire brush to remove any rust or corrosion that may have built up over time. Then, install the new clamps and tighten the bolts securely. Finally, reconnect the negative cable to the battery and you’re done! It’s important to remember to always wear gloves and eye protection when working with batteries, and to make sure the battery is disconnected before starting any work.
So if you’re experiencing issues with your battery, don’t hesitate to change the clamps yourself to ensure your car is running smoothly.
Why Change Battery Clamps?
Changing battery clamps might not seem like a big deal, but it can make all the difference in your car’s performance. Over time, battery clamps can become corroded or loose, causing your car’s electrical system to malfunction. This can cause problems such as difficulty starting your car, flickering lights, or even a dead battery.
By replacing your battery clamps, you ensure a secure connection between your car’s battery and electrical system. This will provide consistent and reliable power, which is essential for operating your car’s electronics and engine. Don’t underestimate the importance of battery clamps – they are a small but crucial component of your car’s electrical system.

Tools Required
In order to complete any task or project efficiently, you need the right tools. The same goes for any DIY home project. The tools required for a DIY job could be very different from one project to another.
That’s why it is always important to have a good idea of what tools you’ll need before you begin your project. Some of the basic tools you’ll need for most DIY projects include a hammer, screwdrivers, pliers, measuring tape, and a level. Other tools might be needed depending on your project type, such as a power drill, saw, or sander.
It’s worth taking the time to research and invest in good quality tools, as it can make a huge difference in the outcome of your project. By having the right tools on hand, you can ensure that your DIY project will be completed on time and to your satisfaction.
Step-by-Step Guide
Changing battery clamps may seem like a daunting task, but with the right tools and steps, it can be quite simple. First, ensure that the engine is off and the key is out of the ignition to avoid any potential accidents. Next, loosen and remove the negative clamp from the old battery by using a wrench.
Repeat the same process for the positive clamp. Once both clamps are removed, clean them using baking soda and water to remove any corrosion or rust. After cleaning, attach the new positive clamp to the positive battery terminal, followed by the negative clamp to the negative terminal.
Tighten both clamps with a wrench, making sure they are secure enough. Finally, start the engine to confirm that the battery is properly attached and working. Regular maintenance of your vehicle’s battery clamps can help prolong battery life and ensure safe driving.
Step 1: Locate the Battery Clamps
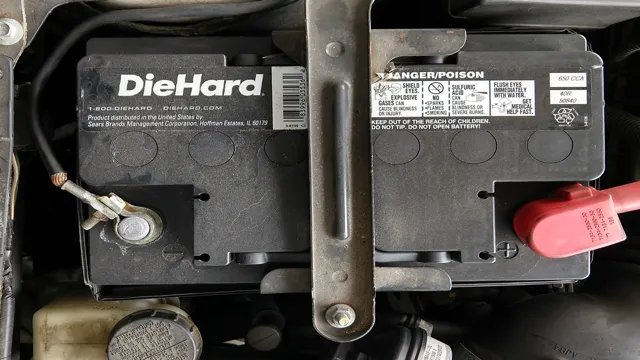
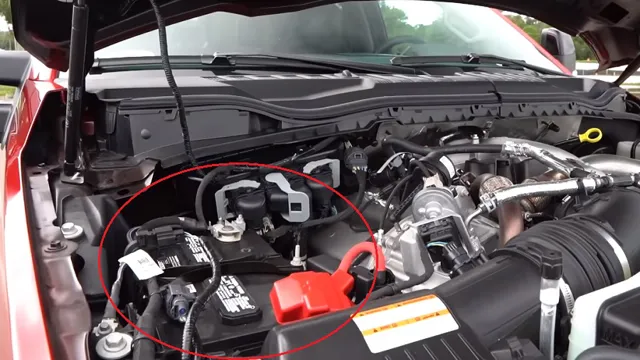
As you prepare to change your car battery, the first step is to locate the battery clamps. These clamps are typically found on the tops or sides of the battery, and they are connected to the battery’s terminals, which are labeled positive and negative. It’s crucial to know which is which, so make sure to locate those labels as well.
Once you’ve found the clamps, the next step is to use a wrench to loosen the nuts that hold them in place. Keep in mind that the nuts may be on quite tight, so be prepared to use some elbow grease. Once the nuts are loose enough, you can lift the clamps off of the terminals and set them aside.
By completing this simple task, you’re already on your way to swapping out your old battery for a new one and getting your vehicle running smoothly once again.
Step 2: Remove the Old Clamps
Removing old clamps is an essential part of any plumbing project. Not only do they get in the way, but they can also be a real pain to remove. The first thing you need to do is locate the clamps that need to be removed.
If you’re working on a sink or toilet, the clamps are likely located on the bottom of the fixture. Once you’ve located them, use a pair of pliers to loosen them. Depending on how tight they are, you may need to apply some pressure to get them to budge.
Once they’re loose enough, you can slide them off the pipe. Be careful not to damage the pipe or any other components while removing them. Once you’ve removed the old clamps, discard them and move on to the next step.
This process may seem simple, but taking the time to do it right will save you a lot of headaches down the line. Remember to use a firm but gentle grip on the pliers to avoid damaging the fixture, and always wear protective gear to prevent injury.
Step 3: Identify the Positive and Negative Clamps
When it comes to jump-starting your vehicle, it’s essential to identify the positive and negative clamps. The positive clamp is typically colored red, and the negative clamp is colored black. It’s crucial to ensure that these clamps are connected to the correct battery terminals.
The positive clamp should be connected to the positive terminal of the dead battery, and the negative clamp should be connected to an unpainted metal surface on the engine block or chassis of the car. Always double-check the placement of the clamps before starting the jump-start process. Connecting the clamps correctly will prevent damage to the battery or electrical components of your vehicle.
Remember, safety should always come first!
Step 4: Install the New Clamps
After removing the old clamps and placing the new exhaust pipes, the next step is to install the new clamps. This is a vital step as the new clamps will secure the individual pipes and ensure that there are no leaks. Start by placing the clamp in the correct position on the exhaust pipe, ensuring that it is in the right direction and orientation.
Tighten the clamp using a wrench until it is snug and holds the exhaust pipe firmly in place. Do not over-tighten, as this may crush the exhaust pipe and cause damage. Repeat this process for all the clamps, checking that the pipes are correctly aligned and making any necessary adjustments.
With the new clamps in place, your exhaust system is now secure and ready to go. Remember to check for any leaks before taking your car for a drive.
Conclusion
Well folks, there you have it. Changing battery clamps is a no-brainer. It’s as easy as unscrewing, unplugging, and re-plugging.
Just remember to disconnect the negative cable first and connect it last. And if you’re feeling extra fancy, you can even upgrade to some snazzy new clamps to give your ride a stylish new edge. So go forth and conquer, my fellow mechanics.
Your car battery will thank you for it!”
Safety Precautions
When it comes to safety precautions, there are a few important steps to follow to ensure that you stay safe and avoid any accidents. Firstly, always wear the appropriate protective gear for the task at hand. This may include items such as gloves, safety goggles, or steel-toed boots.
Secondly, make sure that the area you’re working in is properly ventilated and free from any potential hazards. It’s also important to keep your workspace clean and tidy to avoid tripping or falling. When operating heavy machinery or tools, always read the instructions carefully and follow them closely.
Remember to never rush or take shortcuts when completing a task, as this can lead to accidents. By taking these steps, you can ensure that you stay safe and avoid any unnecessary risks while working.
Final Thoughts
In conclusion, following this step-by-step guide can help boost your digital marketing success. Starting by defining your target audience, you can create a more personalized approach and tailor your marketing strategies to meet their specific needs. Researching your competition can help you stay ahead of the game and differentiate yourself from similar businesses in your industry.
By setting clear goals and analyzing your progress, you can continuously refine your plan and measure your success. Additionally, utilizing different channels and types of content can help diversify your approach and reach a wider audience. Overall, remember to stay consistent, adapt to changes, and always prioritize quality over quantity.
With these tactics in mind, you can create a successful and impactful digital marketing strategy.
FAQs
What tools do I need to change my battery clamps?
You will need a wrench, pliers, wire cutters, and a battery terminal puller.
Can I use any type of replacement battery clamp?
It is recommended to use the same type and size of battery clamp as the original.
Is it necessary to disconnect the battery before changing the clamps?
Yes, always disconnect the battery before attempting to change the clamps to prevent electrocution.
How do I remove the old battery clamps?
Use a battery terminal puller or pliers to remove the old clamps. Remember to loosen the bolts before attempting to remove the clamps.
What should I do if the battery clamp is corroded?
Use a wire brush or sandpaper to clean the corrosion off the battery clamp before attempting to remove it.
How tight should the battery clamp be?
The battery clamp should be tight enough to prevent any movement, but not too tight that it damages the battery terminals.
Can I change the battery clamps myself or should I take it to a mechanic?
If you have the necessary tools and experience, you can change the battery clamps yourself. However, if you are unsure, it is recommended to take it to a mechanic.


