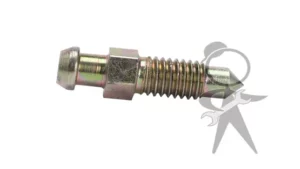
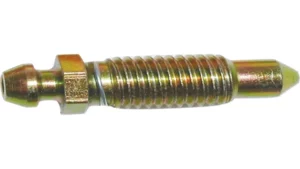
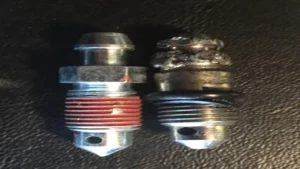
Have you ever struggled with trying to bleed your brakes alone or with a helper who can’t seem to get the job done? Fret no more! Building a pressure brake bleeder can make the process of bleeding your brakes a breeze. Not only is it a straightforward and inexpensive solution, but a pressure brake bleeder can also save time, money, and make you feel like a pro mechanic in your own garage. In this blog post, we’ll guide you through the step-by-step process of building your own pressure brake bleeder without breaking the bank.
So, grab your tools, put on your DIY cap, and let’s get started on creating a hassle-free brake bleeding experience.
Introduction
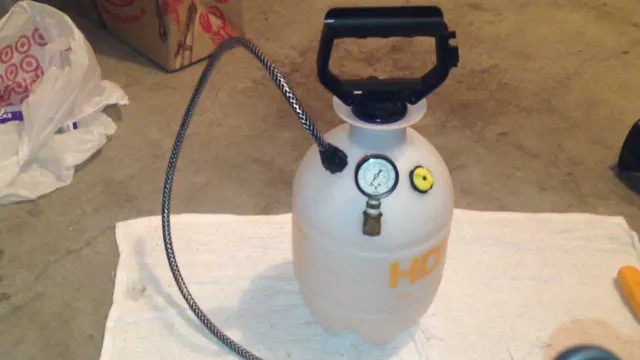
Building a pressure brake bleeder can save you a lot of time and money, especially if you’re someone who works on cars frequently. This tool can help you bleed your brakes quickly and efficiently by using air pressure to force air and old brake fluid out of your brake lines. To build your own pressure brake bleeder, you’ll need a few essential tools and materials, including a pressure tank, a regulator, a pressure gauge, a hose, and a set of adapters for your brake lines.
Once you have all of your supplies, it’s just a matter of assembling the parts, testing the pressure, and bleeding your brakes. With a well-built pressure brake bleeder, you can enjoy better brake performance and faster maintenance on your vehicle.
Benefits of a Pressure Brake Bleeder
Pressure brake bleeders are quickly becoming a popular choice among car enthusiasts who regularly perform their brake maintenance. These small, handheld devices can make a world of difference in brake bleeding efficiency, especially when compared to traditional bleeding methods. The benefits of a pressure brake bleeder are numerous, but one of the most significant advantages is that they save time.
Using a pressure brake bleeder eliminates the need for a second person to pump the brake pedal, making brake bleeding a one-person job. This means you can complete the task in less time and with less frustration, especially when you’re working on your own. Additionally, using a pressure brake bleeder ensures that air is fully removed from the brake lines, resulting in a more efficient brake system with better performance and reliability.
Ultimately, investing in a pressure brake bleeder is a smart choice for anyone who wants to save time and get the best possible results when performing brake maintenance on their vehicle.
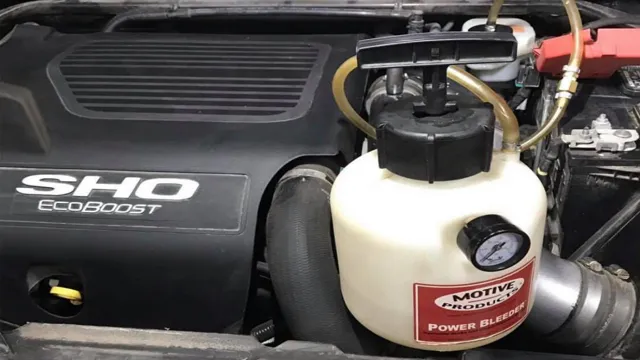
Materials and Tools Needed
When it comes to DIY projects, having the right tools and materials is crucial. Whether you’re a seasoned DIYer or just starting out, it’s important to have the proper resources to get the job done right. Some common materials you may need include lumber, screws, nails, and paint.
For more specific projects, you may need specialized materials like drywall or electrical wiring. As for tools, you’ll likely need a saw, drill, hammer, and screwdriver at a minimum. Power tools like a circular saw or table saw may also come in handy depending on the project.
Having the right materials and tools will not only make your project easier, but it will also ensure that the end result is safe, sturdy, and visually appealing. So before you start your next DIY project, take the time to gather the necessary resources and ensure that you have everything you need to get the task done effectively.
Step-by-Step Guide
If you’re planning to bleed the brakes on your vehicle, a pressure brake bleeder can help make the process easier and more efficient. Fortunately, building a pressure brake bleeder is a fairly simple process that can be completed with just a few basic tools and materials. To get started, you’ll need a brake fluid reservoir, a brake fluid pressure gauge, a pressure release valve, and a length of rubber tubing.
First, attach the pressure release valve to the brake fluid reservoir, then connect the gauge to the valve using the rubber tubing. Finally, connect the other end of the tubing to the brake bleeder valve on your vehicle and pressurize the system. With a bit of trial and error to adjust the pressure, you should be able to achieve a smooth and effective brake bleeding process with your newly built pressure brake bleeder.
Just remember to follow all safety guidelines and use caution when working with pressurized fluids.
Step 1: Prepare the Container
When preparing a container for use, there are some critical first steps to take to ensure your plants have the best possible chance of thriving. The first step is to prepare the container properly. This involves ensuring it is clean and free from any debris or contaminants that could harm the plants once they are planted.
Start by cleaning the container with hot soapy water and rinsing it thoroughly. Once it is clean and dry, you can add any necessary drainage materials such as rocks or gravel to the bottom of the container. This will help prevent water from pooling in the soil and causing root rot.
By taking the time to prepare your container correctly, you’ll be able to create an ideal environment for your plants to grow and thrive.
Step 2: Attach the Air Fitting
To continue with the installation of your air compressor, the next step involves attaching the air fitting. The air fitting is responsible for connecting your air compressor to your air tool or equipment. First, ensure that the threads of both the fitting and your air tool are clean and free from any debris.
Next, take the male end of the air fitting and screw it into the female end of your air hose. Remember to tighten it firmly to prevent any air leaks. The other end of the air fitting should then be screwed onto your air compressor’s discharge port.
Make sure to tighten this end as well to prevent any leaks. Once everything is properly secured, you can turn on your air compressor and test the connection by using your chosen air tool. The keyword used organically in this paragraph is “air fitting”.
Step 3: Install the Bleeder Valve
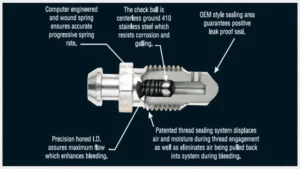
Now that you have successfully flushed your brake system and replaced the old brake fluid, it’s time to move on to step three – installing the bleeder valve. This step may seem simple, but it is crucial to ensure that your brake system is properly bled and that there is no air trapped inside. First, locate the bleeder valve on your brake caliper, typically found on the top or the backside.
Next, attach a clear plastic hose over the valve and securely fasten it with a wrench. Then, have a friend sit in the driver’s seat and press down on the brake pedal while you slowly turn the bleeder valve counterclockwise. You should see a stream of brake fluid coming out of the valve and into the plastic hose.
Finally, once the stream of fluid is free of air bubbles, close the valve and repeat the process on the other brake calipers. As always, check your owner’s manual and consult a professional mechanic if you are unsure about any step. Ensuring proper brake function is essential for your safety on the road.
Step 4: Add Brake Fluid
Brake Fluid When it comes to adding brake fluid, it’s important to choose the right type and follow the correct steps. Firstly, open the hood of your vehicle and locate the brake fluid reservoir. Check the owner’s manual if you’re unsure of its location.
Next, use a funnel to avoid any spillage, and add enough brake fluid until it reaches the recommended level. Make sure to only use the type specified in the owner’s manual, as the wrong fluid can damage the braking system. It’s also important to keep the reservoir cap closed tightly to prevent any air or moisture from entering.
It’s recommended to check the brake fluid level every few months, and particularly before long road trips. By taking the time to properly add brake fluid, you can help ensure your brakes work effectively and keep you safe on the road.
Step 5: Bleed the Brakes
Bleeding the brakes is a crucial step in keeping your vehicle running smoothly and safely. This process involves removing air bubbles from the brake lines to ensure they function properly. To begin, locate the brake bleed screw on each wheel and clean the area around it.
Then, attach a clear plastic hose to the bleed screw and submerge the other end in a container filled with fresh brake fluid. Have a friend pump the brakes several times then hold the pedal down while you loosen the bleed screw to release any trapped air. Repeat this process, starting with the wheel farthest from the master cylinder, and work your way towards it until all air bubbles are removed.
Once finished, tighten the bleed screws, top off the brake fluid, and test your brakes to ensure they are functioning correctly. By following these steps, you can ensure safe and effective stopping power for your vehicle.
Tips and Precautions
Building a pressure brake bleeder may seem daunting for those who have never done it. However, with the right guidance and precautions, it can be done easily. Before starting the project, make sure you have all the necessary tools and supplies such as a vacuum pump, hoses, and a pressure gauge.
Safety should also be a top priority – wear safety goggles and gloves to protect yourself from brake fluid. Additionally, ensure that all parts are tightly secured to prevent any potential leaks. When ready, follow instructions precisely and take your time to avoid mistakes that could result in improper brake bleeding.
By taking these tips and precautions into consideration, you can confidently build a pressure brake bleeder and improve the performance of your vehicle’s brakes.
Use the Right Pressure
When it comes to using a pressure washer, it is crucial to know the right pressure for the task at hand. Using the wrong pressure can result in damage to surfaces, causing costly repairs. A general rule to keep in mind is that softer surfaces, such as wood and stucco, require low pressure, while harder surfaces, like concrete and brick, can handle higher pressure.
Additionally, it is important to wear protective gear, such as gloves and eye gear, and to keep the pressure washer nozzle at least one foot away from the surface being cleaned to prevent unintentional damage. Always testing the pressure on a small, inconspicuous area before starting the full cleaning process is also recommended to ensure the right pressure is being used for the task. By using the right pressure and taking necessary precautions, a pressure washer can be an efficient and effective tool for cleaning various surfaces.
Monitor the Fluid Level
It is crucial to regularly monitor the fluid level in your vehicle to ensure that it is running smoothly and prevent damage to your engine. One of the most common reasons for a breakdown is low fluid levels, and neglecting to check this can be costly in more ways than one. A good rule of thumb is to check your fluids at least once a month, and always before a long road trip.
Be sure to check the oil, transmission fluid, coolant, brake fluid, and washer fluid, and add more as needed. Additionally, it’s essential to follow the manufacturer’s recommended intervals for changing your fluids. By keeping an eye on your fluid levels and taking preventive measures, you can avoid costly repairs and ensure your car is running smoothly.
Remember, prevention is always better than cure!
Conclusion
So there you have it! Building a pressure brake bleeder is a fun and rewarding DIY project that can save you time and money on maintaining your vehicle’s brakes. With just a few simple tools and some elbow grease, you can create a tool that will make your brake bleeding process a breeze. And who knows, you may even impress your mechanic friends with your newfound knowledge and skills.
So go ahead, grab your tools, and get started on building your very own pressure brake bleeder. Your brakes (and your wallet) will thank you!”
FAQs
What is a pressure brake bleeder and how does it work?
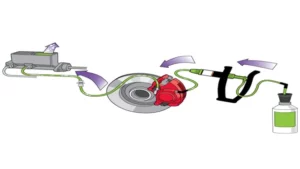
A pressure brake bleeder is a tool that pressurizes the brake system to flush out old brake fluid and air pockets. It works by pushing new fluid through the system while releasing air from the brake lines.
Can I build my own pressure brake bleeder?
Yes, you can build your own pressure brake bleeder using parts from a hardware store or by purchasing a DIY pressure brake bleeder kit. However, it is important to follow proper safety measures and instructions.
How much pressure should I use when using a pressure brake bleeder?
The recommended pressure range for a pressure brake bleeder is between 10 to 20 psi. However, it is important to refer to your brake system’s manufacturer specifications to ensure the correct pressure.
Is it necessary to bleed brakes with a pressure brake bleeder?
Bleeding brakes is important to maintain the braking system’s performance and ensure safety. While a pressure brake bleeder is not the only method, it is an effective and efficient way to flush out old fluid and air.
How often should I use a pressure brake bleeder on my vehicle?
The frequency of using a pressure brake bleeder varies depending on your vehicle’s maintenance needs and driving conditions. However, it is typically recommended to bleed brakes every 2 years or sooner if you notice decreased braking performance.
Is it safe to use a pressure brake bleeder on ABS brakes?
Yes, it is safe to use a pressure brake bleeder on ABS brakes. However, it is important to follow the brake system’s manufacturer specifications and bleed the brakes properly to avoid damaging the ABS module.
Can I use a pressure brake bleeder on all types of vehicles?
Pressurized brake bleeders are compatible with most types of vehicles, including cars, trucks, motorcycles, and RVs. However, it is important to ensure that the pressure brake bleeder is suitable for your specific vehicle’s brake system.
