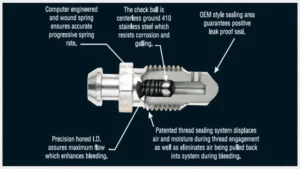
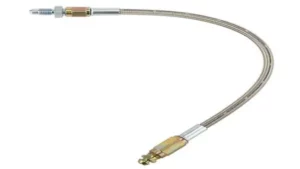
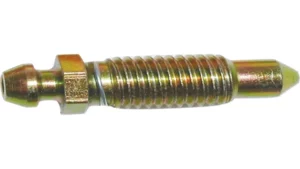
Are you tired of squishy brakes that don’t give you the stopping power you need? Bleeding your brakes with a brake bleeder can help restore the responsiveness and safety of your braking system. But how do you do it? Bleeding your brake system involves removing any air bubbles that have gotten into the brake lines, which can cause the brakes to feel spongy and reduce their effectiveness. A brake bleeder is a simple tool that allows you to easily remove this air by creating a vacuum that sucks out any trapped air.
By following a few simple steps and using a brake bleeder, you can efficiently and effectively bleed your brake system without having to take your vehicle to a mechanic. Whether you’re a seasoned mechanic or a DIY enthusiast, this process is relatively simple and can be done with just a few basic tools. In this blog post, we’ll walk you through the steps of how to bleed brakes with a brake bleeder, giving you the confidence to tackle this important maintenance task on your own.
We’ll also provide valuable tips and insights to help you ensure that your brake system is functioning at its best, keeping you and your passengers safer on the road. So, let’s dive in and get those brakes working like new again!
What You Will Need
If you’re looking to bleed your brakes with a brake bleeder, there are a few things you’ll need beforehand. The first thing to consider is the type of brake fluid your car requires. Make sure to check your car’s owner manual to find out which type of brake fluid is recommended.
Next, you’ll need a brake bleeder kit which includes a hand-held pump, a clear hose, and a bleeder bottle. You’ll also need a wrench, a jack and jack stands, and a clean rag. Before you start the bleeding process, be sure to wear safety goggles and gloves to protect your eyes and hands from any brake fluid that may splash or spill.
With these items in hand, you can now begin the process of bleeding your brakes with ease and confidence. Remember, safety should always come first, so never overlook any steps in the process and take your time to make sure every step is followed correctly.
Brake Bleeder Kit
If you plan to perform brake maintenance at home, investing in a brake bleeder kit is a must-have. However, it’s crucial to ensure that you have the necessary tools to complete the job properly. Firstly, you will require a brake bleeder wrench to loosen and tighten the bleeder valve safely.
Secondly, a clear plastic hose to fit over the bleeder valve, which will connect the other end of the hose to the catch container. It’s also recommended to have a catch container to contain the brake fluid that will come out during the bleeding process. Some brake bleeder kits come with a hand pump or vacuum pump, but if yours doesn’t, you’ll require one to create a vacuum to allow the brake fluid to flow out.
Remember, if air enters the brake lines, it can cause brakes to fail. Therefore, you must have all the necessary tools to do the job correctly and safely.
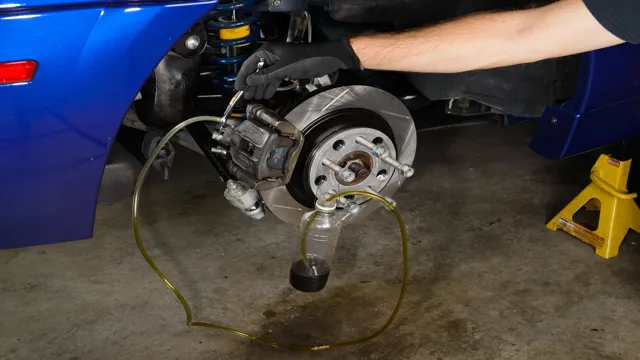
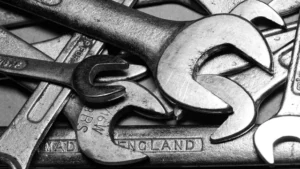
Wrench or Socket
When it comes to DIY car repairs, having the right tools is essential. One of the most common questions beginners have is whether they should use a wrench or a socket set. The answer depends on the job you are trying to do.
If you are working with a bolt that is difficult to reach, a socket set is probably your best bet. Sockets are designed to fit snugly around a bolt head, which makes it easier to apply torque. On the other hand, if you are working with a larger bolt or nut, a wrench may be more appropriate.
Wrenches are available in a range of sizes and styles, so it’s important to choose the right one for the job. Ultimately, it’s always a good idea to have both wrenches and sockets in your toolbox, so you are prepared for any situation that may arise. By utilizing the right tool for the job, you can ensure that your DIY car repairs are successful and efficient.
Brake Fluid
When it comes to brake fluid, there are a few things you’ll need to properly maintain your vehicle’s braking system. First and foremost, you’ll need to determine which type of brake fluid is compatible with your car’s make and model. This information can usually be found in your vehicle’s owner’s manual.
Next, you’ll need a brake fluid tester to check the condition of your current brake fluid, as well as a brake fluid pump to replace it if necessary. It’s important to remember that brake fluid should be replaced every few years, depending on the make and model of your vehicle, to ensure optimal braking performance. Additionally, you’ll need a funnel, a drain pan, and a rag or two to clean up any spills that may occur during the process.
By having the right tools on hand, you can help ensure your vehicle’s brakes are in top condition and perform as they should to keep you safe on the road. So, if you notice any issues with your brakes, don’t hesitate to check your brake fluid and make any necessary adjustments using these essential tools.
Preparing Your Vehicle
If you’re planning on bleeding your brakes with a brake bleeder, it’s important to make sure your vehicle is properly prepared first. Start by checking the brake fluid level and topping it up as needed. Next, locate the brake bleeder screw on each brake caliper and ensure you have the correct size wrench to loosen it.
It’s also a good idea to have extra brake fluid on hand in case you need to refill during the bleeding process. Finally, make sure the vehicle is secure and level, with the emergency brake engaged, so that it doesn’t roll or move during the procedure. Once everything is in order, you’re ready to begin the brake bleeding process with your brake bleeder.
Jack Up the Vehicle
To prepare your vehicle for maintenance or repairs, the first step is typically to jack it up. This allows you better access to the underside of the car and makes it easier to perform any necessary work. However, before doing so, it’s essential to ensure that the vehicle is on level ground and the handbrake is securely engaged.
You should also be careful to choose a stable and secure surface to jack the car on. Avoid soft or uneven ground and opt for a hard, level surface instead. Once you have selected the ideal surface and positioned the vehicle in the correct spot, place the jack under the designated jacking point, following the instructions in your car’s manual, and start jacking the vehicle up.
Remember to go slowly and carefully, ensuring that the jack is stable and secure at all times. By taking these precautions, you can confidently and safely jack up your vehicle to perform any necessary maintenance or repairs, keeping your car running smoothly.
Remove Wheels and Find Brake Calipers
When you begin preparing your vehicle for brake maintenance, the first thing you should do is remove the wheels. This will give you access to the brake calipers, which are responsible for squeezing the brake pads against the rotor to slow or stop the vehicle. Depending on the make and model of your car, the brake calipers may be located behind or in front of the rotor.
You can identify them by their distinctive shape, which looks like a clamp with a piston on each side. It’s important to handle brake parts with care, as they are critical components of your vehicle’s safety system. Using a jack stand or a car lift can also help make the process of removing the wheels and accessing the brake calipers easier and safer.
Once you have located the brake calipers, you can begin inspecting them for signs of wear or damage. Regular brake maintenance can help ensure that your vehicle stops safely and efficiently, so don’t overlook this important step in caring for your car.
Using the Brake Bleeder
Bleeding brakes is crucial to maintaining safe and efficient braking on your vehicle. One way to do this is by using a brake bleeder. The first step is to locate the bleeder valve on each brake caliper and remove its protective cap.
Then, connect the brake bleeder to the valve and make sure the bleeder’s hose is submerged in a container of brake fluid. Next, open the valve and begin pumping the brake pedal until all air bubbles are removed from the system. Finally, close the valve and repeat the process on the remaining calipers until all the brakes have been bled.
With this simple process, you can ensure that your brakes are working at their best and keep yourself and others safe on the road. So, if you’re wondering how to bleed brakes with a brake bleeder, it’s a simple and straightforward process that requires only a little time and effort.
Attach Brake Bleeder to Caliper
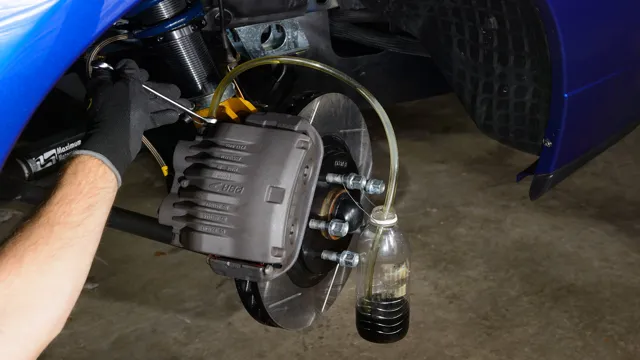
Attaching the brake bleeder to the caliper is a crucial step in the brake bleeding process to ensure optimal performance of your vehicle’s braking system. To use the brake bleeder, you will need to locate the bleeder valve on the caliper. Once you have identified the location of the valve, you can attach the brake bleeder to it.
The brake bleeder kit typically includes a hose and a collection bottle to collect the old brake fluid. It’s essential to make sure that the brake bleeder is securely attached to the valve before proceeding with the brake bleeding process. When you are ready to start, open the valve on the brake bleeder and pump the brake pedal to push out the old fluid.
Keep an eye on the collection bottle, and make sure to close the valve before the bottle overflows. Repeat the process for each brake caliper until all old brake fluid has been removed. By using a brake bleeder, you can easily and effectively replace your brake fluid, which will improve the overall performance of your vehicle’s braking system.
Open Bleeder Valve and Pump Brake Pedal
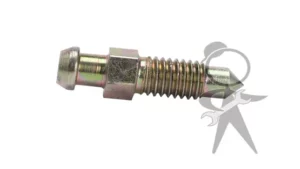
Using the brake bleeder can sometimes feel intimidating, but it’s a straightforward process once you get the hang of it. The first step is to open the bleeder valve, which is typically located near the brake caliper. You’ll need a wrench to do this, and it’s important to be gentle so as not to strip the valve.
Once the valve is open, pump the brake pedal a few times until you can feel resistance. This will pressurize the brake lines and allow the old fluid to escape through the bleeder valve. Keep an eye on the brake fluid level and add more as needed to avoid air getting into the system.
Remember to close the valve once the old fluid has drained out, and repeat the process on the other wheels until all the fluid has been replaced. With a bit of practice, you’ll get the hang of using the brake bleeder and be able to keep your brakes in top condition. So, if you’re experiencing spongy brakes or noticing reduced performance, it’s time to give the brake bleeder a try!
Check Brake Fluid Level and Close Valve
When using a brake bleeder, it is crucial to first check the brake fluid level and ensure that the valve is closed before beginning the process. Firstly, locate the brake fluid reservoir and inspect the fluid level. If the level is too low, refill it to the appropriate mark with the recommended brake fluid.
Next, close the brake bleeder valve and attach the bleeder kit to the brake caliper. Once securely attached, open the brake fluid reservoir cap and remove any excess fluid until it sits below the recommended level. Now, pump the brake pedal and watch the fluid as it exits the bleeder tube.
Continue to pump the pedal until the fluid runs clear, free of any contaminants or air bubbles. After a thorough bleeding, refill the brake reservoir to the appropriate level and test the brakes to ensure they are in proper working order. Following these steps will help maintain proper brake function and keep your vehicle running safely on the road.
Repeat Process for all Calipers
After successfully bleeding one brake caliper, repeat the process for all other calipers. This is important because each brake caliper needs to be bled individually in order to ensure all air bubbles are removed from the brake lines. Starting with the caliper furthest from the master cylinder, attach the brake bleeder and open the valve.
Have a helper pump the brake pedal and hold it down while you close the valve. Release the pedal and repeat the process until all air bubbles are removed. Move on to the next caliper and repeat until all calipers have been bled.
By using a brake bleeder, you can quickly and easily bleed all your brake calipers without the need for a helper, giving you confidence in the safety of your vehicle.
Rear Calipers First
“rear calipers first” When it comes to changing your brake pads, the order in which you replace the calipers is important. Always start with the rear calipers first, as they tend to wear out faster than the front ones. This simple tip can save you time and money in the long run.
Once you’ve completed the rear brake pads, move onto the front. And remember, it’s important to repeat this process for all of your calipers. The brake system in your car is crucial for your safety on the road, so it’s important to take care of it properly.
Don’t hesitate to seek help from a professional mechanic if you’re unsure about the replacement process. By following this simple rule of “rear calipers first,” you can ensure a safer and more enjoyable driving experience.
Front Calipers Second
Now that you’ve successfully changed the front calipers on your vehicle, it’s time to tackle the remaining calipers. The process is similar to what you did previously, so you should have a general idea of what to expect. Start by removing the rear wheels, then the calipers themselves.
Remember to support the brake line to prevent it from coming loose. At this point, you can slide out the old pads and replace them with the new ones. Ensure that the pads are seated properly in the caliper.
Next, compress the caliper piston using a specialized tool. Once it’s fully compressed, you can install the caliper and torque it to the manufacturer’s recommendations. Finally, replace the wheel and repeat these steps for all the remaining calipers.
With some patience and a bit of effort, you’ll have successfully replaced all your vehicle’s calipers, ensuring better braking performance and safety for your drives.
Testing Your Brakes
If you’re having trouble with your brakes feeling spongy or unresponsive, it may be time to bleed them with a brake bleeder. Bleeding the brakes involves removing any air bubbles that have accumulated in the brake lines, which can cause a loss of pressure and make it difficult to stop your vehicle. Using a brake bleeder kit is a fairly simple process, and can be done by most DIY enthusiasts.
First, locate the brake caliper or wheel cylinder that needs to be bled. Then, attach the brake bleeder kit to the bleeding screw and open the valve. Pump the brake pedal or lever until the fluid runs clear and all the air bubbles have been removed.
Once you’ve finished bleeding all the brakes, make sure to top up your brake fluid reservoir and take your car for a test drive to ensure the brakes are working properly. Remember, brakes are one of the most important safety features on your vehicle, so it’s important to keep them in good working order.
Perform a Test Drive
When it comes to performing a test drive, one crucial aspect that you should never overlook is testing your brakes. The brakes are a vital safety feature of any vehicle, and it’s crucial to know how well they function before you hit the road. During your test drive, make sure to simulate various driving scenarios, such as sudden stops and emergency situations.
Doing so can help you determine if your brakes are responsive enough. Listen for any unusual sounds, such as grinding or squeaking, that could indicate issues with your brake pads or rotors. If you notice anything unusual or concerning, don’t hesitate to have a professional mechanic inspect your brakes.
Remember, having reliable brakes is essential for your safety and the safety of others on the road. So, always test your brakes before driving your vehicle, especially for long distances.
Check for Leaks and Proper Braking Response
Testing Your Brakes – Check for Leaks and Proper Braking Response Regular inspections of your car’s brakes can never go wrong; in fact, they can save your life. Checking for leaks and proper braking response is one of the critical aspects of testing your brakes. Leaks are caused by worn-out seals and hoses, and if left unaddressed, can cause a significant safety issue.
When inspecting, start by checking your brake fluid level, which should be between the minimum and maximum marks. If your brake pedal feels spongy or it requires more than normal pressure to stop, it might be an indication of a leak or air in the brake fluid. On the other hand, the braking response can be tested by the way your car behaves during emergency braking.
If you experience a vibration or hear a screeching sound, your brakes may be worn or damaged, and it’s crucial to have them checked by a professional. Remember, your safety is non-negotiable, and your brakes play a massive role in it.
Conclusion
In conclusion, bleeding brakes with a brake bleeder is like giving your car’s circulatory system a much-needed tune-up. By flushing out old, contaminated brake fluid and replacing it with fresh, unobstructed fluid, you’ll ensure your brakes perform at their peak potential. Plus, with the help of a brake bleeder, the process becomes simpler and less messy.
So, don’t let air bubbles and dirty fluid slow down your stopping power. Get your brakes bled properly and hit the road with confidence!”
FAQs
What is a brake bleeder and how does it work in bleeding brakes?
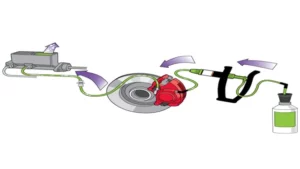
A brake bleeder is a tool used to remove air bubbles and old brake fluid from the brake system. It works by attaching to the brake bleeder valve and creating a vacuum to pull out the old fluid and air.
Can I bleed brakes without a brake bleeder?
Yes, you can bleed brakes without a brake bleeder by using the traditional method of pumping the brake pedal and opening the bleeder valve. However, using a brake bleeder tool can make the process faster and more efficient.
Is it necessary to bleed brakes after replacing brake pads?
While it is not always necessary to bleed brakes after replacing brake pads, it is recommended to inspect the brake fluid and ensure it is not contaminated or old. If there are any signs of contamination or degradation, bleeding the brakes may be necessary.
How often should I bleed my brakes?
It is recommended to bleed brakes every 2 years or 30,000 miles. However, it is important to inspect the brake fluid regularly and bleed the brakes when necessary, such as when there are signs of contamination or air bubbles in the system.
What happens if I do not bleed my brakes?
If brakes are not bled regularly, air bubbles can accumulate in the system and reduce the effectiveness of the brakes. This can lead to longer stopping distances, spongy or soft brakes, and in severe cases, brake failure.
Can I bleed brakes by myself or do I need a professional?
You can bleed brakes by yourself using a brake bleeder tool and following the manufacturer’s instructions. However, if you are not comfortable or confident in your ability to do so, it is recommended to have a professional mechanic perform the task.
What type of brake fluid should I use when bleeding brakes?
It is important to use the type of brake fluid recommended by the vehicle manufacturer. This information can typically be found in the owner’s manual or on the brake fluid reservoir cap. Using the wrong type of brake fluid can lead to brake system damage and failure.
