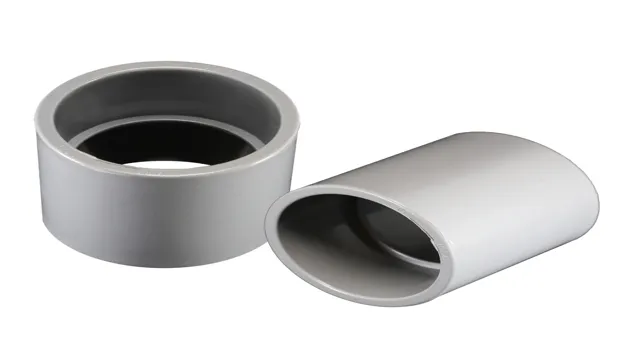
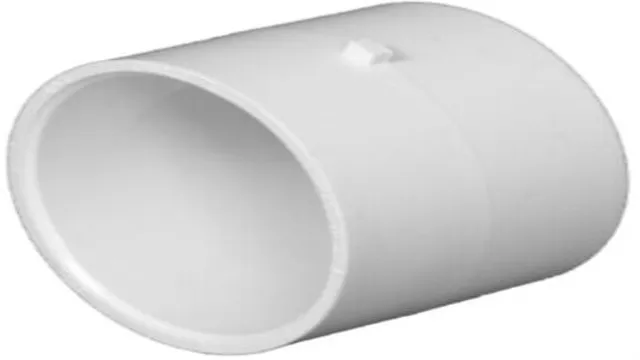
Have you ever had a PVC pipe break or crack, causing water to leak everywhere? It’s a situation that’s definitely not fun to deal with, but thankfully it’s not the end of the world. You don’t necessarily need to call a professional plumber to fix the problem either. With the help of a PVC repair coupling, you can quickly and easily repair the broken pipe yourself.
In this blog post, we’ll explain exactly what a PVC repair coupling is, how it works, and how you can use one to fix your broken PVC pipe in no time. So let’s get started!
What is a PVC Repair Coupling?
If you’re dealing with a damaged PVC pipe, a PVC repair coupling may just be the solution you need. It’s essentially a small tube that fits over the damaged section of the pipe and is used to join two pieces together. Using a repair coupling is relatively simple, and anyone can do it with the right tools.
First, use a hacksaw to cut out the damaged section of the PVC pipe. Then, clean both ends of the remaining pipe thoroughly using sandpaper. Slip the repair coupling onto one end of the pipe and push it down until it’s in the right position.
Next, slide the other end of the piping into the other end of the coupling to complete the repair. Finally, make sure everything is flush, tighten everything down, and test for leaks. A PVC repair coupling can save you the time and expense of replacing a whole section of pipe and ensures your plumbing system remains effective and efficient.
Definition and Features
PVC Repair Coupling If you’re looking for a quick and easy way to fix a leaky PVC pipe, then a PVC repair coupling might be just what you need. This handy tool is designed to connect two pieces of PVC pipe together, even if they have different diameters or are not perfectly aligned. The coupling is made from durable PVC material, which is resistant to corrosion and can withstand a wide range of temperatures and pressures.
One of the key features of a PVC repair coupling is its flexibility. It can be easily installed in tight spaces and awkward angles, making it a great choice for DIY plumbing repairs. Additionally, the coupling is reusable and can be removed and reinstalled multiple times without causing any damage to the pipes.
Overall, a PVC repair coupling is a cost-effective and practical solution for fixing a variety of PVC pipe issues.

Tools and Materials Needed
If you’re looking to repair a broken PVC pipe, a PVC repair coupling may be just what you need. However, before you start, it’s important to have the right tools and materials on hand. First, make sure you have a saw or pipe cutter to cut the PVC pipe to the needed length.
You’ll also need sandpaper or a deburring tool to remove any rough edges on the cut pipe ends. Once your PVC pipe is cut and deburred, you’ll need a PVC primer and cement to join the pieces together. It’s important to follow the manufacturer’s instructions carefully to ensure a proper seal.
Lastly, don’t forget safety gear – protective eyewear and gloves can prevent injuries while handling the saw and primer/cement. By taking the time to gather the proper tools and materials, you can effectively use a PVC repair coupling and fix your broken pipes with ease.
List of Required Tools and Materials
To get started on a project, you need to have the right tools and materials at hand. For any DIY project, you will require a few basic tools such as hammers, screwdrivers, pliers, and power tools like drills and saws. You will also need to have materials such as nails, screws, and glue.
For larger projects, you may need to invest in more advanced tools and materials like paint sprayers, laser levels, and building materials like drywall or lumber. It is important to have a list of all the tools and materials that you need for your specific project. This will ensure that you don’t forget anything and can be prepared to complete the project efficiently.
By having the right tools and materials, you can save time and produce high-quality work that you can be proud of.
Preparing the Pipes for Repair
If you’re dealing with a damaged PVC pipe, a repair coupling can be an excellent solution. But before you start working on the repair, it’s crucial to prepare the pipes properly. The first step is to turn off the water supply to the damaged area.
Next, you’ll need to remove the damaged section of the pipe with a saw or pliers. Make sure to cut the pipe straight and clean up any rough edges. You’ll also want to take the time to clean the pipe and fittings thoroughly with a cloth to ensure a tight seal for the repair coupling.
Once your pipes are prepared, you can install the repair coupling by simply sliding it over the ends of the fitting and tightening the clamps. With a little prep work, your PVC pipes will be as good as new in no time.
Assessing the Damage, Cutting the Pipes, Sanding the Ends
After assessing the damage to the pipes, the next step in preparing them for repair is cutting the pipes and sanding the ends. This may seem like a daunting task, but with the right tools and techniques, it can be done with ease. First, make sure to turn off the water supply and drain any remaining water from the pipes.
Then, using a pipe cutter, cut the damaged section out of the pipe, leaving a clean and straight edge. After cutting, use sandpaper or a pipe reamer to smooth and remove any burrs or rough edges from the ends of the pipes, as this will ensure a tight fit with the replacement piece. Remember to wear protective gear and take caution when cutting and sanding the pipes.
With these steps, you’ll be well on your way to successfully repairing your damaged pipes.
Installing the PVC Repair Coupling
If you need to repair a damaged PVC pipe, a PVC repair coupling is an excellent choice. It’s straightforward to install, and you don’t need to be a professional to do it. The first step is to cut out the damaged section of the PVC pipe; make sure to cut it cleanly and straight.
Next, take the PVC repair coupling and slip one end onto one of the cut edges. Then, slide the other end onto the other cut edge, making sure that it fits snugly. Once you have the PVC repair coupling in place, you’ll need to tighten the clamps that are holding it together.
Use a screwdriver to tighten the clamps, making sure they’re snug but not too tight. After you’ve finished tightening the clamps, turn the water back on to make sure the repair is holding up. With a little bit of effort, a PVC repair coupling can be a straightforward and affordable way to repair damaged PVC pipes.
Sliding the Coupling onto the Pipes, Tightening the Joints
When it comes to repairing PVC pipes, using a PVC repair coupling can make things much easier. One of the steps to successfully installing a PVC repair coupling is sliding it onto the pipes and tightening the joints. This may seem straightforward, but there are a few things to keep in mind.
Firstly, it’s important to make sure the pipes are clean and dry before attempting to slide the coupling on. If there’s any debris or moisture, the coupling may not fit properly. Additionally, it’s important to lubricate the inside of the coupling for easy sliding.
Once the coupling is in position, hand-tighten the joints first before using a wrench to ensure a tight seal. Remember not to over-tighten as this could damage the pipes or coupling. It’s also important to make sure the pipes are aligned properly before tightening the joints.
Following these steps will ensure a successful installation of a PVC repair coupling, which can save time and money in the long run.
Testing the Repaired Pipeline
If you’ve recently repaired your pipeline using a PVC repair coupling and want to ensure that the fix is holding up, there are a few steps you can take to test it out. First, turn off the water supply to the pipeline and drain any remaining water from the system. Then, turn the water supply back on and check for any leaks or drips around the repaired area.
If everything looks good, turn on each fixture or appliance one at a time to check for water pressure and flow. It’s also important to monitor the repaired area over time to ensure that it continues to hold up under pressure. By taking these steps, you can be confident in the effectiveness of your repair and enjoy a working pipeline once again.
So, if you’re wondering how to use PVC repair couplings to fix your pipeline, it’s a simple and effective solution that can have your plumbing up and running in no time.
Inspecting the Coupling, Checking for Leaks or Other Issues
After repairing a pipeline, it’s crucial to test it to ensure it’s functioning correctly. The first step is to inspect the coupling to make sure it’s properly connected and bolted. Then, it’s necessary to check for leaks or other issues.
One way to do this is by using a hydrostatic testing method, which involves filling the pipeline with water and pressurizing it to a certain level. This allows for any leaks or weaknesses in the pipeline to be detected. During the testing process, it’s also important to check for potential damage caused by repairs, such as dents or scratches.
If any issues are discovered during testing, they must be addressed before the pipeline can be put back in service. Testing a repaired pipeline may seem tedious, but it’s a crucial step in ensuring safe, reliable pipeline operations.
Conclusion
In conclusion, using a PVC repair coupling is like having a magic wand for fixing pipes. It’s simple, easy, and takes only a few minutes to do the trick. With this wizardry tool, even the clumsiest and inexperienced DIY-ers can become hotshot plumbers in no time.
So, roll up your sleeves, grab a PVC repair coupling, and let the fixing begin! May the force, ahem, the glue be with you!”
FAQs
What is a PVC repair coupling?
A PVC repair coupling is a type of fitting used to repair broken or damaged PVC pipes without having to replace the entire line.
How does a PVC repair coupling work?
The repair coupling is designed to slip over the damaged section of pipe and create a watertight seal, using a combination of compression and adhesive.
What sizes do PVC repair couplings come in?
PVC repair couplings can be found in a range of sizes, from small ½ inch fittings to large 6 inch fittings.
Can a PVC repair coupling be used for both hot and cold water pipes?
Yes, PVC repair couplings are suitable for use with both hot and cold water pipes.
Do I need any special tools to install a PVC repair coupling?
No, PVC repair couplings can be easily installed with just a wrench or pliers.
Are PVC repair couplings permanent solutions?
While they are designed to last a long time and provide a reliable repair, PVC repair couplings are not considered permanent solutions and may need to be replaced over time.
Can PVC repair couplings be used on other types of pipes besides PVC?
No, PVC repair couplings are designed specifically for use with PVC pipes and may not work with other materials.


