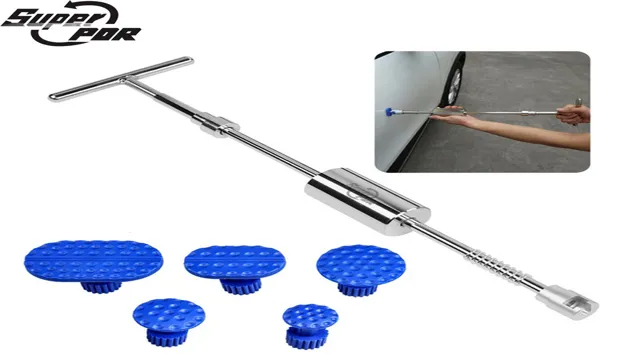
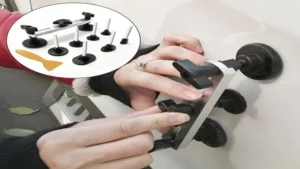
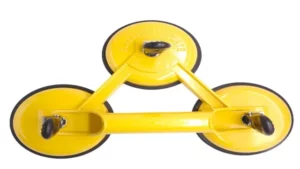
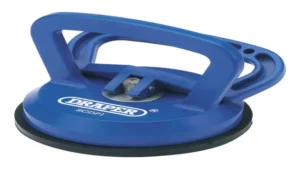
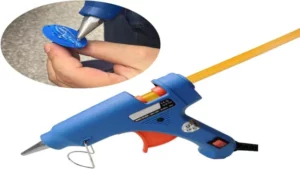
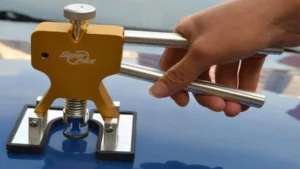
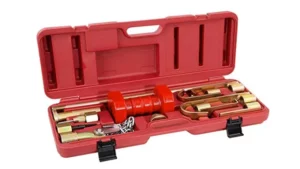
Have you ever had a dent in your car that you just couldn’t ignore anymore? Maybe it’s been sitting there for weeks, taunting you every time you walk by. Well, fear not! Using a PDR dent puller may be just the solution you need to get rid of that pesky mark. But how exactly do you use one of these tools? Don’t worry, we’ve got you covered with a step-by-step guide.
With a little bit of patience and the right technique, you’ll be amazed at how easily you can make your car look brand new again. So, grab a cup of coffee and let’s get started!
Preparation
If you’ve got a dent in your car, using a PDR dent puller may seem like a quick and easy solution – but it’s important to do some preparation first. Start by examining the dent closely, as the size and location of the dent will affect the success of your repair. You also need to ensure that the area around the dent is clean and dry, to allow for proper adhesion of the suction cups.
If applying the dent puller to a curved surface, such as a fender, you may need to use additional suction cups to achieve proper pull. Finally, be sure to read the instructions carefully and be patient – using a dent puller can take some practice to get the hang of, but with the right preparation and technique, you can achieve a smooth and professional-looking repair.
Clean the Dent Area
When it comes to fixing a dent on your vehicle, it’s essential to properly prepare the area before beginning the repair process. One crucial step in the preparation process is to clean the dent area thoroughly. Cleaning the dent area involves removing any dirt, grime, or debris that may be present.
You can do this by using a microfiber cloth and a gentle automotive cleaner. Avoid using harsh chemicals or abrasive materials as they can cause further damage to the car’s surface. Once you have cleaned the dent area, rinse it with water and dry it with a clean, dry cloth.
By doing this, you will ensure that the area is free of dirt and debris, allowing for a more accurate assessment of the damage and increasing the likelihood of a successful repair. Keep in mind that a clean dent area is critical to achieving a smooth and seamless repair. So take your time, use a gentle touch, and be thorough when preparing your dent area.
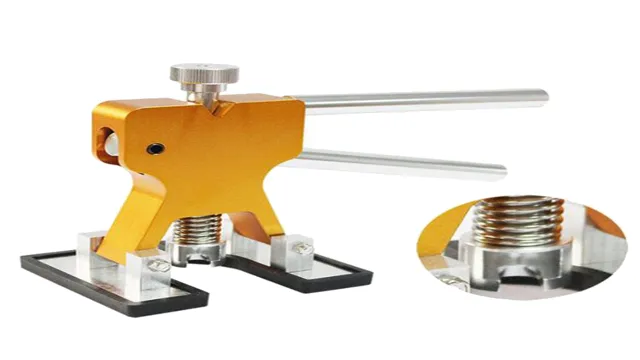
Choose the Right Puller
When choosing the right puller, preparation is key. It’s important to know the size and weight of the object you’ll be pulling and choose a puller that can handle that load. Look for a puller with a capacity rating that exceeds the weight you’ll be pulling, as well as durable materials like hardened steel that can withstand the force.
It’s also important to consider the environment in which you’ll be using the puller. If you’ll be working in a tight space, a compact design may be necessary. Additionally, familiarizing yourself with the instruction manual and any necessary safety precautions can help ensure a successful and safe pulling operation.
By taking the time to prepare and choose the right puller, you can minimize the risk of damage and ensure efficient and effective pulling.
Using the PDR Dent Puller
If you have a dent on your car, you might be wondering how to use a PDR (Paintless Dent Repair) dent puller to fix it. The first step is to clean the area around the dent thoroughly, so there is no dirt or debris that might interfere with the suction cup. Then, moisten the surface with a bit of water, which helps to improve the suction.
Place the suction cup over the center of the dent and apply pressure to create a tight seal. Using a pulling motion, gently and steadily pull the dent outwards until it returns to its original shape. You might need to repeat the process a few times to get the best results, but with patience and practice, you can successfully use a PDR dent puller to repair small dents on your vehicle’s body.
Remember to always follow the instructions carefully and wear protective gloves to avoid hurting your hands during the process.
Attach the Puller
When it comes to using a PDR dent puller, one of the first steps is to attach the puller to the dent. It may seem intimidating at first, but it’s a straightforward process. First, clean the surface area around the dent thoroughly, removing any dirt, debris, or wax buildup.
Then, select the appropriate puller size for the dent and attach it to the center of the dent. Make sure the suction pad is placed directly on the dent, providing a tight seal. Once attached, begin pulling gently on the puller handle, making small adjustments as necessary, until the dent pops back into place.
With a little patience and practice, using a PDR dent puller can be an effective and affordable way to fix those unsightly dings and dents on your vehicle. So why not give it a try and see the results for yourself?
Apply Pressure and Pull
When it comes to removing dents from your vehicle, using a PDR dent puller can be a quick and effective solution. But how exactly does it work? The key is to apply pressure and pull. First, position the puller over the dent, making sure it’s centered.
Then, use the provided suction cups to attach it firmly to the surface of the car. Next, pull the dent puller away from the car, using a steady and firm motion. As you do this, you’ll feel resistance building up, which means the dent is slowly being pulled out.
Keep pulling until the dent is completely removed. One advantage of using a PDR dent puller over other methods is that it doesn’t damage the paint or require any harsh chemicals, making it a much safer option for both you and your car. Overall, using a PDR dent puller is a simple and effective way to get rid of those pesky dents and restore your car’s beauty.
Check the Dent
If you’re looking for a simple and cost-effective way to remove dents from your vehicle, then a PDR (Paintless Dent Removal) tool could be the perfect solution. With a PDR Dent Puller, you can repair small dents caused by hail, car doors, and other minor bumps without affecting the original paint job. To use the tool, simply position it over the affected area and twist the handle to remove the dent.
But before you get started, it’s important to check the dent carefully. Make sure it’s not too deep or too large to be fixed with a PDR tool. If the dent is severe, then you may need to seek professional help.
However, if it’s a small dent, then a PDR tool can be a great option to save you time and money. So why not give it a try and see how easy it can be to fix minor dents on your vehicle with a PDR Dent Puller.
Release the Puller
When it comes to removing dents from your car, using a PDR dent puller can be a game-changer. Once you have positioned the suction cup over the dent, it’s time to release the puller. This can be a nerve-wracking experience for those who have never used a puller before.
But don’t worry, it’s a relatively simple process. You just need to pull the release lever, which will cause the suction cup to release from the dent. However, it’s important to remember that the dent may not completely disappear after the first attempt.
It may take a few tries to fully remove the dent. Don’t get discouraged if your first try doesn’t yield the desired results. Keep trying until you see the dent gradually disappear.
Remember, practice makes perfect!
Final Touches
When using a PDR dent puller, it’s important to focus on the final touches to make sure the repair looks seamless. One of the first steps is to clean the area around the dent with a gentle cleanser and allow it to dry completely. Then, use a small amount of touch-up paint or a paintless dent repair compound to fill in any remaining imperfections.
Finally, take a close look at the surrounding paint job to ensure that there are no visible color discrepancies or texture differences. If there are any issues, consider using a polishing compound or having a professional touch-up paint the area. By taking the time to focus on these final touches, you can ensure that your repair looks professional and seamless.
Clean the Area Again
Now that you’ve decluttered and cleaned out the area, it’s time for final touches! The space may look clean, but it’s important to go over it one more time to make sure it’s spotless. Start by vacuuming or sweeping the floors, and wipe down any surfaces that may have collected dust or debris. If there are any windows in the area, don’t forget to clean them as well.
Once you’ve gone over everything, take a step back and assess the space. Does everything look organized and put away? Do you notice anything that may be out of place or that needs to be cleaned again? This final step is essential to ensure that your space remains clutter-free and tidy. By taking these final touches, you’ll have a clean and organized space that will feel like a breath of fresh air every time you step into it.
Assess the Results
After completing your data analysis, it’s time for the final touches of your assessment. One crucial aspect to consider is the accuracy of your findings. Double-check your methodology, data sources, and calculations to ensure that your results are factual and reliable.
If you notice any discrepancies or outliers, it’s essential to investigate them further to determine their cause and whether they affect your final conclusions. Additionally, it’s crucial to communicate your results effectively to your audience. Consider the best format to present your findings and simplify any technical jargon or complex data visualizations for easier understanding.
Finally, reflecting on your analysis and overall process can help improve your skills for future assessments. By analyzing your strengths and weaknesses, you can refine your approach to better extract valuable insights from your data. Overall, performing a thorough and accurate assessment of your data is critical for making informed decisions and driving positive outcomes in your business or research.
Conclusion
So, there you have it folks – using a PDR dent puller is as easy as pie! With just a few simple steps, you can rid your car of those pesky dents without having to spend a fortune at the body shop. And let’s not forget the added bonus of impressing your friends with your newfound DIY skills. So, next time you’re faced with a dent, fear not – grab your trusty PDR dent puller and get to work!”
FAQs
What is a PDR dent puller and how does it work?
A PDR dent puller is a tool used to remove dents from a vehicle without damaging the paint. It works by using suction to pull the dent out from the inside, gradually popping the dent out.
Can I use a PDR dent puller on all types of dents and materials?
PDR dent pullers work best on minor dents that have no creases and limited paint damage. They are typically not effective on larger, deeper dents or areas with extensive paint damage. Additionally, the effectiveness of a PDR dent puller can vary depending on the material of the vehicle.
How much pressure do I need to apply when using a PDR dent puller?
The amount of pressure needed varies depending on the size and location of the dent. Generally, you want to apply enough pressure to create a suction seal but not so much that it damages the surrounding area.
Do I need any special tools or skills to use a PDR dent puller?
No, PDR dent pullers are designed to be easy to use and do not require any special tools or skills. However, it is important to follow the instructions carefully and take your time to avoid causing more damage.
Can a PDR dent puller be used to remove dents from other objects besides cars?
Yes, PDR dent pullers can be used to remove dents from a variety of objects, including appliances and metal furniture. However, the effectiveness may vary depending on the material.
Is it safe to use a PDR dent puller on my car’s paint?
Yes, PDR dent pullers are specifically designed to remove dents without damaging the paint. However, it is still important to be careful and follow the instructions closely to avoid causing any damage.
How long does it take to remove a dent using a PDR dent puller?
The length of time it takes to remove a dent with a PDR dent puller varies depending on the size and location of the dent, as well as the skill level of the user. Some small dents can be removed in just a few minutes, while larger dents may take several hours.
