If you’re looking for a guide to using an OEM brake bleeder kit, you’re in the right place! Bleeding your brakes is an essential maintenance task for any vehicle owner, as it ensures proper functioning of your brakes. A brake bleeder kit is an easy and efficient tool to use for the job, but some may be intimidated by the lack of experience in brake maintenance. Worry not, as this step-by-step guide will walk you through the entire process, making it simple and easy to understand.
From assembling the kit to performing the bleed, we’ve got you covered. Whether you’re a seasoned auto mechanic or a beginner DIYer, this guide will provide you with all the knowledge required to bleed your brakes effectively and maintain your vehicle to the best of its ability. So sit back, grab your brake bleeder kit, and follow the steps provided in this guide.
You’ll be a brake maintenance pro in no time, and your vehicle will thank you for it.
What is an OEM Brake Bleeder Kit?
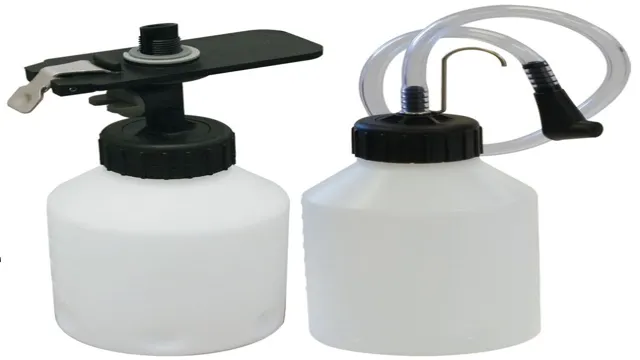
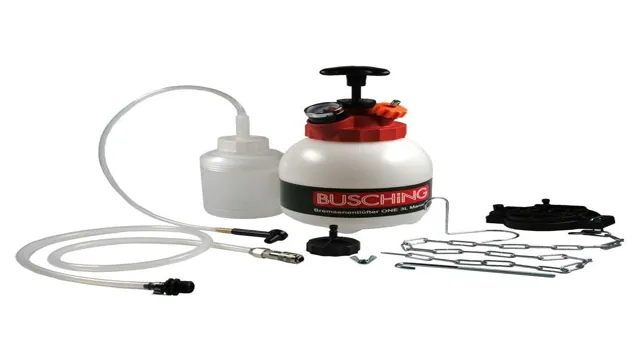
If you’re looking to bleed your brakes at home, an OEM brake bleeder kit can make the process much easier and more efficient. This kit typically includes a hand-held pump or vacuum system that can be used to draw air and old brake fluid out of the brake lines. To begin, locate the bleeder valve on your brake caliper and attach the kit according to the manufacturer’s instructions.
Then, pump the vacuum or use the hand-held pump to create suction, which will draw old fluid out of your brake lines. Once you’ve removed all the old fluid, refill your brake system with fresh brake fluid and repeat the process until you’ve bled all the air out of your brake lines. With an OEM brake bleeder kit, you can save time and money by performing this maintenance task at home, rather than taking your vehicle to a mechanic.
Just be sure to follow the instructions closely and take all necessary safety precautions while working under your vehicle.
Overview of the Tool and its Functionality
An OEM brake bleeder kit is a specialized tool that helps maintain the safety and effectiveness of a vehicle’s braking system. This kit is designed to remove any air bubbles or other contaminants from the brake lines, ensuring that the brakes are responsive and reliable. By using a pump to create a vacuum, the kit draws brake fluid through the system, removing any air pockets that may have formed during normal use.
This also helps prevent corrosion and other damage that can occur when moisture collects in the brake lines. Overall, an OEM brake bleeder kit is an essential tool for anyone who wants to keep their vehicle’s brakes in top condition, and it is often used by mechanics and DIY enthusiasts alike.
Preparing Your Vehicle for Bleeding
When it comes to bleeding your brakes, you need to ensure that your vehicle is properly prepared to avoid any complications. Start by gathering all the necessary equipment, including an OEM brake bleeder kit and brake fluid. Next, locate your brake system’s bleed valve and clean the surrounding area.
Remember to check your brake pads and rotors for any wear or damage and replace them if needed. Ensure that your vehicle is on a level surface and put on the emergency brake. Then, connect the brake bleeder kit to the bleed valve and slowly pump your brakes until air bubbles are no longer visible in the tube.
It’s essential not to allow the brake fluid reservoir to run dry at any point during the bleeding process. Once you have completed the bleeding process, top up the brake fluid to the recommended level and dispose of the old fluid responsibly. With these simple steps, you can be sure that your vehicle is prepared for a successful brake bleeding job.
Gathering Necessary Materials
Preparing your vehicle for bleeding is an important task to ensure optimal performance and safety while driving. To gather necessary materials, you will need a brake fluid, a clear plastic tubing, a suitable wrench, and a brake bleeding kit. It’s important to note the owner’s manual to make sure you’re using the right type of brake fluid for your vehicle.
Using the wrong type of brake fluid may affect the performance of your brakes or even cause damage to your braking system. After gathering the necessary materials, it is essential to prepare your vehicle for bleeding. Begin by parking your vehicle on a level surface and chocking the wheels to prevent it from rolling.
It’s important to keep in mind that before initiating the bleeding process, your brakes should be in good condition, and the entire system should be free from any leaks or damages. Being prepared and having the right materials on hand will help ensure a safe and successful bleeding process for your vehicle.
Locating Brake Bleeder Valves and Checking for Damage
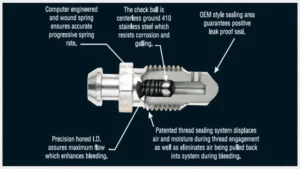
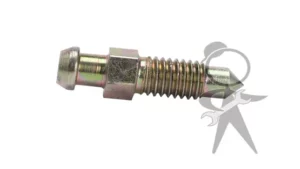
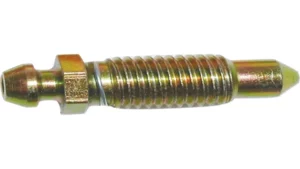
If you’re planning on bleeding your vehicle’s brake system, one of the first things you need to do is locate the brake bleeder valve. This valve can usually be found at the caliper or wheel cylinder, and it may look like a small nipple sticking out from the part. Once you’ve found the valve, it’s essential to check it for any damage or wear.
A damaged valve can cause leaks, which may lead to brake failure. To make sure the valve is in good condition, you can use a wrench to gently turn it. If it’s difficult to turn or appears to be cracked or corroded, it may need to be replaced.
Checking your brake bleeder valves before bleeding the brakes can help prevent any potential issues and ensure your brakes function correctly.
Bleeding Your Brakes with an OEM Kit
If you’re wondering how to use an OEM brake bleeder kit, the process is actually quite straightforward. First, you’ll need to gather all the necessary tools and equipment, including the OEM kit, brake fluid, a wrench set, and a friend to help you. Start by lifting your car off the ground and removing the wheels.
Locate the bleeder valve on each brake caliper and attach the OEM kit. You’ll need to pump the brake pedal while your friend opens and closes the bleeder valve until all the air bubbles are out of the brake lines and clean brake fluid is visible. Keep in mind that this process can take several rounds of bleeding each brake caliper, so be patient and take your time to ensure that each brake line is free of air pockets.
Finally, refill the brake master cylinder with fresh brake fluid and test your brakes to make sure everything is working properly. With a little patience and the right tools, bleeding your brakes with an OEM kit is a task that is completely doable for any DIY mechanic.
Inserting the Hose into the Bleeder Valve
When bleeding your brakes with an OEM kit, it’s essential to properly insert the hose into the bleeder valve to ensure that the bleeding process goes as smoothly as possible. Start by locating the bleeder valve and cleaning it to prevent dirt or debris from entering the system. Then, attach the hose to the bleeder valve and secure it in place.
It’s crucial to ensure that the hose is tightly secured to prevent any air from entering the brake system during the bleeding process. Finally, begin the bleeding process by opening the valve and monitoring the fluid flow. Remember, proper insertion of the hose is critical to the success of the bleeding process and ensuring the safety of your brakes while driving.
Connecting the Hose to the Bleeder Kit Pump
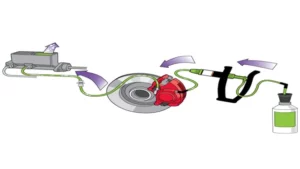
When it comes to bleeding your brakes with an OEM kit, it can be quite a confusing process. One important step is connecting the hose to the bleeder kit pump. This can be done by first removing the cap from the brake fluid reservoir and attaching the hose to the bleeder valve.
Once this is done, attach the other end of the hose to the pump itself. It’s important to make sure the connections are secure, otherwise, you could end up with brake fluid leaking out. Once you’ve connected everything, you’re ready to start pumping the brake pedal to get the fluid flowing through the system and remove any air bubbles.
Remember to keep an eye on the brake fluid level in the reservoir as you go through this process as it will go down as you bleed the brakes. By following these steps carefully, you’ll be able to bleed your brakes with ease and ensure they are working safely and effectively.
Pumping the Kit and Bleeding the Brakes
When it comes to maintaining your brakes, bleeding them is an important task that needs to be done properly. Using an OEM kit makes the process easier, as it comes with everything you need to get the job done right. The first step is to pump the brake pedal a few times to build up pressure in the system.
Then, using the kit’s instructions, attach the bleeder valve to the caliper and place the other end of the tube into a container to catch the old brake fluid. It’s important to use the correct type of brake fluid for your vehicle, as specified in the owner’s manual. Once everything is set up, start the bleeding process by opening the bleeder valve and slowly pressing down on the brake pedal.
This will force the old fluid out of the system and into the container. Keep an eye on the fluid level in the master cylinder and refill as necessary to avoid introducing air into the system. Repeat the process until clean fluid is coming out of the bleeder and there are no air bubbles.
Properly bleeding your brakes is crucial for maintaining the safety and performance of your vehicle, so be sure to take your time and follow the instructions carefully.
Troubleshooting Common Issues
If you’re having trouble using your OEM brake bleeder kit, there are a few common issues that you may encounter. One of the most common problems is air in the brake lines. If you’re experiencing spongy brakes or reduced brake performance, this could be the culprit.
To solve this issue, you’ll need to bleed the brakes using your kit. Another issue you may encounter is leaks. This could be caused by a faulty seal or damaged component.
In this case, you’ll need to inspect your kit and replace any damaged parts before using it again. It’s also important to make sure that you’re using the correct adapters and fittings for your vehicle’s brake system. Using the wrong components could cause damage or even failure, so be sure to double-check before starting.
By troubleshooting these common issues, you can make sure that your OEM brake bleeder kit works as intended and keeps your brakes in top condition.
Dealing with Leaks or Obstructions
Dealing with leaks or obstructions can be a real headache – it’s not only unpleasant, but can also cause extensive damage to your home. The first step is to identify the source of the problem. For leaks, check your pipes and fixtures for signs of damage or wear, and tighten any loose connections.
If the leak persists, it may be time to call in a professional plumber. Obstructions can be caused by a variety of things, including hair, food waste, grease, or even tree roots. You can try using a plunger or drain snake to remove the blockage, but be careful not to damage your pipes in the process.
If the obstruction is severe, you may need to hire a professional plumber with specialized tools to tackle the problem. Remember, prevention is always key – regular maintenance and cleaning can help prevent leaks and obstructions before they become a major issue.
Understanding Brake Fluid Types and Their Impact on Bleeding
When it comes to brake fluid types, there are a few things you need to know, especially if you’re bleeding your brakes. The two most common types are DOT 3 and DOT 4 brake fluids, which both have their pros and cons. DOT 3 is compatible with most vehicles and has a lower boiling point, making it a good choice for everyday driving.
However, it’s not ideal for high-performance vehicles or extreme environments. On the other hand, DOT 4 has a higher boiling point, making it better suited for track use or towing. However, it’s not recommended for old or classic cars that were designed for DOT
If you’re having trouble bleeding your brakes, make sure you’re using the right type of brake fluid and double-check the manufacturer’s recommendations. Other common issues when bleeding brakes include air in the system, a clogged master cylinder, or a faulty brake line. By understanding the basics of brake fluid types and troubleshooting common issues, you’ll be able to keep your brakes in top shape and ensure a safe driving experience.
Conclusion and Final Thoughts
In conclusion, using an OEM brake bleeder kit is like having a conversation with your brakes. By opening up the lines and allowing any trapped air to escape, you’re ensuring that your brakes are communicating properly and can react quickly when needed. Don’t let your brakes be misunderstood – invest in an OEM brake bleeder kit and keep the conversation flowing smoothly!”
FAQs
What is an OEM brake bleeder kit?
An OEM brake bleeder kit is a tool used to remove air bubbles from the brake lines of a vehicle, ensuring that the brakes function properly.
How does an OEM brake bleeder kit work?
An OEM brake bleeder kit works by creating a vacuum to draw air and brake fluid out of the brake lines, removing any air bubbles that may be present.
Can an OEM brake bleeder kit be used on any type of vehicle?
Yes, an OEM brake bleeder kit can be used on any type of vehicle that has hydraulic brakes.
Is it necessary to use an OEM brake bleeder kit to bleed the brakes on a vehicle?
While it is possible to bleed brakes using other methods, an OEM brake bleeder kit is specifically designed for the task and can make the process quicker and more efficient.
What are the benefits of using an OEM brake bleeder kit?
The benefits of using an OEM brake bleeder kit include improved brake performance, increased safety on the road, and longer brake lifespan.
Can a beginner use an OEM brake bleeder kit?
Yes, a beginner can use an OEM brake bleeder kit. However, it is important to follow the instructions carefully and take the necessary safety precautions.
How often should brakes be bled using an OEM brake bleeder kit?
Brakes should be bled using an OEM brake bleeder kit whenever there are signs of air bubbles in the brake lines or the brake pedal feels spongy. It is also recommended to bleed brakes as part of regular vehicle maintenance, typically every 2-3 years.
