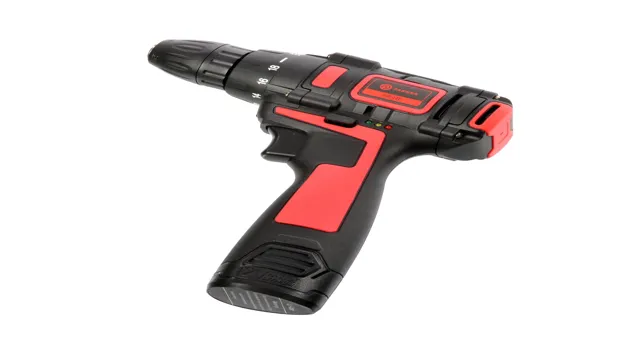
How to Use Hyper Tough Cordless Drill: Tips for Beginners

As a homeowner, DIY enthusiast or professional contractor, a cordless drill is a must-have tool to handle a wide range of drilling and driving tasks. And, if you’re looking for an affordable, high-performance model, then the Hyper Tough cordless drill could be a top contender. However, as with any power tool, it’s essential to know how to use it safely and effectively to get the job done right.
This is where we come in! In this blog post, we’ll walk you through the basics of using your Hyper Tough cordless drill, including how to charge it, change the bits, and adjust the clutch settings. So, whether you’re a seasoned pro or a newbie to DIY, read on to learn how to make the most of your Hyper Tough cordless drill.
Step One: Charging the Battery
If you just purchased your Hyper Tough Cordless Drill, congratulations on taking the first step towards home improvement! Before we jump into how to use it, let’s go over the first and essential step: charging the battery. Now, Hyper Tough Cordless Drills come with a rechargeable Lithium-Ion battery, which means they need to be charged before first use. To charge the battery, simply insert it into the charger and plug the charger into an outlet.
You’ll know it’s done charging when the LED light turns green. Once you have a fully charged battery, it’s time to put your Hyper Tough Cordless Drill to work!
Plug in the charger and connect the battery
When it comes to charging your battery, it’s essential to make sure you plug in your charger correctly and connect the battery. The first step is to find a suitable location to charge your battery, making sure it’s away from any flammable materials and in a stable position. Next, carefully connect the charger to the battery, ensuring you follow the manufacturer’s instructions.
Look for any damage to the cables or battery terminals before starting the charging process. When you’re confident everything is in good working order, plug in the charger and wait for the battery to charge. It’s important to monitor the charger throughout this time and never leave it unattended.
Remember that safety should always be your top priority, so if you’re unsure about anything, seek advice from an expert. By following these simple steps, you can ensure your battery is charged safely and ready for use.

Step Two: Installing the Drill Bit
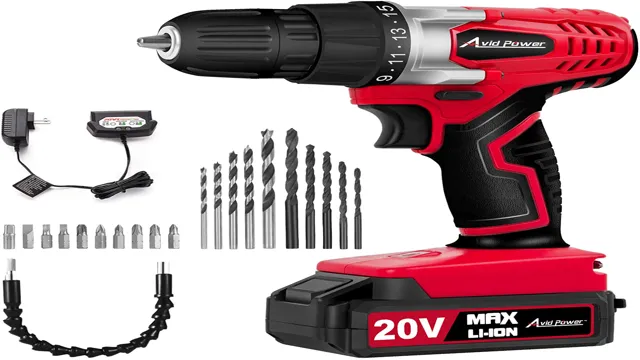
Now that you’ve got your Hyper Tough cordless drill in hand, it’s time to move on to step two: installing the drill bit. This is an important step in the process, as the correct installation of the drill bit will ensure that it functions properly and safely. Begin by selecting the appropriate bit for your project and slide it into the chuck.
Hold the chuck with one hand and use the other hand to turn the chuck key clockwise, tightening the jaws around the bit. Make sure the bit is firmly secured in the chuck before moving on to the next step. With the bit installed, you’re now ready to move on to the task at hand and start drilling like a pro! Remember, always wear safety goggles and keep your work area free of clutter to avoid accidents.
Happy drilling!
Push and hold the chuck to expose the bit hole
Installing the drill bit is a crucial step in the drilling process, and it’s essential to do it properly to get accurate and efficient results. To start, push and hold the chuck to expose the bit hole. The chuck is the part of the drill that holds the bit in place and rotates it.
By pushing and holding the chuck, you can easily access the bit hole where you’ll insert the drill bit. Choose the right size drill bit for your task, and insert it firmly into the hole. You’ll feel some resistance as it slides into place, but make sure it doesn’t wobble and stays securely in position.
With the drill bit installed, you’re now ready to move on to the next step in the process. Remember, taking your time to do each step carefully makes all the difference. So, take a deep breath, focus on what you’re doing, and get ready to drill like a pro!
Insert the bit and release the chuck
“drill bit installation” Welcome back! Today, we’re discussing step two of how to properly set up your drill: installing the drill bit. This may seem like a simple task, but it’s crucial to do it correctly for safety reasons and to ensure efficient drilling. Here’s the process: first, locate your chuck, the three-pronged mechanism on the front of the drill.
Then, select the drill bit you want to use and insert it into the chuck. Make sure it’s straight and secure. Next, tighten the chuck by turning it clockwise until the bit is firmly in place.
You May Also Love:
To release the chuck, turn it counterclockwise. Keep in mind that different drills may have different methods for installing bits, so always check your specific model’s instructions to ensure you’re doing it right. With these steps, you should now have your drill bit securely attached and ready to go.
Happy drilling!
Step Three: Adjusting the Torque
Adjusting the torque setting on your Hyper Tough cordless drill is essential to ensure the proper amount of power is being used for the task at hand. To do this, locate the torque adjustment ring near the chuck of your drill. Turn it clockwise to increase the torque and counterclockwise to decrease it.
It’s important to note that using too much torque can damage the material you’re working on, while not enough torque can result in an incomplete or inefficient job. As you work, take care to monitor your progress and adjust the torque as necessary. With practice, you’ll soon get the hang of how to use your Hyper Tough cordless drill effectively and get the job done right the first time.
Turn the torque setting ring to the desired level
Adjusting the torque on your power tool is an essential step in achieving precise drilling results that matches your requirements. To start with, you need to turn the torque setting ring to the desired level. The torque setting ring determines the rotational force applied by the drill bit upon penetrating the material surface.
It is usually located at the chuck end of the power tool, and it ranges from low to high settings. Typically, the lower settings correspond to lighter materials like wood or drywall, while the higher settings correspond to tougher materials like metal or concrete. By choosing the correct torque level, you can avoid overdriving your screws, damaging your surface or bit, or underperforming on more robust materials.
Hence, adjusting the torque setting ring with the required attention to detail will ensure that you complete your drilling and driving tasks efficiently and accurately. So, take your time to study the type and density of the materials you’ll be working on and set your torque accordingly to ensure perfect results.
Step Four: Using the Drill
Now that you have charged your Hyper Tough cordless drill, it’s time to put it to use. To begin, make sure you have the proper drill bit inserted into the chuck and tighten securely using the chuck key or by using the quick-release mechanism. Then, set the speed and torque of the drill by adjusting the settings on the drill’s body.
Lower speeds may be best for delicate projects, while higher speeds may be needed for tougher materials. When you’re ready to start drilling, hold the drill firmly with both hands, keeping your fingers away from the trigger until you’re ready to begin. Once you have positioned the drill where you want to drill, slowly depress the trigger until the drill bit begins to turn.
Be sure to apply even pressure and keep the drill straight to avoid any accidents. Remember to take breaks frequently to avoid overworking the battery. With these tips in mind, using your Hyper Tough cordless drill will be a breeze.
Hold the drill with both hands and depress the trigger
Using a drill can seem intimidating, but it’s actually quite simple if you follow a few basic steps. To begin, hold the drill with both hands and depress the trigger. It’s important to keep a firm grip on the drill to prevent it from slipping or jerking in your hands.
When you depress the trigger, the drill will begin to spin, and you can guide it to the desired area. Remember to keep your hands and fingers away from the drill bit while it’s in motion to avoid injury. As you drill, apply steady pressure but don’t force the bit to go too quickly or deeply into the material.
Take breaks as needed to adjust your grip or rest your hands. With practice, you’ll be able to drill with ease and confidence.
Adjust the speed as needed using the trigger
Adjusting the speed of a drill is crucial when performing certain tasks. Thankfully, most drills come equipped with a trigger that allows you to control the speed and power of the drill. So, when working with hard materials such as metal or concrete, you can decrease the speed to avoid overheating the drill bit.
Conversely, when drilling through softer materials such as wood or plastic, you can increase the speed to save time and get the job done quicker. It’s important to note that adjusting the speed of the drill not only helps in completing the job, but it also prolongs the life of the drill. So, next time you’re using a drill, keep in mind that you have full control over the speed and power, thanks to the trigger.
Happy drilling!
Step Five: Maintenance
Now that you know how to use your Hyper Tough cordless drill, it’s essential to stay on top of maintenance to ensure its longevity and functionality. Firstly, always store your drill in a dry and cool place and keep it clean. Use a soft cloth to remove any excess dirt or debris after each use.
Secondly, keep your battery charged and store it separately from the drill when not in use. Thirdly, inspect your drill bits and replace any worn or damaged ones to prevent any accidents or damage to your materials. Finally, lubricate the chuck occasionally to keep it working smoothly.
By following these basic maintenance tips, you’ll have a well-functioning Hyper Tough cordless drill for years to come.
Clean the chuck and bit after every use
Keeping your drill press chuck and bit clean is essential for maintaining their performance and prolonging their lifespan. Neglecting to do so can cause rusting, chipping, and even affect the accuracy of your drilling. After every use, it’s crucial to clean the chuck and bit thoroughly with a dry cloth or a soft brush to remove debris and prevent any residue buildup.
This will not only ensure that your drill bit stays sharp but also preserve the quality of the chuck’s jaws, preventing them from slipping or damaging the bit. Remember, a well-maintained chuck and bit equals a safer and more efficient drilling experience. So, take the extra time to clean them, and you’ll thank yourself in the long run!
Store the drill in a cool, dry place
When it comes to maintaining your drill, storage is a critical factor to consider. Proper storage can significantly prolong the lifespan of your tool and prevent it from deteriorating prematurely. It’s essential to store your drill in a cool, dry place that’s free of moisture and extreme temperatures.
Moisture can seep into the tool’s inner workings, causing corrosion, rust, and damage to its electrical components. On the other hand, extreme temperatures can cause the metal to expand and contract, leading to cracks and fractures. Therefore, storing your drill in a temperature-controlled environment, such as a garage cupboard or a toolbox, is advisable.
It’s also essential to keep it away from direct sunlight, which can cause the plastic components to fade and become brittle over time. Taking these simple steps can help you keep your drill in excellent condition, ensuring that it’s ready for use whenever you need it.
Conclusion
In conclusion, using the Hyper Tough cordless drill is as easy as driving a nail through butter. With its powerful battery, durable construction, and ergonomic design, it’s the perfect tool for tackling any DIY project with ease. Whether you’re a seasoned pro or a novice, this drill will make you feel like a true DIY champion.
So, go ahead and take on that shelf installation, fix that squeaky door hinge, or build that dream treehouse. With the Hyper Tough drill on your side, the only limit is your imagination (and maybe the amount of free time you have). So, grab your drill, put on your tool belt, and get ready to take on the world, one project at a time!”
FAQs
What is the battery life of the Hyper Tough cordless drill?
The battery life of the Hyper Tough cordless drill depends on the model, but it typically ranges from 20-30 minutes of continuous use.
Can the Hyper Tough cordless drill be charged while in use?
No, it is not recommended to charge the Hyper Tough cordless drill while in use. It is recommended to fully charge the battery before use.
How do I change the drill bits on the Hyper Tough cordless drill?
To change the drill bits on the Hyper Tough cordless drill, first, ensure the drill is turned off and the battery has been removed. Then, loosen the chuck by turning it counterclockwise, insert the new bit, and tighten the chuck by turning it clockwise.
What materials can the Hyper Tough cordless drill be used on?
The Hyper Tough cordless drill can be used on a variety of materials including wood, metal, plastic, and concrete.
Can the speed of the Hyper Tough cordless drill be adjusted?
Yes, the speed of the Hyper Tough cordless drill can be adjusted by pressing the trigger lightly for a slower speed or fully for a faster speed.
How long does it take to charge the battery on the Hyper Tough cordless drill?
The time it takes to fully charge the battery on the Hyper Tough cordless drill depends on the model, but it typically takes 45-60 minutes.
Can I use the Hyper Tough cordless drill for heavy-duty tasks?
While the Hyper Tough cordless drill is designed for general DIY projects, it may not be suitable for heavy-duty tasks. It is recommended to use a corded drill for more demanding tasks.

