Are you tired of seeing your car with dents and dings? Do you want to address them without spending a fortune at the auto body shop? A hot glue dent puller might be the solution you’re looking for. This method is becoming increasingly popular among DIY enthusiasts and car owners who want to fix their dents using simple tools. In this blog, we’ll discuss what a hot glue dent puller is, how it works, and what you need to get started.
We’ll also give you some tips on how to use it effectively, so you can achieve a smooth and dent-free surface on your car. Let’s get started!
What You Need
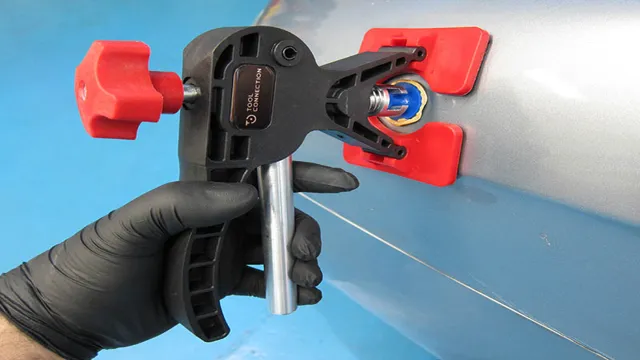
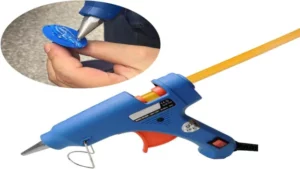
If you’re looking to fix small dents on your car or motorcycle, using a hot glue dent puller can be a quick and effective solution. Here’s what you need: a hot glue gun, dent puller kit, rubbing alcohol, plastic spatula, and a heat source (such as a hair dryer). First, clean the area around the dent with rubbing alcohol and dry it with a clean cloth.
Then, heat up the glue gun and apply hot glue to the dent pulling tab in the kit. Place the tab on the dent and let the glue dry for a few minutes. Once the tab is securely attached, use the plastic spatula to pull the dent outwards.
Use the heat source to warm up the glue on the tab and gently pull until the dent pops out. Repeat this process until the dent is fully removed. Be sure to remove any excess glue by gently lifting it off with your fingers or a flat tool.
With a little bit of patience and the right tool, you’ll be able to restore your vehicle to its original appearance in no time.
1. Hot glue gun
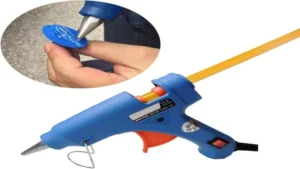
If you’re looking to take on a DIY project, there are certain tools that you just can’t do without. One such tool is a hot glue gun. A hot glue gun is an essential tool for anyone who loves crafting, DIY, or even home repairs.
You can use it to glue together a range of materials, including wood, plastic, and fabric. To get started with a hot glue gun, you’ll first need one of course. You can find them at most hardware stores or online.
Make sure to choose a glue gun with the right size and temperature range for your needs. Additionally, you’ll need some glue sticks to feed into the gun. It’s important to choose the right type of glue stick for your project; for example, some glue sticks are better for crafts while others are better for heavy duty repairs.
With a hot glue gun in hand, the possibilities are endless – you can create anything from DIY home decor to back-to-school crafts for the kids. Don’t wait to add this versatile tool to your arsenal!
2. Hot glue sticks
Hot glue sticks are a versatile and essential tool for any DIY enthusiast or crafter. To use them effectively, you’ll need a hot glue gun and a supply of glue sticks. When choosing the right hot glue sticks, it’s important to consider the temperature range of the glue gun you plan to use.
Low-temperature glue guns require low-temperature glue sticks, while high-temperature glue guns require high-temperature glue sticks. It’s also important to consider the type of material you’ll be bonding. For example, if you plan to use hot glue to bond fabric, you’ll need a glue stick that’s designed for use with fabric.
The same goes for wood, plastic, and other materials. Be sure to choose a glue stick that’s designed for the job you have in mind, and always follow the manufacturer’s instructions for best results. With the right hot glue sticks and a little practice, you’ll be able to tackle a variety of DIY projects with ease.
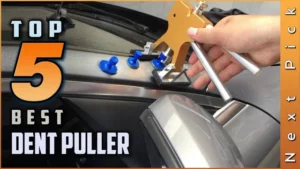
3. Dent puller tabs
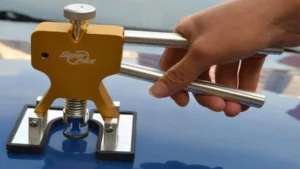
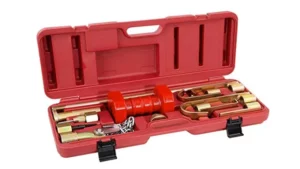
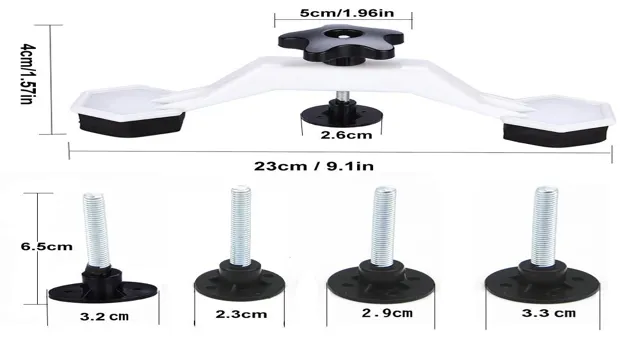
When fixing a dent in your car, using a dent puller tab can make the job much easier. To get started, you’ll need a few things. First, you need a dent puller tool, which includes a slide hammer or a glue puller.
Second, you need a dent puller tab, which is a small metal piece attached to the puller tool. The right size and shape of the tab will depend on the size and shape of the dent. Third, you need a clean surface for the puller tab to adhere to, which may require removing any wax or debris from the car’s surface.
With these tools in hand, you can begin to pull the dent out of the car’s surface using the dent puller tab. By gently pulling on the tab with the puller tool, you can slowly restore the car’s surface to its original shape. With a little patience and persistence, you can save money by fixing dents yourself rather than taking your car to a shop.
4. Rubbing alcohol
Rubbing alcohol is a common household item that can be found in almost any local drugstore or supermarket. If you want to use rubbing alcohol on your skin, you will need a bottle of isopropyl alcohol with an alcohol concentration of at least 60%. Along with that, you can also choose to use cotton balls or a clean cloth to apply the rubbing alcohol to the affected area.
However, when using rubbing alcohol, it is important to note that it can be extremely drying and can cause irritation or skin sensitivity. For this reason, it is always best to use rubbing alcohol sparingly and not as a long-term solution for skin care. If you have any doubts or concerns about using rubbing alcohol, it’s always best to consult with a dermatologist or skin care professional before proceeding.
By taking these simple precautions, you can safely use rubbing alcohol to treat minor cuts, scrapes, and burns on your skin.
Step-by-Step Guide
If you’re wondering how to use a hot glue dent puller, it’s important to first gather all the necessary tools. You’ll need a hot glue gun and hot glue sticks, a dent puller with hot glue pads, rubbing alcohol, a clean rag, and a hairdryer or heat gun. Begin by cleaning the area around the dent with rubbing alcohol and the rag, making sure to remove any debris or dirt.
Then, use the hot glue gun to apply a small amount of hot glue to the center of the hot glue pad, and place it directly over the dent. Once the hot glue has cooled and hardened (this should take about a minute), attach the dent puller to the hot glue pad and apply a steady, even force to the handle. Use a hairdryer or heat gun to gently heat the area around the dent, which will help the hot glue to bond more firmly to the car’s surface.
With a few gentle pulls, the dent should pop right out! Remember to be patient and careful during the process, and practice on a small, inconspicuous area before attempting larger dents. With a bit of practice, a hot glue dent puller can be a great DIY solution for minor car repairs.
1. Clean the affected area
When it comes to treating a wound or injury, the first thing you need to do is clean the affected area thoroughly. This will help prevent infection and ensure a faster healing process. To start the cleaning process, wash your hands thoroughly with soap and warm water.
Then, gently clean the wound using a sterile saline solution or clean water and mild soap. Make sure to remove any debris or dirt that may have gotten into the wound. If there’s any bleeding, apply gentle pressure using a clean cloth or bandage until it stops.
After cleaning the wound, cover it with a sterile bandage or dressing. Remember, keeping the wound clean and covered is crucial for a speedy recovery. So, always make sure to keep an eye on it and replace the bandage as necessary.
With proper care and attention, your wound should heal in no time!
2. Preheat the glue gun
Preheating the glue gun is a crucial step when starting any glue gun project. The purpose of preheating the glue gun is to melt the glue sticks and bring them to the desired consistency. Once the glue gun is heated to the appropriate temperature, the glue dispensing process becomes smoother and more effortless.
Most glue guns take anywhere from two to five minutes to preheat fully, so it’s vital to be patient during this process. Many beginners make the mistake of rushing this step and end up with uneven glue distribution that could ruin their project. Therefore, it’s crucial to wait until the glue gun is appropriately heated, and there’s a steady flow of melted glue before starting any project.
By preheating your glue gun, you ensure a successful bonding process that will give your project a professional finish.
3. Apply hot glue to tabs
Now that you’ve cut out all the pieces of your paper model and folded them into shape, it’s time to secure everything in place. Applying hot glue to the tabs is the best way to ensure that your model stays together. Start by heating up your glue gun and waiting for the glue to become hot and melted.
Then, carefully apply a small dab of glue to the inside of each tab, making sure not to use too much or it will create an unsightly mess. Quickly and efficiently, fold the tab in place and hold it down until the glue cools and sets. Repeat this process for all tabs to create a sturdy and long-lasting paper model.
Don’t be afraid to practice a few times to perfect your technique. Before you know it, you’ll have a beautiful and impressive paper model that you can proudly display.
4. Attach tabs to dent
Attaching tabs to a dent is a crucial step in the dent repair process. Here’s a step-by-step guide on how to do it right. Firstly, ensure that the area around the dent is clean and dry.
Then, take the adhesive tabs and select one that fits the size and shape of the dent. Remove the protective film on the tab and place it in the center of the dent. Press down firmly to ensure a tight seal.
Repeat this process with additional tabs if necessary. Once all tabs are in place, attach a puller to each tab. Apply gentle and even pressure to the puller until the dent pops out.
The tabs should remain attached to the surface of the car, making it easy to repeat the process if necessary. Using tabs for dent repair is a safe and effective way to fix dents without causing any further damage to your vehicle. Remember to use the right size and shape of tab for the dent, and to apply even pressure when using a puller.
With a little patience and practice, you’ll be able to restore your car’s exterior back to its former glory.
5. Let the glue cool
Once you’ve applied the glue to your project, it’s important to let the glue cool. This step ensures that the glue sets and creates a strong bond. How long you should wait for the glue to cool will depend on the type of glue you’re using and the temperature of the room.
In general, most glue will cool within 10-15 minutes. However, it’s a good idea to wait for a full 24 hours before using or handling the glued object to make sure it has fully set and won’t come apart. Rushing this step can result in a weak bond, so be patient and let the glue cool completely before moving on to the next step.
Remember, taking your time during the process will ultimately lead to a better finished product that will last.
6. Pull the dent
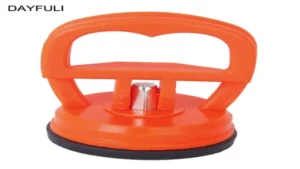
Pulling a dent out of your car can be a daunting task, but it’s actually simpler than you might think. Here’s a step-by-step guide to help you get the job done right. First, you’ll need a plunger that’s slightly larger than the dent.
Wet the suction cup of the plunger and place it over the dent, making sure it has a tight seal. Slowly pull the plunger outwards, being careful not to use too much force. You should start to see the dent slowly popping out.
If the dent is not completely gone, repeat the process until it looks as good as new. It’s important to note that this method does not work with all dents, especially those that are too deep or too large. In those cases, it’s best to take your car to a professional repair shop.
With a little patience and persistence, you can easily pull out a small dent and save yourself some money in the process. So why not give it a try?
7. Remove glue residue
Removing glue residue can be a frustrating task, especially when you don’t know the right techniques. But don’t worry, with our step-by-step guide, you can remove glue residue effortlessly. Firstly, gather your supplies, including a bowl of warm water, vinegar, and a plastic scraper.
Next, apply the warm water to the affected area and let it sit for a few minutes to loosen the glue. If the glue is still stubborn, add vinegar to the warm water and continue to soak the area. Use the plastic scraper to gently remove the glue, being careful not to damage the surface underneath.
Repeat the process until the glue is completely removed. If you’re still having trouble removing glue residue, try using rubbing alcohol or nail polish remover, but be cautious as they can damage some surfaces. Following these simple steps should have your surfaces looking good as new in no time!
Tips and Precautions
If you’re thinking of using a hot glue dent puller, there are some tips and precautions you should keep in mind to ensure you get the best results without damaging your car’s paint. Firstly, make sure the surface of the area you want to pull the dent from is clean and dry. Any dirt or moisture on the surface could make it harder for the glue to adhere correctly.
Secondly, avoid using the hot glue gun on plastic components of the car, as it can melt the plastic and cause further damage. Instead, stick to metal surfaces. When applying the glue, use small beads and apply light pressure to ensure the glue doesn’t spread too much.
Once you’re ready to pull the dent, be sure to use steady, even pressure to slowly pull the dent back into shape. Remember not to use too much force, or you risk damaging the surface of the car. With the right precautions and technique, a hot glue dent puller can be a convenient and effective way to fix minor dents and dings on your car.
1. Use caution when handling hot glue and equipment
Hot glue guns are essential tools for DIY enthusiasts and professionals alike, but they require caution and care to use safely. When dealing with hot glue, it’s important to remember a few safety tips and precautions. First and foremost, always wear protective gear such as gloves and eye protection to prevent burns or other injuries.
It’s also advisable to use a heat-resistant surface for crafting and to keep children and pets away from the workspace. Additionally, be sure to read and follow the manufacturer’s instructions carefully to avoid accidents and injuries. Remember, using a hot glue gun can be incredibly rewarding, but it’s important to prioritize safety above all else.
2. Test the glue tabs on a discrete area before use
Before using glue tabs on a surface, it is highly recommended that you test them out on a discrete area. This will help determine whether the tabs are suitable for the intended surface and prevent any damage that may arise from using incompatible tabs. You can do this by applying a small amount of glue to a corner or edge of the surface to see how well it bonds with the material.
Once the glue has dried, you can check the adhesion and ensure that the tabs come off without leaving any residue. By conducting this test, you’ll have peace of mind knowing that the glue tabs you’re using will not damage the surface. Remember, prevention is always better than cure.
So, the next time you plan on using glue tabs, take a few extra minutes to test them on a discrete area, and save yourself any unforeseen difficulties.
3. Do not overheat the glue or tabs
When it comes to using glue and tabs for various projects, it’s important to keep in mind that overheating can cause some serious problems. Not only can it make the glue difficult to work with, but it can also damage the surface you’re attaching it to. To avoid any mishaps, it’s best to stick to the instructions provided with your glue or tabs.
Additionally, using a lower temperature setting on your heating tool can make a big difference. Another helpful tip is to apply the glue or tabs in small sections rather than all at once. This ensures that you have more control over the process and can avoid overheating any particular area.
By taking these precautions, you can ensure that your projects turn out exactly as you intended without any issues along the way. So, whether you’re working on a crafting project or repairing something around the house, always keep in mind the importance of not overheating your glue or tabs.
4. Apply pressure gradually when pulling the dent
When it comes to pulling a dent on your car, it’s important to know that you should apply pressure gradually. This means that you shouldn’t try to yank or forcefully remove the dent all at once. Instead, start by applying gentle pressure and gradually increasing it until the dent pops out.
This technique not only helps to avoid any further damage to your car, but it also ensures that the dent comes out evenly. Before applying any pressure, ensure that the surface is clean and free of any debris that could scratch the paint. You should also use a soft cloth or rubber suction cup to avoid causing any scratches or damage to the paint while pulling the dent.
By following these tips and precautions, you can safely and effectively remove the dent on your car without causing any additional damage.
5. Repeat the process and be patient
When it comes to repeating the process and being patient, there are a few tips and precautions to keep in mind. Firstly, remember that nothing happens overnight, and it takes time to see the results of your efforts. Don’t get discouraged if you don’t see immediate progress.
Secondly, make sure to track your progress consistently to understand what works and what doesn’t. Lastly, don’t hesitate to ask for help or advice if you need it. Building anything worth having takes time, effort, and persistence.
It’s like planting a garden; you can’t expect the flowers to bloom overnight, but with regular care and attention, you’ll eventually see the fruits of your labor. So, stay consistent, be patient, and trust the process. Remember, success is a journey, not a destination.
Happy building!
Conclusion
In conclusion, using a hot glue dent puller is a simple and effective method to fix those pesky dents on your car. Just remember to make sure the surface is clean, apply the glue evenly, and let it cool before pulling. With a little bit of patience and some glue sticks, you’ll be able to restore your car’s exterior with ease.
Don’t be afraid to put your hot glue gun to good use and pull those dents like a pro! After all, as the famous proverb goes, “a little bit of hot glue can go a long way in fixing a dent.”
FAQs
What is a hot glue dent puller?
A hot glue dent puller is a tool used to remove dents from a vehicle’s body by pulling them out using hot glue.
How do I use a hot glue dent puller?
First, clean the area around the dent using rubbing alcohol. Apply hot glue to the center of the dent puller, then attach it to the dent. Allow the glue to cool and harden before using the puller handle to slowly pull the dent out.
Can a hot glue dent puller be used on all types of dents?
The hot glue dent puller works best on smaller, shallow dents. It may not be effective on larger or deeper dents.
Do I need any special skills to use a hot glue dent puller?
No special skills are needed to use a hot glue dent puller, but it does require patience and a steady hand.
Can a hot glue dent puller damage my car’s paint?
If used correctly, a hot glue dent puller should not damage your car’s paint. Be sure to follow the instructions carefully and remove any excess glue carefully.
How long does it take to use a hot glue dent puller to remove a dent?
The time it takes to remove a dent using a hot glue dent puller depends on the size and depth of the dent, as well as your level of experience. It could take anywhere from a few minutes to a few hours.
Are hot glue dent pullers a cost-effective alternative to professional dent removal services?
Yes, using a hot glue dent puller can be a cost-effective alternative to professional dent removal services, which can be quite expensive. However, it may not be the best option for larger or more complex dents.
