Looking to fix a dent in your car yourself with the help of a glue dent puller? You might be hesitant to do it on your own, but don’t worry! Using a glue dent puller is a popular method for repairing dents and scratches on your vehicle. With the right technique and tools, it’s possible to make your car look brand new again without having to spend money on a professional auto body shop. In this blog post, we’ll provide you with some practical tips for using a glue dent puller to help get your car looking good as new.
Prepare Your Vehicle
If you’re looking for a cost-effective solution to fix minor dents and dings on your car, a glue dent puller can be a valuable tool to have. But before you start using it, it’s essential to prepare your vehicle properly to avoid making any damage worse. First, clean the area around the dent thoroughly with soap and water to remove any dirt or debris that could interfere with the glue’s adhesion.
Then, use a heat gun or hairdryer to warm up the dented surface, which will make the glue more pliable and easier to manipulate. Finally, apply a small dab of glue to the center of the dent and attach the suction cup to it. With a few gentle pulls, you should be able to remove the dent without leaving any marks or blemishes.
Just make sure to follow the manufacturer’s instructions carefully and use caution, as excessive force or incorrect application can lead to further damage. With some practice and patience, you’ll soon be able to restore your car’s appearance to its former glory.
Clean the Affected Area
Before you start cleaning the affected area of your vehicle, the first step is to prepare it properly. This means getting all the necessary supplies ready, such as a bucket of warm water, a sponge or microfiber towel, and a cleaning solution that is safe for your car’s paint. You should also make sure to park your car in a shaded area, as direct sunlight can cause the cleaning solution to dry too quickly and leave streaks.
Once you have everything you need, wet the affected area thoroughly, making sure to remove any loose dirt or debris. Next, apply the cleaning solution to the area and use the sponge or towel to spread it evenly. Be sure to scrub gently, as too much pressure can scratch the paint.
After you have cleaned the area thoroughly, rinse it off with clean water and dry it with a soft towel. Keeping your vehicle clean not only helps it look better, but it also protects the paint and prevents any potential issues from becoming more serious.
Choose the Right Glue Tabs
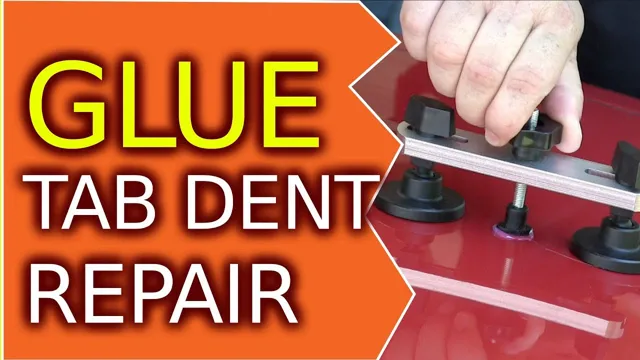
When it comes to removing dents from your vehicle using glue pulling, it’s important to choose the right glue tabs. Different types of tabs are available, and you’ll need to select the right one depending on the size and shape of the dent. For example, a larger dent requires a larger tab.
You’ll also need to choose between soft and hard tabs, depending on the type of surface you’re working with. Once you have your glue tabs, it’s time to prepare your vehicle for the process. Start by cleaning the area thoroughly and making sure any wax, grease or dirt is completely removed.
Then, use a hairdryer or heat gun to warm up the panel around the dent, which helps the glue to stick better. Finally, apply the glue tab to the center of the dent and pull until it pops back into place. With the right tabs and preparation, you can easily fix unsightly dents and restore your car’s appearance.
Warm Up the Glue
Preparing your vehicle is an essential step before applying any glue. You don’t want to waste your time and effort on a poorly prepared surface that won’t hold the glue for long. Begin by cleaning the area where you will be applying the glue.
Remove any dirt, grime, or debris that might interfere with the adherence of the glue. Use an alcohol-based cleaner to get rid of any oils or wax that might be present on the surface. Once it’s clean, dry the area completely before moving on.
A damp surface will prevent the glue from bonding properly. Ensure that the surface is smooth and free of any rough edges. Any surface imperfections can lead to glue failure, causing your material to detach and putting you at risk.
Once the surface is smooth and dry, and you have ensured that there are no rough edges, you can preheat it. Heating up the surface can activate the adhesive properties of the glue, resulting in better bonding, particularly for plastic materials. You can use a heat gun or a hairdryer to preheat the surface.
Apply the glue only after the surface temperature has stabilized and cooled down. This process can be time-consuming but is necessary to guarantee a safe and reliable attachment. A well-prepared surface provides an excellent foundation for adhesive attachment, enabling you to maximize the effectiveness of your glue.
Apply the Glue Tabs
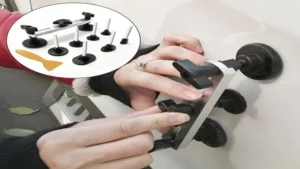
Now that you have cleaned and prepared the damaged area on your car, it’s time to apply the glue tabs of the dent puller. Before starting, make sure the tabs you are using are the correct size for the dent. You don’t want them to be too small or too large, as this could hinder the pulling process.
Then, place a small amount of hot glue on the back of each tab and press it firmly onto the dent. Make sure it’s centered and secure. Once the glue has dried completely, you can use the dent puller to gently apply pressure and pull the dent out.
Remember to work slowly and carefully, adjusting the pressure as needed. And don’t worry if you don’t get it perfect on the first try – you can always repeat the process until the dent is completely removed. With these tips on how to use a glue dent puller, you’ll be able to repair your car’s dents like a pro!
Secure the Tabs on the Dent
When applying glue tabs to secure the dent, it’s essential to make sure the surface is clean and dry. Wipe down the area with a cloth and some alcohol to remove any dirt, oils, or debris that may hinder the glue’s adherence. Once you’re ready, select the right size glue tab and apply a small amount of glue to its surface.
Place the tab in the center of the dent, then use a hot glue gun to secure it firmly into place. The glue should be heated until it becomes tacky, but not too hot to the touch. Allow the glue to cool for a few minutes, then gently lift the tab and check how well it’s sticking.
If it’s not secure, reapply the glue and allow it to dry before trying again. By following these steps, you can effectively secure the tabs on the dent and begin the process of repairing your vehicle with ease.
Wait for the Glue to Cool Down
When it comes to applying glue tabs, it’s important to wait for the glue to cool down before proceeding. Trying to apply the tabs while the glue is still hot and runny can result in a messy and ineffective application. So, take your time and wait for the glue to cool down to a tacky consistency before placing the tabs on the appropriate area.
This helps to ensure that the tabs adhere properly and securely, creating a strong bond that will last. Remember, patience is key when it comes to applying glue tabs. Rushing the process can lead to subpar results and potentially even damage.
Therefore, allow the glue to cool down properly before moving onto the next step of your project. By doing so, you’ll achieve the best possible results with your glue tab application.
Use the Dent Puller
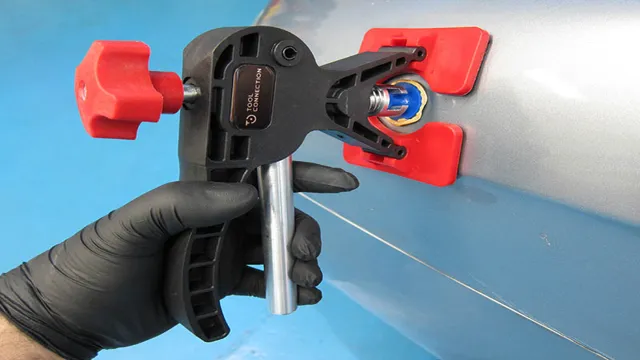
If you’ve got a pesky dent in your car and want to fix it yourself, then a glue dent puller might just be the solution you need. So, how do you use a glue dent puller? Firstly, clean the area around the dent with soap and water, and dry it well. Next, apply hot glue to the suction cups of the dent puller and stick it firmly onto the center of the dent.
Make sure the dent puller is firmly attached to the car. Now, using the pulling bridge, start pulling the dent gently and slowly until it pops out. If the dent hasn’t completely popped out, you can repeat the process until it’s completely gone.
Once the dent is removed, use some rubbing alcohol to clean any residual glue residue. The best part about using a glue dent puller is that it’s easy, efficient, and cost-effective, making it a reliable option for anyone looking to fix dents on their vehicle. So, why not give it a try? You’ll be amazed at how quickly and easily it can remove those pesky dents.
Attach the Puller to the Tabs
To use the dent puller, you need to attach it to the tabs. The tabs act as an anchor that pulls the dent out of the surface. Before attaching the puller, make sure the surface is clean and dry.
Clean the area with a degreaser, sandpaper, or rubbing alcohol. Then attach the puller to the center of the tab. Use a twisting motion to ensure a tight fit.
Pull the dent gently and slowly, using firm pressure until it pops out. If the dent doesn’t pop out, release the puller and reposition it on the tab. Repeat the process until the dent is completely removed.
Using a dent puller can be confusing, but with these simple steps, you’ll be able to fix dents with ease. It’s like using a plunger to unclog a toilet – you need a little bit of pressure and patience to get the desired result. The main keyword “dent puller” is crucial in getting your content seen by those who are looking for solutions to their dent problems.
By using the keyword naturally in your writing, you’ll be able to attract and engage your audience, who are searching for reliable solutions to their dent problems. Remember to take your time and be patient, and soon you’ll be able to restore your vehicle’s surface to its former glory.
Pull Until Dent Pops Out
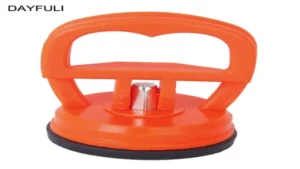
The best way to get rid of a car dent is by using a dent puller. This tool is designed to work on small and medium-sized dents that are not too deep. To use the tool, you will need to find the center of the dent, and then attach the suction cup to it.
Once the suction cup is in place, pull back on the handle firmly until you hear a pop. This is the dent coming out of the car’s surface. You may need to repeat this step a few times until the dent is completely gone.
Another trick is to pull until the dent pops out, then push it back in and repeat the process until it is no longer visible. Remember, using a dent puller is not a guaranteed way to remove a dent, but it is a cost-effective and safe method to try before considering more expensive options like professional auto body work or a new paint job.
Final Touches
Now that you’ve successfully used your glue dent puller to remove those unsightly dents on your car, it’s time to add the final touches. First, remove any excess glue residue using a plastic scraper or rubbing alcohol. Once you’ve cleaned the area, you can use a sanding block to smooth out the surface even further.
Be sure to use a fine-grit sandpaper to avoid scratching the paint. After sanding, you can apply a coat of wax or polish to restore the shine of your car’s finish. Now, step back and admire the work you’ve done with your trusty glue dent puller.
With a little patience and effort, you can make your car look as good as new without breaking the bank. So go ahead and hit the open road with confidence, knowing you’ve got the skills to handle any dent that comes your way.
Remove Any Remaining Glue Residue
Now that you’ve successfully removed that stubborn sticker or label, the final step is to clean off any remaining glue residue. Don’t worry, it’s a quick and easy process. There are various products you can use, such as rubbing alcohol, vinegar, or even cooking oil.
Apply a small amount of your chosen solution onto a clean cloth or paper towel, then gently rub it onto the glue residue. You should see the residue start to loosen and come off. If there are still some stubborn spots, you can try using a plastic scraper, taking care not to scratch the surface.
Once you’ve removed all the residue, give the area a quick wipe with a clean, damp cloth to remove any excess solution. Voila! Your surface is now clean and free of any leftover glue. So go ahead and enjoy your newly de-stickered item!
Polish the Affected Area
After you have applied the necessary remedies to the affected area, the final step is to polish it up. This will help to ensure that the area doesn’t look out of place or patchy. The first thing you need to do is to inspect the area and make sure that it has fully healed.
If it has, you can start polishing it up. Begin by cleaning the area with some warm water to get rid of any dirt or debris. Once you have cleaned it properly, you can proceed to apply some cosmetic products such as a concealer, foundation, or color corrector.
The type of product you use will depend on the affected area and how deep the mark is. When applying the cosmetic products, try to blend them in gently and apply them in thin layers. This will help to give you a more natural look while also ensuring that the products don’t cake up or look too obvious.
Take your time when applying the products and remember that less is more. You can always add more if needed, but it can be difficult to remove excess products once they are applied. Don’t forget to set the area with some powder to keep it in place and ensure that it remains looking polished throughout the day.
In conclusion, polishing up the affected area is essential to make sure it looks natural and flawless. Inspect the area, clean it, and use cosmetic products to achieve a polished look. Remember to blend in the products gently, apply them in thin layers, and set the area with powder.
Doing this will help you achieve the desired polished look while also ensuring that the area remains protected and heals properly.
Conclusion
In conclusion, using a glue dent puller is as easy as sticking the device onto the affected surface and pulling it out. But remember: just like life, patience is key. You may have to repeat the process a few times and be gentle with the pulling force to avoid causing further damage.
So go ahead, fix those dents like a pro and show off your newly acquired skills at your next dinner party. It’s sure to make you the glue-pulling hero of the night!”
FAQs
What is a glue dent puller?
A glue dent puller is a tool used for removing dents from a car’s surface using a special adhesive and pulling force.
How does a glue dent puller work?
A glue dent puller works by gluing a special adhesive onto the dent, then attaching a tool to the adhesive and pulling it back to remove the dent.
What type of dents can a glue dent puller remove?
A glue dent puller can remove small to medium-sized dents on flat or slightly curved surfaces of a car’s body.
Is it easy to use a glue dent puller?
Yes, it is relatively easy to use a glue dent puller. However, it takes practice to perfect the technique.
Can a glue dent puller damage a car’s surface?
If not used properly, a glue dent puller can damage a car’s surface by pulling too hard or leaving residue from the adhesive.
What type of adhesive is used with a glue dent puller?
A special adhesive is used with a glue dent puller that is designed to stick to metal surfaces and can be easily removed without leaving residue.
Can a glue dent puller be used on other surfaces besides cars?
Yes, in some cases, a glue dent puller can be used on other surfaces such as metal furniture or household appliances. However, it’s essential to ensure that the adhesive will not damage the surface.
