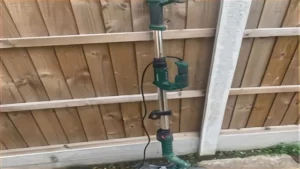
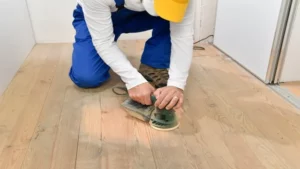
Are you planning a DIY home renovation project that involves sanding drywall? While hand sanding can be effective, it’s a time-consuming and laborious task. Luckily, there’s a more efficient option: an electric drywall sander. Using an electric drywall sander can save you hours of work and leave your walls looking smooth and even.
It’s a versatile tool that can tackle large areas and corners with ease, thanks to its adjustable speed and swiveling head. Plus, it produces less dust than traditional sanding methods, making it a healthier option for you and your home environment. But how do you use an electric drywall sander? In this blog, we’ll walk you through the steps and give you tips for achieving the best results.
Whether you’re a seasoned DIY-er or a novice, you’ll find this guide informative and helpful. So let’s get started and make your drywall sanding project a breeze!
Safety Measures
When using an electric drywall sander, it is important to take safety measures to avoid accidents and injuries. First and foremost, always wear proper safety gear such as goggles, a dust mask, and earplugs to protect your eyes, lungs, and ears from the flying debris and loud noise. Also, make sure the sander is always plugged into a properly grounded outlet to prevent electrical shocks.
Before starting, inspect the sanding disk and make sure it is in good condition and tightly secured to the sander. Keep the sander flat against the surface and avoid applying too much pressure to prevent it from jumping or jerking. Always work in a well-ventilated area and avoid sanding near flammable materials.
Finally, turn off and unplug the sander before changing the sanding disk or cleaning the machine. By following these safety tips, you can use your electric drywall sander with confidence and avoid any unwanted mishaps.
Wear protective gear such as goggles, earplugs, respirator mask
Safety gear is essential when working in any industry or environment that poses potential risks. Wearing protective gear such as goggles, earplugs, and a respirator mask can significantly reduce the risk of severe injury or long-term health issues. Goggles can protect your eyes from flying debris or harmful chemicals that can damage your vision.
Earplugs can prevent permanent hearing damage caused by loud noises. A respirator mask can safeguard you against airborne pollutants and harmful fumes that can cause respiratory problems. Safety gear should not be overlooked or taken for granted as it can be the difference between a minor injury and a life-threatening situation.
It is important to take time to properly fit and adjust safety gear for maximum protection. So, always make sure to wear appropriate safety gear before starting any job or task that could be potentially harmful. Remember, “Safety first” is not just a mantra but a practice that can save lives.

Ensure the power switch is off before connecting
When it comes to electronic devices, safety should always come first, and one of the most important things to remember is to turn off the power switch before connecting any cables or wires. This is essential to prevent overloading the circuits, electrocution, or short-circuiting. Even if the device is not powered on, the electrical current could still be present and pose danger.
So, before you plug in any cord or cable, make sure that the power switch is completely turned off and unplugged from the outlet. It’s also important to inspect the wires and cables for any damages or frays that could lead to electrical hazards. Remember, a small mistake could lead to serious injury or even death, so take the necessary precautions and stay safe.
By following this simple rule, you can ensure a safe and enjoyable electronic experience.
Power the sander on when it is firmly fixed in place
When it comes to using a sander, safety should always come first. One important safety measure to remember is to power on the sander only when it is firmly fixed in place. This means ensuring that the sanding pad is securely attached and the machine is stable before switching it on.
Doing so prevents the machine from moving and potentially causing injury or damage to your workpiece. Plus, a wobbling sander can decrease the quality of the sanding job, leaving an uneven finish and wasting your time and effort. So, take a few extra moments to double-check that the sander is stable and safe to use before turning it on.
In the end, this small step can protect you from harm and contribute to a more successful sanding project.
Steps to Use Electric Drywall Sander
Using an electric drywall sander can be a time-saving and efficient way to finish a drywall job. To start, make sure you have all the necessary safety equipment, such as gloves, goggles, and a mask, to protect yourself from dust and debris. Next, turn on the vacuum attached to the sander to collect the dust as you work.
Begin by testing the sander in an inconspicuous area and adjusting the speed setting to your liking. Move the sander in circular motions, working from the top down and left to right, overlapping each pass slightly. Be sure to keep the sander moving constantly to avoid creating gouges or uneven spots.
Once you have finished sanding, turn off the sander and vacuum, and clean up the space. With a bit of practice and patience, mastering the electric drywall sander can help you create professional-looking results without the time-consuming effort of traditional hand sanding.
Set up an appropriate grit sandpaper according to the sander’s manual
Using an electric drywall sander can make your job easier and faster, but it’s essential to set it up properly before use. The first step is to check the manual to understand the appropriate grit sandpaper to use. This will depend on the condition of the wall you’re working on and the type of finish you want to achieve.
The most common grits are 80, 120, and 150. Once you’ve purchased the right sandpaper, you can attach it to the sander according to the instructions. Make sure to insert the screws tightly to prevent the sandpaper from coming loose during use.
It’s also important to wear protective gear like goggles and a mask to keep dust away from your eyes and lungs. By following these steps, you’ll be ready to start sanding your drywall efficiently, resulting in a smooth and even finish.
Place the sander on the surface to begin sanding
Using an electric drywall sander can save you time and effort on your next home renovation project. To get started, place the sander on the surface you want to sand and turn it on. It’s essential to keep the sander moving at all times and avoid applying too much pressure as it can damage the surface.
When sanding, start with a coarse-grit sandpaper and progressively switch to a finer grit. Remember to wear protective gear such as a dust mask and safety glasses to prevent inhaling dust particles or getting debris in your eyes. Once you’re finished sanding, wipe the surface with a damp cloth to remove any remaining dust.
An electric drywall sander is an excellent investment for anyone who wants to save time and energy while achieving a professional-looking finish.
Ensure the sander is held steady and move in a circular pattern
Using an electric drywall sander can save you time and effort when it comes to smoothing and preparing surfaces for painting or wallpapering. Here are some easy steps to use an electric drywall sander effectively. Firstly, ensure that the sander is held steady with two hands and move in a circular pattern.
It’s important to choose the right sandpaper, starting with a coarse grit for rough areas and working down to a finer grit for a smoother finish. Also, make sure to wear protective gear such as goggles and a mask to avoid inhaling dust and debris. When sanding, keep the sander flat against the wall or ceiling to avoid making unwanted swirl marks.
Finally, clean up any dust and debris left behind and put away the sander correctly to avoid any damage. By following these straightforward guidelines, you can achieve a professional-looking finish on your drywall surfaces with ease. Happy sanding!
Work methodically across the surface in small sections
Using an electric drywall sander can be a time-saving and efficient way to tackle your home renovation projects. To get the most out of your tool, it’s important to work methodically across the surface in small sections. Start by testing the sander on a small area to determine the ideal speed and pressure to use.
Once you find the right setting, begin sanding from the top of the wall down to the bottom, moving in a side-to-side motion. Be sure to overlap each section as you work to avoid missed spots. When you finish one section, move on to the next, taking care not to press too hard or work too quickly, as this may result in uneven texture on the wall.
With a bit of practice and patience, using an electric drywall sander can help you achieve professional-quality results without the hassle of traditional sanding methods.
Frequently check the sandpaper and replace if necessary
When it comes to using an electric drywall sander, there are a few essential steps you need to keep in mind to ensure that you get a smooth and even finish. Firstly, make sure that the power is disconnected before attaching the sandpaper to the sander. Once you have the sandpaper in place, turn the sander on and begin by using light, gentle strokes to sand the surface in a back-and-forth motion.
It’s important to use a steady hand, applying just enough pressure to remove any rough bumps or imperfections. As you work, frequently check the sandpaper for wearing and replace it if necessary to ensure the best results. Finally, when you are finished, remember to clean up any dust or debris created during the sanding process to avoid creating a mess that can be difficult to clean up later on.
With these steps in mind, using an electric drywall sander can be an efficient and effective way to get a professional-looking finish on your wall or ceiling in no time. Don’t forget to stock up on replacement sandpaper and enjoy a smooth sanding experience!
Cleaning and Maintaining Electric Drywall Sander
If you’re wondering how to use an electric drywall sander, it’s important to also know how to clean and maintain it. Regular cleaning can extend the performance and life of your sander. Before starting any cleaning, make sure the sander is unplugged.
Use a soft cloth to wipe the outside of the sander and remove any dust or debris. For the sanding pads, detach them from the sander and gently brush off any remaining dust. If the pads are excessively dirty, you can wash them with water and mild soap.
After cleaning, dry the pads completely before reattaching them to the sander. Lubricate the moving parts of the sander with a recommended lubricant to ensure optimal performance. Taking care of your electric drywall sander will not only make your sanding work easier but also save you money in the long run.
Switch off and disconnect the power when not in use
When it comes to maintaining your electric drywall sander, there are a few things you should keep in mind to ensure a long-lasting tool that performs how it should. One crucial aspect of maintaining your electric drywall sander is switching off and disconnecting the power when not in use. This not only saves energy but also prevents damage to the tool’s components.
Always make sure to unplug your electric sander from the power source when you are not using it, whether for a short break or an extended period. This habit helps to avoid the risk of accidental start-ups or power surges that may harm the sander’s motor. Taking care of your electric drywall sander in this way can significantly prolong its lifespan, saving you the cost and hassle of frequent repairs or replacements.
So, make it your habit to switch off and disconnect the power when not in use, and you will have a reliable and long-lasting electric drywall sander to use when you need it.
Remove the sandpaper and clean the sander’s vacuum and filter system
Cleaning and maintaining an electric drywall sander is essential if you want your sander to function correctly and last for a long time. One of the most crucial steps in maintaining your electric drywall sander is cleaning its vacuum and filter system. After using the sander, make sure to remove the sandpaper and empty the dust collection bag.
Next, remove the filter and clean it with a brush or compressor. Additionally, wipe the sander’s body and hose with a damp cloth to prevent dust buildup. Neglecting to clean your electric drywall sander can harm its motor and cause it to malfunction.
A well-maintained sander will save you money in the long run as you will not need to replace damaged parts or buy a new sander. By following these simple maintenance tips, you can prolong the life of your electric drywall sander, improving its performance and saving yourself time and money.
Regularly lubricate the moving parts of the sander according to the manual
One of the essential aspects of owning an electric drywall sander is keeping it well-maintained. Regular cleaning and lubrication of the moving parts can ensure optimum performance and extend the lifespan of the tool. Following the manual’s instructions, you should regularly lubricate the sander’s moving parts, such as the bearings and gears.
It’s crucial to use the recommended lubricant for your specific sander model. Using the wrong lubricant can cause damage and decrease the efficiency of the machine. Proper lubrication can also prevent the tool from overheating, which could potentially cause motor failure.
By keeping your electric drywall sander in tip-top shape, you can use it for extended periods without experiencing a drop in performance.
Conclusion: Efficient Drywall Sanding
In conclusion, using an electric drywall sander is like having a magic wand for your walls. It not only makes the sanding process faster, but also leaves your walls smoother than a baby’s bottom. So if you’re ready to say goodbye to manual sanding and hello to effortless and flawless walls, it’s time to wield the power of the electric drywall sander!”
Following the above steps and safety measures will guarantee an efficient sanding process.
When it comes to using an electric drywall sander, proper maintenance is key to ensuring it remains an efficient tool for sanding. First and foremost, it’s important to keep the sander clean after each use. This can be achieved by wiping down the exterior with a damp cloth, making sure to avoid any electrical components.
Additionally, it’s important to regularly check the sandpaper for signs of wear and tear and replace as necessary. It’s also recommended to lubricate the moving parts of the sander with a lightweight oil to prevent any rust or corrosion. Taking these simple steps will not only prolong the life of the sander but also guarantee a more effective sanding process.
FAQs
What is an electric drywall sander and how does it work?
An electric drywall sander is a tool used for smoothing and finishing drywall surfaces. It works by using a motor to rotate sanding disks, which effectively sand the surface in a circular motion.
Can I use an electric drywall sander on surfaces other than drywall?
While it is not recommended to use an electric drywall sander on surfaces other than drywall, it can be safely used on surfaces such as wood or metal with the appropriate sanding disks.
Do I need to wear protective gear when using an electric drywall sander?
Yes, it is highly recommended to wear protective gear such as safety glasses, a dust mask, and earplugs when using an electric drywall sander. This will help to prevent dust and debris from entering your eyes, lungs, and ears.
How do I choose the right sanding disk for my electric drywall sander?
The type of sanding disk you choose will depend on the level of sanding required for the specific task. Generally, a finer grit sandpaper (such as 120 or 150 grit) is used for finishing work, while a rougher grit (such as 80 or 100 grit) is used for heavy sanding and removing excess material.
Can I use my electric drywall sander for wet sanding?
No, electric drywall sanders are designed for dry sanding only and should not be used for wet sanding.
How do I maintain my electric drywall sander?
Regular maintenance is important to ensure the longevity and effectiveness of your electric drywall sander. This includes cleaning the tool after each use, checking for any damage or wear on the sanding disks, and lubricating any moving parts as needed.
Can I use my electric drywall sander for sanding ceilings?
Yes, an electric drywall sander can be used for sanding ceilings. However, it is recommended to use a lightweight model with a long handle for better control and maneuverability. It is also important to take frequent breaks to prevent fatigue and strain on your arms and hands.


