Looking for an easy and affordable way to fix dents in your car? A dent puller tool might just be the solution you’ve been searching for. This simple tool uses suction to pull out small to medium-sized dents in your vehicle’s bodywork, without the need for expensive repairs or professional help. But how do you use a dent puller tool? In this blog post, we’ll walk you through the steps, from preparing the surface to using the tool and achieving a smooth finish.
With a little elbow grease and the right technique, you’ll be able to restore your car’s appearance in no time.
What is a Dent Puller Tool?
If your car has sustained some dents, a dent puller tool can be a lifesaver in restoring the beauty of your vehicle. This tool is designed to remove small dents from the exterior of your car by applying suction to the affected area. To use a dent puller tool, begin by cleaning the area around the dent to remove any dirt or debris.
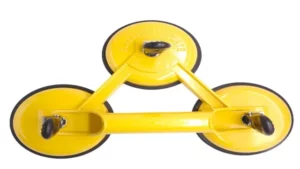
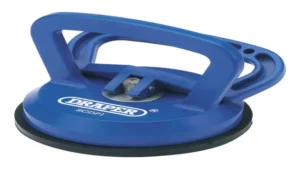
Next, place the suction cup of the tool over the dent and press down firmly until it creates a strong seal. Finally, pull the tool away from the surface of the car using a steady, even motion until the dent pops out. It’s important to note that this tool is only effective for small dents, and for larger dents, it may be necessary to take your car to a professional body shop.
With the help of a dent puller tool, you can save money on expensive repairs and keep your car looking great without breaking the bank.
Definition and Types
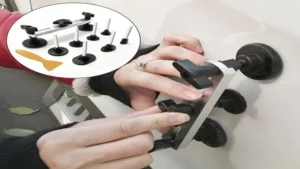
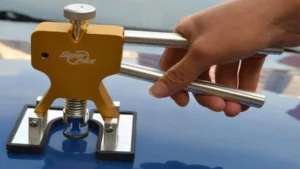
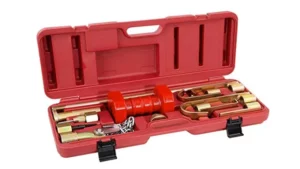
A dent puller tool is a type of device that is used for removing dents from a car’s body without damaging the paint or the surface. This tool is designed to create a strong suction that can easily lift the affected area back into its original position. Dent pullers come in various types, each with their own set of advantages and disadvantages.
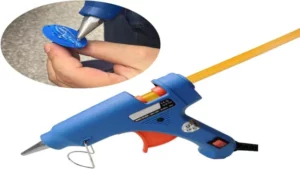
For instance, traditional dent pullers require manual force to create the suction, while electronic dent pullers use electricity to create a powerful suction. Similarly, glue-based dent pullers utilize a special type of adhesive to bond the puller to the dent, making it easier to lift. Overall, the choice between these different types of dent pullers depends on the size and severity of the dent, as well as personal preferences and budget constraints.
Whether it’s a minor dent or a major collision, a dent puller tool can definitely come in handy for restoring your car’s appearance.
Preparing the Surface
If you’re looking to fix a dent on your car yourself, using a dent puller tool can be a cost-effective option. But before starting, it’s important to prepare the surface properly. You should clean the area around the dent and ensure it’s free of any debris, dirt, or grime to allow the dent puller tool to grip the metal properly.
Make sure the surface is dry and use rubbing alcohol to remove any wax buildup. After cleaning, you’ll need to roughen up the surface with sandpaper or a coarse-grit sanding disc. This will give the suction cups on the dent puller tool a better grip, creating a stronger pull and increasing the chances of successfully removing the dent.
By following these steps, you’ll be ready to use the dent puller tool and start repairing your car like a pro. So grab your tool, prepare the surface, and get to work!
Cleaning and Sanding
Preparing the Surface Cleaning and sanding are the two most important tasks when preparing a surface for painting or coating. Before beginning the process, it is important to make sure the surface is free of any dirt, grime, or any other debris. Sanding the surface will provide a rougher texture, which will allow the paint or coating to adhere better.
This will also help the paint or coating last longer. When sanding, it is important to use the correct grit sandpaper for the surface you are working on. Too fine of grit will not provide the necessary roughness, while too coarse of grit will leave deeper scratches that may be visible under the final product.
For best results, it is recommended to use a sanding block or sponge to ensure an even sanding. After sanding, it is important to wipe down the surface with a damp cloth to remove any dust or debris before beginning the painting or coating process. Remember to take your time during this process as proper preparation will make a huge difference in the finished product.
Using the Dent Puller Tool
If you’re looking to fix minor dents on your car’s surface, a dent puller tool is a great option. Using this tool is easy, and anyone can do it with a bit of practice. First, clean the surface around the dent and ensure that it’s dry.
Then, attach the suction cup of the dent puller tool to the center of the dent. Apply pressure and pull the handle of the tool in an outward motion. This will cause the suction cup to create a vacuum and, in turn, pull the dent out.
Repeat the process until the dent is wholly removed. It’s crucial to ensure that you keep the suction cup in a straight line while pulling it. Otherwise, you may cause more damage to your car’s surface.
With a bit of patience and practice, you can fix minor dents on your vehicle and save yourself a trip to the mechanic. So, next time you need to fix a small dent, consider using a dent puller tool.
Placing the Tool and Pulling the Dent
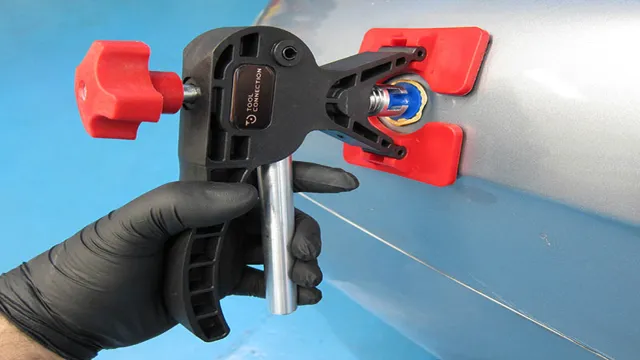
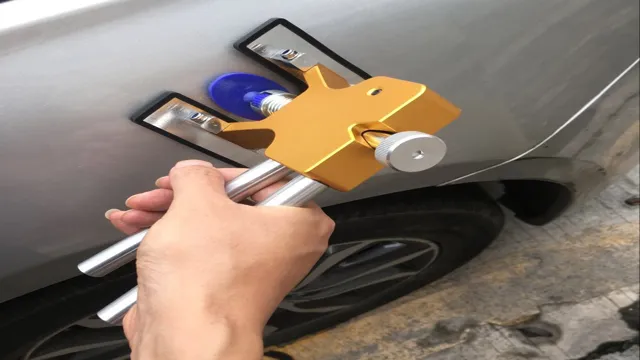
Using a dent puller tool requires a bit of finesse, but it’s not as complicated as it may appear at first glance. To begin, you need to place the tool onto the dent, making sure it’s centered over the damaged area. Then, attach the suction cup to the body of the car, making sure it’s firmly secured.
Once you’ve confirmed that the suction cup is in place, take a deep breath and pull back on the handle of the tool. You’ll feel the suction grip the surface of the car, and as you pull, the dent will start to pop out. It’s important to keep the handle steady and apply pressure evenly to avoid causing further damage to the car’s body.
With a bit of patience and practice, you’ll soon master the art of using a dent puller tool. Whether you’re a DIY enthusiast or an auto repair professional, this handy tool is essential for quickly and easily fixing those unsightly dents on your car.
Using Glue Tabs
Using the dent puller tool is an effective and efficient way to fix dents on your vehicle. To use this tool, you will need a glue tab. First, you will need to clean the surface of the dent thoroughly.
Then apply the glue stick on the center of the glue tab and place it on the dent. Wait for a minute or two for the glue to dry. Next, attach the dent puller tool to the center of the glue tab and pull it gently.
Repeat the process until the dent is noticeably reduced. This technique may require you to use different sizes of glue tabs depending on the size of the dent. Moreover, using a heat gun can make it easier for the glue to stick to the surface properly.
Overall, dent puller tool is a quick, easy, and cost-effective solution to fix dents on your vehicle without having to go to the auto shop or spending a lot of money.
Finishing the Job
If you’re looking to fix a dent in your car, a dent puller tool can be a great option. Here’s how it works: first, clean the area around the dent thoroughly. Then, place the suction cup of the dent puller tool onto the center of the dent and push down firmly.
Pull the handle away from the car, creating a vacuum, and then slowly release it. Repeat this process until the dent pops out. However, using a dent puller tool is just the first step in finishing the job.
Once the dent is removed, you’ll need to sand the area down to smooth out any small scratches or imperfections. Then, prime and paint the area to match the rest of the car. With a little bit of patience and elbow grease, you can have your car looking as good as new!
Removing Excess Adhesive
If you’ve just finished laying new tiles or installing a backsplash, you’re probably thrilled with the results – until you notice the excess adhesive that clings to the edges of your hard work. Don’t worry; removing excess adhesive is easier than you think. One of the simplest ways to tackle the problem is to use a scraper or a utility knife.
Gently scrape away any leftover adhesive, working in small sections to avoid damaging your tiles or backsplash. You can also rub the adhesive gently with a damp sponge or cloth, but be careful not to let any water seep into the seams of your tiles and grout. Whatever method you choose, take your time and be careful.
This is the final step to finishing the job and making your project look brand new – and it’s worth taking the time to do it right.
Filling and Painting the Surface
Filling and painting a surface is the final step towards completing a DIY project. Once the repairs and sanding have been completed, the surface needs to be prepared for paint. The first step is to fill any holes or gaps with a wood filler or spackle.
Allow sufficient time for the filler to dry and then sand it until it’s evenly smooth with the surface. Next, apply primer to the entire surface. The primer ensures the paint adheres better and creates a uniform base for paint color.
After the primer has dried, it’s time to paint. Always use high-quality paint that is specifically made for the surface you’re working on, whether that’s wood, metal, or plastic. Apply at least two coats of paint, allowing sufficient time for each to dry.
Finally, after the paint has dried, the surface can be finished with a sealer or varnish to protect it against damage or staining. With a little bit of patience and attention to detail, you’ll be able to enjoy the fruits of your DIY labor for years to come!
Safety Considerations
When it comes to using a dent puller tool, safety should always be a top consideration. Before you start, make sure to read and follow the instructions carefully. You may want to wear gloves to protect your hands, as working with metal can be sharp and slippery.
Additionally, be aware of the surface you’re working on and make sure it is sturdy and stable enough to support the tool and the weight of the vehicle. Always check the dent puller tool for any signs of damage or wear and tear before use, and never use it without the necessary safety features, such as suction cups or clamps. Following these safety tips will help you use your dent puller tool effectively and without incident.
Remember, taking the time to prioritize safety will be worth it in the long run.
Eye and Hand Protection
Eye and hand protection is a critical safety consideration in any workplace where hazards such as chemicals, flying debris, or machinery can cause injury. Proper eye protection can prevent eye injuries caused by flying debris, chemical splashes, or bright light sources. Safety glasses or goggles with side shields, face shields, and welding helmets are all types of eye protection that can be used depending on the type of job and the risks involved.
Additionally, hand protection is also important to prevent cuts, punctures, and chemical exposure. Gloves made of materials such as leather, rubber, or Kevlar can provide the necessary protection, but it’s important to choose the right type of glove for the task at hand. Choosing the appropriate eye and hand protection can help reduce the risk of injury and create a safer work environment for everyone involved.
Remember to prioritize safety and never overlook the importance of protective equipment.
Fire and Electrical Hazards
When it comes to fire and electrical hazards, safety considerations are of the utmost importance. Whether at work or at home, taking simple steps to prevent fires and electrical accidents can save lives, prevent property damage, and avoid costly repairs. One of the most critical aspects of fire safety is having functional smoke detectors and fire extinguishers readily available.
Smoke detectors should be installed in every bedroom, hallway, and common area, and tested regularly to ensure they are functioning correctly. Fire extinguishers should be placed in accessible locations and checked annually to ensure they are fully charged and have not expired. Electrical safety also requires caution and attention to detail.
Never overload outlets or use frayed or damaged cords, and be sure to hire a licensed electrician for any significant electrical work. By taking these precautions and remaining vigilant, you can minimize the risk of devastating fires and electrical accidents.
Conclusion
Now that you’re an expert in using a dent puller tool, you can confidently tackle those unsightly dents that have been plaguing your car. Not only will you impress your friends and family with your newfound skills, but you’ll also save yourself time and money by not having to take your car to a professional. So go forth and pull those dents with ease- just don’t forget to celebrate your victory with a victory lap around the neighborhood before parking your newly pristine car.
“
FAQs
What is a dent puller tool?
A dent puller tool is a device used for removing dents and creases from car body panels.
How do you use a dent puller tool?
First, you need to clean the area around the dent. Then, place the suction cup of the dent puller tool over the dent. Pull the handle of the tool toward you with a quick motion to create suction. Repeat the process until the dent pops out.
What types of dents can a dent puller tool fix?
A dent puller tool can fix shallow and medium-sized dents that don’t have sharp creases or damage to the paint.
Can a dent puller tool be used on all types of car panels?
No, a dent puller tool works best on metal panels. It may not be effective on plastic or fiberglass body panels.
Is it necessary to apply heat to the dent before using a dent puller tool?
No, it is not necessary to apply heat before using a dent puller tool. However, if the dent has sharp creases or damage to the paint, it might be necessary to use a different repair method.
Can a dent puller tool damage the paint on a car?
A dent puller tool can cause damage to the paint if it is not used correctly. It is important to follow the instructions carefully to avoid damaging the paint.
How much pressure should be applied when using a dent puller tool?
You should apply enough pressure to create suction, but not so much that it causes damage to the car body panel. It is important to start with a gentle pull and gradually increase the pressure if necessary.
