So, you’ve noticed that your brakes are not performing as well as they should be and you suspect that it’s due to air in the brake lines. Or perhaps you’re in the process of replacing your brake pads and want to ensure that you have a foolproof method to ensure your brakes are functioning as they should be. Whatever the reason may be, having a brake bleeder repair kit can be a lifesaver and can save you time and money from having to take your vehicle to a mechanic.
In this step-by-step guide, we’ll show you how to use a brake bleeder repair kit so that you can easily perform this task without any hassle.
What is a Brake Bleeder Repair Kit?
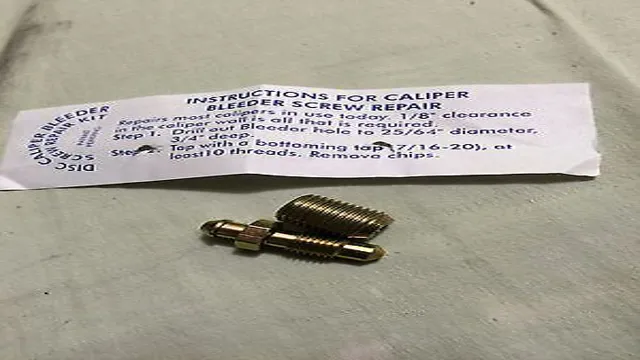
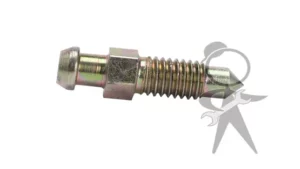
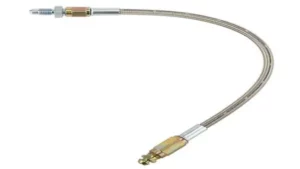
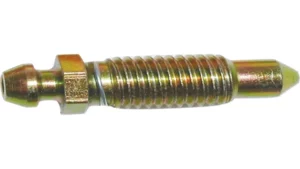
A brake bleeder repair kit is an essential tool for every driver who wants to maintain their brakes in excellent condition. It’s a set of tools that allows you to remove air bubbles that accumulate in your brake system, which can cause brake failure or lead to a reduced braking ability. The kit contains a vacuum pump, a hose, a brake fluid reservoir, and a bleed valve.
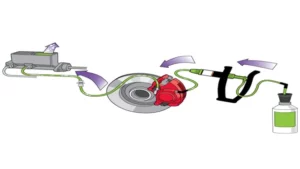
Using this kit involves connecting the hose to the bleed valve and the brake caliper, creating a vacuum, and then opening the bleed valve to let the trapped air bubbles escape. Afterward, you top up the brake fluid reservoir with new brake fluid and repeat the process until all the air bubbles are removed. Using brake bleeder repair kit is quite easy as it comes equipped with clear and concise instructions that guide you through the process.
By implementing this process, you can ensure that your vehicle has a proper braking mechanism, improving your vehicle safety while on the road.
Function of Brake Bleeder Kit
A brake bleeder repair kit is a handy tool for people who want to ensure their brake system is functioning properly. It is a device used to bleed air out of hydraulic brake systems, which is critical for maintaining brake performance. It works by connecting to the brake caliper or wheel cylinder, creating a vacuum, and drawing out the old brake fluid.
The kit includes a hand-held vacuum pump, a set of adapters that fit the different types of brake calipers and cylinders, and a container for collecting the old fluid. With this tool, you can not only bleed the air out of your brake system but also replace your brake fluid. Brake bleeder repair kits help to prevent brake failure, which can be a dangerous situation while driving.
Overall, it is an excellent investment for those who want to ensure their vehicle’s brake system is functioning at an optimal level.
Preparing for Brake Bleeding
To use a brake bleeder repair kit, you need to first prepare your vehicle and the kit. Begin by jacking up the car and removing the wheels. Then, fill the brake fluid reservoir with fresh fluid and clean the bleeder screws with a wire brush.
Next, attach the brake bleeder tool to the bleeder screw and open the valve to begin the process. It’s important to monitor the fluid level in the reservoir and maintain a consistent flow of fluid throughout the bleeding process. Keep your eye on the kit’s pressure gauge and make sure it stays within the designated range.
Lastly, make sure to repeat the process for each brake caliper to ensure that all the air bubbles have been eliminated. Using a brake bleeder repair kit may be a bit daunting at first, but with proper preparation and careful monitoring, it is a straightforward process that can improve the overall safety and performance of your vehicle.
Gather Your Tools and Materials
When it comes to brake bleeding, having the right tools and materials is essential for a successful process. Firstly, you will need a brake bleeding kit that usually includes a tubing and a vacuum pump. Make sure the kit you buy is compatible with your vehicle’s brake system.
You will also need a wrench, brake fluid, a clean cloth or towel, and a container to collect the used fluid. It’s crucial to wear protective gloves and eye goggles to prevent injury or damage to your skin or eyes from the brake fluid, which can be corrosive. Additionally, ensure that your vehicle is parked on a leveled surface and that the engine is turned off before starting.
Having all the necessary tools and materials ready beforehand can make the brake bleeding process smoother and prevent complications during the procedure.
Locate the Bleeder Valve and Brake Fluid Reservoir
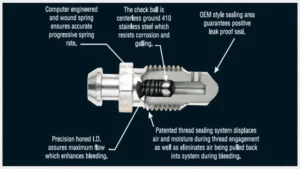
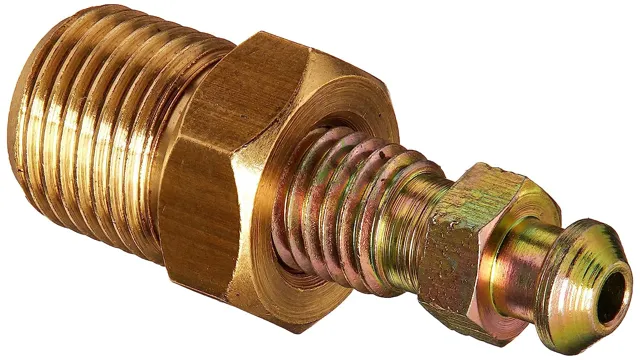
Before you start the process of bleeding your brakes, it’s important to locate both the bleeder valve and brake fluid reservoir. The bleeder valve is typically located on the brake caliper and can be identified by its small size and hexagonal shape. The brake fluid reservoir, on the other hand, can usually be found under your car’s hood, close to the firewall.
It’s important to locate both of these components before starting the brake bleeding process, as you’ll need to access them throughout the procedure. Additionally, you’ll want to ensure that you have the appropriate tools on hand, such as a brake bleeding kit, brake fluid, and a wrench. Proper preparation is crucial to succeed in brake bleeding, as it’s a delicate process that can be easily hindered by a lack of attention to detail.
By properly locating the bleeder valve and brake fluid reservoir and having all the necessary equipment on-hand, you’ll be able to make the process go more smoothly and efficiently.
Inspect Your Brake Bleeding Kit
Before starting the brake bleeding process, it’s crucial to inspect your brake bleeding kit to ensure that everything is in order. This will help you avoid any mishaps while bleeding your brakes. First, you should check the brake fluid reservoir cap and ensure it’s tight and secure.
Then, ensure that all the components needed for the brake bleed are present, including the brake bleeding valve, hose, and catch bottle. Double-check that the hose is the correct size to prevent any leaks. Also, ensure that the kit is free from any dirt or debris that could contaminate the brake fluid.
Overall, taking the time to inspect your brake bleeding kit before starting will make the process smoother, faster, and more efficient. So, always keep your brake bleeding kit in excellent condition before starting your brake bleeding process. Keyword: brake bleeding kit
Bleeding the Brakes
If you’ve ever been in a situation where you need to stop your car quickly, you know how important it is to have efficient brakes. One of the most important maintenance tasks you can do to keep your brakes functioning properly is bleeding them. Fortunately, with the help of a brake bleeder repair kit, this process becomes easy and quick.
To begin, locate the brake bleeder valve at each caliper. Next, attach the bleeder kit to the valve and loosen it to allow air and old brake fluid to escape. Once the fluid runs clear, close the valve and move to the other wheels.
Remember to check your brake fluid level before and after bleeding your brakes to ensure you have the right amount. With a brake bleeder repair kit, you can ensure that your brakes are working safely and effectively.
Attach the Bleeder Valve
When it comes to bleeding the brakes, attaching the bleeder valve is a crucial step. This valve is used to release any air that may have entered the brake lines. To attach the bleeder valve, start by locating the valve on the brake caliper.
Once you have located the valve, you will need to attach a piece of clear tubing to the valve and place the other end of the tubing in a container to catch the brake fluid. From here, you will need to use a wrench to slowly loosen the bleeder valve, being careful not to overtighten or cross-thread the valve. Once the valve is open, pump the brake pedal a few times to expel any air from the brake lines.
Finally, close the valve before removing the tubing and disposing of the old brake fluid. Properly attaching the bleeder valve is important to ensuring a successful brake bleed, so take your time and be cautious throughout the process.
Open the Bleeder Valve
Bleeding the brakes is a crucial step in ensuring maximum efficiency and safety on the road. To bleed the brakes, you need to open the bleeder valve, which is usually located on the brake caliper. Start by removing the cap from the brake fluid reservoir and adding fresh fluid.
Then, locate the bleeder valve on the caliper and attach a hose to it. Place the other end of the hose in a container that can hold brake fluid. With the help of a friend, press the brake pedal and hold it down.
Then, open the bleeder valve and allow the brake fluid to flow through the hose and into the container. Make sure to close the bleeder valve before releasing the brake pedal. Repeat this process for each wheel until the brake fluid looks clean and free of air bubbles.
By bleeding your brakes, you’ll reduce your stopping distance and prevent potential accidents on the road.
Depress the Brake Pedal
When it comes to bleeding the brakes of your vehicle, one crucial step is to depress the brake pedal. You can’t simply pour new fluid into the master cylinder and hope it will work seamlessly with the old one. The new fluid will mix with any old fluid still present in the lines, potentially causing issues with braking performance.
To avoid this, you need to bleed the brake lines, which entails removing any old, contaminated fluid and replacing it with fresh fluid. The process itself is quite involved and requires precision, but one thing that you’ll need to do is depress the brake pedal. This is done to move the piston in the master cylinder, which will push fluid through the lines and expel any air pockets that might be present.
The process is usually repeated several times, each time with fresh fluid, until all the old fluid is purged from the system. By depress the brake pedal as part of this procedure, you’re helping to ensure that your braking system is doing what it needs to do – keeping you and your passengers safe on the road.
Close the Bleeder Valve
Bleeding the brakes is a crucial maintenance task that every vehicle owner should know how to do. It ensures that the brake system is free of air bubbles, which can compromise braking performance and the safety of the driver and passengers. When bleeding the brakes, one critical step is to close the bleeder valve properly.
The bleeder valve is located at each wheel’s brake caliper and is used to release the trapped air and old brake fluid from the brake lines. To close the valve, start by loosening it slightly and then pressing the brake pedal down. As you steadily push the brake pedal down, tighten the bleeder valve, making sure it is snug but not over-tightened.
Repeat this process until there is no air or old fluid coming out of the valve. Remember that this task requires patience, as it may take several attempts to bleed each wheel correctly. In summary, closing the bleeder valve is a crucial step in bleeding the brakes, and it should be done correctly to ensure a safe and smooth driving experience.
Refill Brake Fluid Reservoir
Bleeding the brakes is an essential maintenance task that every car owner needs to know. Refilling the brake fluid reservoir is part of this process, as the fluid should be checked and refilled regularly to maintain optimal brake performance and ensure safety on the road. When bleeding the brakes, the old brake fluid is replaced with fresh fluid, which helps to remove any air bubbles in the system.
Air bubbles cause the brakes to feel spongy and reduce their responsiveness, which is why bleeding the brakes is necessary. Before refilling the brake fluid reservoir, it’s important to check the type of brake fluid that your car manufacturer recommends. This information can be found in your car’s owner’s manual or on the brake fluid reservoir cap.
Always use the recommended brake fluid and avoid mixing different types as this can cause damage to the brake system. Once you have refilled the reservoir, the next step is to bleed the brakes to ensure that the entire system is free of air bubbles. This can be a bit tricky, but with the right tools and instructions, you can do it yourself and save money on expensive auto repair bills.
Testing the Brakes
If you’re having issues with your brakes, using a brake bleeder repair kit could be the solution. To begin, you’ll need to gather all the necessary tools, which include the brake bleeder kit, a wrench, a container to catch the old brake fluid, and new brake fluid. Once you have all the materials, jack up your car and remove the wheels.
Then, locate the bleed valve and attach the brake bleeder kit to it. Next, pump the brake pedal to force the old fluid out and replace it with new fluid until there are no air bubbles left. After bleeding all four brakes, carefully reinstall the wheels and lower your car off the jack.
Finally, test your brakes by applying pressure and make sure they’re working correctly. With a little patience and attention to detail, using a brake bleeder repair kit can be a straightforward and uncomplicated process that can save you time and money on costly repairs.
Check for Leaks
When it comes to testing the brakes, one of the most important things to do is to check for leaks. Brake fluid leaks can cause serious problems with your braking system, so it’s crucial that you check for leaks regularly, especially if you notice any decrease in braking performance. To start, look for any signs of fluid on the ground where you park your car.
If you see any leaks, take note of where they are coming from and how much fluid is present. You can also check the brake lines and hoses for any cracks or damage, as these can be a common source of leaks. In addition to visual checks, it’s also a good idea to check the brake fluid level in the master cylinder reservoir.
If the level is low, it could be a sign that there is a leak somewhere in the system. Remember, if you suspect that there is a problem with your brakes, it’s important to have them checked by a qualified mechanic as soon as possible. Don’t take any chances when it comes to your safety on the road.
Stay safe and keep your brakes in top condition by checking for leaks regularly.
Road Test the Vehicle
When it comes to testing a vehicle, the brakes are a crucial component that must be examined thoroughly. During the road test, it’s important to pay attention to how the brakes feel and perform, especially in different driving scenarios. A good way to evaluate the braking system is to test them at different speeds, including sudden stops.
This will help determine if there is any pulling or grabbing from one side or if any vibrations are experienced. Another thing to look out for is any noise coming from the brakes when engaged. If there is any squeaking or grinding, it may indicate a need for repairs or replacements.
Testing the brakes is essential in ensuring the safety of the vehicle and its passengers on the road. So before hitting the road, it’s best to make sure that the brakes have been given a thorough inspection and testing.
Conclusion
In summary, using a brake bleeder repair kit can seem daunting at first, but with the right tools and a little bit of patience, anyone can master the art of bleeding their brakes. Remember, it’s always better to be safe than sorry when it comes to something as important as your brakes. So, grab your brake bleeder repair kit, follow the instructions carefully, and before you know it, you’ll be braking like a pro!”
FAQs
What is a brake bleeder repair kit?
A brake bleeder repair kit is a set of tools needed to repair and maintain the brake bleeder valve in a vehicle’s brake system. It includes items such as a bleeder valve, hoses, and a bottle to collect the brake fluid.
How do I know if I need a brake bleeder repair kit?
You may need a brake bleeder repair kit if you notice your brake pedal feels spongy, if there is air in the brake lines, or if you see fluid leaking from the brake bleeder valve.
Can I use a brake bleeder repair kit on any vehicle?
No, brake bleeder repair kits may vary depending on the type of brake system in your vehicle. It’s important to check the compatibility of the kit with your vehicle before purchasing.
How often should I use a brake bleeder repair kit?
How often you use a brake bleeder repair kit largely depends on how often you drive your vehicle and how much wear and tear your brake system experiences. It’s recommended to have your brake system inspected by a professional at least once a year.
Can I use a brake bleeder repair kit to replace my brake pads?
No, a brake bleeder repair kit is not used to replace brake pads. It is used to repair and maintain the brake bleeder valve in the brake system.
How do I use a brake bleeder repair kit?
To use a brake bleeder repair kit, first, locate the brake bleeder valve on the brake caliper. Attach the hose from the kit onto the valve and then use the pump to create suction and remove any air or fluid in the lines.
Can I use a brake bleeder repair kit to fix a brake line leak?
No, a brake bleeder repair kit is only used to maintain and repair the brake bleeder valve. A brake line leak requires a professional repair and should not be fixed with a repair kit.
