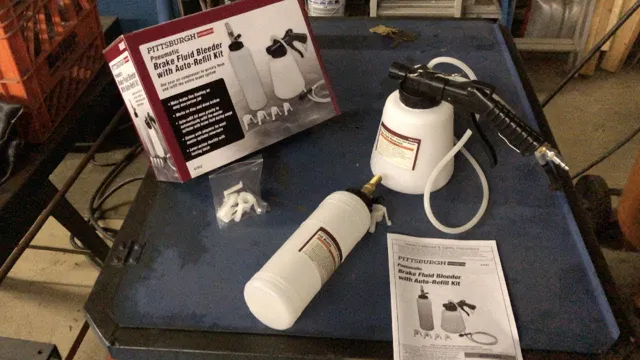
Do you dread the thought of having to bleed your car’s brake system? It can be a messy and time-consuming task. Luckily, with the Harbor Freight Brake Bleeder Kit, you can make this process much easier and more efficient. This kit is specifically designed to help you bleed your brake system without any hassle.
Whether you’re a professional mechanic or just a car enthusiast, this kit is perfect for anyone who wants to maintain their car’s brake system. In this blog post, we’ll take a closer look at how you can use the Harbor Freight Brake Bleeder Kit for easy brake bleeding.
Preparing the Vehicle
If you’re looking to bleed the brakes on your vehicle, a brake bleeder kit from Harbor Freight can be a great tool to have in your garage. Before you get started, make sure to jack up the vehicle and remove the tires to access the brake calipers. You’ll also need to locate the brake bleeding valves, which are usually located near the calipers.
Once you’ve prepared the vehicle, you can connect the brake bleeder kit to the valve using the provided hose and fittings. You can then use the hand pump to create pressure in the brake lines, which will force any air bubbles out. It’s important to work slowly and methodically, starting with the valve furthest from the master cylinder and working your way towards it.
With a little patience and care, you can use a brake bleeder kit to effectively remove air from your vehicle’s brake lines, ensuring optimal braking performance.
Step 1: Lift the Vehicle
Before you start working on your vehicle, it’s important to prepare the vehicle properly. The first step in this process is lifting the vehicle off the ground. This step ensures that the wheels are off the ground and that they won’t be spinning while you’re working underneath the vehicle.
There are several ways to lift a vehicle, but the most commonly used method is using a floor jack. Before using a floor jack, make sure that the vehicle is on a flat and level surface. Park the vehicle and set the emergency brake.
Then locate the jack point under the vehicle. Different vehicles have different jack points, so it’s important to refer to the owner’s manual for the correct location. Once you’ve found the jack point, place the jack under it and raise the vehicle slowly.
Keep an eye on the jack at all times to make sure it’s stable. Once the vehicle is off the ground, use jack stands to secure it in place. It’s important to follow these steps carefully to ensure your safety and the safety of others working on the vehicle.
Step 2: Identify the Brake Bleeder Valve
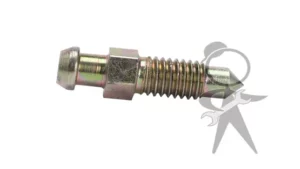
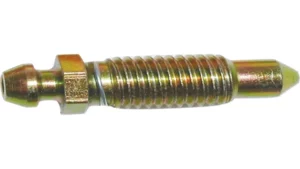
Before you start bleeding the brakes, you’ll need to prepare the vehicle. Begin by identifying the brake bleeder valve. This can usually be found on the caliper or wheel cylinder.
The valve is typically a small screw with a rubber cap that protects it from dirt and debris. Once you locate the valve, remove the cap and inspect it for any damage. If the cap is damaged, replace it before proceeding.
Before opening the valve, make sure the brake fluid reservoir is full and the cap is securely fastened. This will prevent air from entering the system and causing brake failure. By taking these steps, you can help ensure a successful brake bleeding process.
Step 3: Remove the Brake Reservoir Cap
When it comes to preparing your vehicle for brake fluid replacement, the third step is to remove the brake reservoir cap. This is an important step because it allows air to enter the system, enabling the fluid to flow more freely during the replacement process. Before removing the cap, make sure to clean the area around the reservoir to prevent any dirt or debris from falling into the brake fluid.
Also, check the fluid level to ensure that it does not overflow when the cap is removed. The brake reservoir cap is usually located on top of the brake master cylinder, which is typically located near the firewall of the vehicle. It may have a rubber seal or gasket that should be inspected for wear or damage.
If any damage is detected, it is best to replace the cap to prevent any potential leaks during the brake fluid replacement process. Remember to be cautious when handling the cap, as brake fluid can be corrosive and harmful to the skin. By following these steps, you can effectively prepare your vehicle for a brake fluid replacement and ensure that your braking system is functioning smoothly and safely.
Step 4: Connect the Bleeder Kit
Now it’s time to prepare your vehicle to connect the bleeder kit. Ensure that the engine is cool before you start. Check the brake fluid level and make sure that it is at the recommended level.
If the level is low, fill it to the required amount. It is crucial to have the correct brake fluid for your particular vehicle. Check your owner’s manual or contact a professional if you are unsure which type of brake fluid to use.
Once you have the correct fluid, locate the brake fluid reservoir and remove the cap. It’s important to avoid getting any dirt or debris in the brake fluid, so use a clean funnel to add the brake fluid. Now you’re ready to connect the bleeder kit.
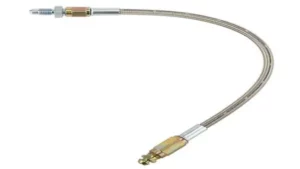
The bleeder kit should come with instructions, but they are usually straightforward. Attach the appropriate adapters to the bleeder valves and connect the hoses to the bleeder kit. Make sure that the hoses are tight and secure.
You’re almost ready to start bleeding the brakes.
Using the Brake Bleeder Kit
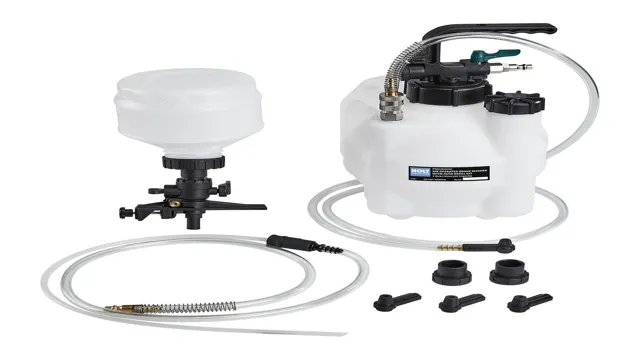
Learning how to use a brake bleeder kit from Harbor Freight is essential for proper vehicle maintenance. The kit includes a hand pump, plastic tubing, and collection bottles. First, locate the bleeder valve on each brake cylinder and unscrew the cap.
Attach the plastic tubing from the kit onto the valve and secure it in place with the provided rubber fitting. Open the valve and pump the handle on the kit until the old brake fluid is expelled and clean fluid begins to flow. Repeat this process on each brake cylinder in the correct order determined by the vehicle’s manual.
It’s important to check the brake fluid level frequently during this process to ensure it doesn’t go below the minimum level. Regular brake fluid changes improve vehicle performance and prevent brake system failures, so it’s worth investing in a reliable brake bleeder kit like the one offered by Harbor Freight.
Step 1: Open the Bleeder Valve
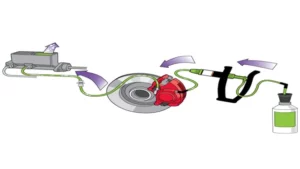
When it comes to using the brake bleeder kit, the first step is to open the bleeder valve. This valve is typically located on the brake caliper or wheel cylinder and is responsible for releasing air and fluid pressure from the brake system. To begin the process, you will need to attach the hose from your brake bleeder kit to the valve and secure it in place.
Be sure to have a catch container ready to collect any fluid that is released. Once everything is in place, open the bleeder valve by turning it counterclockwise with a wrench. This will allow the old brake fluid to drain out of the system and any air bubbles to escape.
It is important to keep an eye on the fluid level in your brake master cylinder and top it off as needed to avoid introducing more air into the system. With this step complete, you can move on to the next stage of the brake bleeding process with confidence in your progress.
Step 2: Attach the Hose and Bottle
The next step in using the brake bleeder kit is to attach the hose and bottle. This is a critical step in the process, as it allows you to actually draw out the old brake fluid from the system. To do this, you’ll first need to attach the hose to both the bleeder valve and the brake bleeder kit itself.
Make sure the hose is securely fastened and won’t come loose during the bleeding process. Then, attach the other end of the hose to the collection bottle. This bottle will be used to capture the old brake fluid as it’s pumped out of the system.
Once everything is securely in place, you can move on to the next step in the process. Remember to be careful while handling brake fluid, as it can be dangerous and corrosive. With the hose and bottle securely attached, you’re well on your way to completing the brake bleeding process.
Step 3: Pump the Brake Pedal
When it comes to using a brake bleeder kit, it’s important to follow the proper steps. Step 3 is to pump the brake pedal. This is a crucial step in the process, as it helps to expel any air bubbles that may have formed in the brake lines.
To do this, you will need to have someone in the driver’s seat, as they will need to press and release the brake pedal repeatedly. You will also need to attach the hose from the brake bleeder kit to the bleeder valve on the brake caliper. This will allow any air bubbles to escape through the hose and into the attached bottle.
You will know that the air bubbles have been expelled when you see a steady stream of brake fluid coming out of the hose. Keep pumping the brake pedal until you see this steady stream, and then move on to the next wheel. Don’t forget to keep an eye on the brake fluid reservoir and top it off as needed.
By following these steps carefully, you can ensure that your brakes are in top-notch condition and ready for the road.
Step 4: Collect the Fluid
Now that you’ve connected the brake bleeder kit, it’s time to collect the fluid. First, locate the bleeder valve on the brake caliper and attach the tubing from the kit to it. Then, open the valve and let the fluid flow into the collection bottle.
Keep an eye on the fluid level and make sure to close the valve when it’s nearly full. It’s important to dispose of the old fluid responsibly, as it can be hazardous waste. You may want to check with your local auto parts store or mechanic to see if they can dispose of it for you.
Once you’ve collected all the fluid, you can move on to the next brake caliper and repeat the process until all four have been bled. By doing so, you’re ensuring that your brakes are working correctly and providing optimal performance. Don’t forget to tighten the bleeder valve and remove the tubing once you’re done.
With patience and attention to detail, using a brake bleeder kit can be a simple and effective way to maintain your vehicle’s braking system.
Step 5: Close the Bleeder Valve
Now that the brake fluid has been successfully bled out, it’s time to close the bleeder valve. This is an essential step to prevent any air from re-entering the brake system. To do this, simply use your ratchet wrench to tighten the bleeder valve until it’s snug against the caliper or wheel cylinder.
It’s important to not overtighten the valve, as this can cause damage to the surrounding components. Once it’s tight, wipe away any excess brake fluid and move onto the next brake. Remember, completing this step correctly will ensure that your brakes work as intended, providing you with the stopping power you need to stay safe on the road.
Finishing Up
Now that you have successfully bled your brakes using the brake bleeder kit from Harbor Freight, it’s time to finish up. First, make sure all connections are properly tightened and there are no leaks. Next, check the brake fluid level in the master cylinder and top off if necessary.
Finally, take your vehicle for a test drive to ensure everything is functioning properly. Remember, maintaining your brakes is crucial for safety on the road, so make sure to check and bleed them regularly. Using the brake bleeder kit from Harbor Freight makes the process simple and affordable.
With just a few steps, you can have peace of mind knowing your brakes will perform when you need them most.
Step 1: Check the Brake Fluid Level
After you’ve checked the brake fluid level in your car, you’re nearly finished with the process of ensuring your brakes are in top shape. It’s important to make sure that you’ve replaced any brake fluid that was low, and that you’ve tightened the lug nuts on the wheels if you had to remove them. Finally, you should test your brakes to make sure they’re working properly.
Find a safe location to drive your car at a slow speed and apply the brakes, noting whether or not they respond as they should. If you notice any issues, such as a soft pedal or a grinding noise, it’s important to get your car inspected by a professional. By taking care of your brakes and performing routine maintenance, you can help keep yourself and others safe on the road.
Step 2: Test the Brakes
Now that you have tested the brake pads and ensured that they are working correctly, it is time to finish up with the overall brake system. Make sure to check the brake fluid level, which should be between the minimum and maximum marks on the reservoir. If the level is too low, top it up with the recommended brake fluid.
It is also essential to look for any leaks in the brake lines or hoses that could cause a malfunction. And if you notice a spongy feel in the brake pedal or a decrease in braking power, it could be a sign that there is air in the brake lines, in which case you will need to bleed the system. Remember, a car’s brakes are crucial for safety, so it is essential to take all necessary precautions and ensure they are always in good condition.
By regularly testing your brakes, you can prevent accidents or costly repairs down the line.
Step 3: Dispose of the Fluid Safely
When you’re finished draining your engine oil, it’s important to dispose of the fluid properly. You should never pour it down a drain or onto the ground, as it can harm the environment. There are a couple of options for disposing of used oil.
You can take it to a recycling center or a garage that accepts used oil, or you can fill a container with the oil and bring it to a hazardous waste collection site. Proper disposal of used oil is crucial for protecting the environment and preventing pollution. Remember to never mix used oil with other hazardous materials, and always handle it with care to avoid spills or leaks.
By disposing of used oil responsibly, you can do your part in protecting our planet’s natural resources.
Conclusion
In conclusion, using a brake bleeder kit from Harbor Freight is like performing a delicate surgical operation on your car’s brakes. With the right tools and technique, you can easily and efficiently remove any air pockets that might be causing your brakes to feel spongy or unresponsive. Consider it a tune-up for your car’s inner workings, ensuring that you’ll always be able to stop on a dime (or a nickel, if you prefer to push the limits of your braking power).
So, go ahead and dive into the world of brake bleeding – just be sure to wear your surgical gloves and have a steady hand!”
FAQs
What is a brake bleeder kit used for?
A brake bleeder kit is used to remove air bubbles from the brake line, which can affect the performance of the brakes and make them less effective.
How do I use a brake bleeder kit from Harbor Freight?
First, attach the kit to the brake bleeder valve, then use the hand pump to create a vacuum in the brake line. Open the valve to release any air bubbles, and repeat the process until all air bubbles have been eliminated.
Can I use a brake bleeder kit on any type of vehicle?
Yes, brake bleeder kits are universal and can be used on any type of vehicle with a brake system.
Is it difficult to use a brake bleeder kit from Harbor Freight?
No, the kits are designed to be user-friendly and easy to use, even for beginners.
Can a brake bleeder kit prevent brake problems in the future?
Yes, by regularly using a brake bleeder kit to remove air bubbles and maintain proper brake pressure, you can prevent brake problems such as brake fade, decreased stopping power, and uneven braking.
How often should I use a brake bleeder kit from Harbor Freight?
It is recommended to use a brake bleeder kit at least once a year, or more frequently if you notice any issues with the brake system.
Are there any safety precautions I should take when using a brake bleeder kit?
Yes, always make sure to wear gloves and eye protection, and use caution when working with brake fluid. Make sure to properly dispose of any used brake fluid, and do not allow it to come into contact with your skin or eyes.
