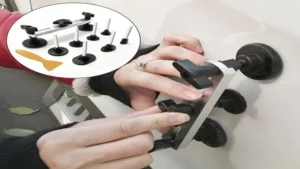
Have you ever had a minor dent in your car that bothers you every time you look at it? Maybe you’ve been putting off getting it fixed because you don’t want to shell out the cash for a professional repair. Well, what if we told you that you could easily pull out those dents yourself using the Autocraft Dent Puller? This nifty little tool is a dream come true for anyone who wants to fix their car’s dents without spending a fortune. With just a few simple steps, you can have your car looking like new again in no time.
But how does it work? And is it really as easy as it sounds? In this blog post, we’ll walk you through everything you need to know about using the Autocraft Dent Puller. We’ll explain how it works, what tools you’ll need, and give you some tips and tricks to make the process as smooth as possible. So, grab a cup of coffee and let’s get started!
Inspect the Dent
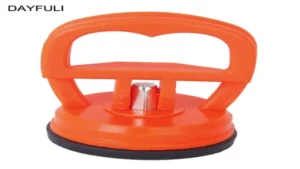
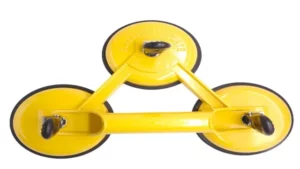
If you’re wondering how to use an Autocraft dent puller, the first step is to inspect the dent thoroughly. You’ll want to look at the size, shape, and location of the dent to determine the best approach for removing it. If the dent is small and shallow, you may be able to suction it out using the dent puller’s vacuum cup attachment.
However, if the dent is larger or has a sharp crease, you may need to use the dent puller’s slide hammer attachment. This will require drilling a small hole in the center of the dent and using the slide hammer to pull the dent out from the inside. Regardless of the method you use, make sure to carefully follow the instructions that came with your Autocraft dent puller, and always wear safety goggles and gloves to protect yourself.
With a little patience and attention to detail, you can successfully remove those unsightly dents and restore your vehicle to its original beauty!
Ensure the dented area is an appropriate candidate for the tool
When it comes to repairing car dents using paintless dent removal tools, not all dents are created equal. It is essential to inspect the dent before attempting to use the tool to ensure it is an appropriate candidate. The first thing to check is the size of the dent.
Generally, PDR tools work best on small to medium-sized dents. Large dents, creases, and sharp bends are usually not ideal for this technique. Once you have established the size of the dent, the next thing to inspect is the location.
Dents located on curved surfaces, such as fenders or doors, tend to respond better to PDR tools than those in flat areas. Additionally, the type of metal used in the car’s manufacturing plays a role. PDR tools work best on aluminum and thin metal panels than steel.
Therefore, it’s crucial to inspect the dent thoroughly before opting for PDR tools and seek the help of a professional if you’re unsure. By carefully inspecting the dent, you can ensure that it is an appropriate candidate for the PDR tool and achieve the desired results.
Preparation
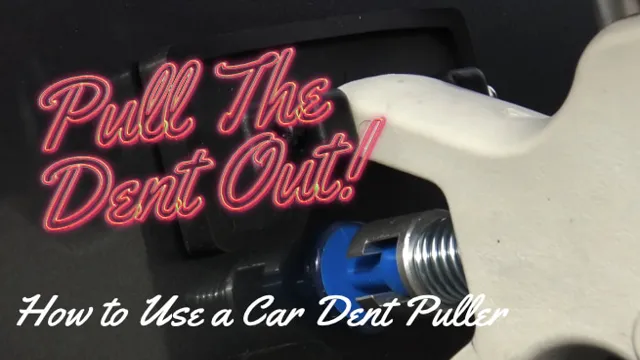
Before using an AutoCraft dent puller, it’s essential to prepare the area that needs to be repaired. Begin by cleaning the surface of the dent to remove any dirt or debris. Next, sand the surface with a fine-grit sandpaper to help the suction cup of the dent puller adhere better.
It’s also crucial to ensure the area around the dent is covered with masking tape to prevent any damage to the paint during the repair process. After preparing the area, apply the suction cup of the dent puller to the center of the dent and adjust the handle to create tension. With a quick, sharp pull, the dent should pop out effortlessly.
By following these simple steps, you can easily and effectively use the AutoCraft dent puller to repair any minor dents on your car’s surface, saving you time and money in the process.
Clean the area around the dent
When it comes to preparing to fix a dent in your car, one of the first things you should do is clean the area around the dent. This is an important step for several reasons. First, debris and particles in the area can make it more difficult to see the dent clearly and accurately assess the damage.
Any dirt or grime on the surface can also create a barrier between the dent and the repair material, making it harder for it to adhere and increasing the risk of further damage down the road. To clean the area, start by washing the affected area with soap and water or a gentle cleaner. Then, use a microfiber cloth to thoroughly dry the area.
It’s also a good idea to remove any loose paint fragments or rust from the surface if there are any. By taking the time to clean and properly prepare the area around the dent, you’ll be setting yourself up for a successful repair that will last for years to come.
Set up the puller and attachments
Before you start using your puller, it’s recommended to prepare everything you need ahead of time. First, make sure that you have a suitable attachment for the material you’ll be pulling. Whether you’re pulling fence posts out of the ground or removing a tree stump, you’ll need the right attachment to ensure a successful pull.
Ensure you’ve got all the tools like shovels, hammers, and wrenches required to fit the tags securely. If working with large machinery, make sure everything is in good working condition and has been adequately maintained. All equipment should be inspected before beginning any work to ensure that everything is working correctly.
With proper preparation, your puller will function effectively, and the process will be enjoyable.
Pulling Process
If you’re wondering how to use an Autocraft dent puller, you’ve come to the right place. The pulling process with this tool is quite simple and straightforward, but it does require a bit of finesse. First, you’ll want to clean the surface area around the dent thoroughly.
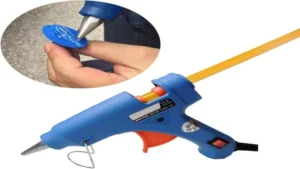
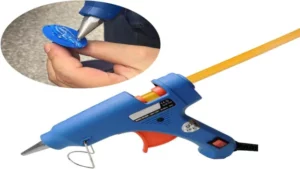
Then, attach the puller to the dent by placing the suction cup over the dent and locking it into place. Make sure that the puller has a firm grip on the dent before proceeding. Once you’re confident that the puller is secure, begin pulling the dent outwards with a firm, steady pressure.
You may need to repeat this process a few times until the dent is fully removed. It’s important to note that this method is best used on smaller dents and dings, as larger dents may require more intensive repair techniques. Overall, using an Autocraft dent puller is quite simple and can save you a significant amount of money on auto body repairs.
Attach the pulling bridge to the center of the dent
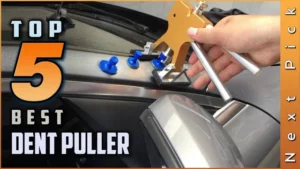
When it comes to fixing dents on your car, one of the most effective methods is using a pulling bridge. However, it’s important to attach the pulling bridge correctly to the center of the dent in order for it to work effectively. The pulling process involves using a small suction cup attached to the bridge, which then pulls the dent outward with force.
This method is especially effective for larger dents as it allows for more precise control over the amount of force being applied, which minimizes the risk of causing further damage. When attaching the pulling bridge, make sure to clean the area thoroughly to ensure maximum suction, and be sure to follow the manufacturer’s instructions carefully. With a steady hand and some patience, your car’s dent should be pulled out with ease – leaving you with a smooth and dent-free surface.
Trust us, your car will thank you for it!
Attach the pulling tabs to the bridge
Attaching the pulling tabs to the bridge is crucial in the pulling process, as it allows for the proper alignment of the bridge and the teeth. Pulling tabs are small metal hooks that are attached to the braces, and they act as the anchor for the rubber bands that gradually align your teeth. The process of attaching the pulling tabs is simple and painless, but it requires the precision and expertise of an orthodontist.
The orthodontist will carefully position the pulling tabs on your braces, ensuring that they are secure and in the right position. Once the pulling tabs are in place, you can begin the pulling process, which gradually moves your teeth into the desired position. It’s important to follow your orthodontist’s instructions regarding the placement and use of pulling tabs, as this can affect the overall success of your braces treatment.
By properly attaching the pulling tabs to the bridge, you can ensure that your teeth are straightened in the most efficient and effective way possible.
Apply tension gradually until the dent pops out
When it comes to removing dents from your car, the pulling process can be quite effective. To get started, you’ll need a few tools, including a plunger, suction cups, or a dent puller kit. Once you have your tools, apply them to the affected area and begin pulling gently.
Apply tension gradually until you feel the dent start to pop out. Be patient and persistent, as this process can take some time. Once the dent is completely removed, be sure to wax and polish the area to restore your car’s original shine.
By using a pulling process, you can quickly and easily remove unsightly dents from your car, restoring its appearance and value. So give it a try next time you notice a dent and see the results for yourself!
Finishing Touches
When it comes to achieving that perfect finish on your car after using the Autocraft dent puller, there are a few key things you need to keep in mind. First and foremost, you’ll want to make sure you thoroughly clean the area where the pulling took place. This will help remove any residue or debris that might otherwise hinder your ability to blend the repair with the rest of the car’s surface.
Once you’ve got the area cleaned up, you can start filling in any remaining low spots with a good quality body filler. Use a fine-grit sandpaper to smooth out any rough edges or imperfections, being careful not to sand through the paint. Finally, apply a coat of primer to the repaired area before painting, to ensure that the new paint adheres properly and gives you a seamless, long-lasting finish.
With these tips in mind, you’ll be well on your way to achieving a flawless repair that looks as good as new.
Remove the tabs and bridge, and clean the area
To achieve a polished and professional look, it’s important to focus on the finishing touches when removing tabs and bridges from your teeth. Begin by cleaning the area thoroughly with a toothbrush and floss, taking care to remove any debris or buildup. Next, use a dental approach that’s gentle yet effective, such as a water flosser or interdental brush, to clean the gaps left by the tabs and bridge.
This will help to remove any remaining plaque or bacteria that could cause inflammation or discomfort. Finally, take some time to assess the appearance of your smile and address any concerns that you may have. Consider discussing the use of teeth whitening or straightening treatments with your dentist to achieve the perfect finishing touch.
Overall, by focusing on the small but important details, you can achieve a perfectly polished look and a confident smile that you’ll be proud to show off.
Inspect the paint and reapply if necessary
After all the hard work you’ve put into painting, you want to ensure the finishing touches are perfect. Inspecting the paint is crucial to ensuring a flawless finish. It’s common to find areas where the paint is thin or faded after the paint has dried, and this can ruin the final appearance of the paint job.
So, it’s essential to inspect your painted surface, and if you find any undercoated spots, reapply the paint to those sections. To apply the paint effectively, use long strokes and apply a thin layer at a time. This approach ensures that the paint dries evenly, preventing brushstrokes from appearing.
By taking your time to inspect and perfect the paint, you’ll be rewarded with a picture-perfect finish that’ll last for years. So, don’t rush through this critical step; instead, embrace it and enjoy the sweet sense of success once the paint job is complete.
Conclusion
Autocraft dent puller is not just a tool, it’s a magical wand that can make dents disappear. All you have to do is follow the instructions carefully and watch the dent vanish like a magician’s trick. With the Autocraft dent puller, you’ll be able to save time, money and most importantly, your sanity.
So, next time you see a dent in your car, don’t panic, just whip out your Autocraft dent puller and give it a go. Who knows, you might just become the next Houdini of dent repairs!”
FAQs
What is an autocraft dent puller and how does it work?
An autocraft dent puller is a tool used to remove dents from a vehicle’s metal body panels. It works by using suction or pulling force to gradually and gently “pop” the dent back into place.
Can an autocraft dent puller be used on all types of dents?
Autocraft dent pullers work best on small to medium-sized dents that are not accompanied by paint damage. They may not be effective on larger dents or those that have caused damage to the paint.
How do I prepare the surface before using an autocraft dent puller?
The surface should be clean and free of any dirt or debris that could interfere with the suction of the dent puller. You can clean the surface with soap and water, then dry it with a clean towel before use.
Is it safe to use an autocraft dent puller on my car’s paint?
As long as there is no damage to the paint, an autocraft dent puller should be safe to use. However, if the paint has been scratched or chipped, using a dent puller could cause further damage.
Can an autocraft dent puller be used on plastic panels?
No, autocraft dent pullers are typically designed for use on metal panels. Using a dent puller on plastic panels could cause damage or distortion.
Can a dent puller be used to fix hail damage?
Yes, an autocraft dent puller can be effective in removing small hail dents. However, larger hail dents may require professional repair.
Can anyone use an autocraft dent puller or is special training required?
While no special training is required, it is helpful to have some general knowledge of dent removal techniques. It may also take some practice to effectively use a dent puller and achieve the desired result.
