Do you want to ensure that your tires are performing at their best? Maintaining proper tire pressure is key to keep your car running safely and efficiently. One tool that can help you in this endeavor is an analog tire pressure gauge. This tool may seem simple enough, but it’s essential to use it correctly to get accurate readings.
In this blog, we will guide you on how to use an analog tire pressure gauge step-by-step, so you’ll know exactly what to do the next time you need to check your tire pressure. Think of an analog tire pressure gauge as a flashlight shining a light on your car’s health. Understanding how to use it can help you detect issues early on, preventing potential accidents and costly repairs down the road.
So, sit tight and let’s dig in!
Step 1: Park Your Vehicle
If you want to use an analog tire pressure gauge, one of the first things you need to do is park your vehicle. This should be done on a level surface so that you get accurate readings. If your tires are warm, wait a few minutes for them to cool down before taking any measurements.
This is because the pressure in your tires increases when they get hot, which can affect the readings. Once your vehicle is parked, locate the valve stem on one of your tires. This is generally a small metal rod with a cap on it that’s located on the outer edge of your tire.
Remove the cap from the valve stem and you’re ready to take a reading. Insert the gauge onto the valve stem and press down firmly until you hear a hissing sound. This indicates that you’re getting a reading.
Look at the gauge to see what your tire pressure is and adjust as needed. By following these simple steps, you can easily check your tire pressure with an analog gauge and ensure that your vehicle is safe and efficient on the road.
Make sure the car isn’t moving
When it comes to parking your car, the most important thing to remember is to make sure it isn’t moving. This might seem like an obvious step, but it’s essential to maintaining your safety and the safety of others around you. Before you even begin to park, make sure you’re in a safe location where you won’t be at risk of hitting other vehicles or pedestrians.
Once you’ve found a suitable spot, bring your car to a complete stop and shift it into park if you have an automatic transmission or neutral if you have a manual transmission. Always remember to engage your parking brake, especially if you’re parked on a hill or incline. By following these simple steps, you can ensure that you’re parking your vehicle safely and securely.

Step 2: Locate the Valve Stem
Using an analog tire pressure gauge is not all that complicated, but it does require a bit of know-how. Step two, in particular, is all about locating the valve stem on your tire. The valve stem is where you’ll insert the gauge to get a reading.
In most cases, the valve stem will have a cap that you’ll need to remove before using the gauge. Make sure to keep the cap somewhere safe while you take your reading so that you don’t lose it. The valve stem is usually located on the outer edge of the rim, but depending on your vehicle, it could be in different spots.
If you’re not sure where to find it, the owner’s manual should be able to steer you in the right direction. In some cases, the valve stem may be hidden behind a hubcap, so you may need to remove that first. Regardless of its location, once you know where the valve stem is, using an analog tire pressure gauge becomes a breeze!
It’s typically located on the sidewall of the tire
When it comes to finding the valve stem on your tire, there’s no need to feel overwhelmed – it’s typically located on the sidewall of the tire. The valve stem is where air is inserted into the tire, and it’s crucial to know where it is in case of an emergency. If you’re unsure where to look, start by checking the outer edge of the tire, where the tread meets the sidewall.
The valve stem will usually be located within a few inches of this area. It’s important to note that the valve stem may be concealed by a hubcap or wheel cover, so you may need to remove these before you can locate it. Once you find the valve stem, check the pressure with a tire gauge, and fill your tire as needed.
Remember that keeping your tire pressure at the proper level is essential for good fuel efficiency, overall safety, and the longevity of your tire. So, don’t forget to check your tire pressure regularly, and keep an eye out for any signs of wear or tear.
Step 3: Remove the Valve Cap
When it comes to measuring tire pressure, an analog tire pressure gauge can be a handy tool for accurately determining the pressure of your car tires. After locating the tire valve stem, which is situated on the outer edge of the wheel, remove the valve cap and carefully place it in your pocket or a safe location to avoid losing it. Using an analog gauge requires you to attach the tool to the valve stem and ensure a proper seal, as air pressure can escape if it’s not secured properly.
Insert the stem of the gauge onto the valve until it clicks, then push it down firmly to make certain it is sealed tightly to avoid any air leaks. Once the gauge is locked in position, an accurate reading of the tire pressure is displayed on the dial. Remember to check and compare the dimensions to the recommended pressure level situated on the car owner’s manual or the tire itself to ensure that they’re within the acceptable range.
This simple process can help prolong the lifespan of the tires and keep you safe on the road.
Unscrew the cap and set it aside
Once you’ve found your way over to the valve stem and removed the cap that was covering it, it’s time to take off the valve cap itself. Removing this cap involves unscrewing it, just like you would with a cap on a bottle or jar. It’s important to set the valve cap aside somewhere safe after removing it so that it doesn’t get lost.
This step might seem simple, but it’s crucial for accessing the valve and putting air into your tire correctly. The valve cap helps protect the valve stem from dirt, debris, moisture, and other elements that can cause damage or corrosion, so it’s important to put the cap back on when you’re finished. Remember, every little step counts when it comes to tire maintenance and ensuring your safety on the road.
Step 4: Press the Gauge Onto the Valve Stem
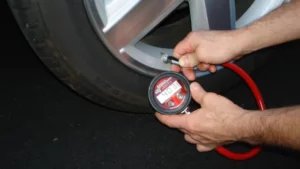
Once you have the analog tire pressure gauge lined up with the valve stem, it’s time to press it on with a firm, even motion. Make sure the gauge is straight and perpendicular to the valve stem to ensure an accurate reading. You should feel the gauge securely snap onto the valve stem, creating an airtight seal.
Then, wait for the gauge’s reading to stabilize. It may take a few seconds, but eventually, the gauge’s needle will stop moving and indicate your tire pressure. Remember to consult your vehicle’s owner’s manual or the tire manufacturer’s recommendations for the ideal pressure for your specific tires.
Maintaining proper tire pressure not only ensures a smoother ride but can also help improve fuel efficiency and extend the life of your tires. So, by using an analog tire pressure gauge, you can easily and accurately check your tire pressure and keep your car running efficiently.
Push firmly onto valve stem to get a good seal
When it comes to measuring tire pressure, you want to make sure you have a good seal between the gauge and the valve stem. That’s where step 4 comes in: pressing the gauge firmly onto the valve stem. This step ensures that the valve opens up and allows air to flow into the gauge for an accurate reading.
It’s important to push the gauge onto the stem with enough force, but not too much that it damages the valve. Think of it like putting a key in a lock – you need to push firmly enough to open the lock, but not so hard that you break the key. In the same way, you want to push the gauge firmly onto the valve stem to get a good seal, but not so hard that you damage the valve stem or the gauge.
Once you’ve established a good seal, you’ll be ready to take an accurate measurement of your tire pressure, which can help you ensure your safety and maximize your tire’s lifespan. So don’t be afraid to push a little harder than you think, but remember to be gentle in the process!
Step 5: Read the Pressure
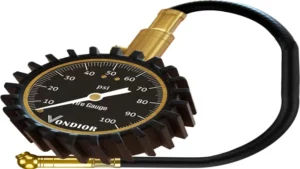
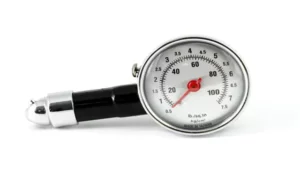
Now that you’ve successfully obtained a reading from your analog tire pressure gauge, it’s time to read the pressure. Make sure to hold the gauge level and steady before looking at the gauge’s face to prevent a misreading. The pressure is displayed by a hand or a needle located on the gauge’s face, which can usually be read in psi (pounds per square inch).
However, some gauges may also display the pressure in kPa (kilopascals), bar, or even a mix of multiple measurement units. Locate the hand or needle and note where it lines up with the face’s marking or scale. This number is the current tire pressure reading.
It’s crucial to ensure you have the correct pressure reading as under-inflated or over-inflated tires can lead to poor gas mileage, decreased braking performance, and even tire failure. Remember, when using an analog tire pressure gauge, it’s crucial to double-check your readings and maintain your tire’s proper pressure levels to ensure a safe and smooth driving experience.
The gauge will display the pressure in PSI or kPa
As you check your tire pressure with a gauge, it’s essential to know how to read it accurately. You’ll find that your gauge displays the pressure in either PSI or kPa. PSI stands for pounds per square inch and is the standard unit for measuring tire pressure in the US, while kPa is used internationally.
To read your gauge, first, ensure the valve stem is correctly secured. Once it’s securely attached, you should see the gauge automatically read the air pressure sent through the valve stem. If the reading isn’t accurate, it is simple to reset the gauge and check again.
The reading on the gauge will show you the current pressure level in your tire, allowing you to adjust your vehicle’s pressure accordingly. Remember, the optimal pressure level will depend on the make and model of your vehicle, so consult your owner’s manual before making any adjustments. By knowing how to read your gauge accurately, you can ensure your tire’s longevity and avoid any potential problems on the road.
Step 6: Check and Adjust Pressure if Needed
Now that you’ve identified the correct pressure for your tire using an analog tire pressure gauge, it’s time to check and adjust the pressure if needed. If the pressure is too low, your tire will wear out faster, and it will negatively affect your vehicle’s performance. On the other hand, if the pressure is too high, it may cause a blowout or reduce the tire’s contact with the road, making it more challenging to steer.
To adjust the pressure, you’ll need an air compressor or a tire inflator. Some gas stations and auto repair shops offer these services, or you can invest in your own. First, unscrew the tire valve cap and attach the air compressor or inflator.
Slowly fill the tire with air until you reach the recommended pressure. Check the tire pressure as you go with the analog gauge. If the pressure is above the recommended level, simply let some air out by pressing the valve stem pin until you achieve the recommended level.
Remember to replace the valve cap when you’re done to prevent dirt and debris from entering your tire. By maintaining optimal tire pressure, you’ll improve your vehicle’s performance, safety, and fuel efficiency while extending the lifespan of your tire.
If pressure is low, add air, if high, release air
When it comes to proper tire maintenance, it’s essential to check and adjust pressure if needed. Low pressure can have a significant impact on your vehicle’s performance, including reduced handling and fuel efficiency. On the flip side, too much pressure can lead to wear and tear, reduced traction, and even blowouts in extreme cases.
To check your tire pressure, you’ll need a pressure gauge, which can be found at many gas stations or auto stores. Simply remove the valve cap and place the gauge onto the valve stem to get an accurate reading. If the pressure is low, add air until it reaches the manufacturer’s recommended level.
On the other hand, if the pressure is too high, release air until it’s at the right level. Keep in mind that tire pressure can fluctuate with changes in temperature, so it’s best to check it regularly, especially during seasonal transitions. By doing so, you’ll ensure that your tires last longer and your drive is safer and smoother.
Step 7: Replace Valve Cap
Once you’ve taken your reading with an analog tire pressure gauge, it’s time to replace the valve cap to avoid any leaks or damage. Make sure the valve is tightened properly to prevent any air from escaping. The valve cap helps to protect the valve from dust and debris and also prevents any moisture from coming inside the tire.
A loose valve cap can lead to a flat tire or even damage to the valve stem. So, ensure that the valve cap is replaced securely and correctly after using the gauge. This quick and easy step will go a long way in keeping your tires in top shape and avoiding any unnecessary tire damage or deflation.
Remember to check your tire pressure regularly to ensure maximum safety and performance on the road.
Screw on the valve cap securely
When it comes to maintaining your tires, replacing the valve cap may seem like a minor detail, but it’s actually an essential step. After inflating your tire, make sure to screw on the valve cap securely to protect the valve stem from damage and prevent air leakage. Not replacing the valve cap can lead to dirt and debris accumulating in the valve, causing it to malfunction and lead to a flat tire.
Think of the valve cap as a protective shield that keeps your tire healthy and happy. So, don’t skip this step, no matter how insignificant it may seem. Take care of your valve cap, and it will take care of your tire.
Step 8: Repeat for Other Tires
After checking the pressure of one tire using your analog tire pressure gauge, it’s important to repeat the process for the other tires. Make sure you note down the readings and adjust the pressure levels accordingly. It’s recommended to check the tire pressure at least once a month or before long trips to ensure optimal tire performance and safety.
Using an analog tire pressure gauge is an easy and effective way to keep track of your tire pressure and maintain your vehicle’s efficiency and longevity. With a little practice, you’ll be a pro at using an analog tire pressure gauge in no time! So, don’t hesitate and grab your gauge to check the pressure of all your tires today!
Conclusion
In conclusion, using an analog tire pressure gauge is a tireless task that requires both precision and patience. To begin, locate the valve stem on your tire and remove the valve cap. Firmly press the gauge onto the valve stem until the hissing sound of air escaping stops.
Then, read the dial on the gauge to determine the pressure of your tire. Remember to repeat this process for each tire on your vehicle, as it’s crucial to maintain optimal tire pressure for both safety and performance. And if you’re feeling extra savvy, you can impress your friends with your newfound tire pressure knowledge.
Now, that’s what I call rolling with style!”
FAQs
What is an analog tire pressure gauge?
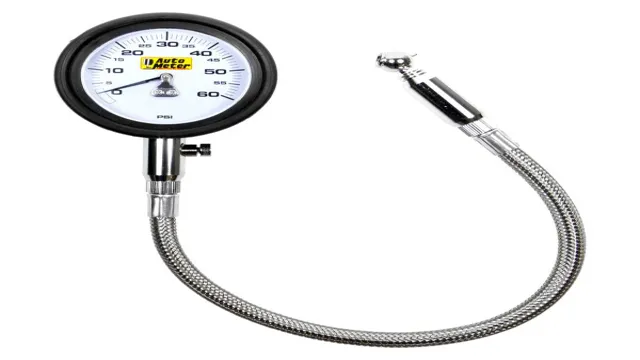
An analog tire pressure gauge is a mechanical tool used to measure tire pressure by displaying readings on a dial.
How do you use an analog tire pressure gauge?
To use an analog tire pressure gauge, you insert the nozzle onto the tire valve stem and press down firmly until the gauge displays the pressure reading.
Can you use an analog tire pressure gauge on any type of tire?
Yes, you can use an analog tire pressure gauge on any type of tire, including car, truck, and bicycle tires.
How accurate is an analog tire pressure gauge?
The accuracy of an analog tire pressure gauge can vary, but most gauges are accurate within plus or minus 2 PSI.
How often should you check your tire pressure using an analog tire pressure gauge?
It is recommended that you check your tire pressure using an analog tire pressure gauge at least once a month or before long trips.
Can an analog tire pressure gauge be calibrated?
Some analog tire pressure gauges can be calibrated, but it’s best to consult the manufacturer’s instructions for specific steps.
What are the advantages of using an analog tire pressure gauge?
Some advantages of using an analog tire pressure gauge are that it’s easy to use, reliable, and doesn’t require batteries or electricity.
