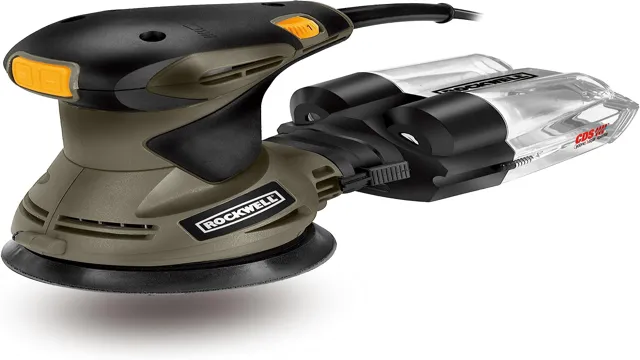
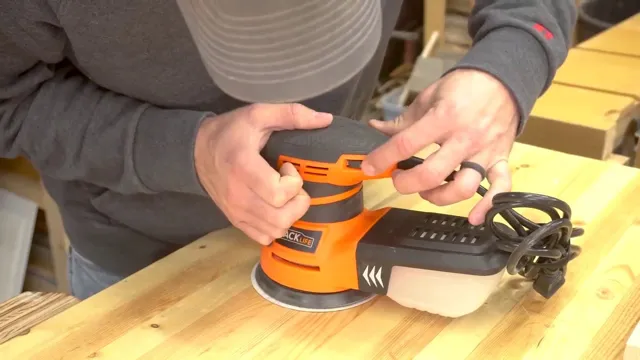
How to Use an Orbital Sander on a Deck: A Comprehensive Guide to Smoothing Out Your Outdoor Space

Looking to give your deck a smooth, even finish for that perfectly polished look? Look no further than your trusty orbital sander! This handy tool can make deck sanding a breeze, taking care of those rough spots and uneven areas with ease. But before you dive in, it’s important to know the ins and outs of using an orbital sander on your deck, from selecting the right grit to avoiding damage to your wood. Thankfully, we’ve got all the tips and tricks you need to get that deck looking its best in no time flat.
So grab your sander and let’s get sanding!
Preparing Your Deck for Sanding
If you’re looking to give your deck a new lease of life, then sanding is a great place to start. Using an orbital sander will make the job a whole lot easier, but before you begin, you need to prep your deck properly. The first thing to do is remove all furniture, planters, and anything else that might be obstructive to sanding.
Next, give your deck a thorough clean using a pressure washer or a scrub brush and deck cleaner. Once it’s completely dry, you can finally sand it down using an orbital sander. Work your way across the deck, going with the grain of the wood, and ensure that you’re covering every inch of the surface.
Remember to wear hearing protection, safety glasses and a dust mask when you’re sanding your deck. When you’ve sanded everything down, give your deck a final clean to remove all of the dust and debris left behind by the sanding process. Now your deck is ready for staining or sealing, and it will look brand new in no time!
Cleaning the Deck Surface
Before diving headfirst into sanding your deck, it’s important to properly prepare the surface. Begin by sweeping or blowing away any leaves, debris, or dirt that may have accumulated on the deck’s surface. If there are any stains or discoloration, now is the time to address them before sanding.
Consider using a deck cleaner or power washer to remove any grime. Once the surface is clean, double-check the hardware and make sure that any loose screws or nails are tightened or replaced as necessary. By taking the time to clean and properly prepare the deck surface, you’ll have a smoother and more successful sanding experience, leaving you with a beautiful, refreshed deck to enjoy.
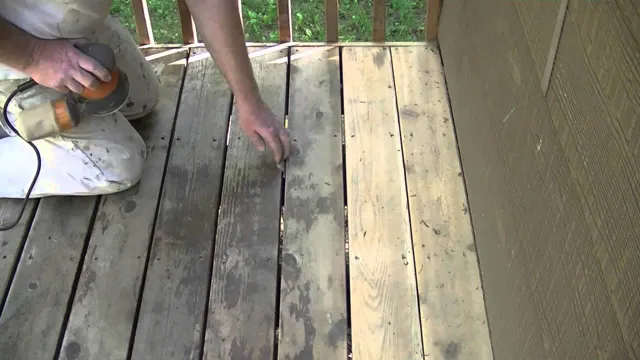
Removing Loose Nails and Screws
Preparing your deck for sanding is an important step in the process of maintaining its quality and appearance. One thing you need to do to prepare your deck for sanding is to remove any loose nails and screws. Loose nails and screws can be dangerous and can potentially cause harm to people who use the deck.
Additionally, if they are left in place, they can cause damage to your sandpaper and even ruin your sander. To remove loose nails and screws on your deck, use a hammer to gently tap them back in or remove them entirely and replace them with new ones. Take the time to inspect the entirety of your deck to ensure that there are no protruding or loose nails and screws that could cause an issue later on.
By taking the time to prepare your deck thoroughly before sanding, you can ensure that your deck looks amazing and lasts for many years to come.
Replacing Damaged Boards
When it comes to maintaining your deck, replacing damaged boards is important to keep it stable and safe to use. But before you begin sanding your deck, you’ll want to make sure the damaged boards are replaced and secure. First, assess which boards need to be replaced and measure their dimensions.
Then, remove the damaged boards using a circular saw or pry bar and replace them with new ones of the same dimensions. Make sure the new boards are securely fastened with screws or nails. Once the replacement boards are in place, you can move onto sanding your deck.
This will help smooth out the surface and prep it for staining or painting. Remember to take your time and follow safety guidelines when replacing damaged boards and sanding your deck to ensure the best results.
Using Your Orbital Sander on the Deck
If you’re looking to give your deck a fresh new look, using an orbital sander is a great way to get the job done with efficiency. To do this, start by selecting the correct sandpaper grit for the job at hand – a coarse grit will be useful for areas with tough, old paint or stains, while a finer grit can be used for smoother portions or for finishing. Begin by sanding with the grain of the wood, moving steadily and slowly all the way to the corners and edges.
Be careful not to oversand or create any dents or grooves. Once you’ve finished with a particular section or part of the board, wipe off the dust with a cloth or vacuum. You can then move on to the next section and repeat the process until the whole deck is sanded to your desired finish.
Remember to wear protective gear and be patient throughout the process. With care and precision, your deck can look brand new again in no time!
Choosing the Right Sandpaper Grit
When it comes to using an orbital sander on your deck, it’s important to choose the right sandpaper grit for the job. If your deck has a lot of rough spots or splinters, you’ll need a coarser grit such as 60 or 80 grit. However, if you’re just trying to smooth out the surface, a finer grit like 120 or 150 will work.
It’s important to always start with a coarser grit and work your way up to a finer grit for the best results. You don’t want to jump straight to a fine grit and risk missing areas that need more sanding. Additionally, make sure to change out the sandpaper frequently to keep it from getting clogged and losing effectiveness.
With the right sandpaper grit and technique, your deck will look brand new in no time. So put on some tunes, grab your orbital sander, and go to town on that deck!
Starting with a Coarse Grit
If you’re starting with a coarse grit, using your orbital sander on the deck can be a great way to achieve a smooth and clean surface. The benefit of using an orbital sander is that it can evenly sand the surface, without leaving swirl marks like other types of sanders can. But it’s important to note that a coarse grit should only be used for decks that are in very poor condition, as it can remove a lot of material quickly.
If your deck is in relatively good condition, it’s best to start with a finer grit and work your way up to a coarser grit if necessary. This will ensure that you don’t damage the wood and get the best possible results. Overall, using an orbital sander can make the deck sanding process much easier and faster, giving you more time to enjoy your newly refreshed outdoor living space.
Using Even Pressure and Movement
When it comes to using your orbital sander on the deck, it’s important to maintain even pressure and movement. This will help to avoid streaks and swirls in the wood and give you a more uniform finish. Start with a coarse grit sandpaper and work your way down to a finer grit for a smooth surface.
Remember to keep the sander moving in a back-and-forth motion, going with the grain of the wood. Don’t apply too much pressure or stay in one spot for too long, as this can lead to uneven sanding and potentially damage the wood. By using your orbital sander correctly, you’ll be able to achieve a professional-looking finish on your deck that will make it look good as new.
Avoiding Over-sanding Spots
When it comes to sanding your deck with an orbital sander, it’s crucial to avoid over-sanding spots. This can happen when you spend too much time in one specific area, causing unevenness in the deck’s surface. To prevent this, work in small sections, and keep the sander moving at all times.
Use a gentle touch, and focus on removing only the rough, damaged or weathered areas of the wood. Keep in mind that a deck’s surface often has slight variations, so go easy on areas that don’t require significant sanding. Going too hard in the wrong place can weaken the wood and lead to an uneven finish.
Take the time to sand methodically and evenly, and you’ll end up with a beautiful, smooth, and even deck surface that looks great and withstands the elements. Remember, patience and a gentle touch are essential when using an orbital sander on a deck.
After Sanding
After sanding your deck with an orbital sander, it’s important to clear away any debris left behind. This is best achieved with a shop vac or broom. Another key step is to wipe down the deck with a damp cloth or sponge to remove any remaining dust.
Once the deck is clean and free of debris, you can move on to applying your desired stain or sealant. Make sure to follow the manufacturer’s instructions and apply the coating evenly. Don’t forget to let it dry completely before allowing foot traffic on the deck.
With the right approach, using an orbital sander on a deck can help you achieve a smooth and beautiful result.
Cleaning the Deck Surface Again
Now that the sanding has taken care of the rough patches and old stains on the deck, it’s time to clean the surface again. This step is important in order to prepare the deck for sealing or staining. The easiest way to do this is with a pressure washer set to a low setting or a simple garden hose with a high-pressure nozzle.
Start at one end of the deck and work your way across, rinsing off all the dust and debris from the sanding process. Be sure to pay close attention to the areas where the deck meets the house or any obstructions, as these areas tend to accumulate debris. After rinsing, allow the deck to completely dry before moving on to the next step of sealing or staining.
By taking the time to properly clean the deck surface, you’ll ensure that the end result is a beautiful, long-lasting finish that will be the envy of all your neighbors.
Applying Stain, Sealant, or Paint
Applying Stain, Sealant, or Paint After Sanding Now that the sanding is complete, it’s time to apply stain, sealant, or paint to your project. But how do you choose which one to use? Well, it largely depends on the type of wood you’re working with and the look you’re trying to achieve. If you want to enhance the natural beauty of the wood while providing some protection, staining is a great option.
Stains come in a variety of colors and can be translucent or opaque, allowing you to customize the look of your project. Apply it with a brush or rag, and be sure to wipe away any excess after a few minutes. For a more durable finish, you may want to use a sealant.
This will protect your wood from moisture, dirt, and other contaminants. Polyurethane is a great option for many projects, but you can also choose from varnish or lacquer. Again, apply with a brush or rag, making sure to hit all the nooks and crannies.
If you really want to change the color of the wood or make a bold statement, paint is the way to go. But keep in mind that paint can hide the natural grain of the wood and may require more maintenance over time. Apply with a brush or roller, and be sure to use a primer first to ensure the paint adheres properly.
No matter which option you choose, be sure to read the manufacturer’s instructions and take your time. A well-applied finish is often the difference between a mediocre project and a stunning one.
Conclusion
So there you have it, folks! Using an orbital sander on a deck is a breeze, just like a cool ocean breeze on a hot summer day. With the right tools and techniques, you’ll have a smooth and flawless finish in no time. Whether you’re a DIY enthusiast or a professional contractor, an orbital sander is a must-have in your kit.
And remember, a little bit of sanding can go a long way in rejuvenating your tired and weathered deck. So go ahead, embrace the power of sanding, and let your deck shine like a star in the galaxy!”
FAQs
What safety precautions should I take when using an orbital sander on a deck?
Before starting, wear eye protection, a dust mask, and ear defenders. Make sure the deck is clear of debris and any protruding nails or screws.
How do I choose the correct sandpaper grit for my deck?
Use a coarse grit (60-80) for smoothing rough spots and removing old paint or stain. For finer sanding, use a medium grit (100-150) or a fine grit (180-220) for finishing touches.
Do I need to sand with the grain of the wood or can I sand in any direction?
Always sand with the grain to avoid damaging the wood and creating unsightly scratches.
Can I use an orbital sander on a wet deck?
It is not recommended to use an orbital sander on a wet deck. Always sand on a dry surface.
How often should I replace the sandpaper on my orbital sander?
Replace the sandpaper when it becomes clogged with debris or loses its abrasive qualities. Usually, this is every 15-20 minutes of continuous sanding.
Is it necessary to sand the entire deck or only certain areas that need it?
Sand the entire deck to ensure an even finish and to remove any imperfections.
Can I use an orbital sander to remove old paint or stain from my deck?
Yes, an orbital sander is effective at removing old paint or stain. However, be prepared to change the sandpaper frequently as it may become clogged with paint or stain residue.

